Reporting for patrol duty: NCR Ranger Veteran

Cinderblock

New Member
Hello everyone, I wanted to post my progress on this build before but i could never get the registration to work for me, so now instead of a long drawn out build, it's going to be everything at once haha. so let's get to it, shall we?
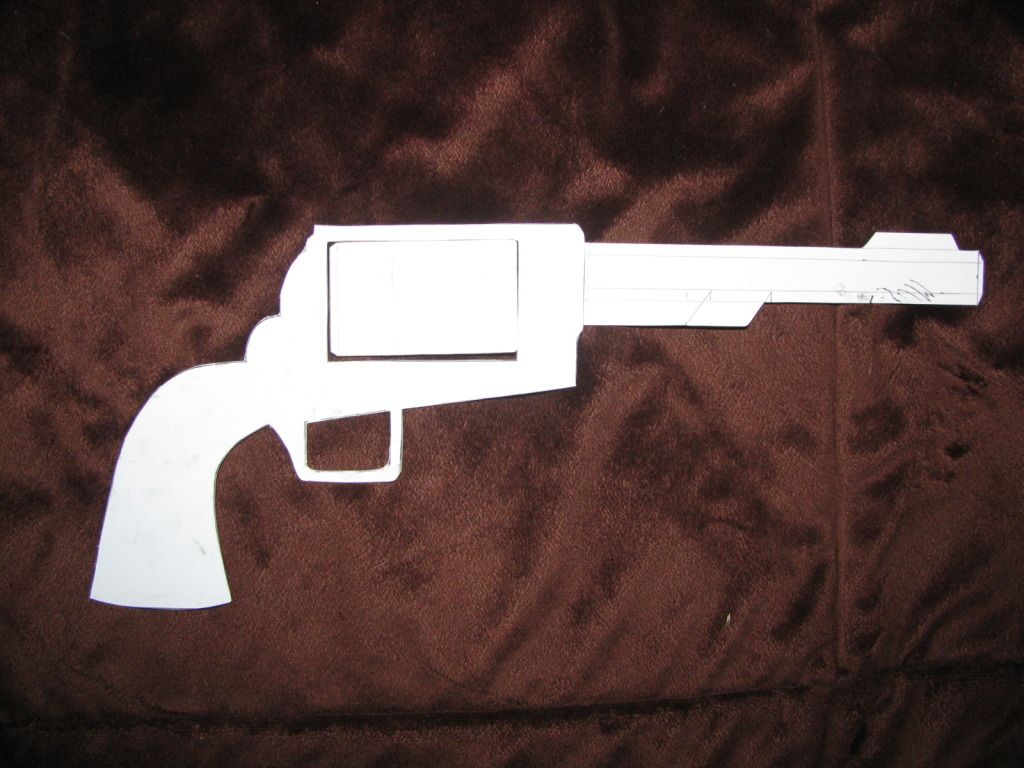
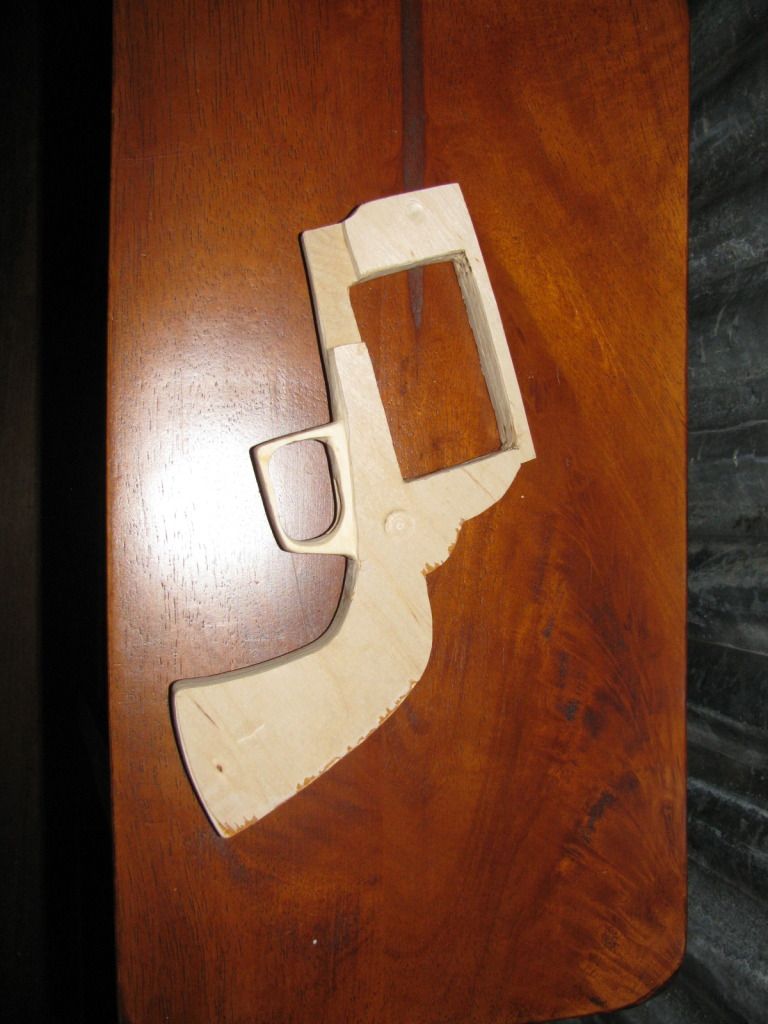
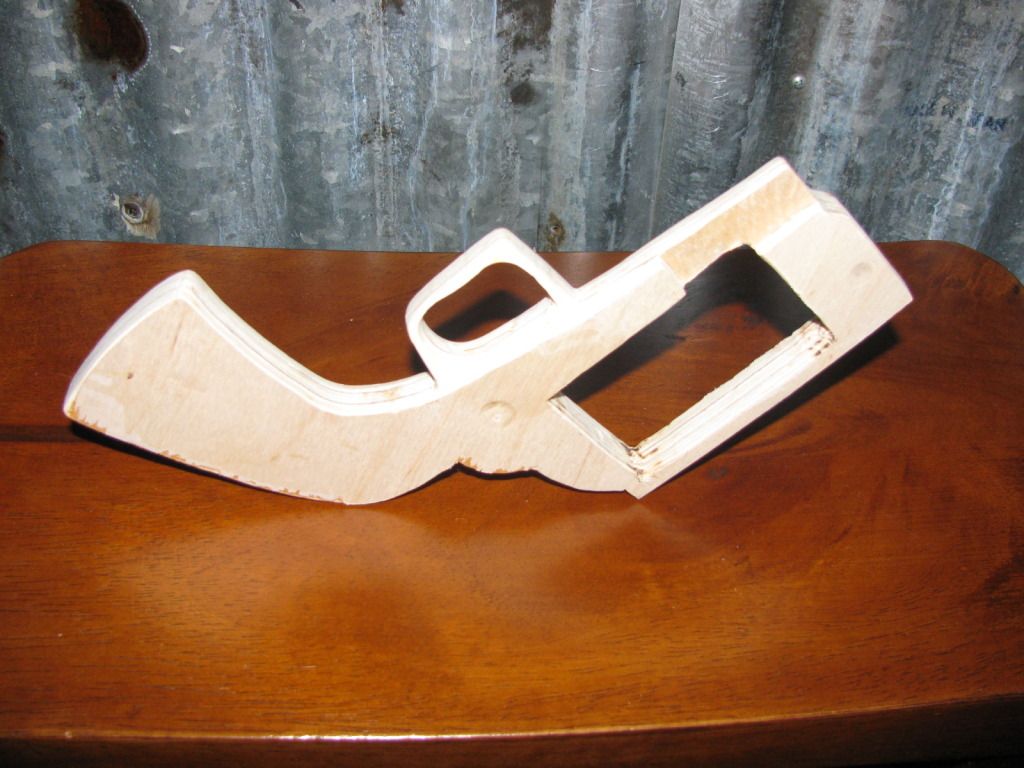
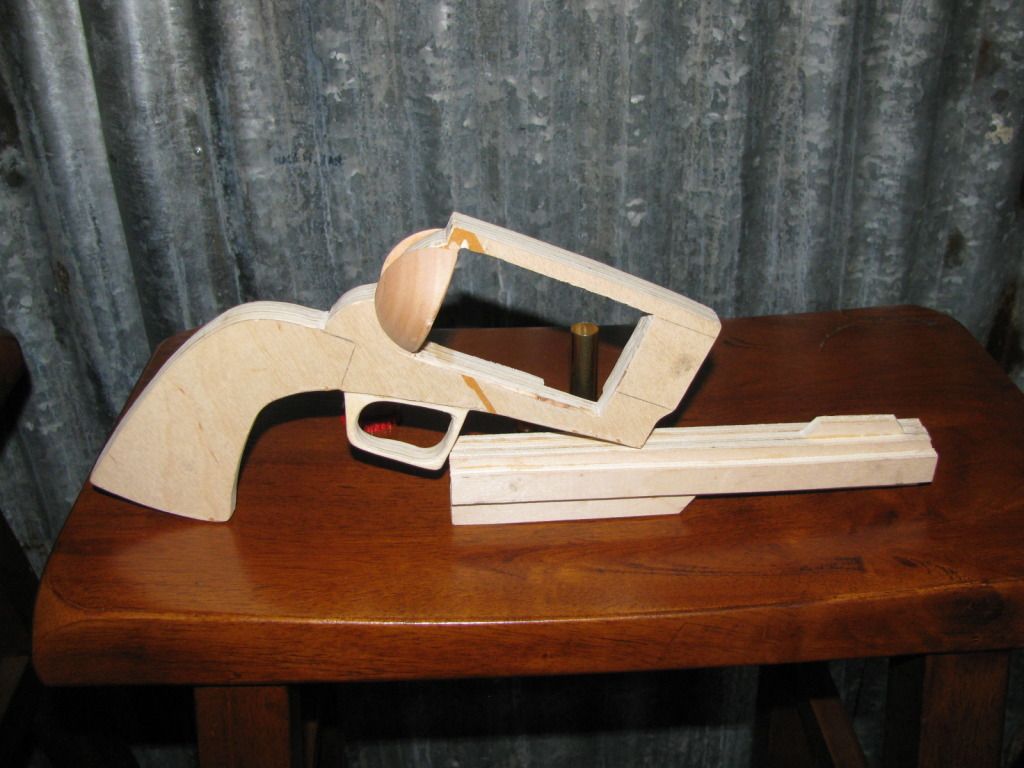
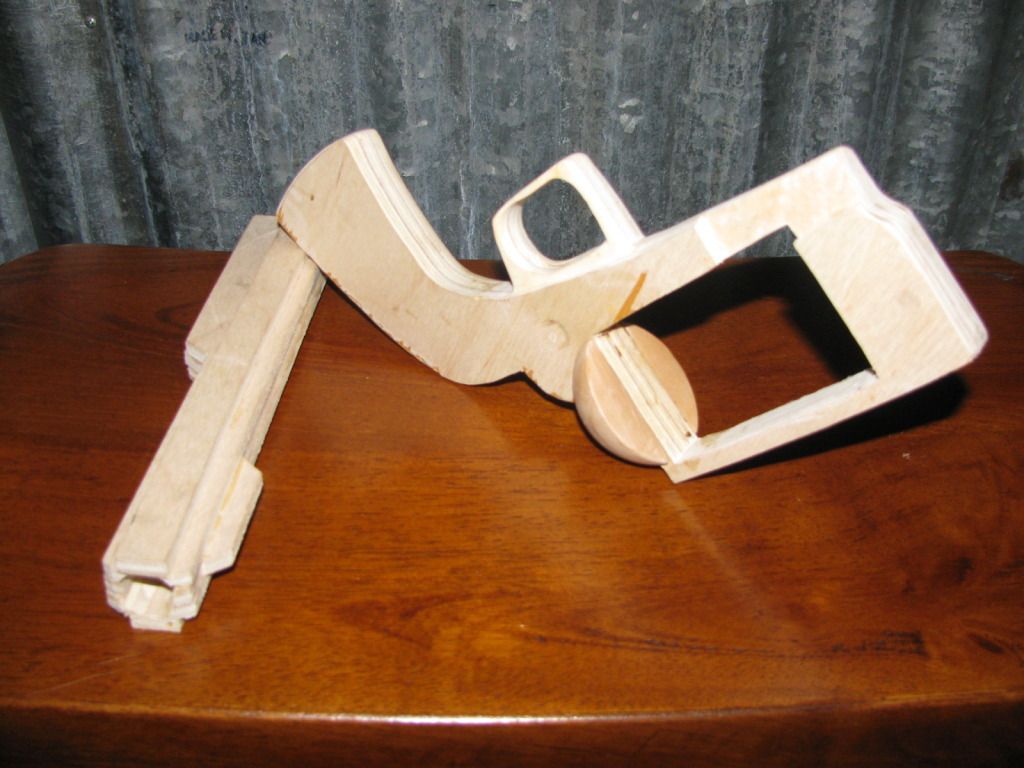
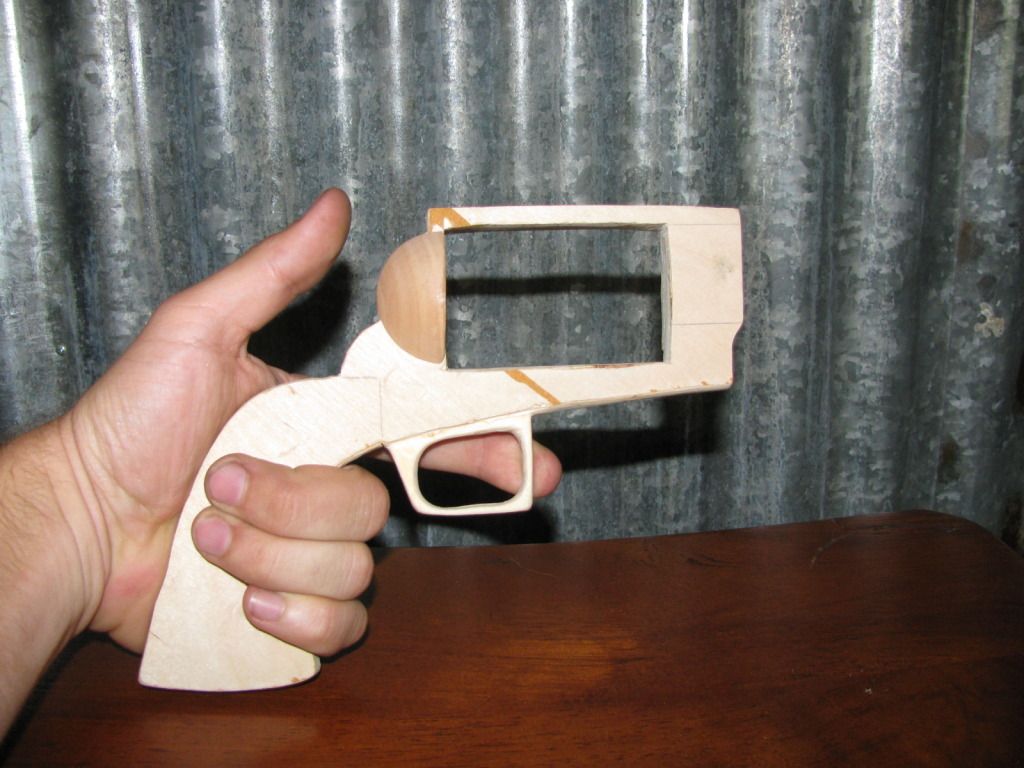
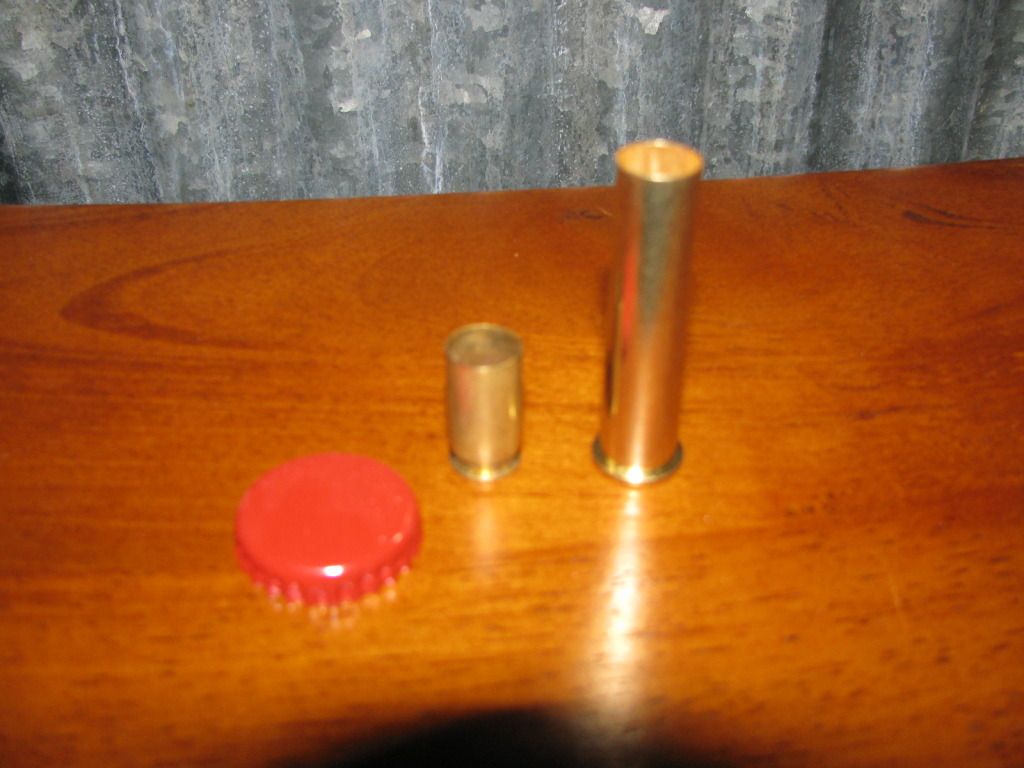
I'll start with some WIP pics so I can prove i made all this, just in case anyone doesnt believe me lol
318364_300698293289553_100000481552869_1235055_340981522_n.jpg

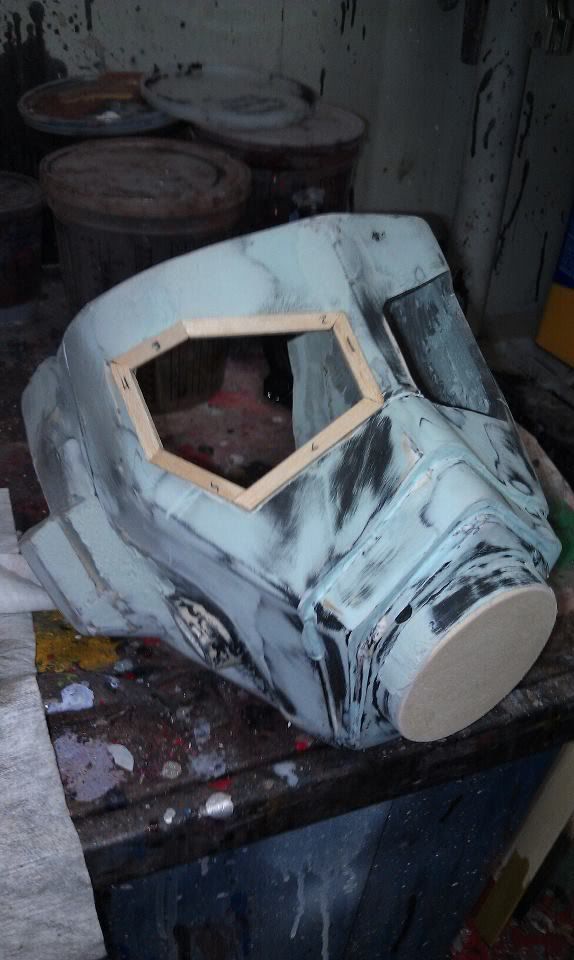
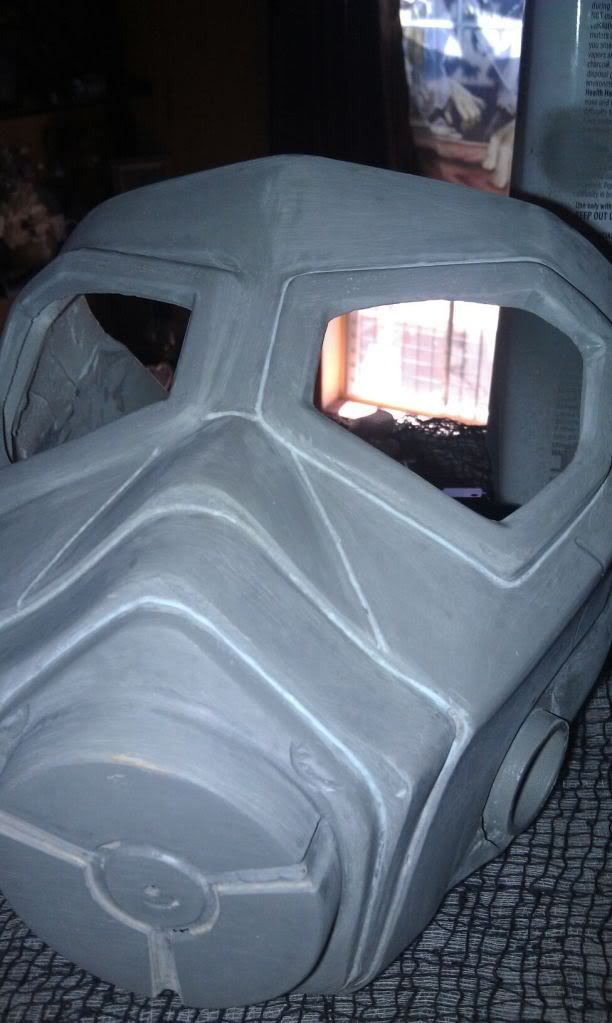
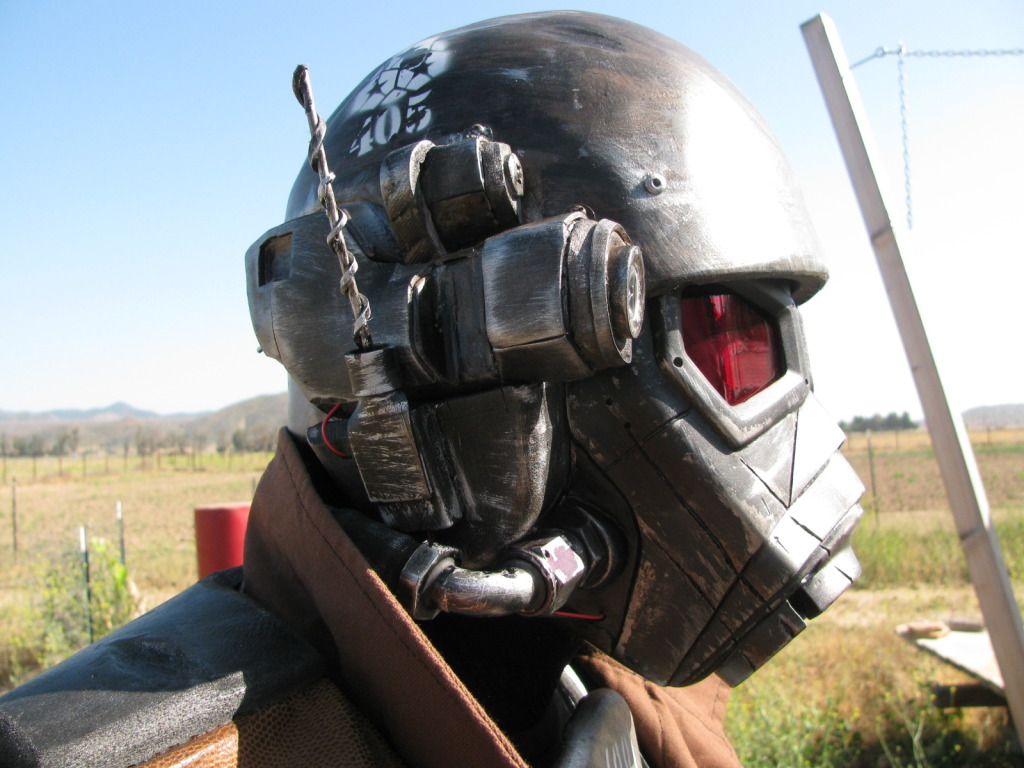
The mask started as a pep file from Nexxt that I modified a bit to make it suit my tastes better.
maskbase.jpg

IMG_3152.jpg

starteddetail.jpg

100MEDIAIMAG0291.jpg

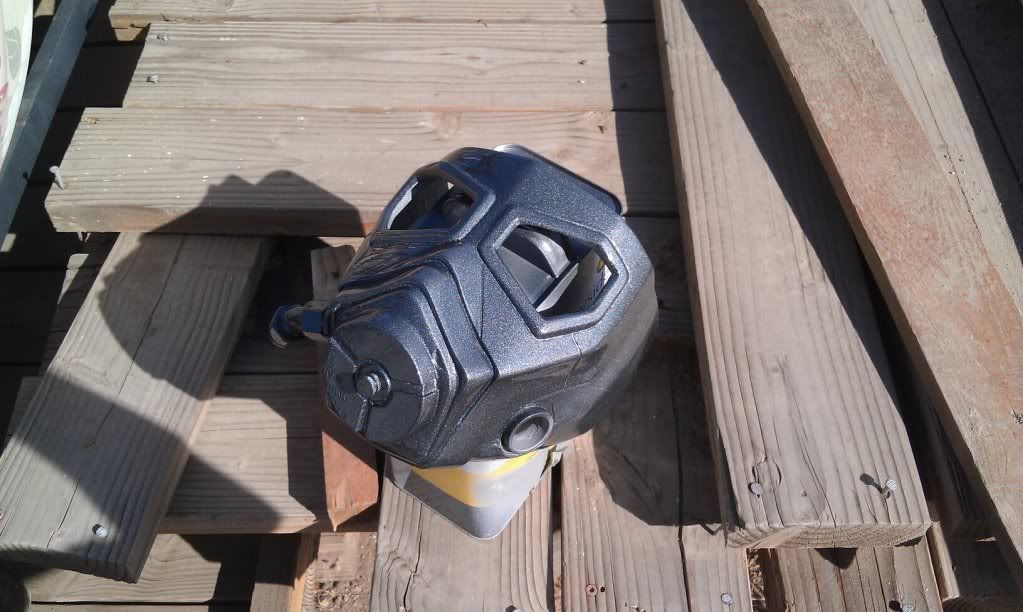
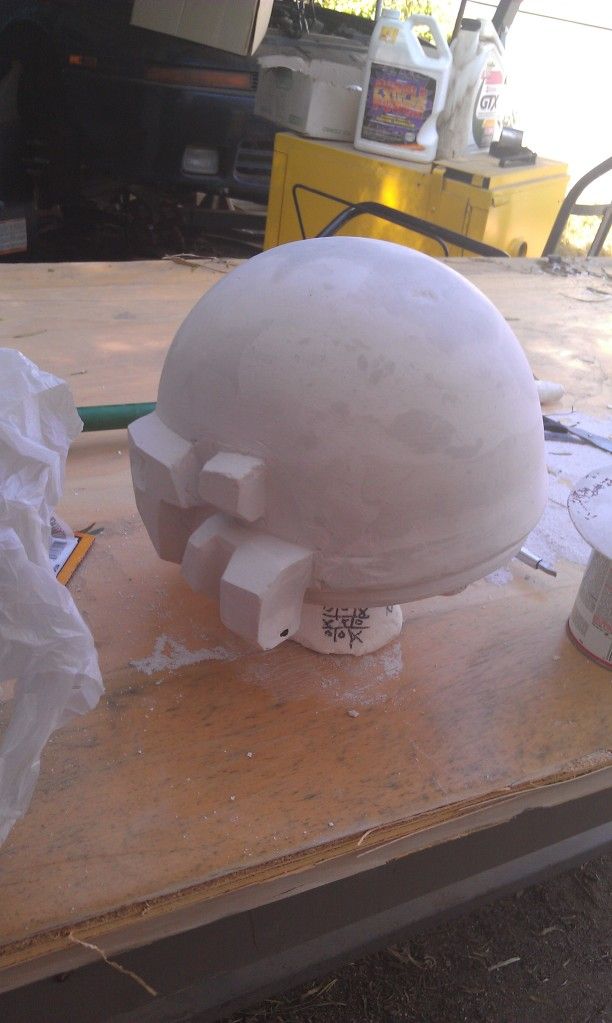
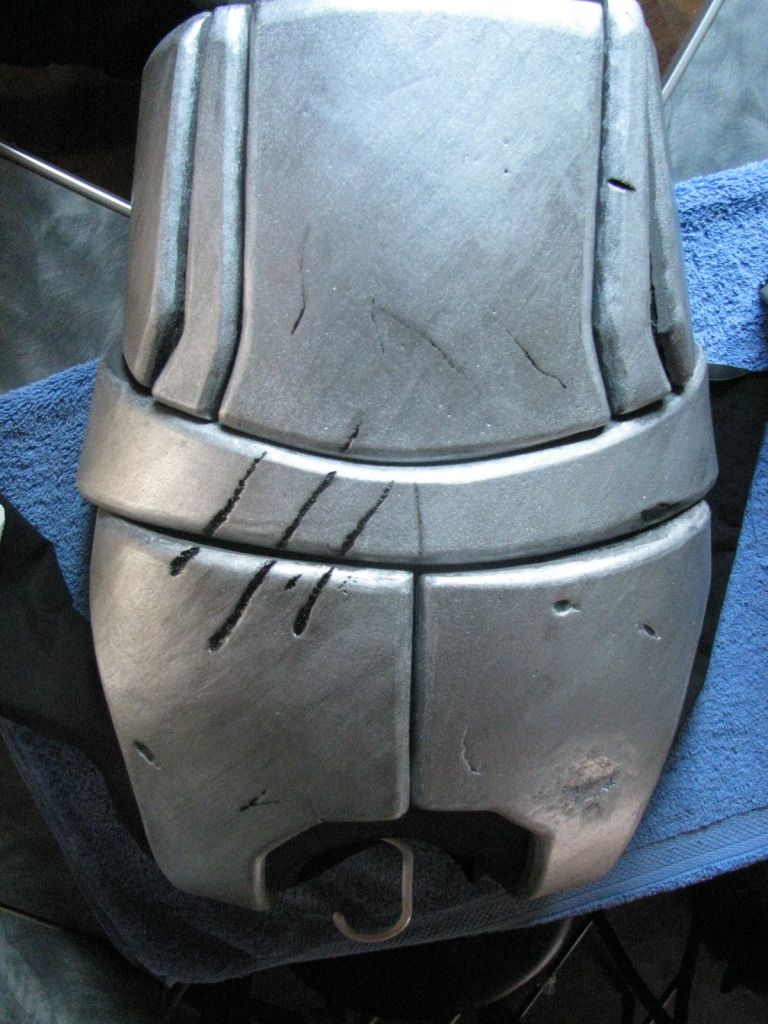
the helmet is sculpted from plaster that i poured into a pepped helmet. anf then smoothed and further shaped.
IMG_3520.jpg

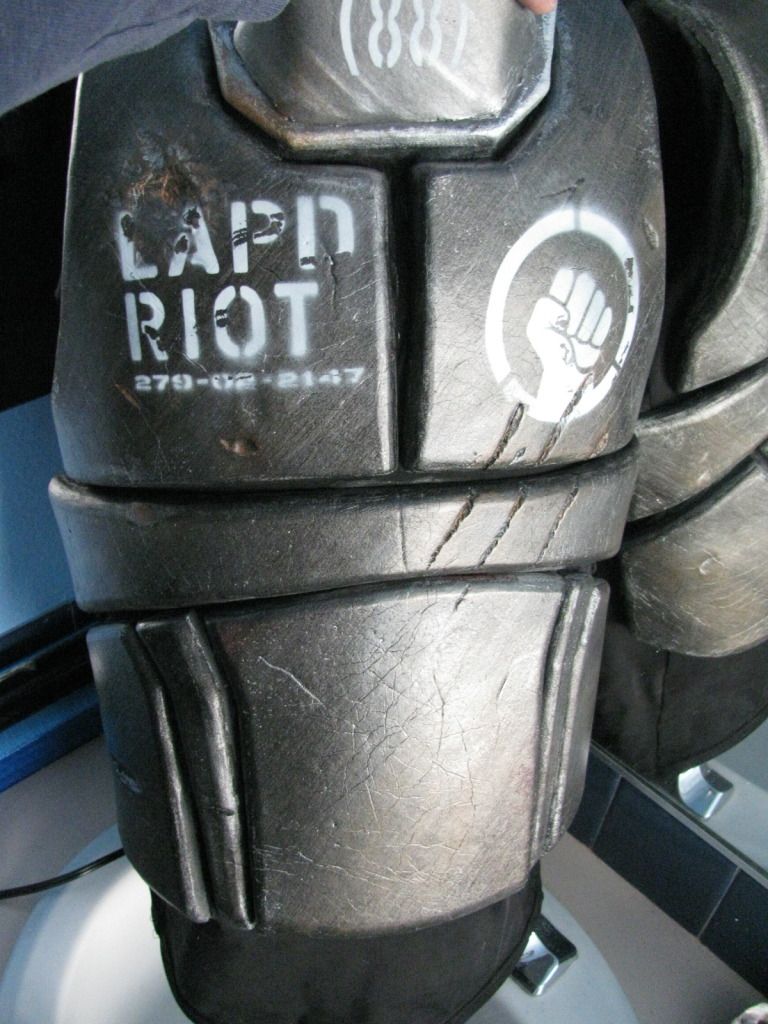
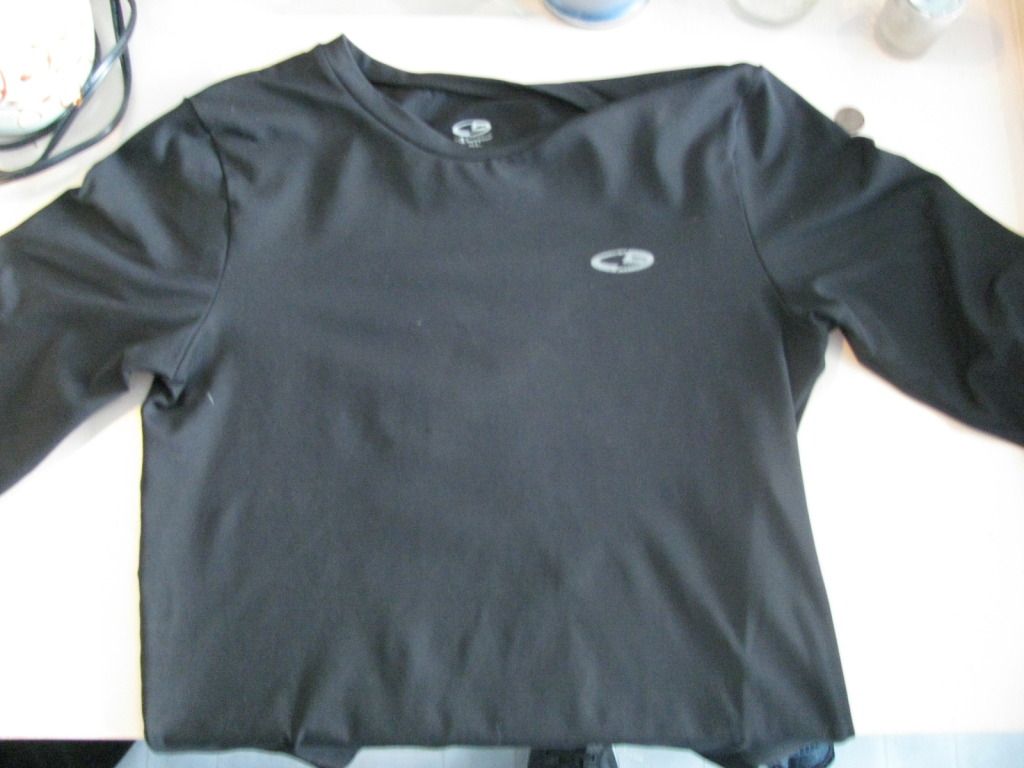
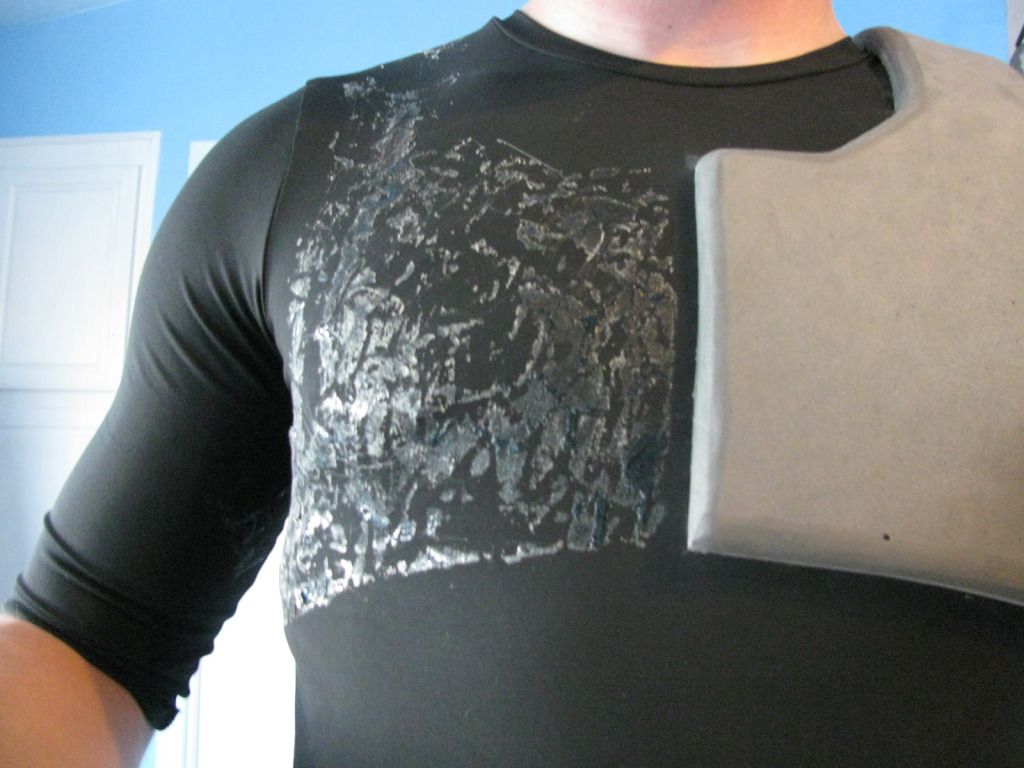
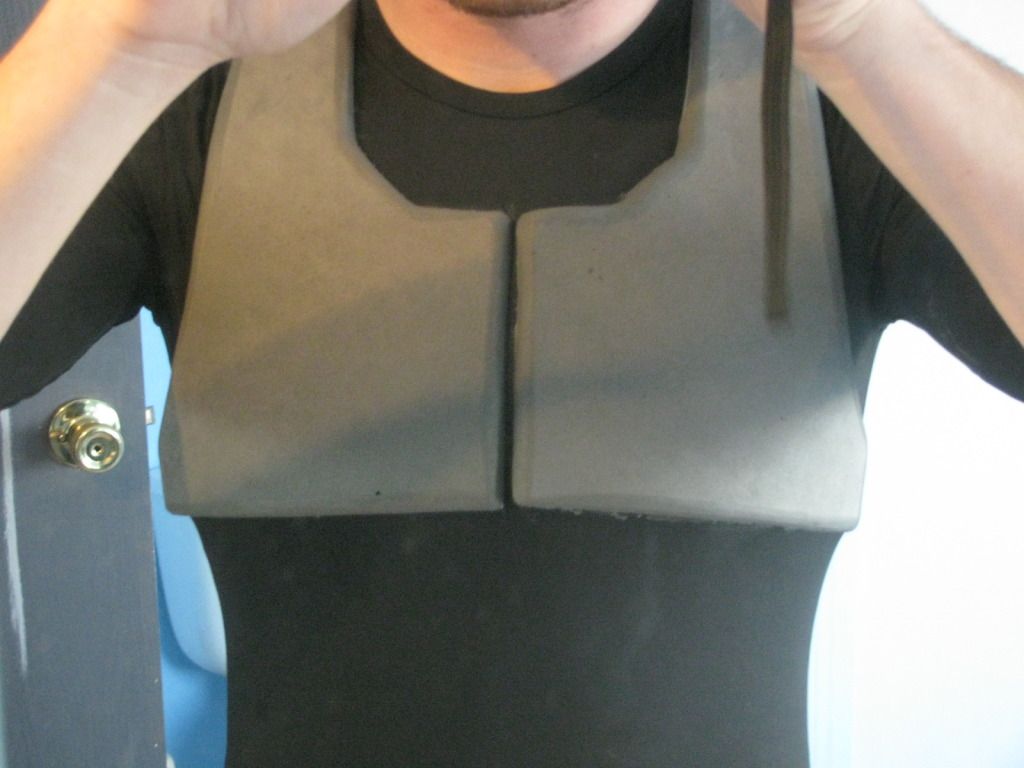
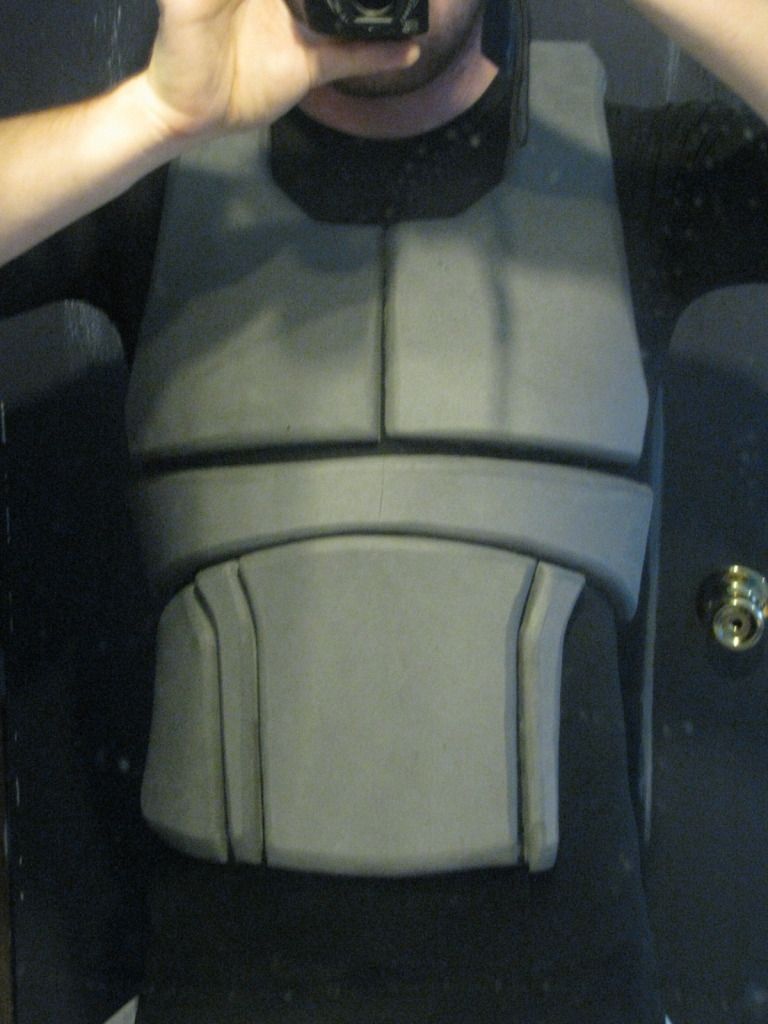
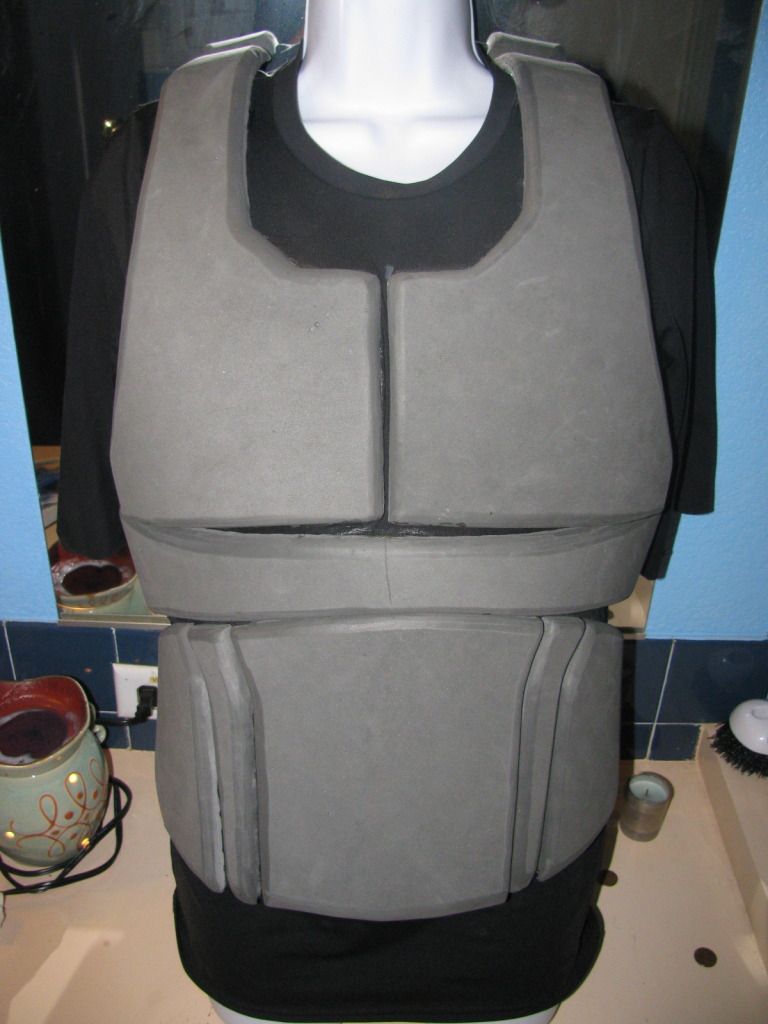
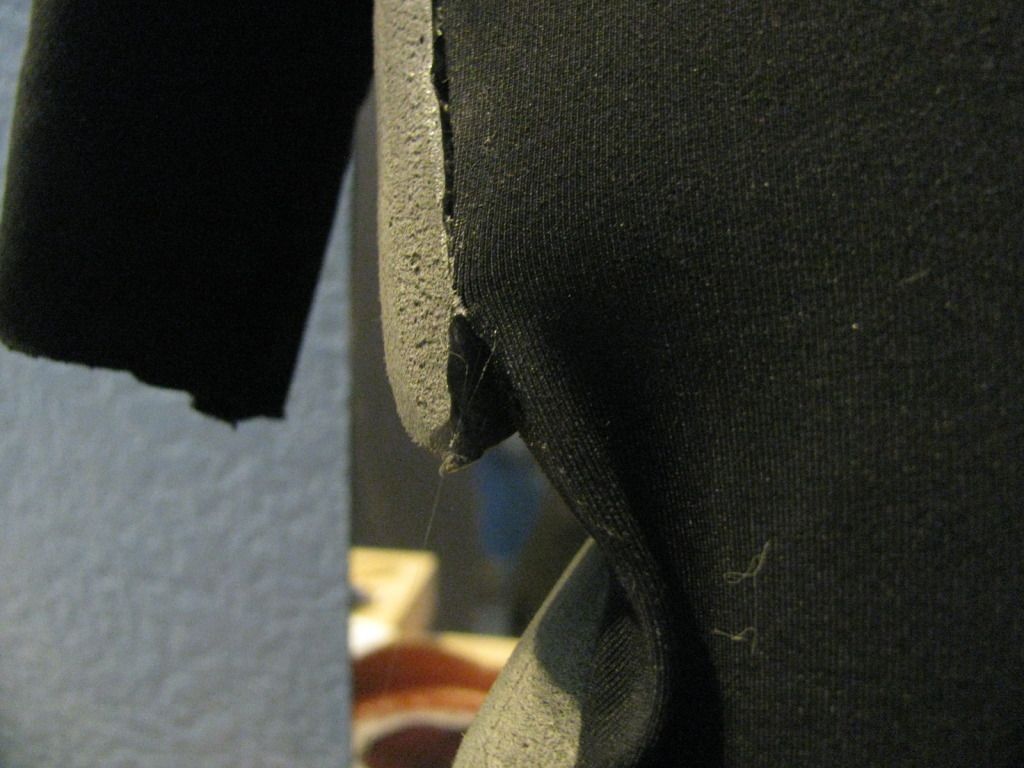
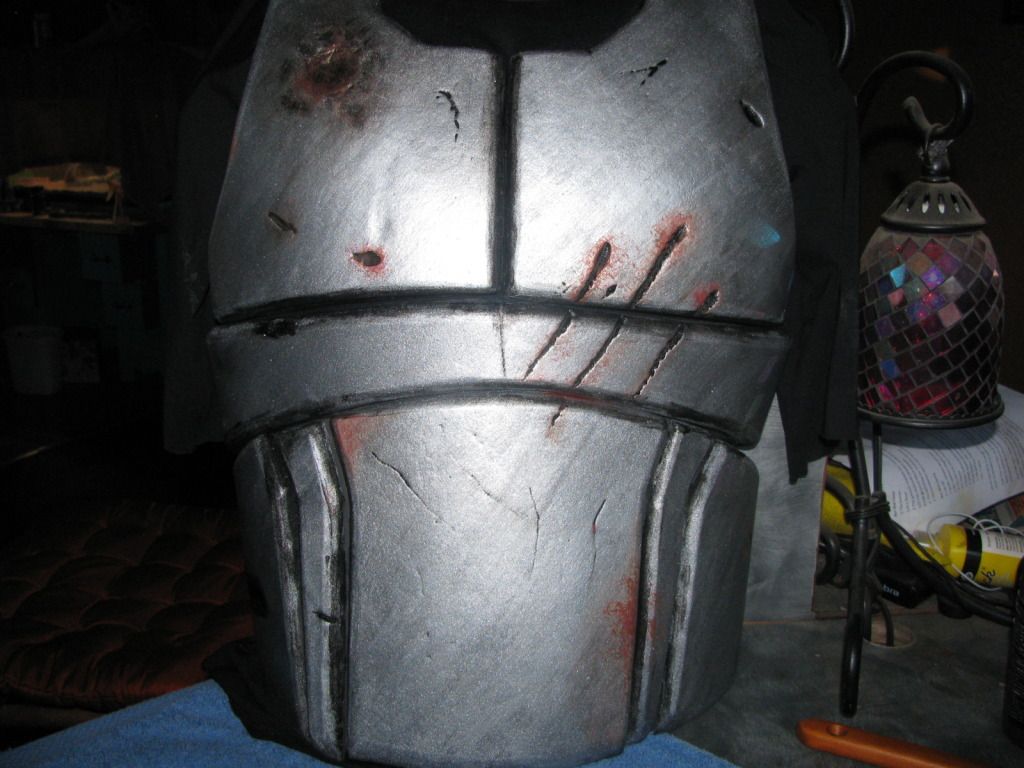
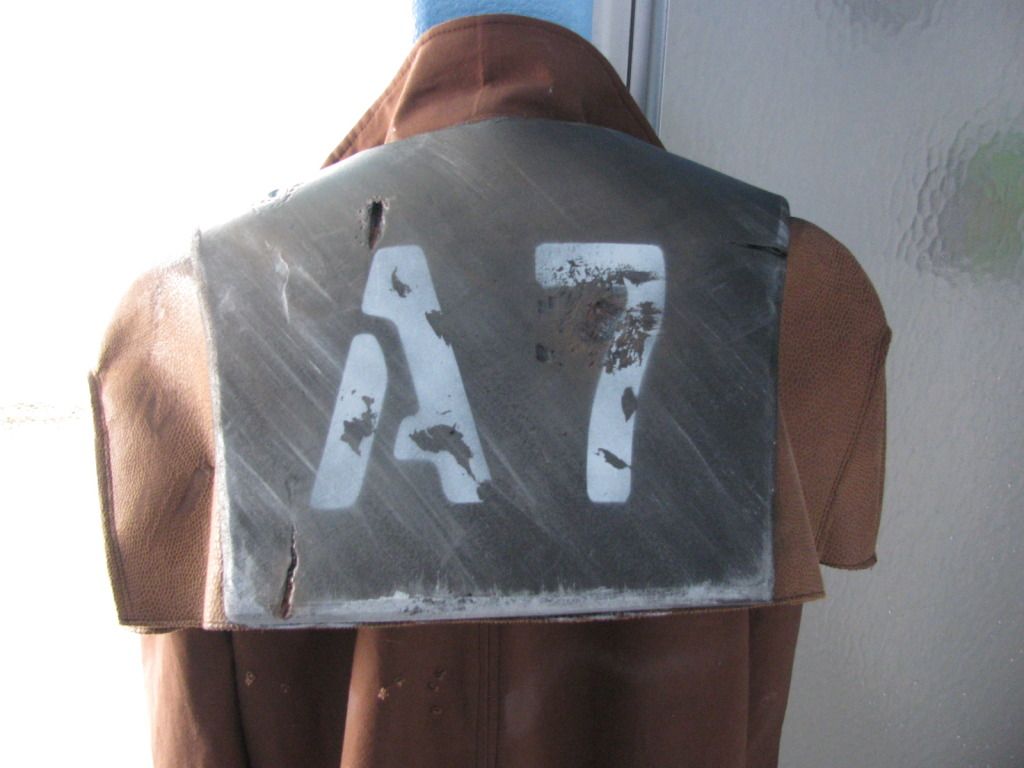
The chest is eva foam mats like most people use, but I adhered them to an under armor shirt so it can be worn like a regular shirt and flexes and breathes amazingly.
IMG_3514.jpg

IMG_3515.jpg

IMG_3523.jpg

IMG_3537.jpg

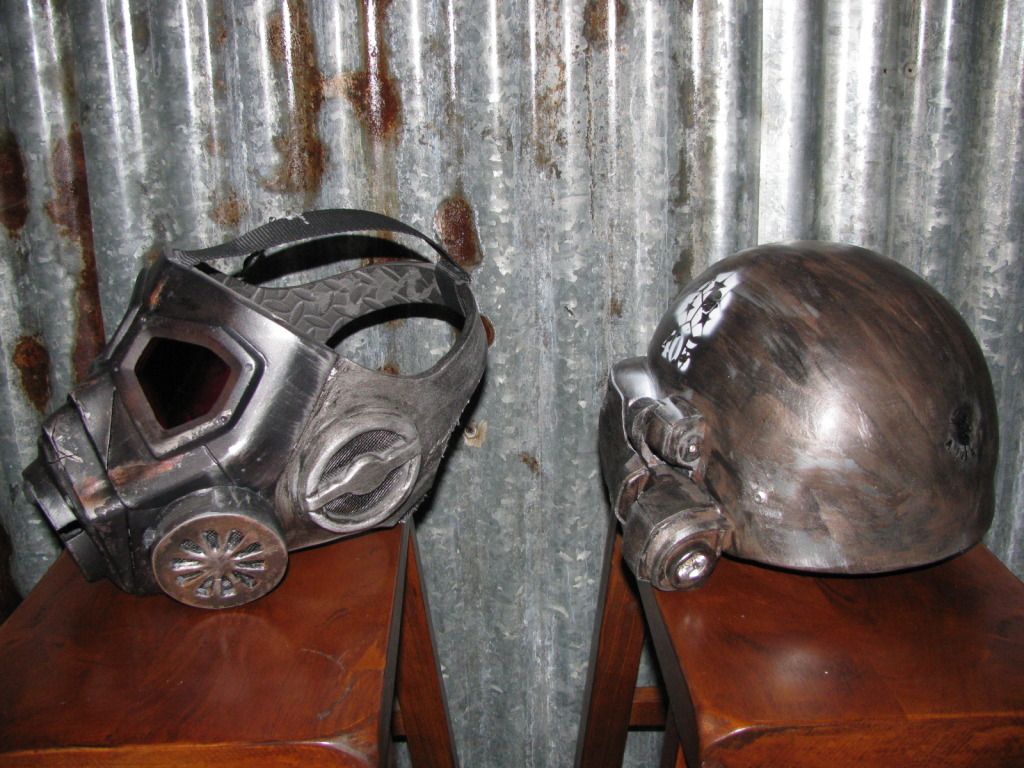
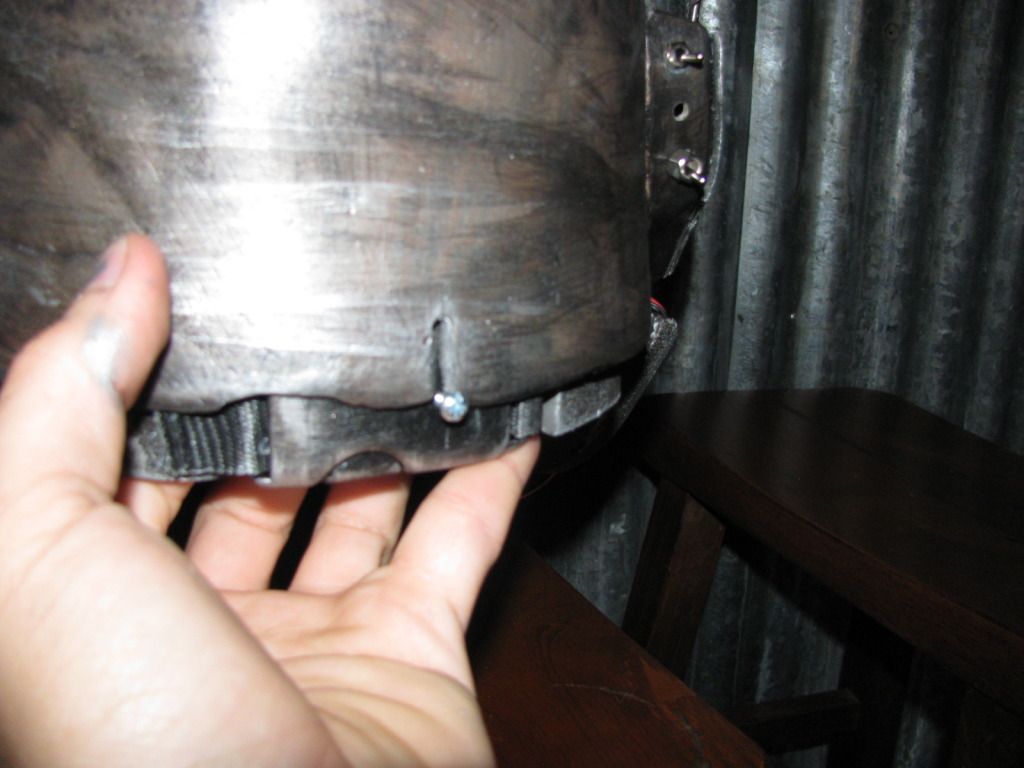
helmet and mask together, finished. the helmet sits on the mask by way of two rivets in the front and a screw that slides in a slot on the rear.
IMG_3547.jpg

IMG_3543.jpg

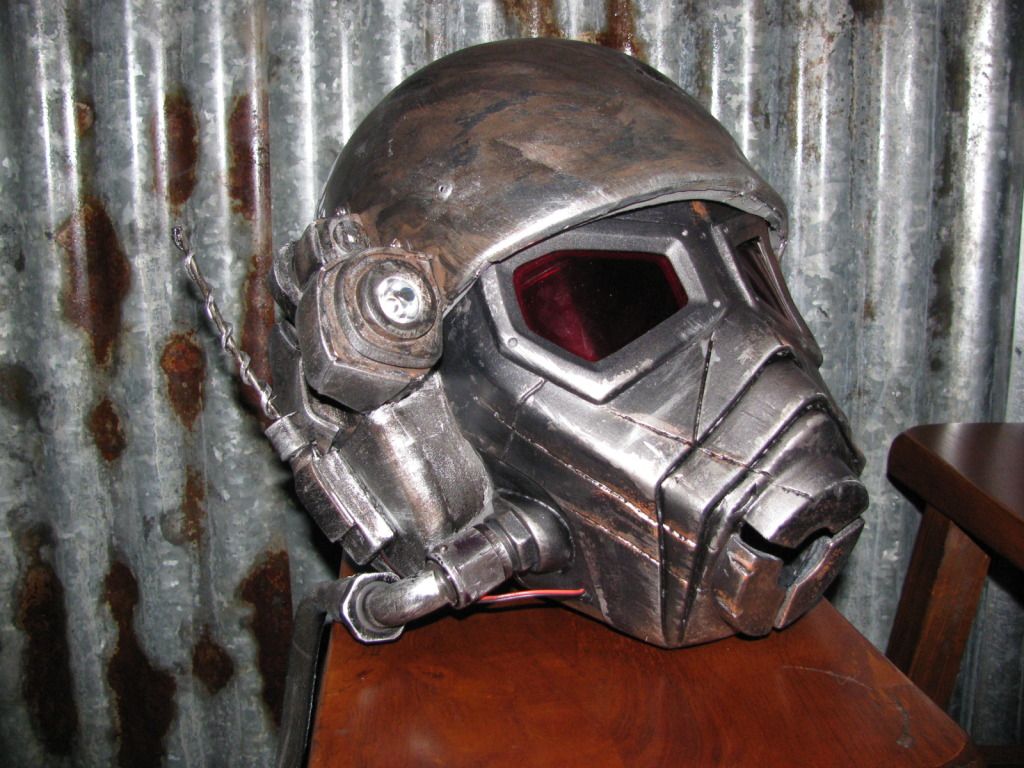
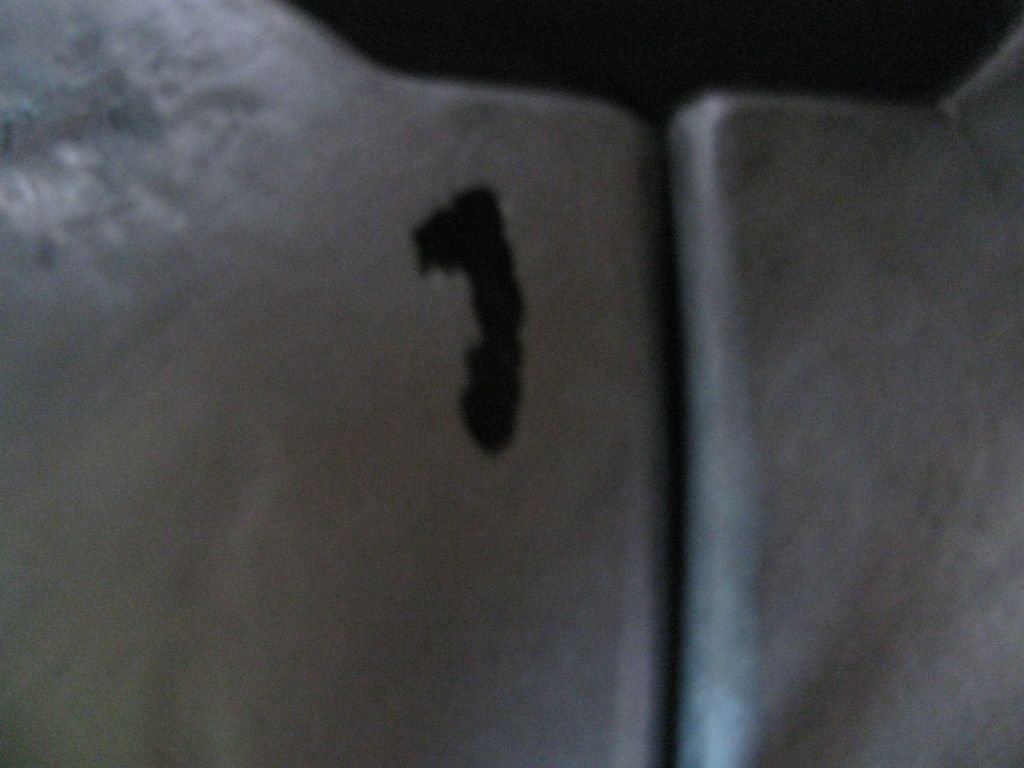
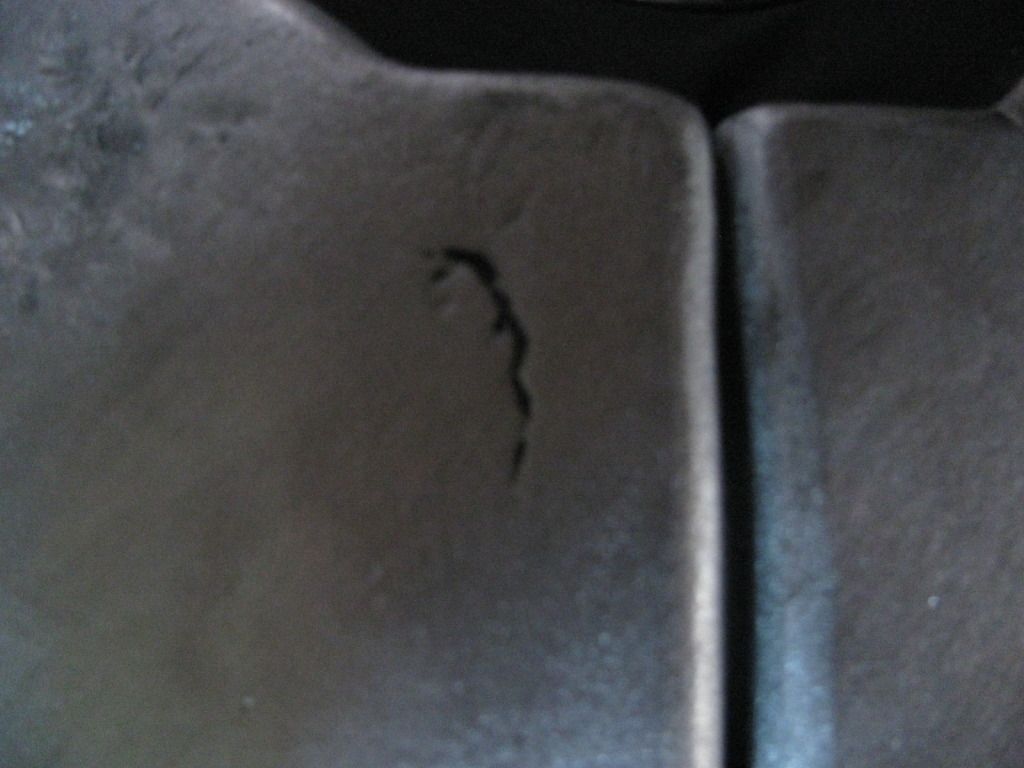
Some extra battle damage on the mask, those deathclaws are a real nuisance. even the babies.

Now onto the finished results of my labor. This build was half a year of on and off progress and addition and touch up.

IMG_3552.jpg

IMG_3553.jpg

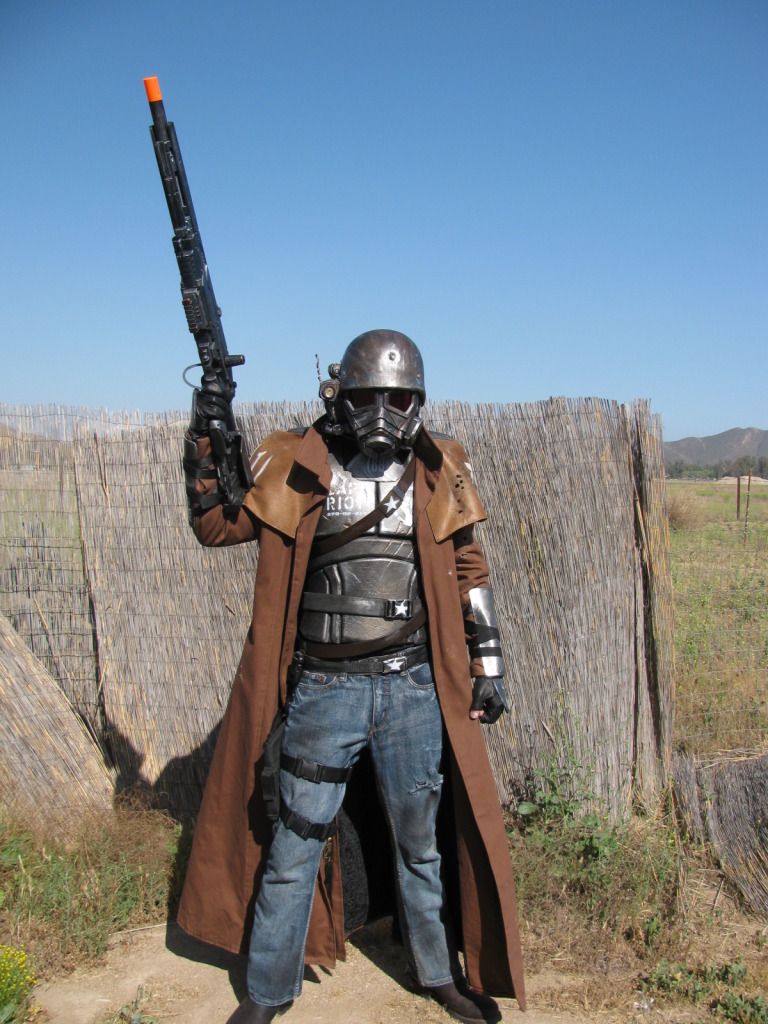
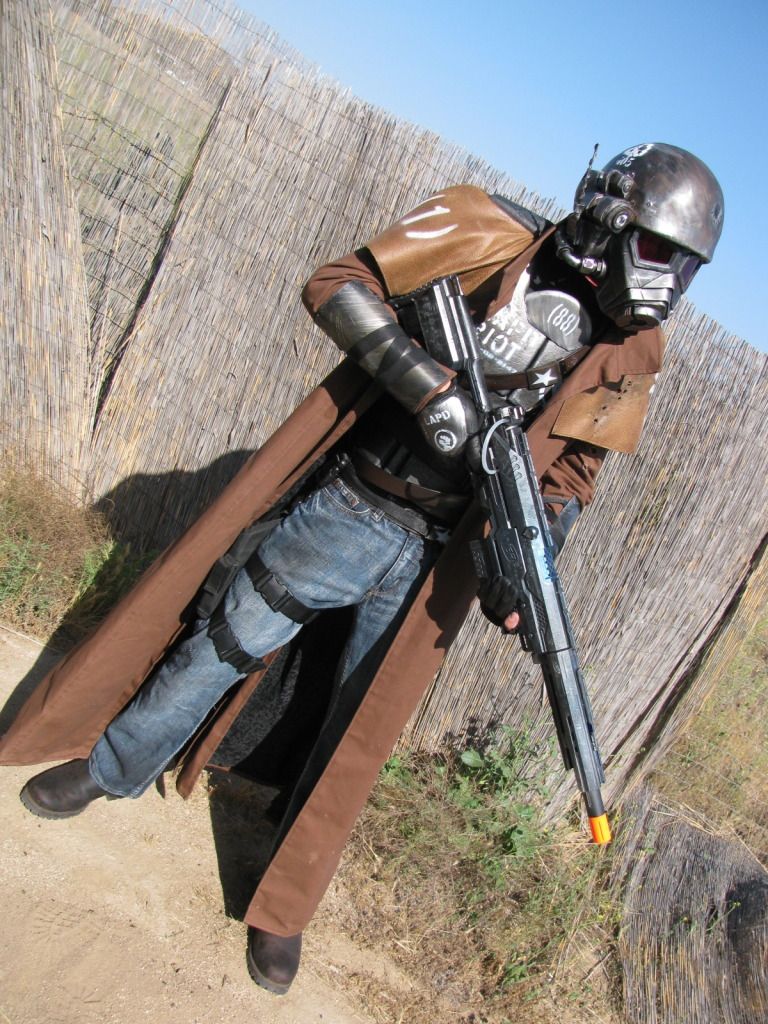
*forgive the nerf gun, i am working on a gobi sniper rifle lol*
IMG_3560.jpg

IMG_3557.jpg

IMG_3562.jpg

IMG_3563.jpg


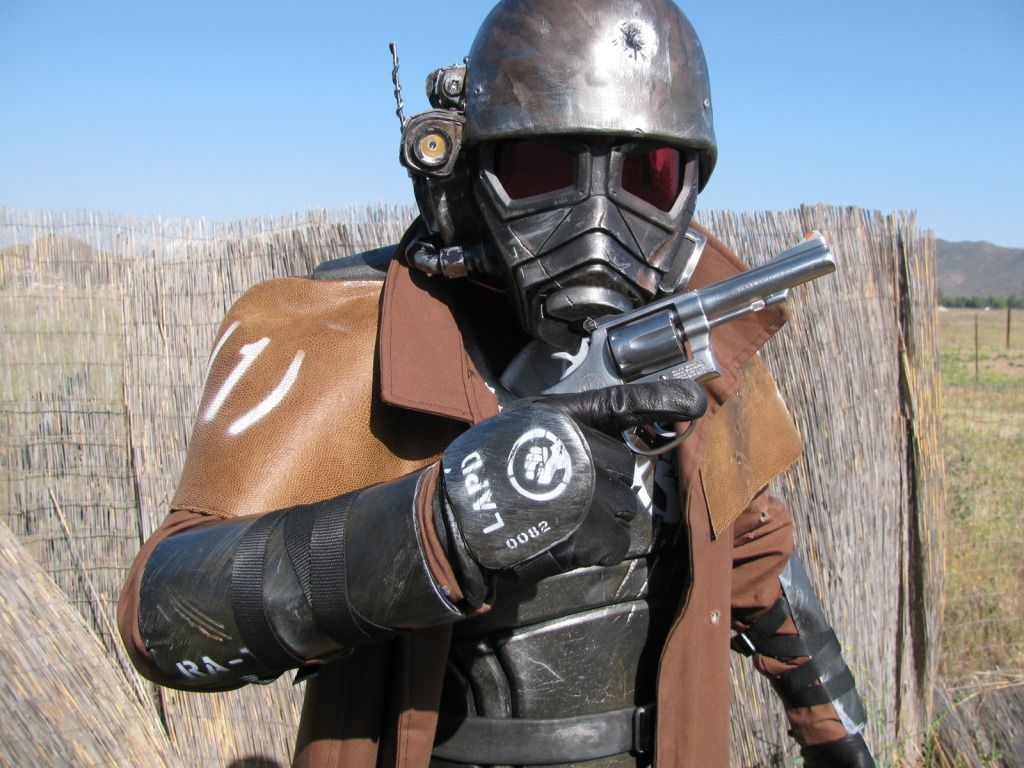
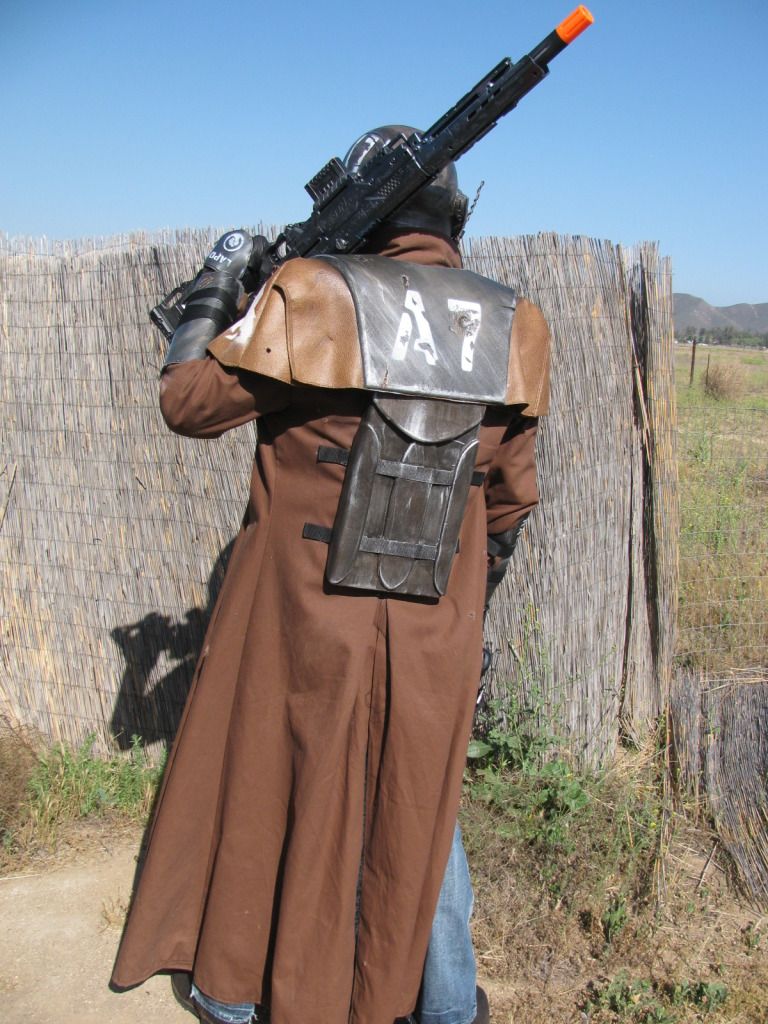
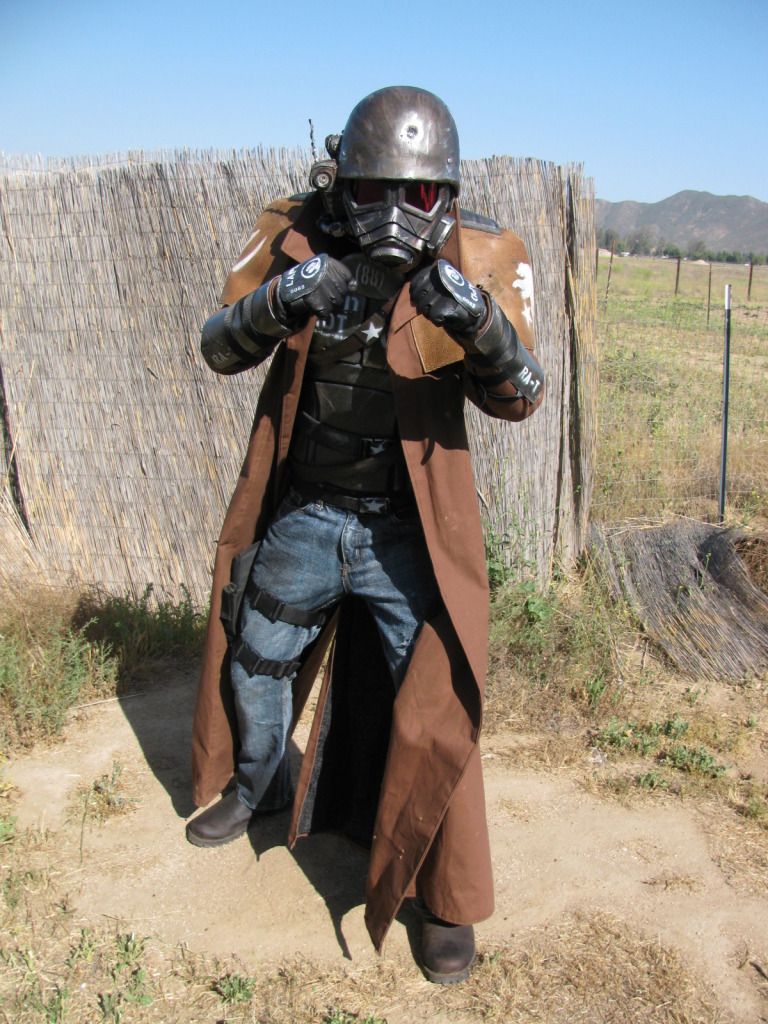
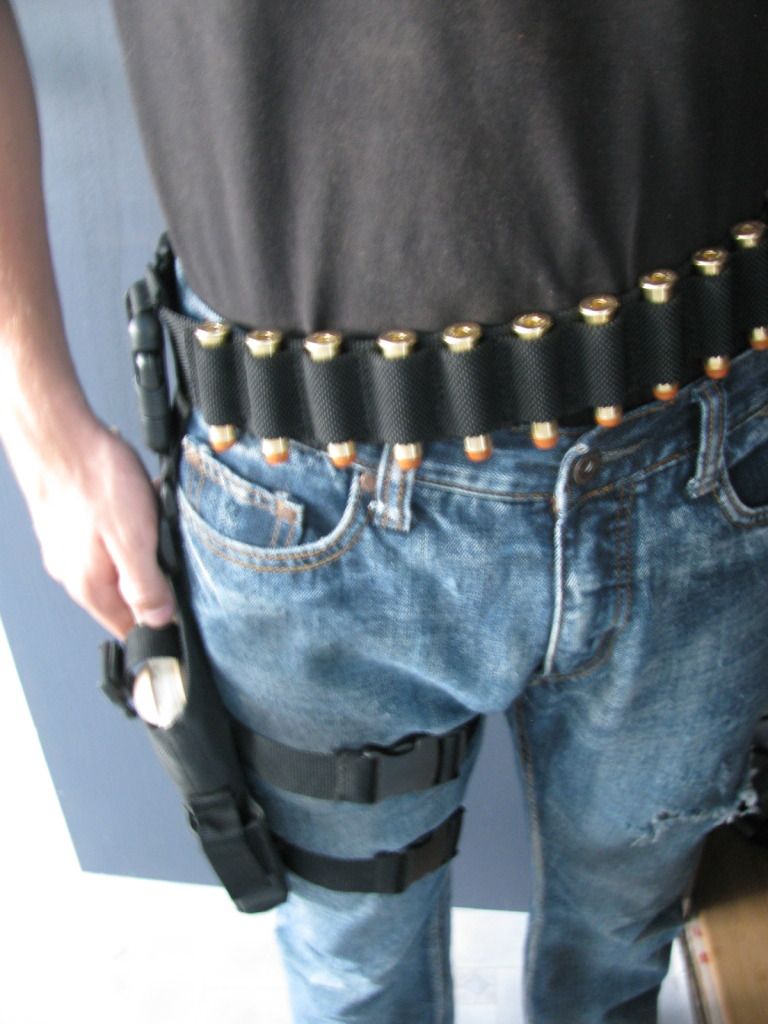
Well that's the mostly all finished costume, it's missing a few tiny things, like the wrist pask med kit, the utility pouches on the back, and the ammo belt, but i'll get those soon. when I do, I'll update it more. If anyone wants more WIP pics, i have plenty haha

returning to patrol,
Cinderblock
 
Thanks guys, I actually started re working my gun today, i was making the gobi campaign rifle, but the anti mati is more fitting for the build so i stripped it down and am re-working it to make it look like the anti mati.

I also started making a template so i can make myself a ranger sequoia as well
IMG_3568.jpg

IMG_3569.jpg

and one with me holding it for size reference
 
I used this for my chest plate on my ncr costume

what you will need:
-Contact Cement, the brush on both sides let it dry kind.
-Foam floor mats, most everyone here seems to know this now
-an under armor (or knock off) shirt. any shirt would most likely work but i wanted the tight fight of the underarmor
-a brush or two, dependent on what size of cement you it may/may not have a built in brush.
-a veeeeery well ventilated work space, and or respirator, and an old shirt you dont mind possibly messing up.
*note this shirt is to be worn under the underarmor shirt, the fumes from the flashing glue will sting your skin in direct contact because under armor is so thin, once it is dry this will no longer be an issue though. If you have a dress form all the better, but do not try gluing the foam on unstretched material or it will not fit properly when worn.

1So first draw out your patterns and cut em and pretty um up the way you want, this will be very difficult once on the shirt.
IMG_3338.jpg

this is the shirt i had laying around, i had cut the lower half off the sleeves for a different custome. and the next pic is the glue i used, i used that entire bottle, so the next size up can may be needed.
IMG_3339.jpg

IMG_3345.jpg

IMG_3341.jpg

2. Put a coat of the glue on the back side of the foam, no too thick yet, then carefully line it up, and firmly press the piece into place, then immediately, but slowly, pull it away and grab the "cobwebs" with your free hand as not to make a mess, now you will have an area of left over glue on the shirt as a template for where to spread the actual coat of glue, so put a thin coat on the shirt, and a nice coat on the foam, let them dry as directed, and then firmly push it into place and hold for a few minutes, pushing all around the edges and center, that piece should now be firmly in place, and you can move on.
IMG_3340.jpg

IMG_3342.jpg

IMG_3343.jpg

IMG_3347.jpg

IMG_3346.jpg

once you are finished wait about 20 mins before carefully removing the shirt so you are not as likely to tear away the foam, look around and look for any edges that weren't glued properly and tend to them.
I let mine sit a day or two, then took my heat gun and shaped the foam as normal, the heat doesn't ruin the spandex/elastic as long you keep it on the foam.
IMG_3348.jpg

I then took my hot knife and proceeded to score and mark up my chest, then gave it two coats of mod podge matte (tho i don't think finish matters) going in a 45degree angle over the entire piece to give it a brushed steel texture. next i did the same thing with some silver paint, brushed a t 45 to simulate steel.
IMG_3349.jpg

IMG_3350.jpg

next i brushed water based paint into all the nooks and crannies and wiped it away to give it some depth. after that i dabbled on a mixture of red and brown for rust in some spots, and boom. all finished.

and this is what i ended up with
IMG_3351.jpg


I could see this working very well for under suits for adding that soft suit armored look as well
Thanks for checking it out.


IMG_3520.jpg


I wanted to add a little how to to my build because the chest seems to be the thing that people ask questions about the most on any ranger build I have seen, so enjoy. :)
 
go ahead, that is exactly why i made the tutorial. i need to get around to getting my templates for the chest transferred to the computer lol.
 
Please do.

Wish they utilized this cool character more effectively in the game. After my first play through I thought to myself "I barely even saw this guy on the box."
 
*MrNixon if you have it on pc, download a mod called adam, it will add in more rangers randomly patrolling the mojave, and make the armor much better like it should be. *


So i started on my sequoia, made some dummy bullets, and got me an ammo belt.
The belt is nylon not leather, but i couldn't find a leather one that i liked that wasnt uber expensive, and half the belts are nylon already so it blends in. While at Bass pro, where i got the belt, I bit the bullet (haha) and spent 40$ on 45-70 govt cartridges. These were the bare cartridge, no slug powder or primer. I then took clay and filled the ends for mock slugs, baked em, dremeled em to look more real, then gave em a coat pearl orange to look like copper.
first off, my sequoia. The frame is mostly smoothed and ready to add the cylinder and details. the barrel is still rough and needs to be trimmed and shaped completely.
IMG_3570.jpg

IMG_3571.jpg

IMG_3576.jpg

IMG_3582.jpg

IMG_3583.jpg

IMG_3584.jpg

That is for size reference, I have fairly large hands, and it is a fairly large gun lol
IMG_3585.jpg

to show why the cylinder is so long, the 45 govt is a rifle cartridge, and is very long lol
IMG_3586.jpg


Now on to my cartridges and belt.
IMG_3579.jpg

IMG_3577.jpg

Some hollows, some slug.
IMG_3580.jpg

size ref. vs a reg 45 and a bottle cap.

Now just the belt.
IMG_3588.jpg

And with the riot armor
IMG_3589.jpg


So that is it for now.
Thank you all for the support and the comments, stay tuned for some new updates soon.
Returning to Patrol.
 
This thread is more than 11 years old.

Your message may be considered spam for the following reasons:

  1. This thread hasn't been active in some time. A new post in this thread might not contribute constructively to this discussion after so long.
If you wish to reply despite these issues, check the box below before replying.
Be aware that malicious compliance may result in more severe penalties.
Back
Top