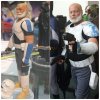
Rebels - Old Captain Rex Build

jackDroid

Member
SDCC 2015 126-1.jpg

19887185952_53ba449461_o.jpg


Wanted to share with everyone my build process for Rex's armor which was debuted at SDCC2015

I will be adding and updating this thread over the next week.

All photos are here as well: https://www.facebook.com/media/set/?set=a.461219407381145.1073741830.452235711612848&type=3

Used various pieces and kits from kwdesigns at www.imperialsurplus.com

1. Animated Clone Season 4-6 armor for chest, shoulders, belt and holsters.
2. Rebels ATDP shins and shin straps for chest straps.
3. Generic Jedi forearms heavily modifed for the new forearms - new sculpt for these is on the to do list!
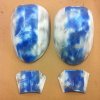
4. Generic Jedi hand backs for Rex's shoe plates

Cant wait to see some more Old Captain Rexs out there!

-jono
Jon Farmer

Reference Images

rexRef_12.pngrexRef_03.pngrexRef_09.pngrexRef_07.pngrexRef_11.pngrexRef_05.png

SDCC 2015 126-1.jpg


rexRef_03.png


rexRef_05.png


rexRef_07.png


rexRef_09.png


rexRef_11.png


rexRef_12.png


19887185952_53ba449461_o.jpg
 
Last edited by a moderator:
Step 1 - Start growing your beard!!

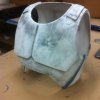
Chest assembly:

Adding the under strapping to glue front to back:
IMG_4732.jpg

IMG_4735.jpg

IMG_4734.jpg

IMG_4733.jpg

IMG_4719.jpg

IMG_4738.jpg

IMG_4737.jpg

IMG_4746.jpg

Cutting and forming new insert pieces to fill gaps:
IMG_4743.jpg

IMG_4747.jpg
 
Assemble shoulders and holsters.

Add bondo to fill gap at chest neck area since it is different in the new show and to clean up shoulder areas:

IMG_4736.jpg

IMG_4748.jpg

IMG_4749.jpg

IMG_4750.jpg

IMG_4780.jpg

IMG_4784.jpg

The finished chest - just needs new Shoulder straps!

IMG_4820.jpg
 
Step 3.

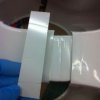
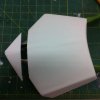
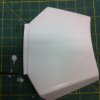
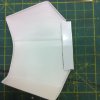
Hand backs modified to look more like the new versions:

IMG_4740.jpg

Patched back in so there is a return thickness and new edge:

IMG_4741.jpg

IMG_4742.jpg

IMG_4783.jpg

IMG_4744.jpg

attachment.php


Step 4.
ATDP Shin straps split and shortened to become the new simpler shoulder straps:

IMG_4873_2.jpg

IMG_4874.jpg

IMG_4879.jpg

attachment.php
 

Attachments

  • IMG_4880.jpg
    IMG_4880.jpg
    37.3 KB · Views: 1,619
  • IMG_4745.jpg
    IMG_4745.jpg
    38.5 KB · Views: 1,652
Step 5.

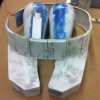
Assemble holsters, belt, shoe plates, and shins.

Shins are ATPD versions with their incised lines filled in and smoothed out.
Shoe plates were Generic Jedi hand backs.
Shoes used were Hunters Bay Eastborough from Payless

RexShoes.png

IMG_4930.jpg

IMG_4785.jpg

IMG_4781.jpg

IMG_4881.jpg
 
Step 6.

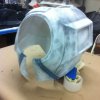
Attempted to use Worbla to make new forearms but failed miserably since a noob with that material!
Sorry no process picks of the Generic Jedi forearm mods - was under the gun to get er done.

IMG_4929.jpg

IMG_4932.jpg

IMG_5341.jpg

The not so pretty inside showing the extra shims I added to get some thickness at the return edge.
IMG_5343.jpg
 
idk how i missed the first post, that came out awesome! I'm newly to the clone wars series i just started watching about a month ago, because i love rebels and saw they are brining back CW characters. Captain Rex i liked allot, I'm so glad to see he's still around. i love what you did with the costume, i don't know if thats you in the picture, but that man matches him real good!!
 
Step 7.

Painting, weathering and decals.

Used the basic Krylon Fusion spray paints.

Base coating:

IMG_4934.jpg


Weathering - the fun part!:

IMG_4939.jpg

IMG_4941.jpg

IMG_4944.jpg

IMG_4947.jpg

IMG_4948.jpg

For the straps and back details I opted for the decal look as seen in the show's armor - here is the artwork I made in Illustrator.

rexDecal.png

I used matte modgePodge to glue them down to the chest and then coated with the same - then added a bit of weathering on top to blend them into the look of the chest.

IMG_5344.jpg

IMG_5345.jpg
 
Step 8.


Soft goods!!

IMG_4819.jpg

I bought a basic black short sleeve compression T - no mods!
Also got some simple gray baseball pants and dyed them with iDye for Polyester.
This had to be done on a stove top method so the polyester pants would take the dye - each pair took about an hour in the roiling dye bath!

IMG_4851.jpg


Washing machine method attempt failed - water not hot enough:

IMG_4857.jpg

Smiling cause I'm standing for over two hours stirring a boiling vat of dye...

IMG_4867.jpg


Final result - Rex's on left and Gregors on right:

IMG_4870.jpg


Finally added some suede fabric knee pads to match the reference - still need to add some quilt padding and a couple horizontal stitching lines tho:

IMG_5346.jpg


-jono
Jon Farmer
TK6834

IMG_4819.jpg


IMG_4851.jpg


IMG_4857.jpg


IMG_4867.jpg


IMG_4870.jpg


IMG_5346.jpg
 
Last edited by a moderator:
First of all... Your a bad Influence ;)

Because of the pics of you from SDCC, I decided to do this armor for myself.

I just received my armor from KWDesigns, He helped a lot in directing me to what pieces I needed. I was planning on starting the construction on Monday (want to help :p)


Now I have to read this thread, in depth, to see how you assembled things. So far, it seems pretty much like I was planning [SUB](if you believe that...)[/SUB]
 
Hey dee oh

Here is a couple of ideas for your pouches. both are Rifle Magazine Pouches.

http://www.ebay.com/itm/Original-La...wo-308-mags-/221350204718?hash=item338980152e
or
http://www.ebay.com/itm/New-Militar...g-Pouch-Tan-/400936379967?hash=item5d59aba63f

The first one is a West German surplus magazine pouch. It's made of rubber and fairly cheap. Modify the flap a bit and it would make a passable pouch. Problem is that it is a bit thin front to back (1.125" I believe) but width and height are almost dead on.

The second one is made out of nylon. dimensionally is a bit closer to what is show in the trailer and has a nice fastening system built in. you would need to cut the elastic band going around the pouch and add a frame to make it hold shape. The problem is that the sides and front of the pouch do not go all the way to the top, leaving a fairly sizable gap near the top (sides only).

I'm also looking at Uzi pouches. So far everything would need a color change to work.

What do you think???
 
Hey dee oh

What do you think???

These both look promising but let me see what I can come up with over the Labor Day weekend - gonna use some 030 plastic and strip heaters to bend the edges based on the pattern I drafted for my first vinyl versions - it just might be too easily tear-able to work.

-jono
Jon Farmer
TK6834
 

Your message may be considered spam for the following reasons:

If you wish to reply despite these issues, check the box below before replying.
Be aware that malicious compliance may result in more severe penalties.
Back
Top