Randy Cooper Stardestroyer - Assembly description

cabour

Sr Member
I made at the beginning of each episode of the original trilogy
I myself symbolizes the power of the Empire
My shape is simple but graphically awfully effective on screen
I impose with my 1600m long
My opponents all have scared to come under my fire
I am ... the StarDestroyer :)

Although I had some 2 or 3 things left to correct on my Salzo Galactica, last december I started the Star Destroyer from Randy Cooper.
This is my favorite ship in the SW saga (the falcon coming in second).
So when Randy Cooper announced that long 90cm kit in early 2008, I quickly positioned and I was among the first buyers.
Ther were some parts missing that Randy sent me quickly.
And so he waited since back then.

This is a rather well detailed kit. I will see if it is well designed during assembly, but I have no doubt it will book me a few surprises!
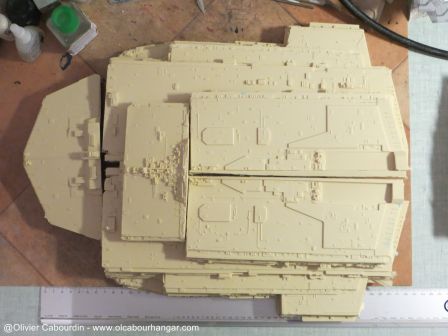
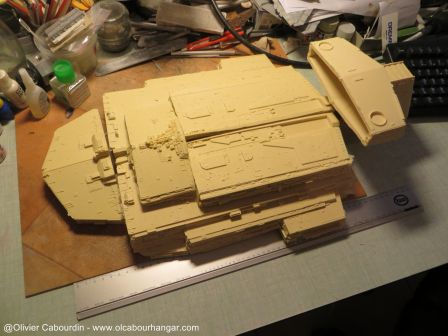
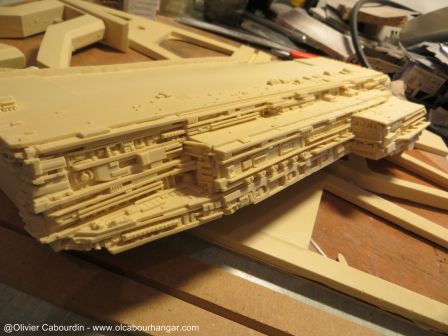
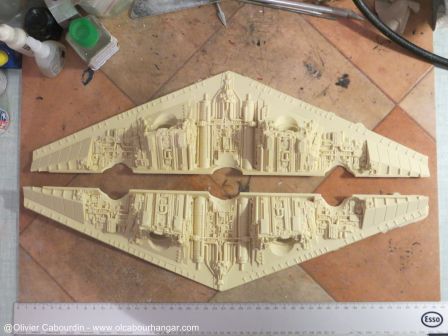
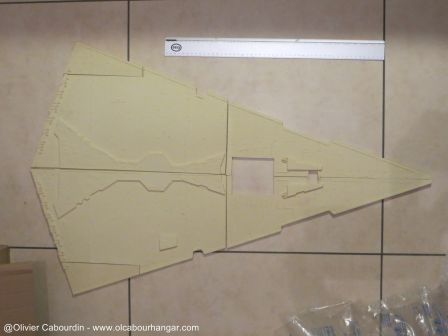
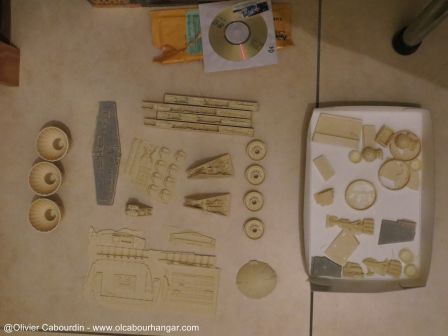
Parts overview (the metal ruler is 50cm long and the floor tiles are 60cm).
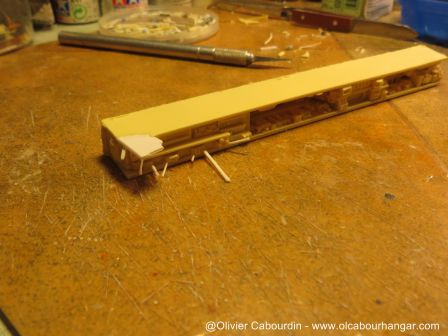
top side:
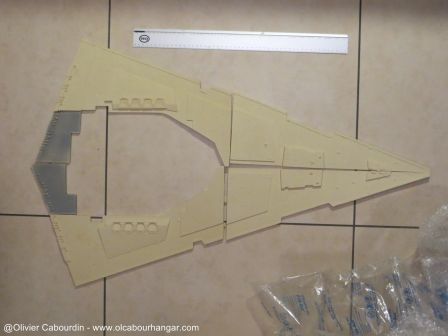
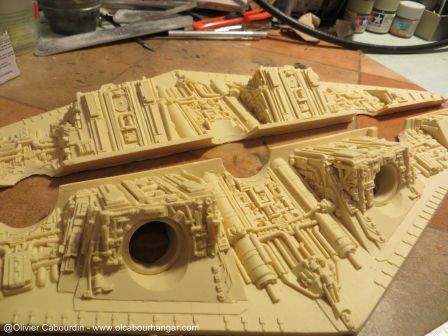
belly:
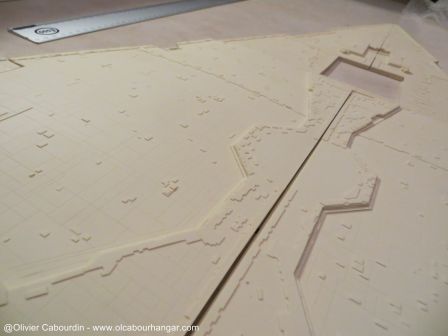

Upper buildings:
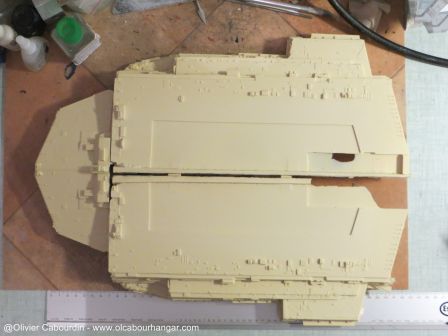


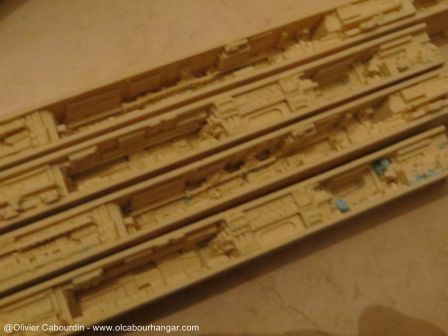
trenches:
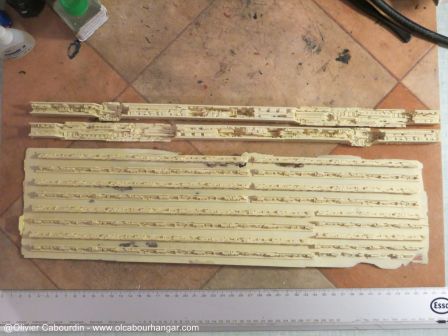
.IMG_0114_m.jpg


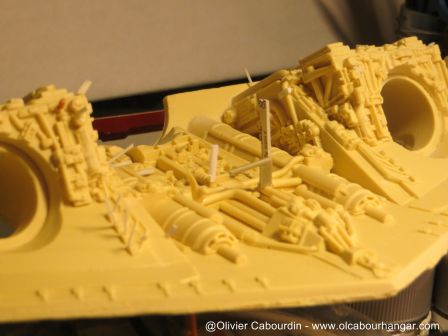
Rear:


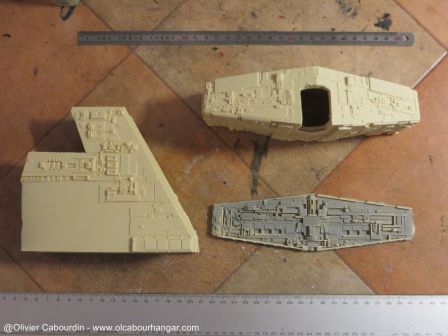
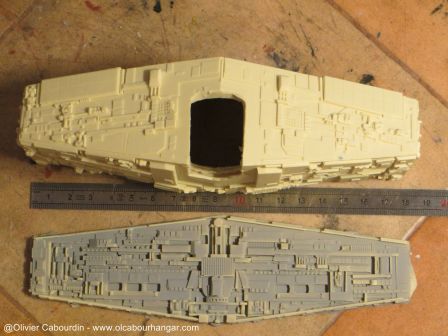
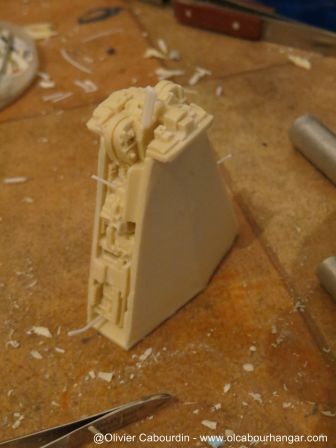
The bridge:


There is a slight offset on the neck (which I hope to correct in hot water)
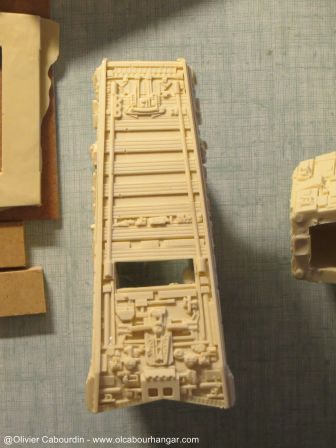


The rest of the parts (shield generators, hangar, nozzles ...)

There is an in scale Blockade Runner.
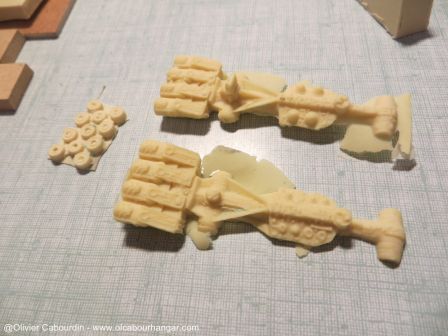

There are some molding defects : bubbles, gaps, flash, resin drops (!)
It seems thare are also some large area to sand, so a fixed belt sander or a lapidary is strongly advised here.
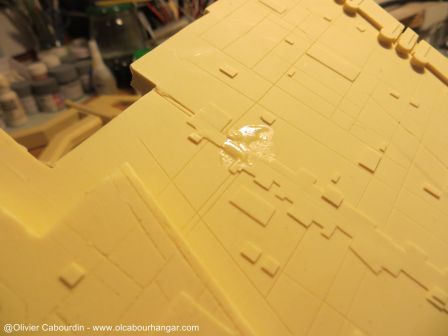
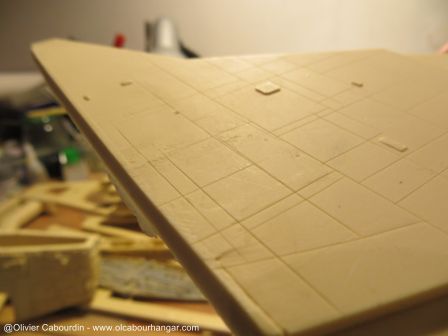
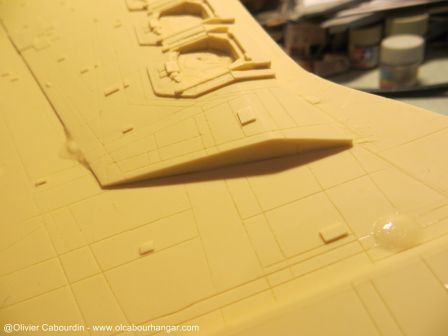
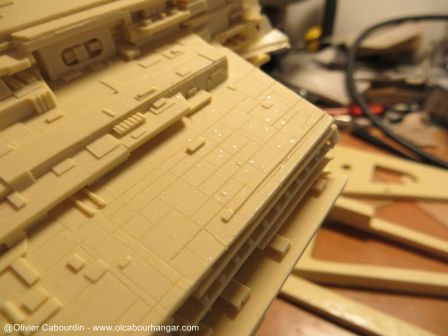
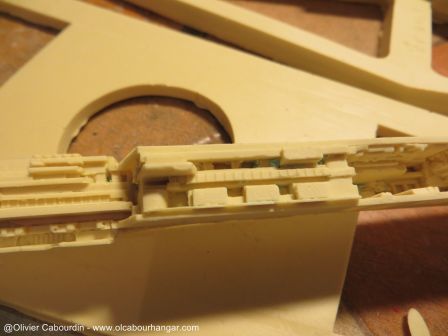
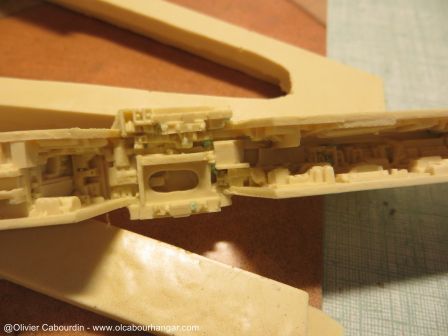
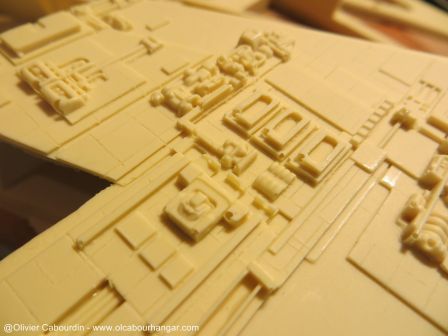
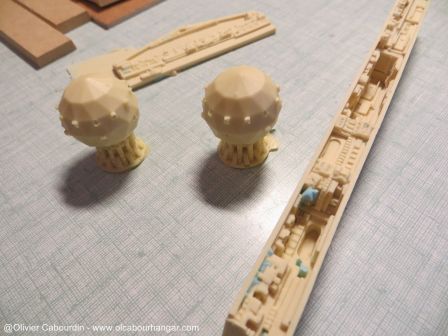
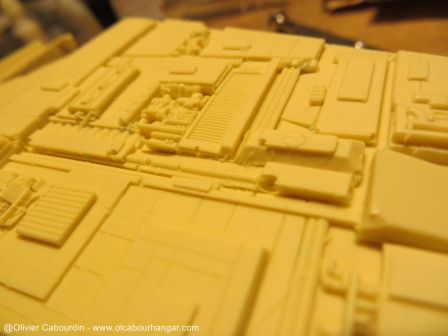

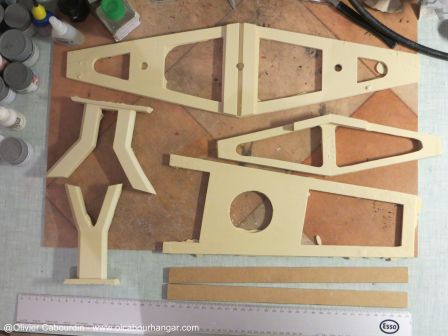
The internal frame is made of 3 resin parts that I don't feel there are not enough, so I am thinking to replace them with wood and aluminum channels.
The display arms are in two parts which I will replace by a single one (a table leg like on my Salzo Galactica)

It is larger than the Anigrand kit of only 20cm (72cm vs 90cm for the RC), that makes it twice bigger in volume.
despite the size, the RC is, to my point of view, more faithfull in shape and detail to the original ESB model, where the Anigrand is a mix between the ANH and ESB stardestroyer studio models.
On the other side, the Anigrand kit is an easier kit to assemble, and of a better molding (some are close to injected !)
 
Thanks for posting these pictures, cabour ... now I'll have to double check if my kit, which I purchased second hand from a member here, also contains that blockade runner ... this build is quite daunting for me ... so I might seek some assistance from a local group of modelbuilders ... looking forward to your progress though :)
Chaim
 
This is a nice ship when put together, and especially so if going the extra mile to outfit it with lighting. I have one sitting in its box waiting for me to find the time to get it done...

Will watch your progress with interest!
 
Indeed ... my kit does contain a blockade runner but it's warped as are some other parts ... anyone know a quick fix how to 'unwarp' parts of this resin kit? That said I'm going to do some more heavy research from other SD builds I found online before I touch or do anything :wacko

Chaim
 
Soak in very hot (not boiling) water and then gently bend it back to shape. If it doesn't flex don't push it - put it back in hot water, and try again in a minute or two. Once its straight drop it into cold water to set the shape.

I've been told you can do this with a heat gun as well - but have never tried it...

Jedi Dade
 
looking forward to see your solutions to the many fit issues that come with this kit. :)

Wow, very disappointing to see these issues. I was looking forward to getting one of these someday.

So it does not go together well, has an inadequate frame, warping, and bubbles.

Does not speak well of the famous Randy Cooper Star Destroyer.

I will have to re-think this one.
 
Wow, very disappointing to see these issues. I was looking forward to getting one of these someday.

So it does not go together well, has an inadequate frame, warping, and bubbles.

Does not speak well of the famous Randy Cooper Star Destroyer.

I will have to re-think this one.


these issues are all normal for a garage kit, parts actually fit not bad on my kit not sure how the molds are holding on as I got mine from his very first run from fresh new molds.
 
Mine was also from the first run, and there were already fitting issues. The most curious issue is the non symetric triangles for the belly.

To manage the warped parts, it is better to use hot water. Heat gun is usefull when hot water is not usable (part too large for example)

For information, my kit is already finsihed. I post here all my notes and solutions as an help for others.
You can see it finished here :
https://www.facebook.com/olcabour.hangar/posts/1598982593711532?pnref=story
it was finished just in time for its first exhibition at Geekopolis event (may 2015) in Paris where we had a stand with the theme "The Empire of Star Wars"
https://www.facebook.com/olcabour.hangar/posts/1599519080324550
 
It take me over 2 months to prepare the parts: cleaning defaults, filling bubbles (always with the hedgehog method: superglue and small plastic rods) and gaps ...


Some parts were bent and reshaped with a bath of hot water or heat gun.

I had no 0.5mm optic fiber, so I ordered a 6000m roll from China (aliexpress), and was surprised to receive it the next week (I was expecting a 3-5 weeks delay).

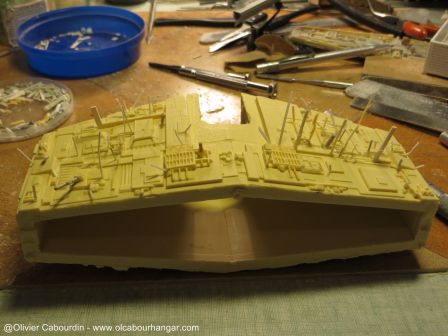
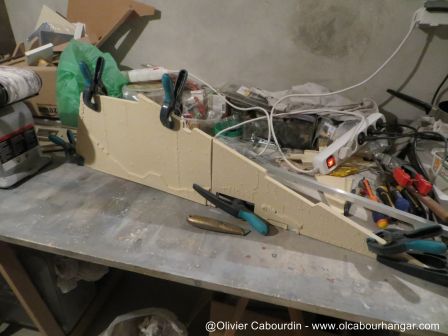
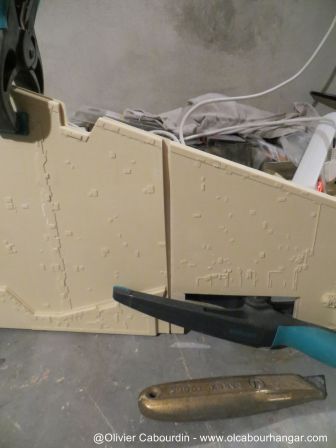
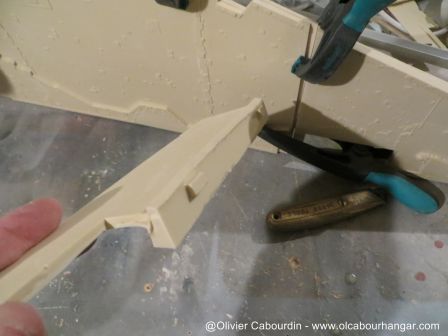
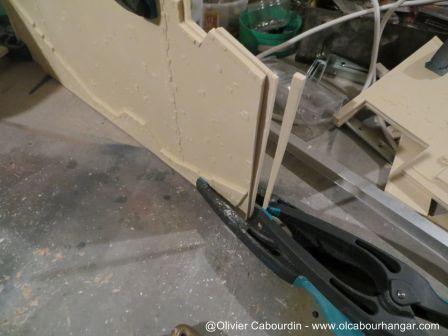
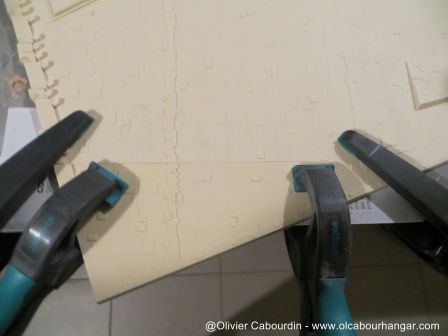
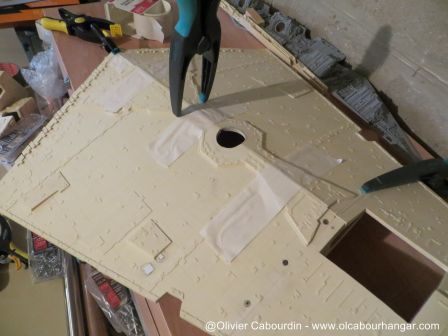
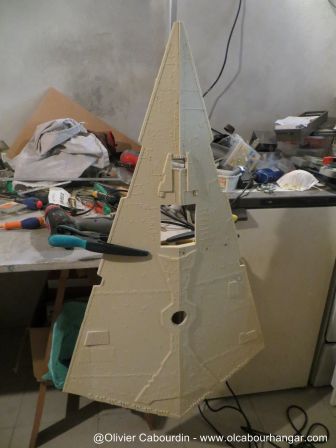
The assembly starts with the lower part, so the two large triangles.
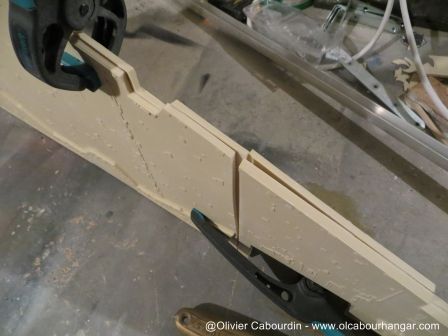
Each triangle is made of three parts, which don't have the same thickness...
And putting them back to back, one can see that the two sides are not symmetrical...


The first gap between the two sides is filled with a resin rod (a resin remaining piece from the cleaning step, shapped with a sanding belt machine).


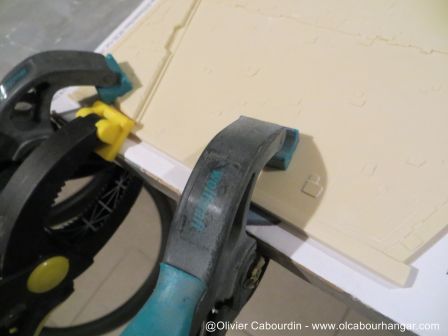
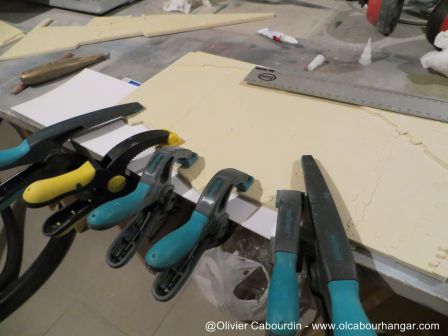
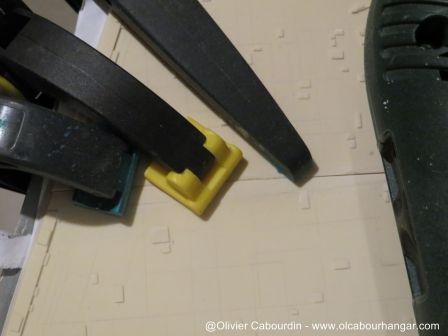
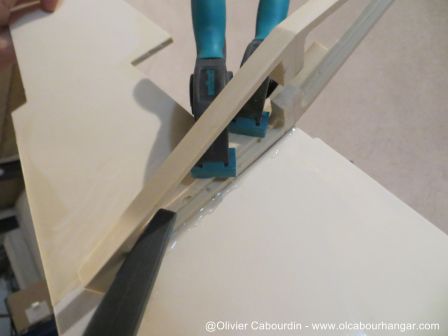
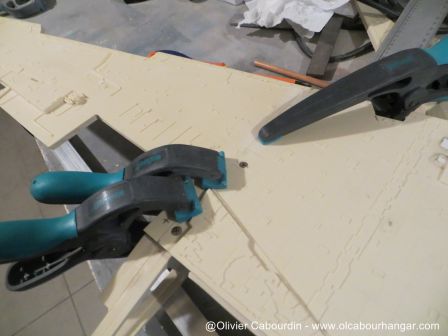
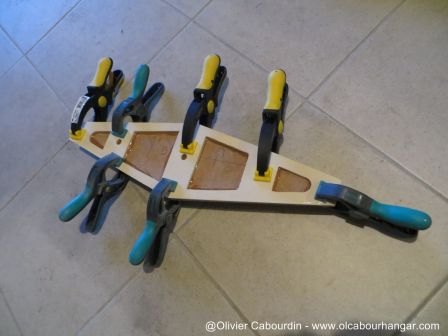
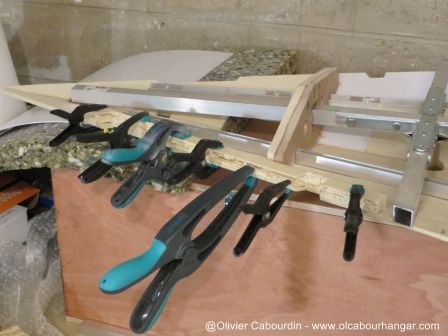
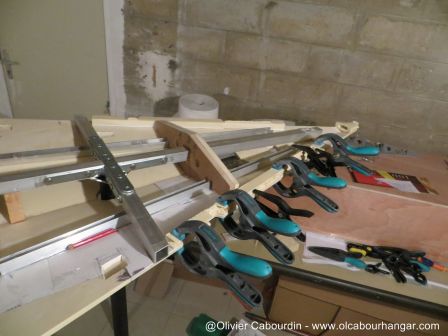
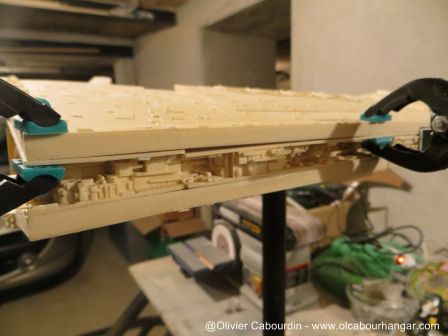
To be sure that the parts are aligned, they are glued in holding them firmly flat on the table (or a wood board) with pliers. A second gap is the thickness of the plates, which is not uniform from one part to another and it needs to be uniformized to facilitate bonding. Therefore, according to places, I glued 1 to 1.5 mm thick plastic cards.


Note, for this type of kit, it is best to have the fixed and portable electrical equipment to go fast: belt sander, band saw, sander, drill, screwdriver, jigsaw ... and a vacuum cleaner for particles and resin dust. So DIY machines and not just modelling machines.
 
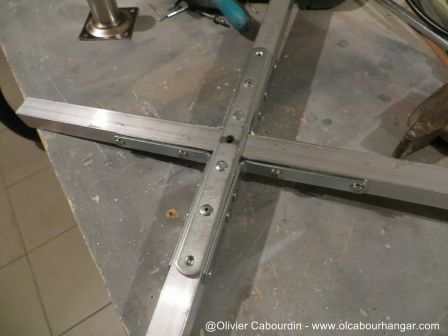
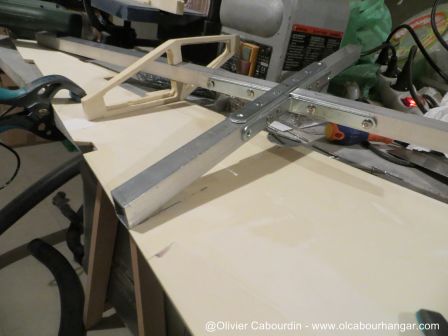
I wanted a metal internal frame to ensure it will support manipulations (transport and convention exhibition) and allowing me to exhibit it under different ways.
The display stand points will be:
- underside, with a table leg (as I did with my 37" Galactica http://www.therpf.com/showthread.php?t=222490&p=3408040&viewfull=1#post3408040)
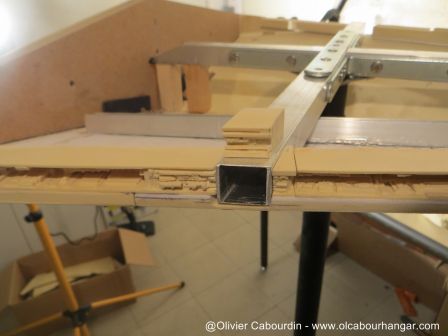
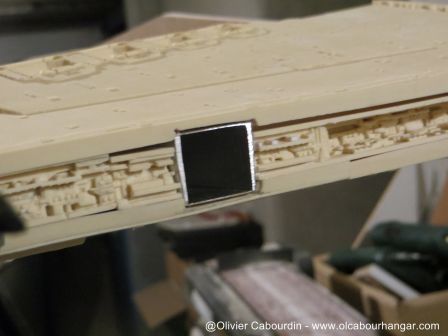
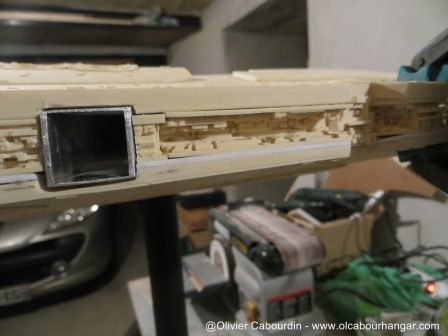
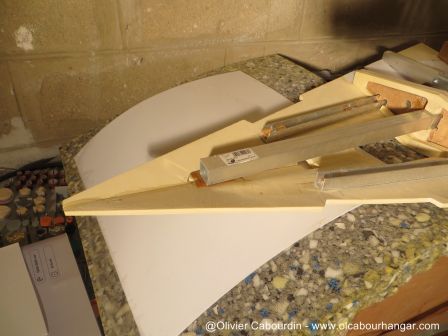
- Or by the sides, with square tube being inserted in the lateral trenches

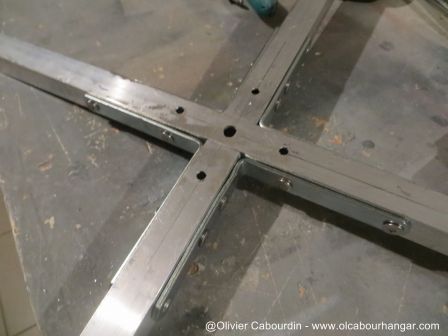
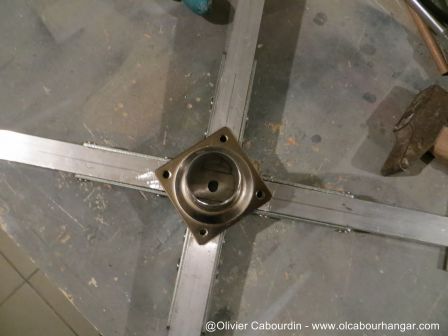
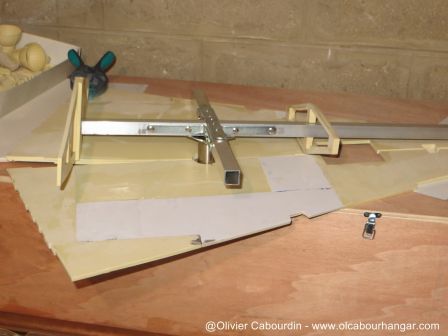
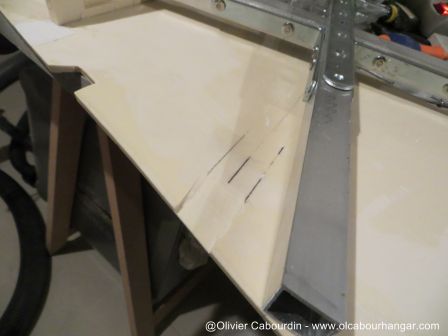
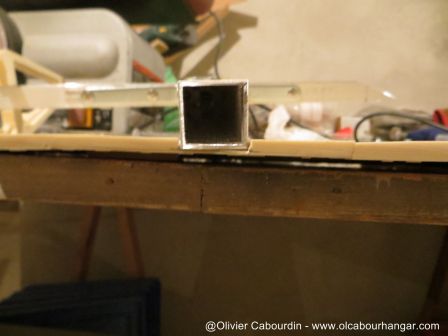
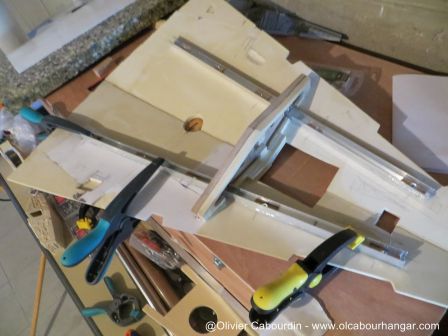
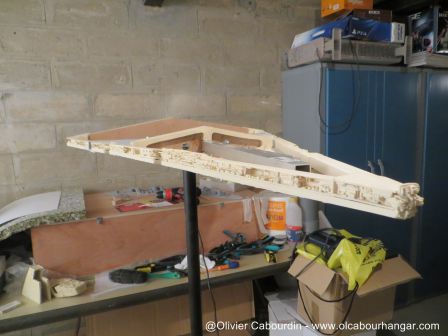
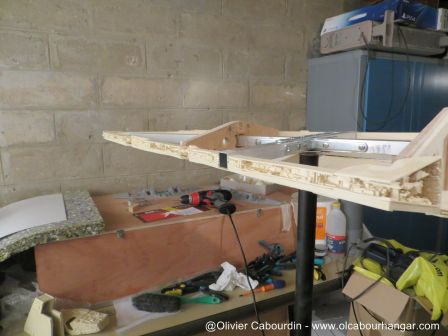
So the internal frame is a cross, made from aluminum square tubes of 2 cm width, riveted together with metal brackets, and a metal plate. The underside is maintained by riveting the table leg.
The materials are so hard I broke 2 hand riveters in this operation!
So it will be very strong :)


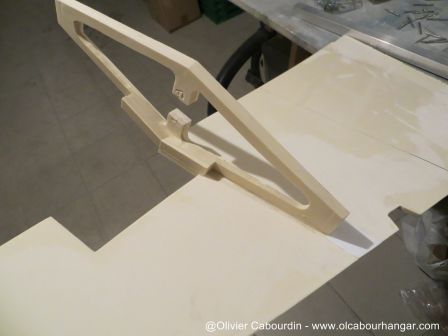
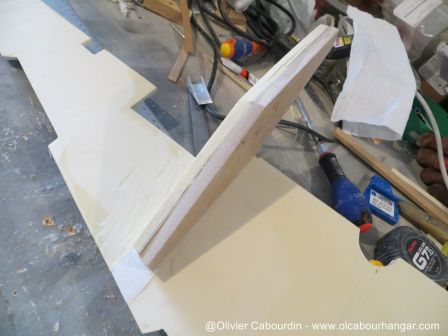
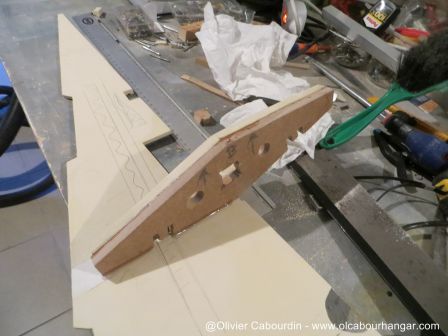
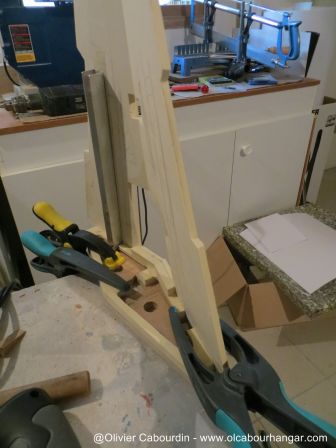
The center of the rib is cut in order to the cross go through. The rib is then glued and screwed on a first triangle side.


The center of the belly dome is hollow to allow the display stand/table leg to go through.


The edges are dig so that the cross arms of the cross settled well.


I've seen your finished SD ... excellent ... I wish I could hire your assistance in finishing mine ... keep posting you progress shots ... quite inspiring indeed :)

Chaim
 
Thanks Syl-Cha :)

---

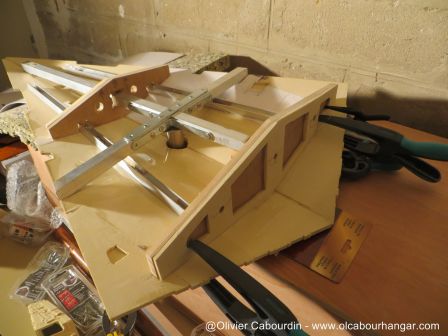
Now that the frame is made, it must be set on the belly shell.
In fact it is the opposite! technically it's the shell that is attached to the frame, but practically, it is similar because they can no longer be dissociated.

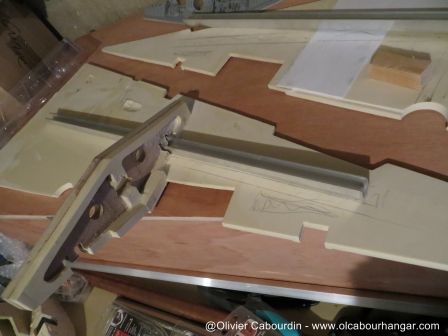
Beforehand I strengthen the ribs with 1cm medium wood plates.


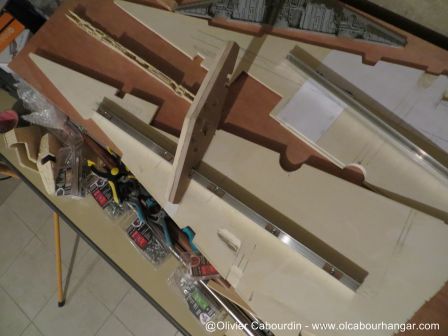
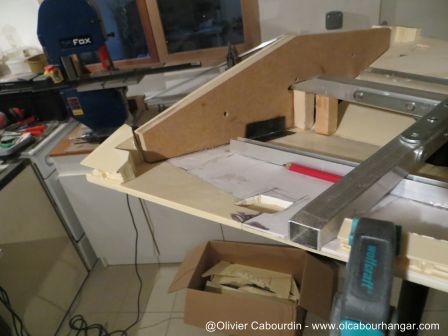
In the center, notches are made in the median rib in order to install the U-shaped aluminum profiles that will keep them out straight the triangles. They are glued and screwed.
I begin with the first side :


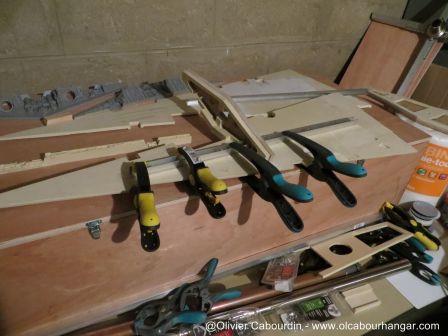
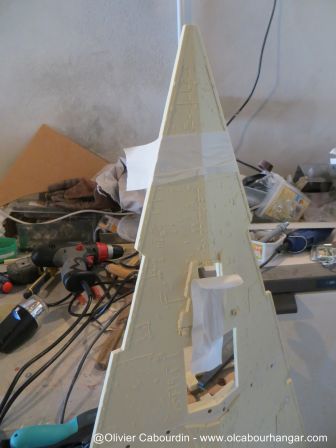
The second triangle is stuck maintaining the join with tape. Bonding is first performed with cyano then reinforced with Pattex 100%.


Installation of the second aluminum U-profile


At the front, a small piece of wood, shaping the belt sander, is needed.


At the back, the top of the cross is part of the wooden rib and is reinforced with wooden blocks.


The glue used is Pattex 100%. It is solid and remains somewhat flexible. It starts to set after half an hour, but not cured before 2 hours. So the parts need to be hold in place (pliers, tapes...) during curing.
 
Pattex 100% - check . . . already used it for Darth Vader shoulder armor attaching the leather for the bells . . . but what do you mean bonding with cyano (?) ... can you show or refere to the actual product, please?

Chaim
 
Pattex 100% - check . . . already used it for Darth Vader shoulder armor attaching the leather for the bells . . . but what do you mean bonding with cyano (?) ... can you show or refere to the actual product, please?

Chaim

moonbus is right, cyano means cyanoacrylate glue, or superglue.

I truly enjoyed making this kit.

I don't want to hijack your your build log but If your interested here's my build http://www.therpf.com/showthread.php?t=189785&page=4

best of luck and happy sanding.

Thanks.
In fact, mine is already finished (https://www.facebook.com/olcabour.ha...32?pnref=story). I post in this thread all my notes taken during the assembly to help others.
I did take a look at your build thread before starting mine (thanks for that :) )

It was finished just in time for its first exhibition at Geekopolis event (may 2015) in Paris where we had a stand with the theme "The Empire of Star Wars"
https://www.facebook.com/olcabour.ha...99519080324550
 
Last edited by a moderator:
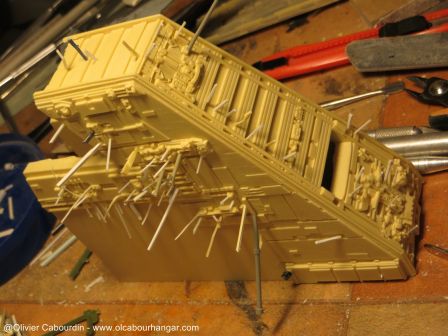
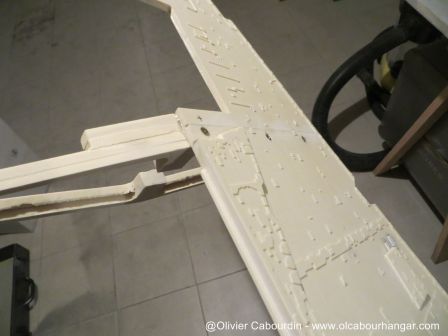
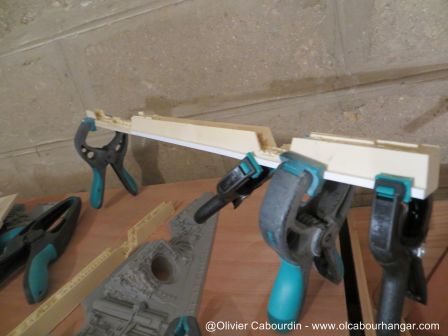
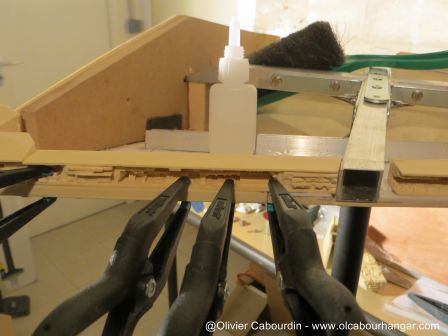
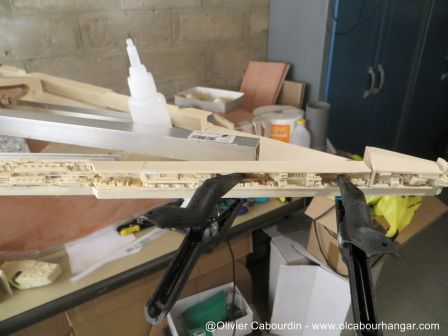
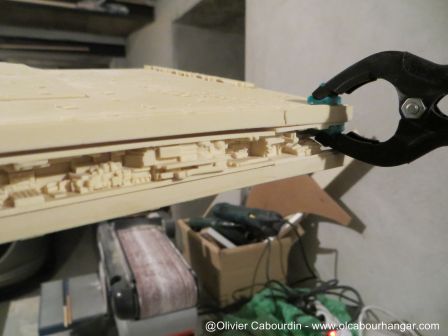
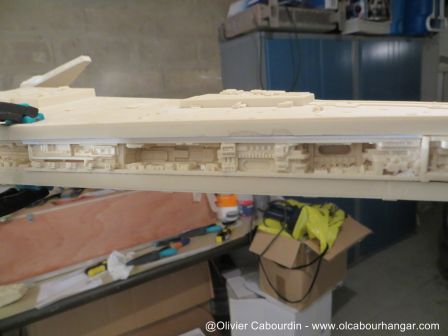
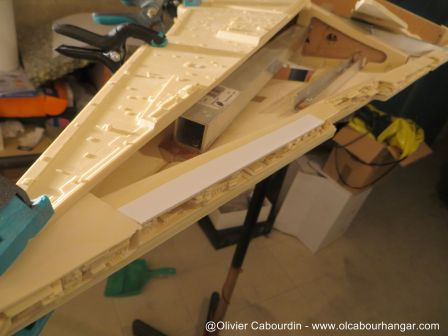
To align the lateral trenches, I added an evergreen strips (4mmx2mm) over the entire length, and I then glue with cyano.


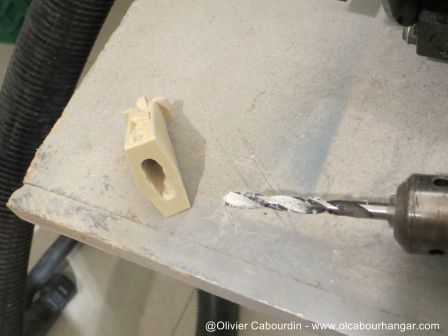
The nose is a solid part so it needs to be hollowed to later allow the passage of the optic fibers.


The end of each aluminum tube will later receive a cache that will be realized with cutted part from the trench.


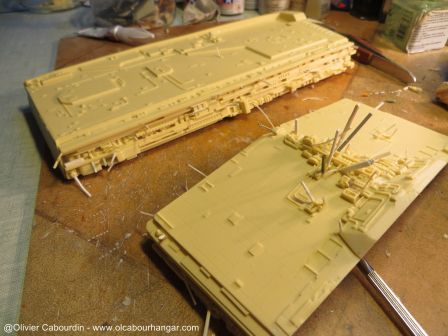
By positioning the upper triangles, trench parts gaps and heigth differences are highlighted.


This is corrected with plastic strips.


Any more 'building updates' ? I can use all the information I need before tackling this monstrosity of a kit :wacko

Chaim
 
This thread is more than 7 years old.

Your message may be considered spam for the following reasons:

  1. This thread hasn't been active in some time. A new post in this thread might not contribute constructively to this discussion after so long.
If you wish to reply despite these issues, check the box below before replying.
Be aware that malicious compliance may result in more severe penalties.
Back
Top