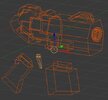
Quake video game series miniatures

Hi all,

I have started a tiny project with nice crisp scope boundaries: Miniature rocket launcher models from the Quake video game series. I plan to have them included on a single display stand with little holders to live on my shelf with my other models.

So far, I am still at the test phase. Lots of iteration in Blender and with my 3d printer. Total scale of each will be approximately 70-100mm long. My main goal here is to create something that looks good on my printer and do some learning along the way. As I post stuff, please feel free to comment on technique, as I am totally green in this domain!

Cheers
 
So far, my tests have been around fit and finish. I haven't yielded anything great so far, but am making steps in the right direction, I think.

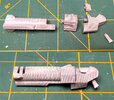
Here is the model broken into parts by color and general geometry. For example, sanding the barrel will be easier if it is separate from the rest of the object.

printedInParts.jpg

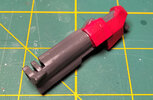
And here is my very first print test (just printed in one piece, don't mind the horrid brush marks here) with some bondo putty applied and some quick and dirty acrylic paint to see what kind of finish I had.

paintTestBad.jpg

I really would ideally love to have a "wow this looks like it was injection molded" quality finish, but that is ambitious. Mainly I think I need to be patient and prime/putty/sand/repeat until I am happy with it. If I can make it happen, I might figure out a way to make blanks and create molds/castings to see what that yields.
 
I've gone and ordered some silicone brushes for helping me shape the tiny inside corners. So far I've found the "mush and smooth with your finger tip" method works very well for putty, but once the gloves get wrinkled or get dry bits on them the method falls down. Hoping silicone brush tips will help here!
 
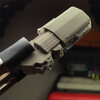
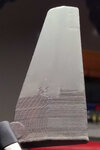
Smallest of updates on this project. I've been tinkering with finishing methods, and did some experiments with epoxy resin as a post-processing solution. I know Smooth-On makes XTC-3D, but I've opted for the 2 part epoxy resin I already had, and it has worked well so far:

resinTest01.jpgresinTest02.jpg

These raw prints given a coat of resin, light sanding, and hasty coat of matte grey paint result in some pretty acceptably smooth faces.

In addition, I've added my long beloved (for whatever reason) Blaster from Quake 2 into the mix. I am making 2 of them, and they're about 40mm long.

WIP_Blasters.jpg

As you can see, I am still perfecting my craft when it comes to inside edges and some of the finer angles and structural elements. But I've ordered some additional shaping and finishing tools as well as some good brushes to help reel in the finer detail work. These photos show a lot of flaws because there are a lot, but also the harsh overhead lighting and ultra close up shots. In my hand to the naked eye, these feel about 75% the way there in terms of the quality I am hoping I can achieve. This has inspired me to possibly try to finish my life-sized blaster as well. It's clunky and made of woody, but if painted correctly and mounted on a shelf it'll do just fine.
 
Oh and if anyone was wondering, these blasters were printed in 4 parts, 3 of them useful at this scale. The triggers are too tiny to be worth while, so I will finish those by hand as the last step (and just push/glue them into the toothpick holes at the bottom).

blenderWireframe.jpg
The joinery is not as snug or deep as I would like, but at this scale it's nothing some super glue gel can't fix. Since they are display pieces I don't expect a lot of torque on the grip :)
 

Your message may be considered spam for the following reasons:

If you wish to reply despite these issues, check the box below before replying.
Be aware that malicious compliance may result in more severe penalties.
Back
Top