indiefilmgeek
Sr Member
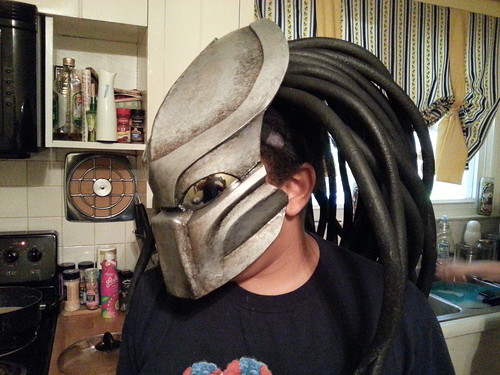
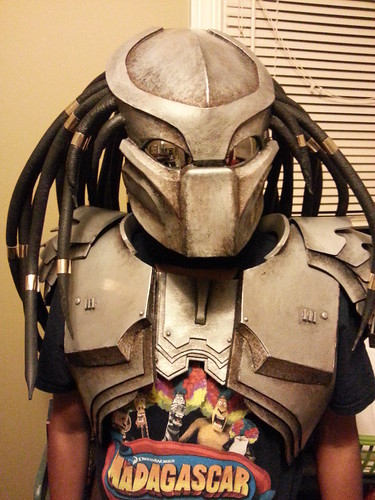
THIS IS THE PREDATOR COSTUME I BUILT FOR MY 10yr OLD DAUGHTER FOR HALLOWEEN 2012

ABOUT:
With roughly 4 weeks before Halloween my 10yr old daughter asked me if I could build her an Alien costume. I said, "No." So, she asked if I could make her a Predator costume... And I said, "Sure." I'm not exactly convinced that one would have been easier than the other, but with my Iron Man experience last year, I figured I could whip up some armor pieces easier than creating a full latex suit which mimics organics that I'm not nearly as experienced with. I was pretty pressed for time, so I wasn't able to maintain my usual build thread. What follows below is a recap of the build from the pictures I took during the build.
BUILD TECHNIQUE:
I used a combination of existing and custom templates to create the Predator armor in EVA foam. The full build thread below shows more specifics on how the individual pieces were constructed.
CHALLENGES:
Well, time was the biggest challenge. I build very slowly, so this was a BIG stretch for me. Budget was the other challenge. We ended up completing this build for a bit over $200.
ELEMENTS I'M PROUDEST OF:
Definitely the self-destruct display. I really wanted to not only have them lit, but also have them completely blacked out (like a monitor screen) when the light was off. The final solution is documented below and includes some tinted sunglasses lenses.
EXPERIENCE:
As most of you know my first MAJOR build was in 2011 for my 5yr son, Michael. It was a full Iron Man suit. It took me over 12 months, but I was very happy with the results. Since then, I've been working on my first commission build for Digitizit (Victorian Age Version of Iron Man).
BUILD THREAD:
First off, I have to thank Spartan857 for the Bio helmet pep file (unfolded by mks81). And vinmanmac from The Hunter's Lair for some great armor templates.
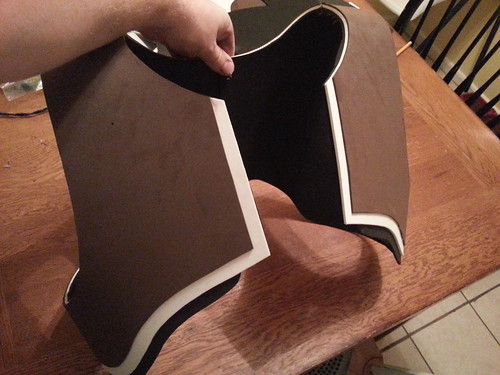
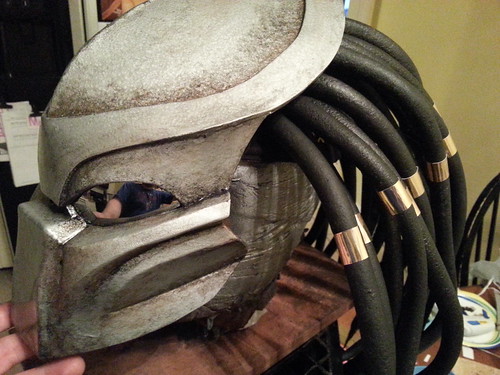
Starting with the Spartan857 pep, I scaled and constructed a pepakura model of the Bio helmet.

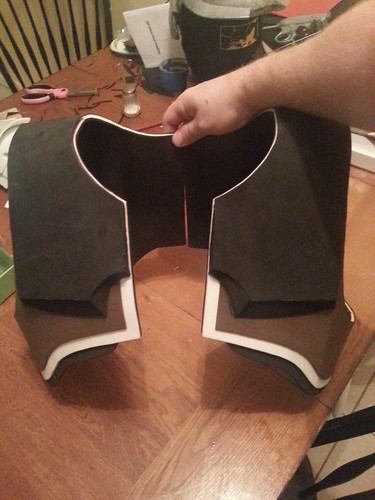
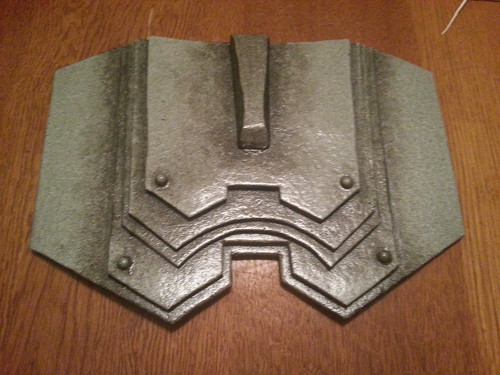
From this I marked the paper pep, cut it and used those pieces as templates for an EVA foam build (4mm).


Then I hit the foam helmet with a couple coats of plasti-dip...

Then some Adhesive Promoter (found at most auto-part stores) and then 'hammered steel - metallic paint' that I got at Wal-mart.

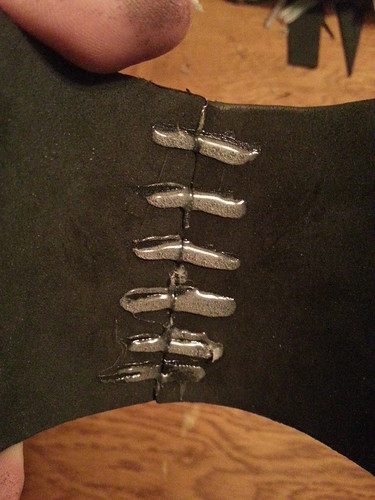
Here's a close-up of the paint effect...

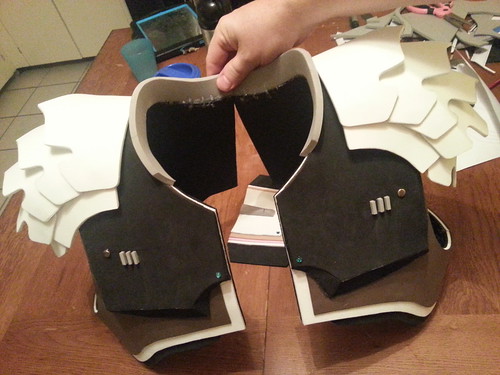
After that dried, I 'weathered' the helmet with some black and brown latex paint I had laying around.

Next, I hit the helmet with a couple coats of clear coat (for Plastics).

And then, finally, I added a couple of mirrored sunglasses lenses...

*****
Setting that aside for a bit, let me go over the Gauntlets...
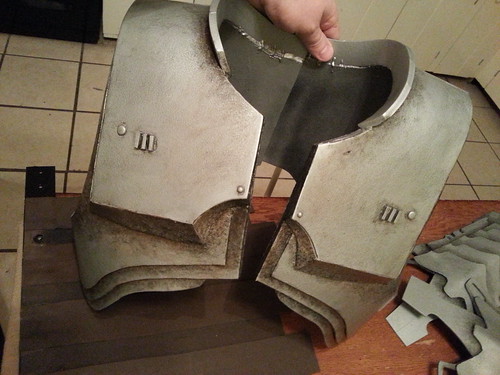
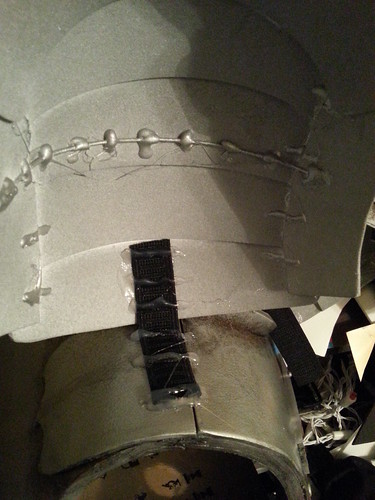
I started with a section of floor matte foam for the top of the gauntlets and a section of 5mm EVA foam for the rest of the wrist unit.

I took some 2mm (maybe thinner) craft foam from Wal-mart and cut out the general shapes of the template just to add texture and details.

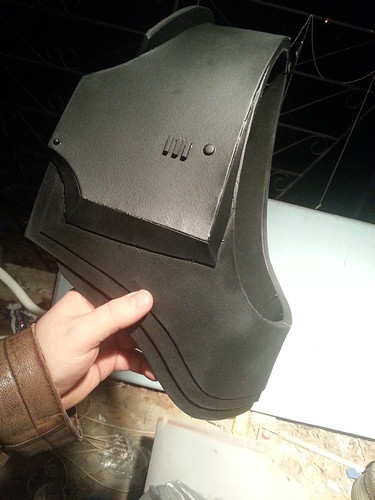
I then created a cover plate for the 'self-destruct' panel gauntlet.

After marketing out the spaces, I then carefully cut out five spaces and installed a battery pack and string of LED's from a set of x-mas lights (a favorite element of mine to use).

I added some ribbed piping and then hit it with a couple of coats of Plasti-Dip.

I followed that with the Adhesive Promoter and hammered steel spray paint.
Then I started to work on the five read-out windows. To get the effect I wanted, I ended up using a $1 red plastic folder, some black electrical tape (to black out everything but the xeno-letters and finally some black sunglass lenses (also from the $1 store).
Here are the glasses...

One lens, which I've cut down to size with the red plastic folder piece and black electrical tape...

Here's the flip side...

And this is what it looks like in place...

Finally... here's what it looks like lit.

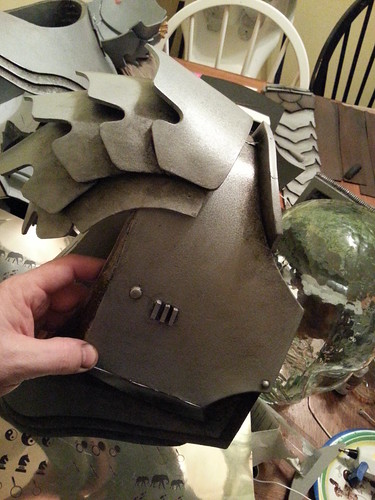
Finished 'self-destruct' gauntlet...


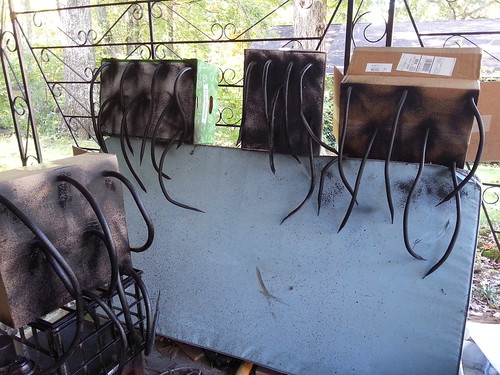
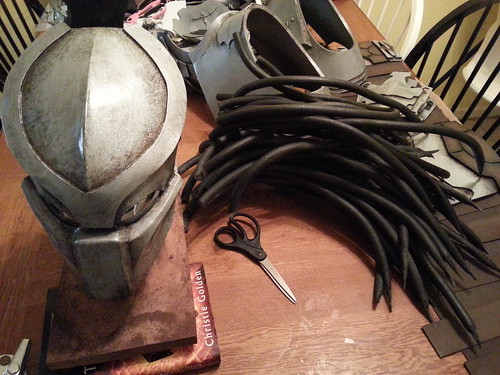
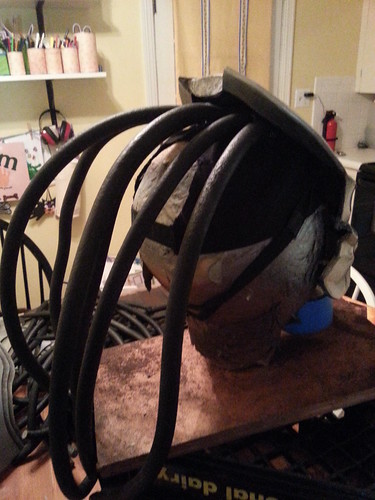
Starting with the same base, I cut the claws out for the 'blades' gauntlet out of stiff plastic and then constructed a simple mounting from foam (no... they don't extend).

And here is what it looks like after plasti-dip and hammered steel paint job.

Finally, here's the weathered final piece...


*****
More WIP pictures soon!
ABOUT:
With roughly 4 weeks before Halloween my 10yr old daughter asked me if I could build her an Alien costume. I said, "No." So, she asked if I could make her a Predator costume... And I said, "Sure." I'm not exactly convinced that one would have been easier than the other, but with my Iron Man experience last year, I figured I could whip up some armor pieces easier than creating a full latex suit which mimics organics that I'm not nearly as experienced with. I was pretty pressed for time, so I wasn't able to maintain my usual build thread. What follows below is a recap of the build from the pictures I took during the build.
BUILD TECHNIQUE:
I used a combination of existing and custom templates to create the Predator armor in EVA foam. The full build thread below shows more specifics on how the individual pieces were constructed.
CHALLENGES:
Well, time was the biggest challenge. I build very slowly, so this was a BIG stretch for me. Budget was the other challenge. We ended up completing this build for a bit over $200.
ELEMENTS I'M PROUDEST OF:
Definitely the self-destruct display. I really wanted to not only have them lit, but also have them completely blacked out (like a monitor screen) when the light was off. The final solution is documented below and includes some tinted sunglasses lenses.
EXPERIENCE:
As most of you know my first MAJOR build was in 2011 for my 5yr son, Michael. It was a full Iron Man suit. It took me over 12 months, but I was very happy with the results. Since then, I've been working on my first commission build for Digitizit (Victorian Age Version of Iron Man).
BUILD THREAD:
First off, I have to thank Spartan857 for the Bio helmet pep file (unfolded by mks81). And vinmanmac from The Hunter's Lair for some great armor templates.
Starting with the Spartan857 pep, I scaled and constructed a pepakura model of the Bio helmet.
From this I marked the paper pep, cut it and used those pieces as templates for an EVA foam build (4mm).
Then I hit the foam helmet with a couple coats of plasti-dip...
Then some Adhesive Promoter (found at most auto-part stores) and then 'hammered steel - metallic paint' that I got at Wal-mart.
Here's a close-up of the paint effect...
After that dried, I 'weathered' the helmet with some black and brown latex paint I had laying around.
Next, I hit the helmet with a couple coats of clear coat (for Plastics).
And then, finally, I added a couple of mirrored sunglasses lenses...
*****
Setting that aside for a bit, let me go over the Gauntlets...
I started with a section of floor matte foam for the top of the gauntlets and a section of 5mm EVA foam for the rest of the wrist unit.
I took some 2mm (maybe thinner) craft foam from Wal-mart and cut out the general shapes of the template just to add texture and details.
I then created a cover plate for the 'self-destruct' panel gauntlet.
After marketing out the spaces, I then carefully cut out five spaces and installed a battery pack and string of LED's from a set of x-mas lights (a favorite element of mine to use).
I added some ribbed piping and then hit it with a couple of coats of Plasti-Dip.
I followed that with the Adhesive Promoter and hammered steel spray paint.
Then I started to work on the five read-out windows. To get the effect I wanted, I ended up using a $1 red plastic folder, some black electrical tape (to black out everything but the xeno-letters and finally some black sunglass lenses (also from the $1 store).
Here are the glasses...
One lens, which I've cut down to size with the red plastic folder piece and black electrical tape...
Here's the flip side...
And this is what it looks like in place...
Finally... here's what it looks like lit.
Finished 'self-destruct' gauntlet...
Starting with the same base, I cut the claws out for the 'blades' gauntlet out of stiff plastic and then constructed a simple mounting from foam (no... they don't extend).
And here is what it looks like after plasti-dip and hammered steel paint job.
Finally, here's the weathered final piece...
*****
More WIP pictures soon!
Last edited:


") :thumbsup
:thumbsup