Shaw
Well-Known Member
Background
A little over a year ago I set out on a project to document and build an original 1966 AMT Enterprise model (mainly because that version of the kit made it into the original series as both the Constellation and Enterprise in the second season). The project has three main elements; reverse engineering plans of the original model, recreating the original decals (including replacements for the model's surface windows), and building the model as authentically as possible to the era it is from.
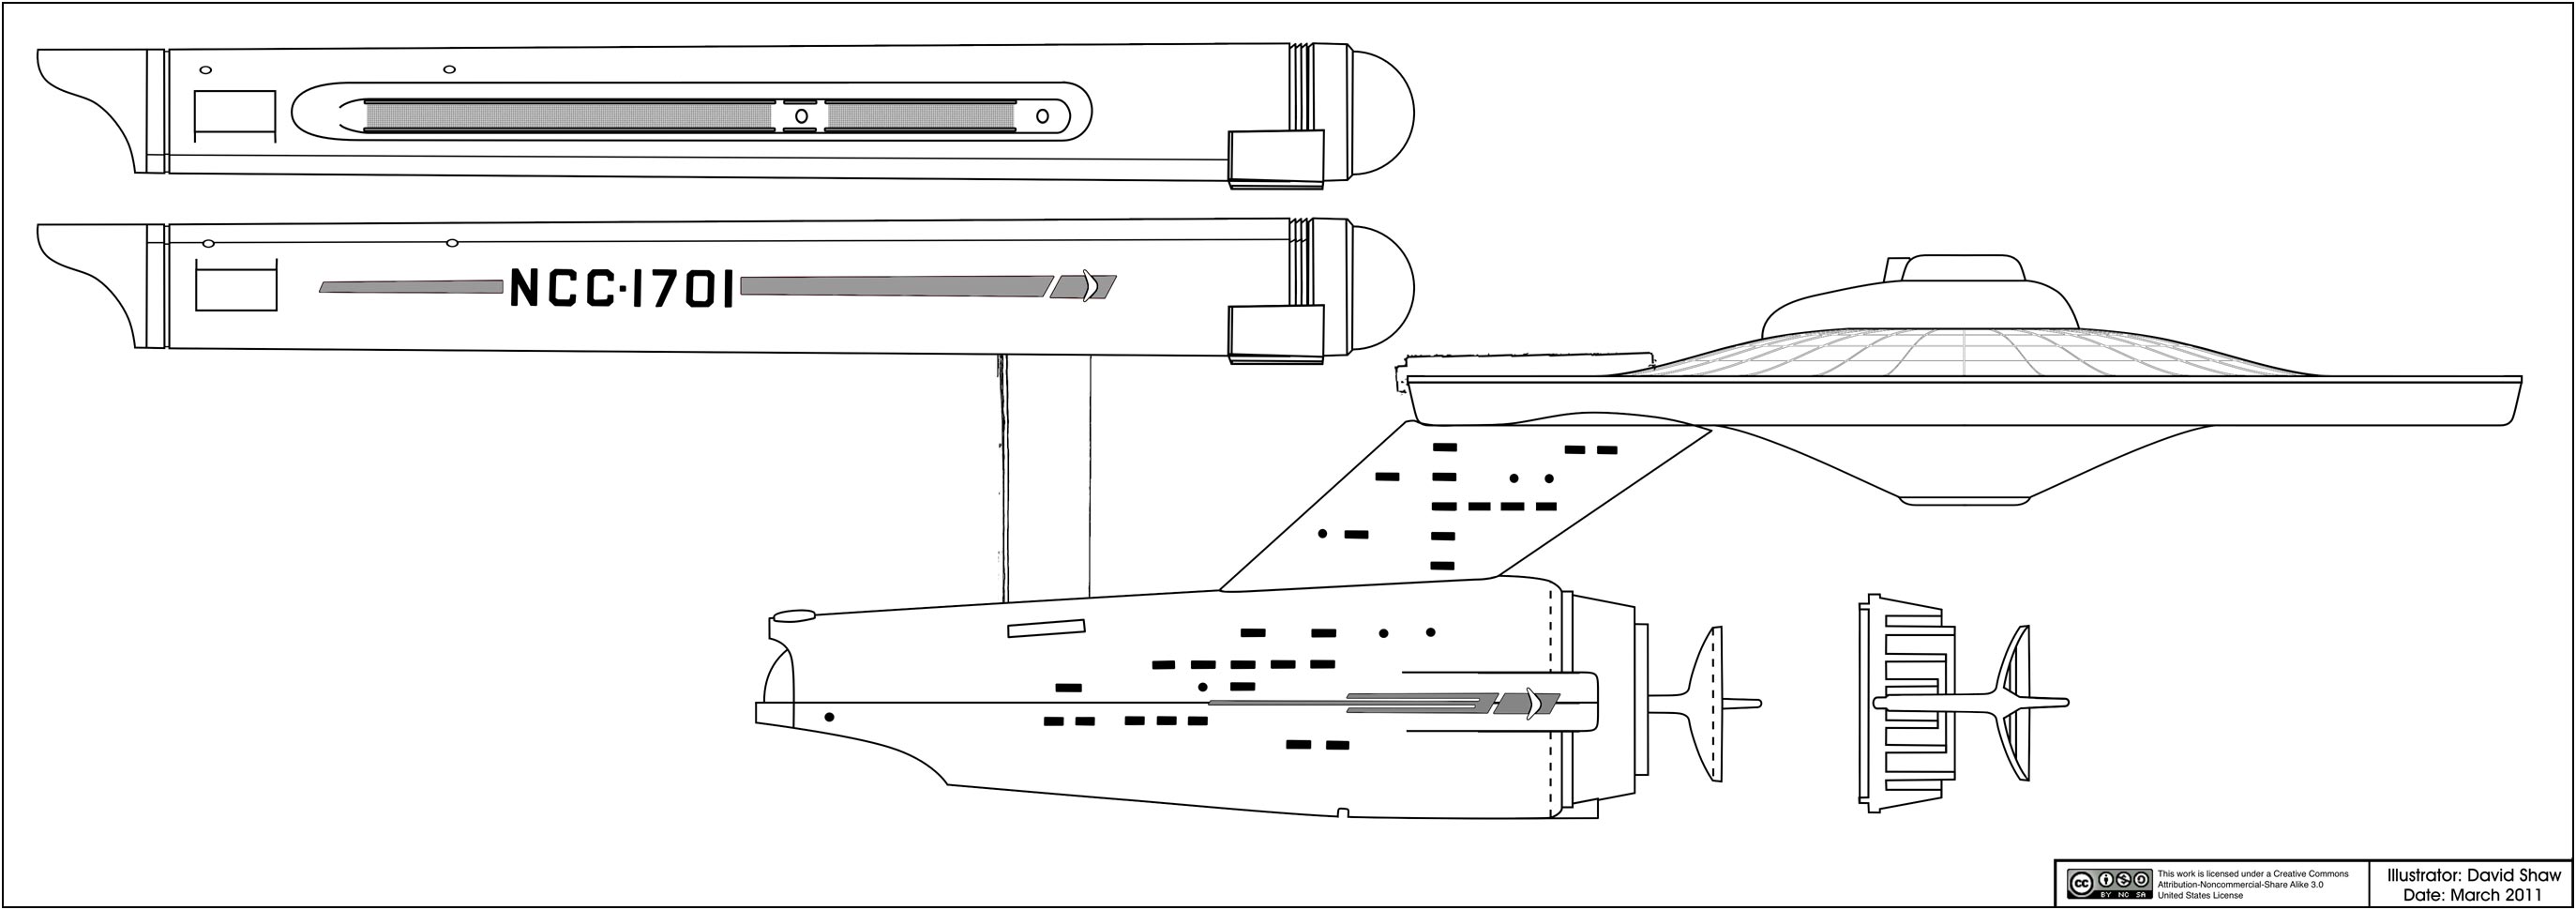
From a series of photos, scans and rubbings of the original models parts, I've made pretty good progress on reverse engineering some plans...
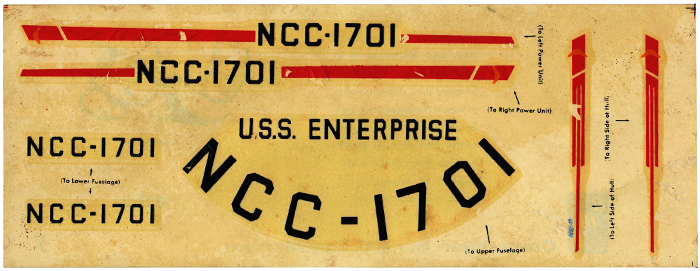
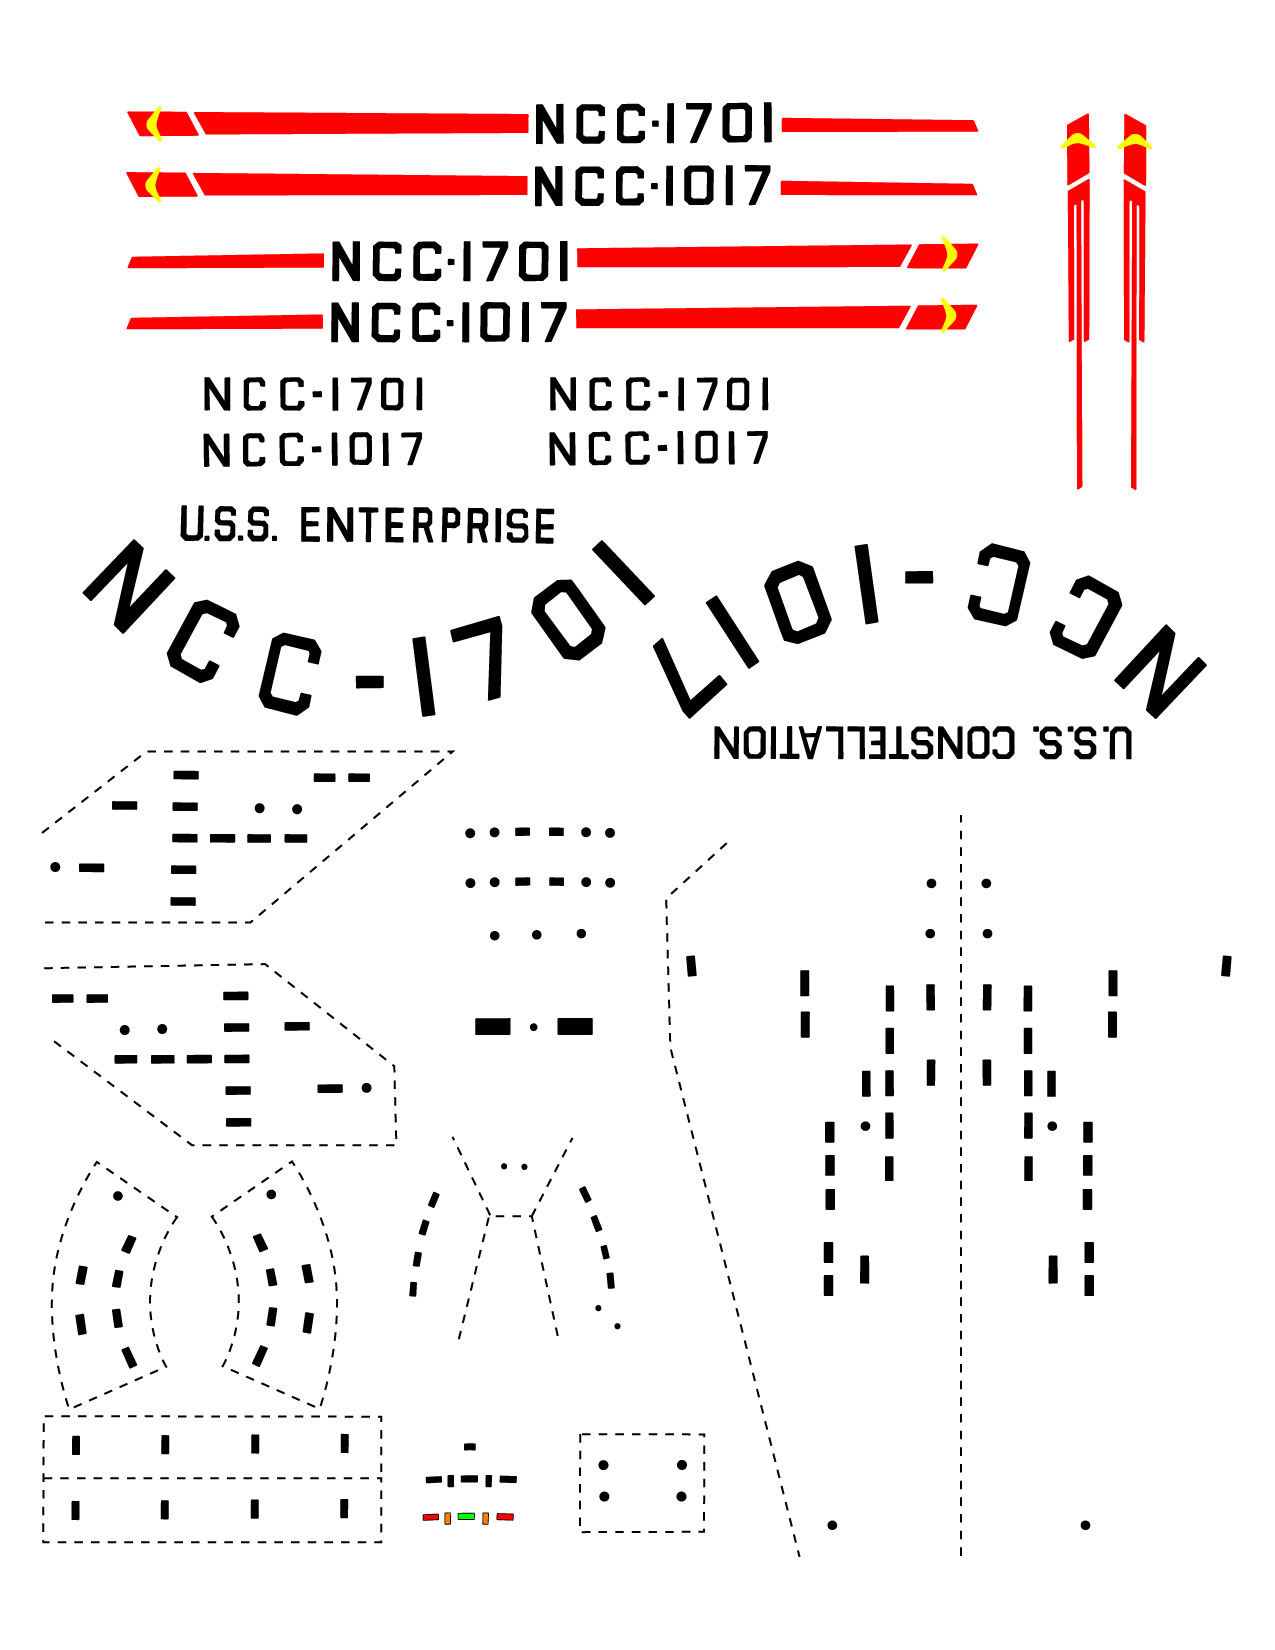
... and I don't plan on starting the building of the model until I finish them (as data collection is easier from the bare, unassembled parts). And even though the decals were in pretty bad shape (the colors weren't even lined up correctly on the original sheet), I was able to recreate the original decals, plus decals for the Constellation and window decals based on rubbings of all the window details on the surface of the model...
The decal graphics turned out well enough that at least two models of the Constellation (that I know of) have been made using them (this studio scale replica by Jay Chladek and this 1/1000 scale replica by Gregatron).
Because the kit set me back almost a hundred dollars (and is quite rare), I didn't want to go into the building of it cold... so I also bought a Round 2 reissue kit to practice on. Plus there were a number of things I've wanted to try out since the last time I built one of these models (which was back in 1992 as I recall).
Round 2 Build
I've seen a large number of builds of this model kit over the years. In fact, I'd say that it is one of my favorite models to watch being built by modelers because what they decide to do with it says a lot about how they see the Enterprise and often shows a number of interesting techniques that I can learn from. I'm actually more likely to click on a thread of a build of this model than the Polar Lights 1/1000 scale kit because of this.
Over time I had put together a laundry list of things that (at a minimum) I would think could be changed to make it feel more accurate (without completely replacing any of the major elements of the kit). And this gave me the opportunity to try out some of those ideas.
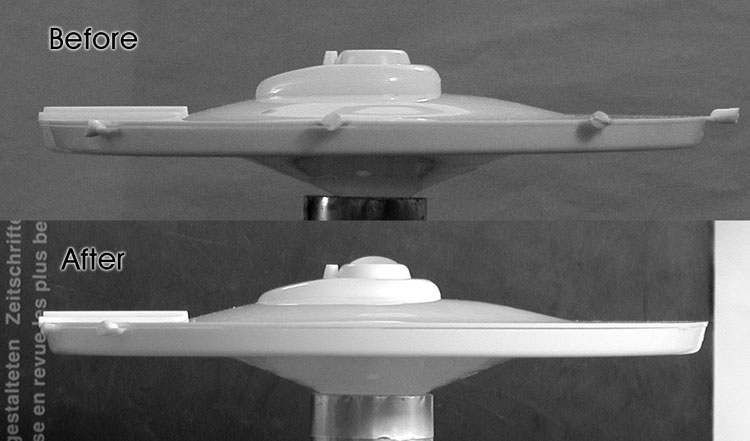
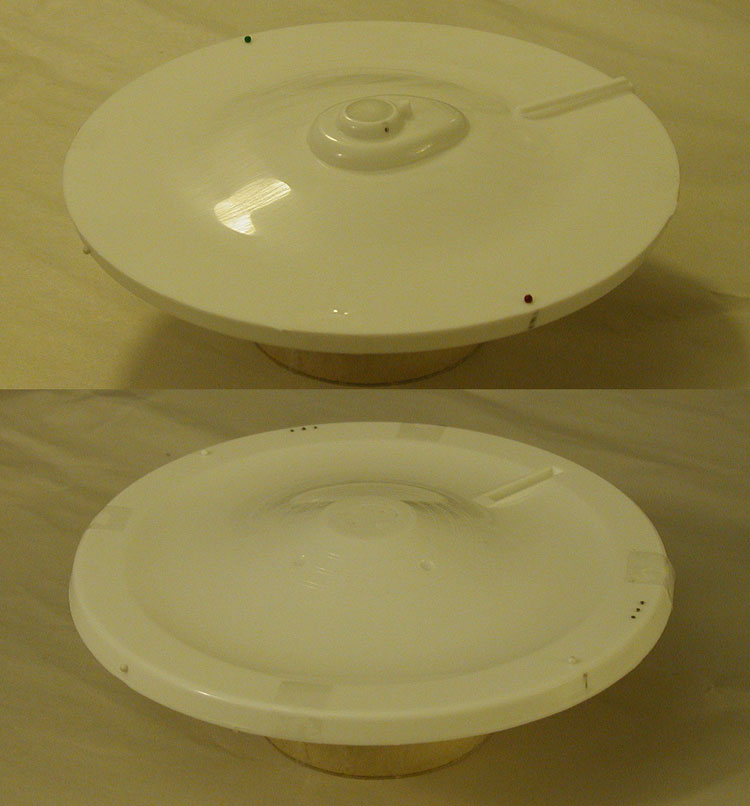
The first of these was repositioning the bridge/B/C deck structure. A lot of people replace this whole element, but I had gotten the feeling (from playing with images of other people's models in Photoshop) that lowering the structure a small amount changed the character to something I liked more. So the first alterations were to lower the structure on the top, and shorten/flatten the cone of the bottom of the primary hull (so it would accept a lower sensor dome mount better).
This is a before and after view of that alteration...
The second alteration I felt the model needed was a repositioning of where the nacelle supports attach to the nacelles. I found from my experiences building models using elements from the 22 inch cutaway kit that changing this brought the nacelles closer together and better replicated the over all feel of the original studio models. So I cut the supports from the nacelles before beginning the building of them.
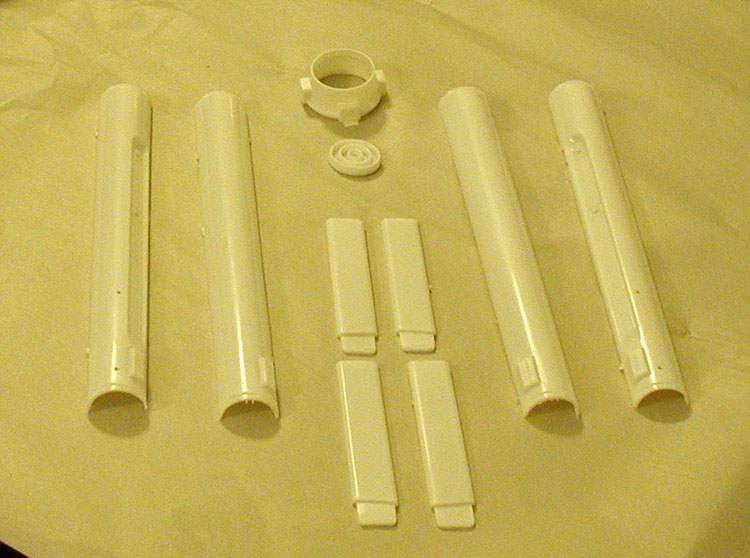
Another element that I felt would help the feel was repositioning the rings behind the deflector dish (which is a change I did make on the last couple builds I did back in the late 80's and early 90's). This required cutting out the rings from the housing. Interestingly, this element was done quite nicely on the original long box version of the kit.
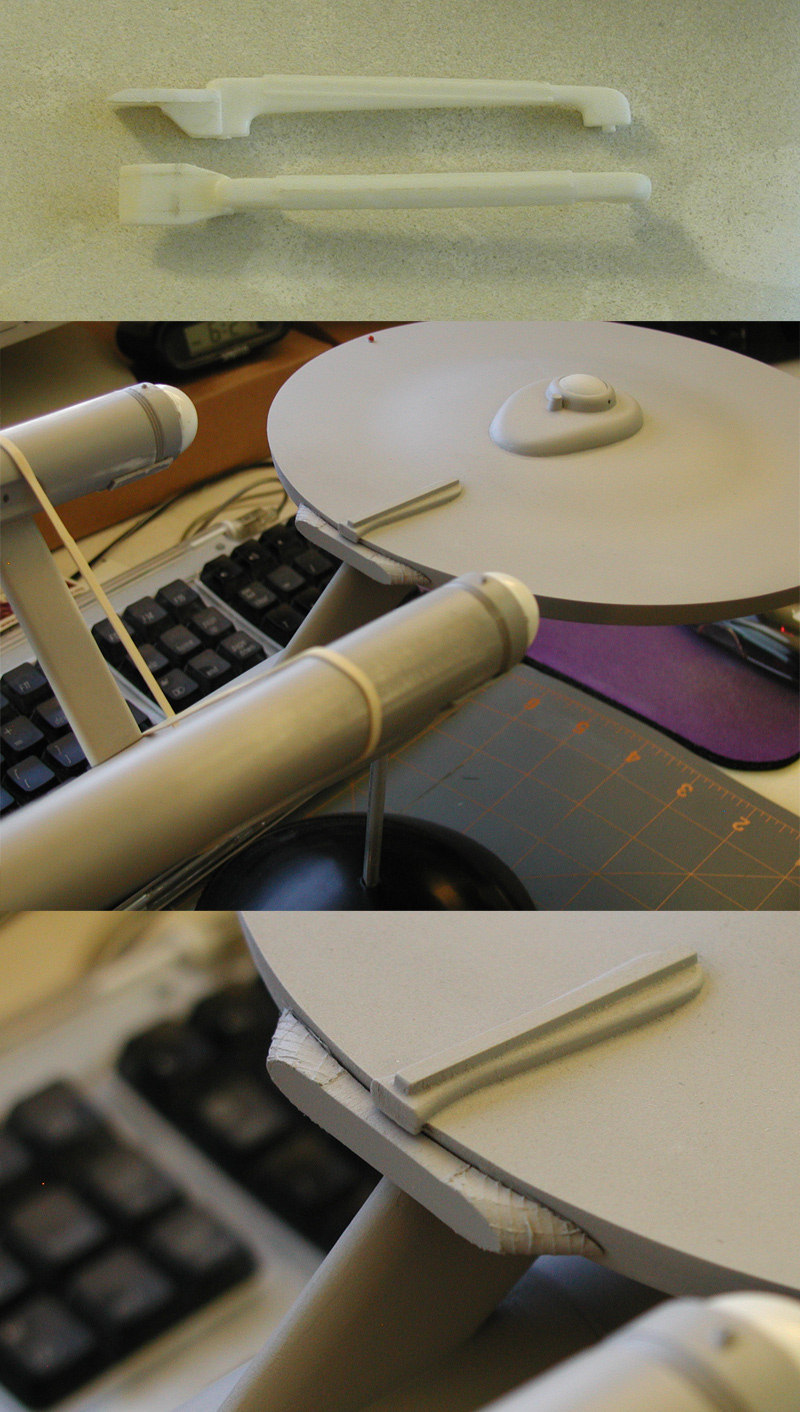
This is those parts after surgery...
I also felt that the addition of marker light elements (even on a model that wouldn't be lit) would be nice so I decided to add spots where raised elements could be positioned later on the model. And because I wasn't going for a model that would match the Enterprise, I decided to do the Republic and mix-n-match some of my favorite elements from the series and pilot versions of the studio models (including a marker light on the front of the primary hull).
I also decided to move the attachment point of the dorsal to the primary hull back slightly so the back of the dorsal would meet the edge of the primary hull. I removed a small notch from the back of the alignment element at the top of the dorsal, and then filled the gaps at the top of the dorsal so when I glued the dorsal to the primary hull later I would get a nice fit.
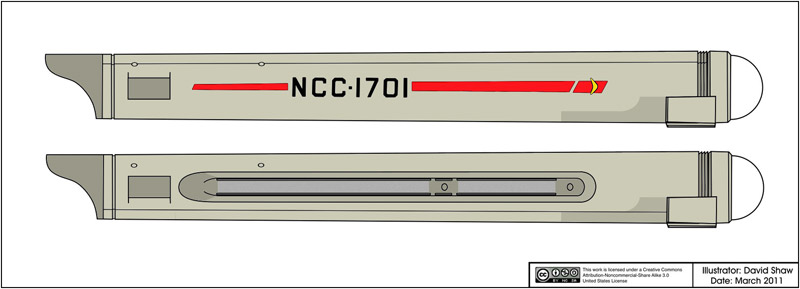
And while putting together the nacelles I started in a few detail changes I had wanted to try. First was removing the rear box features (which are misshapen so the parts are easier to remove from the molds) so they can be replaced. I also filled the openings left from cutting off the supports.
Two changes I had wanted to try were shortening the ring behind the domes and shortening the length (and removing the small dome) of the rear nacelle caps. For the rear nacelle caps I decided on using the first pilot features rather than the series features because I wanted the model to stand out a little from my two-thirds replica of the 33 inch Enterprise, and I always liked the pilot version.
Here is how most of those elements turned out during the modifications (and a progress shot of the deflector rings)...
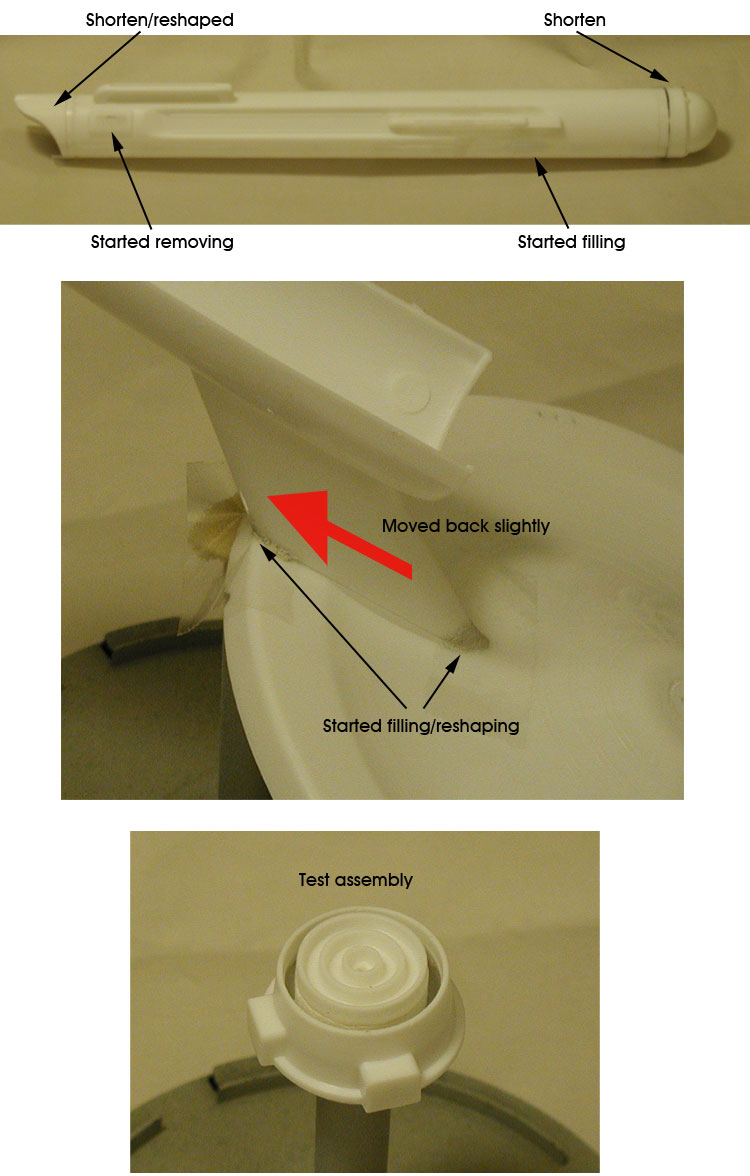
The third party elements I ended up buying for this model were replacements for the box features on the rear of the nacelles, the deflector dish (I decided to get the larger pilot version) and the lower sensor dome assembly.
As the major elements started to come together I started wanting to make sure they were working how I had planned, so I started test assemblies of them. What I had found from previous experience was that the nacelles could be aligned on the supports with the addition of wire from a paper clip and that the nacelle domes could be held in place by rolling up a small piece of paper in the nacelle body.
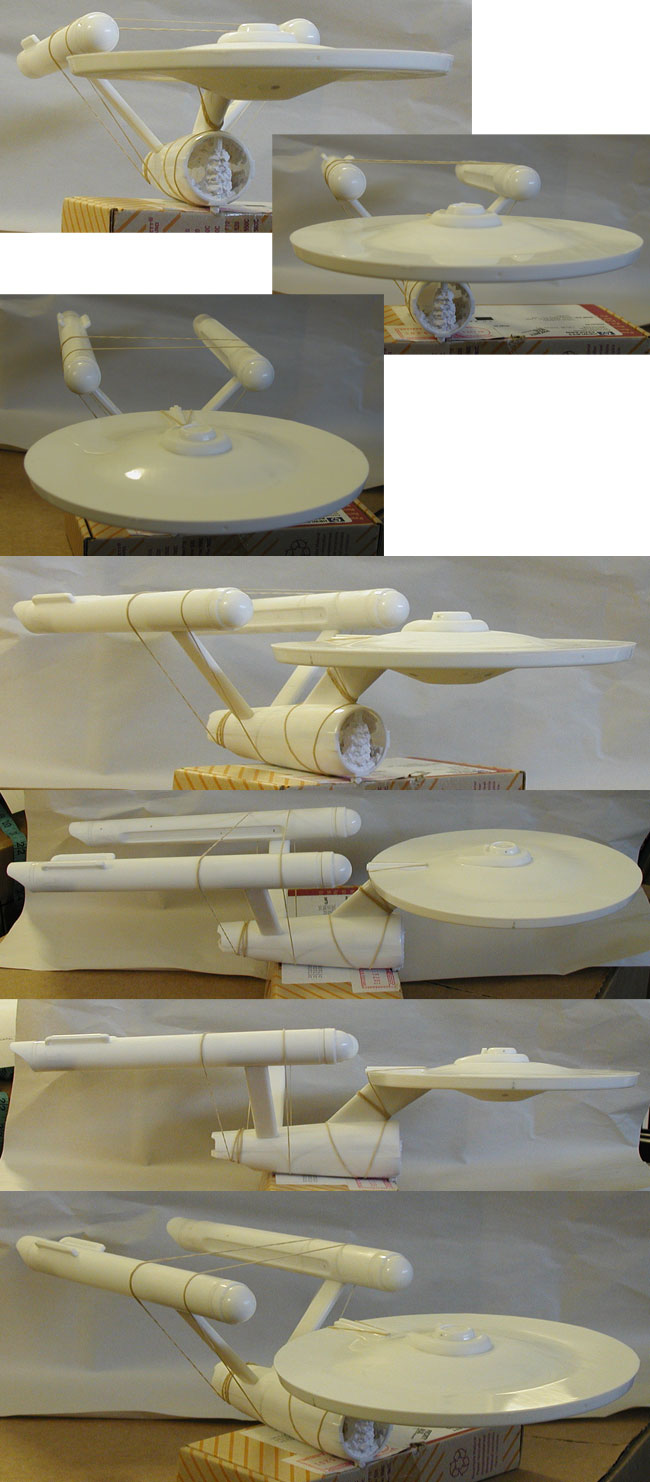
Here is some progress shots which include some of the additional marker light positions...

I had also added a tube to the secondary hull for a mounting rod and started in on filling the interior with a cellulose-based paper maché pulp to re-enforce the part. These elements are visible in these test assembly shots which don't include the deflector assembly elements.
And here are a few more test assembly shots with the deflector assembly elements in place...
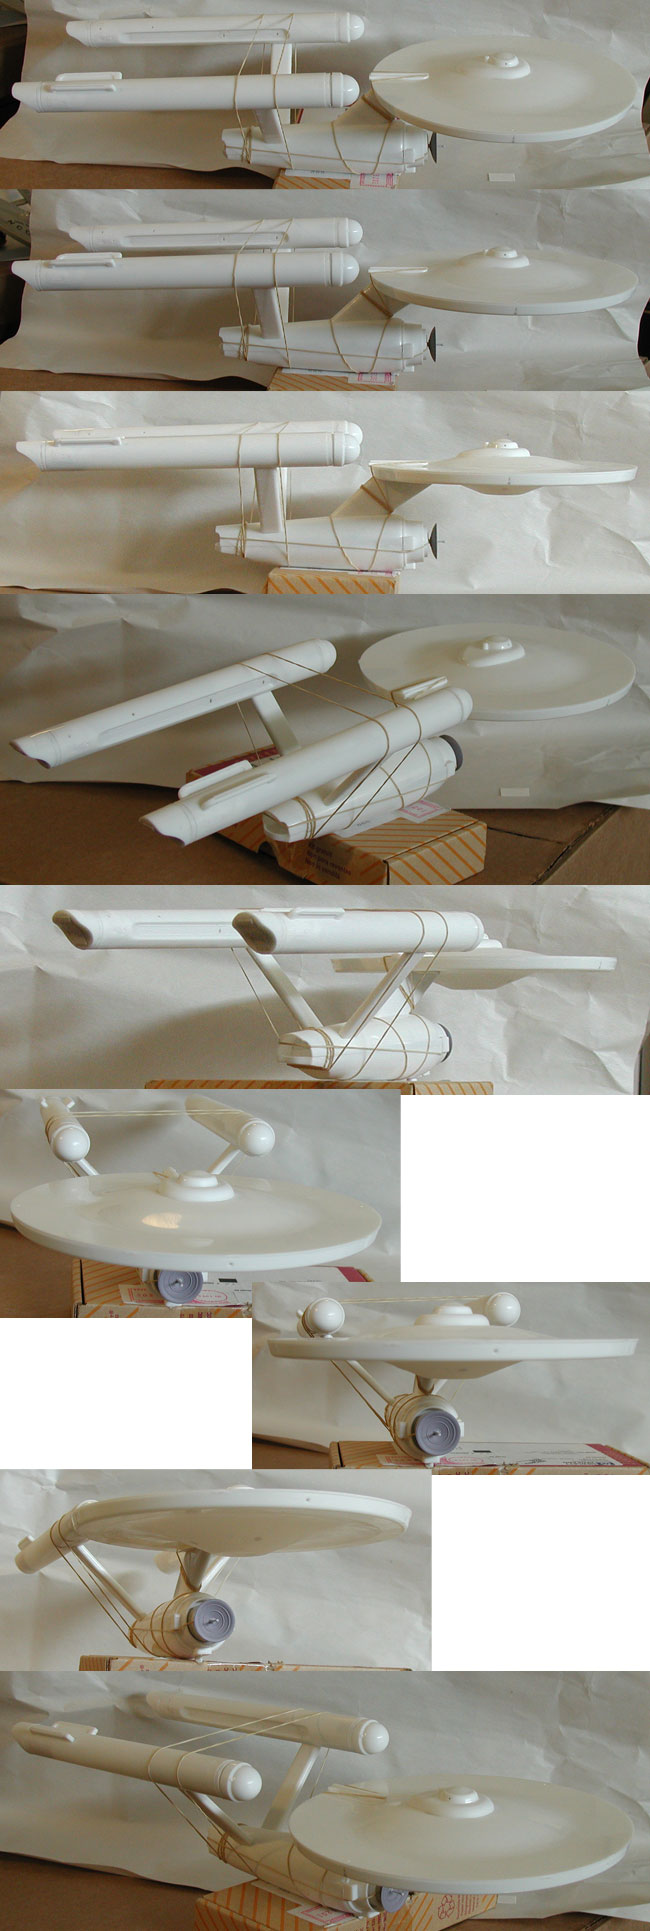
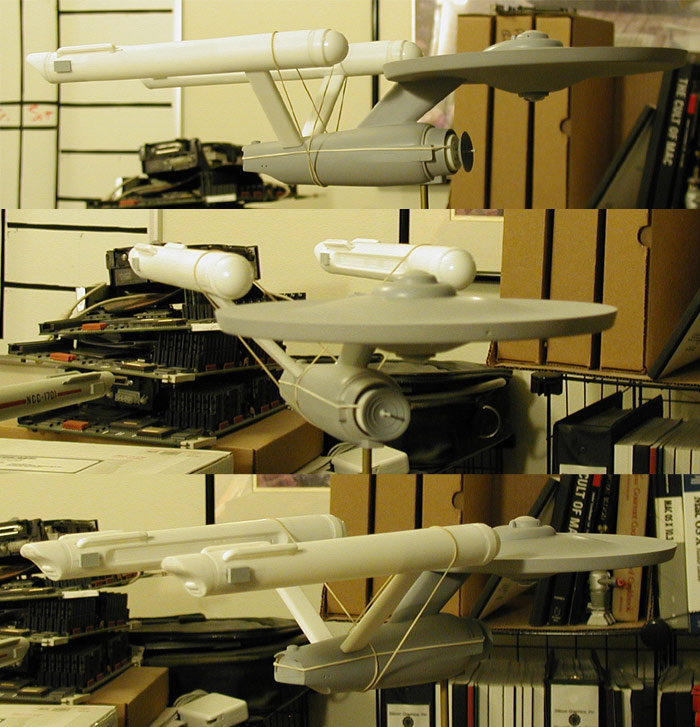
With most of the major aspects of the primary and secondary hulls finished, I glued those elements together (the deflector rings, impulse engines and sensor dome assembly aren't glued in place yet).
Here are a few more test assembly shots (this time in front of a black background) to see how the piece are working when in place...
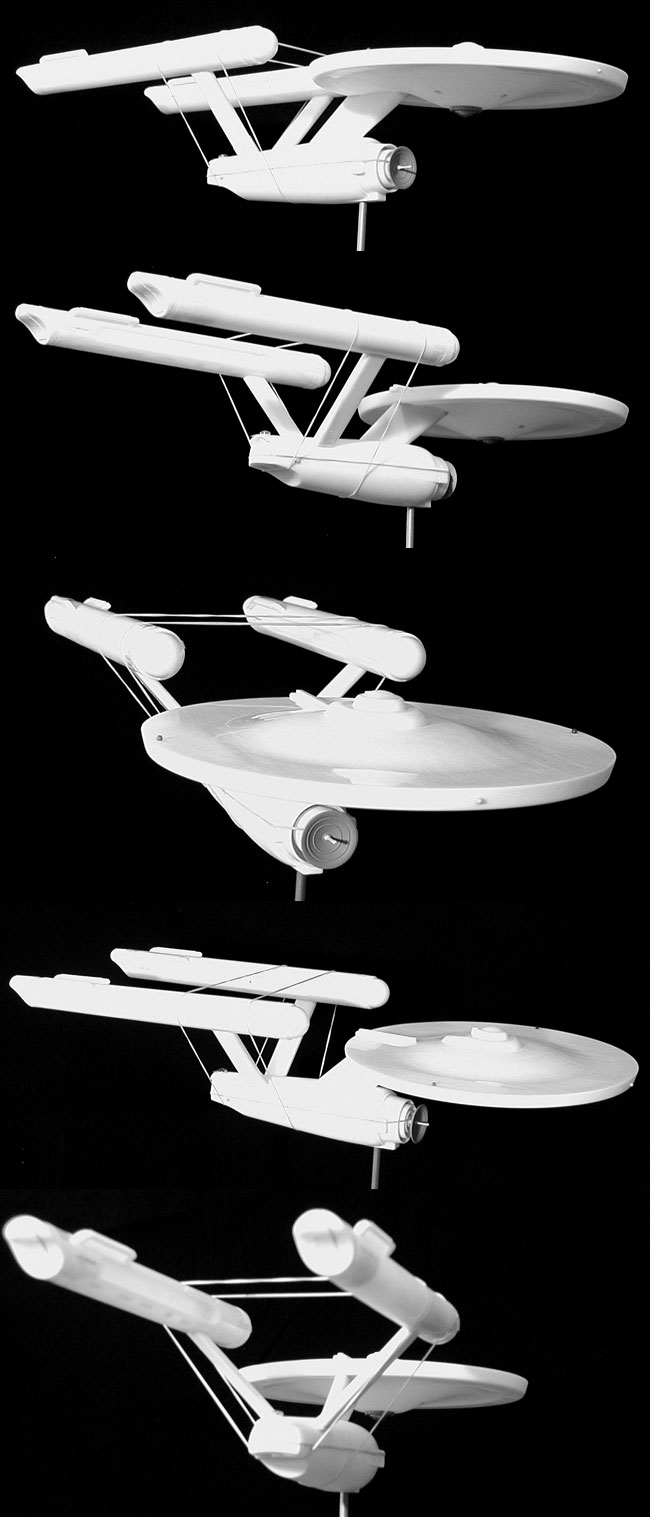
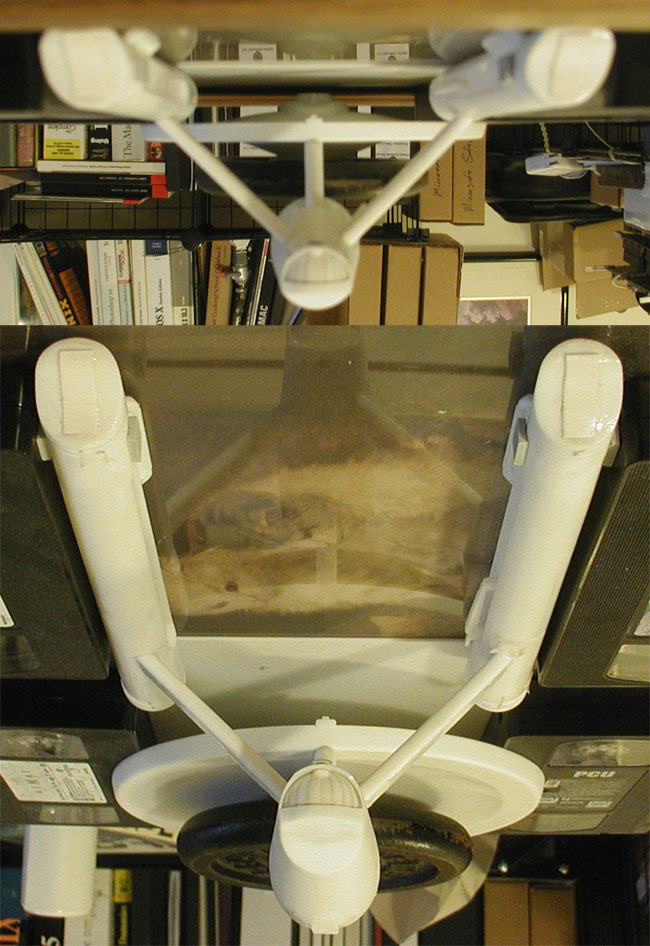
Once I was sure I had gotten the length of the supports correct and the tops the right shape to meet the new attachment points on the nacelles, I set in on gluing them to the nacelles. This required getting all of the major elements in their correct positions so that there wouldn't be any alignment issues later on.
This is the rigging I use to glue the supports back onto the nacelles (the photos are flipped so I could make sure everything was aligning the way I wanted).
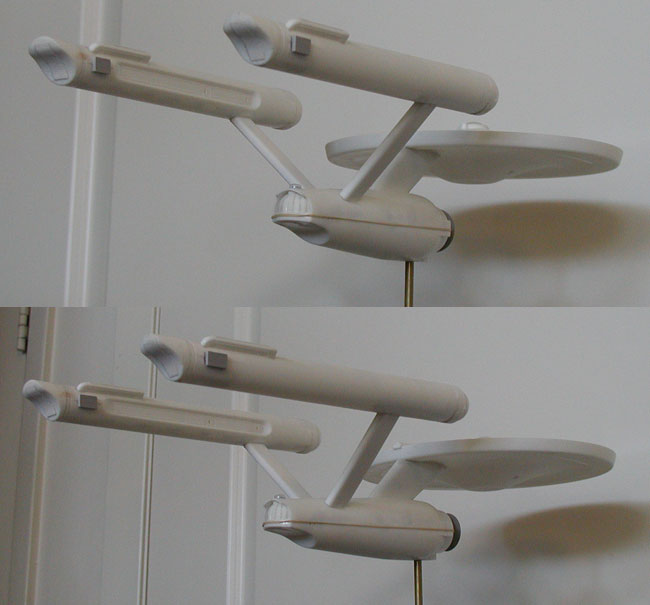
And after letting the glue cure for a few days, here is a couple test assembly shots with the nacelles and supports holding their own weight.
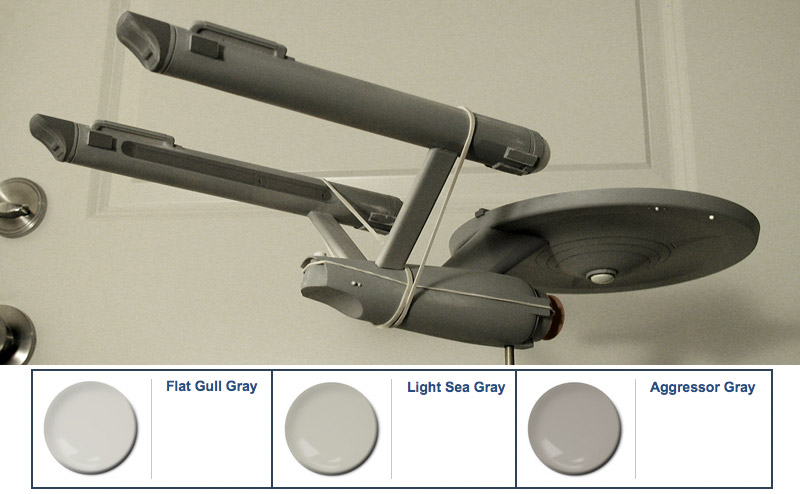
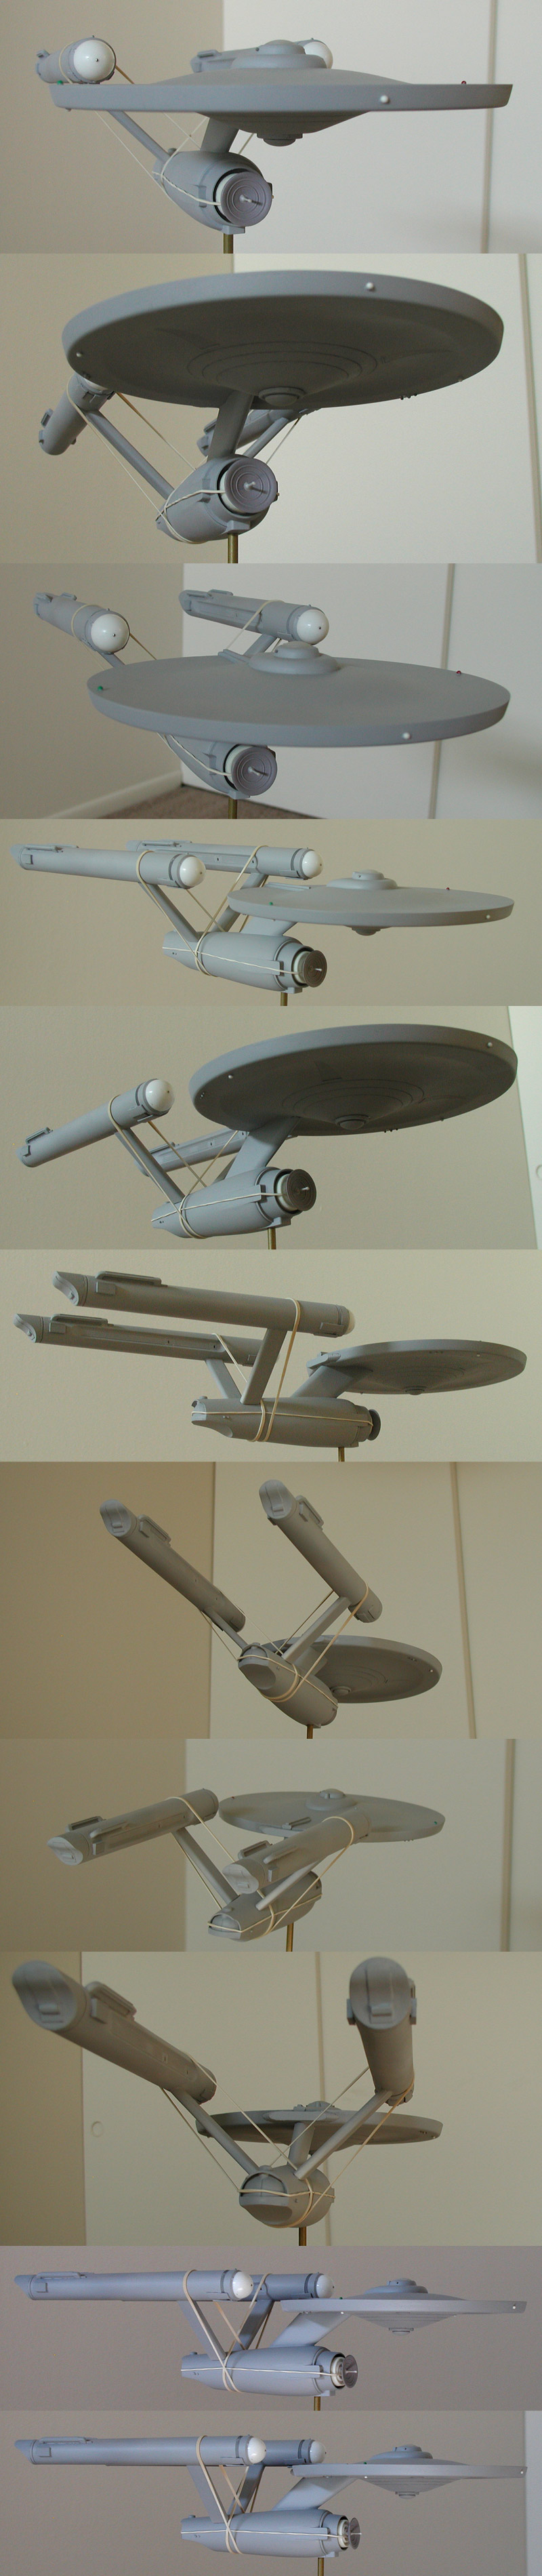
Unfortunately I was forced to let the model sit like this for a few months while I worked on other projects. But recently I started back in on this model and started applying a primer coat to check for surface defects.
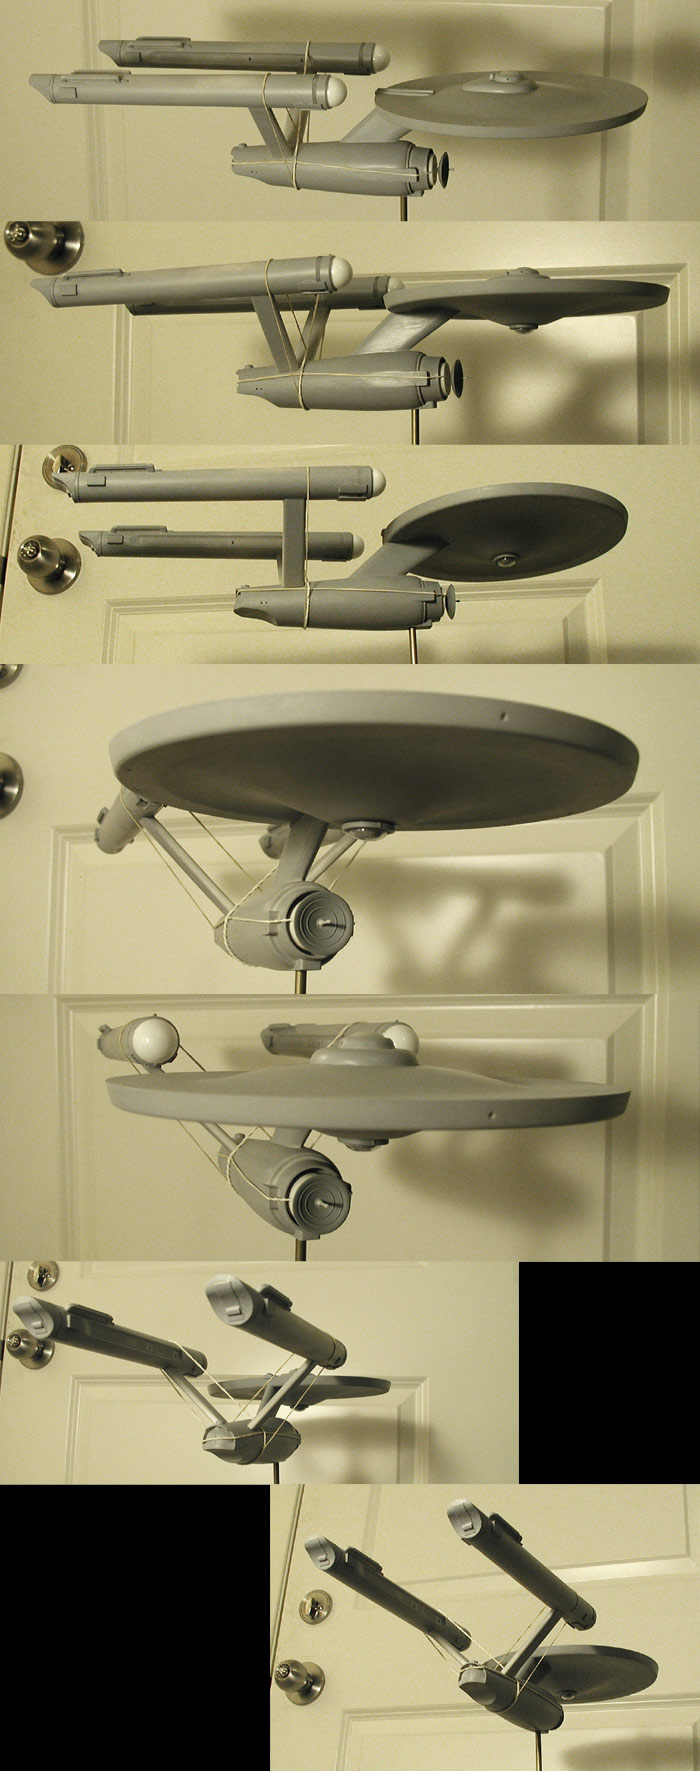
I found a few spots that I'd like to clean up, but I'm pretty happy with how the model is turning out so far. It may not be as interesting a build as my last model of the Enterprise, but it is giving me a chance to practice building models, which I figure is the most important aspect of this build.
A little over a year ago I set out on a project to document and build an original 1966 AMT Enterprise model (mainly because that version of the kit made it into the original series as both the Constellation and Enterprise in the second season). The project has three main elements; reverse engineering plans of the original model, recreating the original decals (including replacements for the model's surface windows), and building the model as authentically as possible to the era it is from.
From a series of photos, scans and rubbings of the original models parts, I've made pretty good progress on reverse engineering some plans...
... and I don't plan on starting the building of the model until I finish them (as data collection is easier from the bare, unassembled parts). And even though the decals were in pretty bad shape (the colors weren't even lined up correctly on the original sheet), I was able to recreate the original decals, plus decals for the Constellation and window decals based on rubbings of all the window details on the surface of the model...
The decal graphics turned out well enough that at least two models of the Constellation (that I know of) have been made using them (this studio scale replica by Jay Chladek and this 1/1000 scale replica by Gregatron).
Because the kit set me back almost a hundred dollars (and is quite rare), I didn't want to go into the building of it cold... so I also bought a Round 2 reissue kit to practice on. Plus there were a number of things I've wanted to try out since the last time I built one of these models (which was back in 1992 as I recall).
Round 2 Build
I've seen a large number of builds of this model kit over the years. In fact, I'd say that it is one of my favorite models to watch being built by modelers because what they decide to do with it says a lot about how they see the Enterprise and often shows a number of interesting techniques that I can learn from. I'm actually more likely to click on a thread of a build of this model than the Polar Lights 1/1000 scale kit because of this.
Over time I had put together a laundry list of things that (at a minimum) I would think could be changed to make it feel more accurate (without completely replacing any of the major elements of the kit). And this gave me the opportunity to try out some of those ideas.
The first of these was repositioning the bridge/B/C deck structure. A lot of people replace this whole element, but I had gotten the feeling (from playing with images of other people's models in Photoshop) that lowering the structure a small amount changed the character to something I liked more. So the first alterations were to lower the structure on the top, and shorten/flatten the cone of the bottom of the primary hull (so it would accept a lower sensor dome mount better).
This is a before and after view of that alteration...
The second alteration I felt the model needed was a repositioning of where the nacelle supports attach to the nacelles. I found from my experiences building models using elements from the 22 inch cutaway kit that changing this brought the nacelles closer together and better replicated the over all feel of the original studio models. So I cut the supports from the nacelles before beginning the building of them.
Another element that I felt would help the feel was repositioning the rings behind the deflector dish (which is a change I did make on the last couple builds I did back in the late 80's and early 90's). This required cutting out the rings from the housing. Interestingly, this element was done quite nicely on the original long box version of the kit.
This is those parts after surgery...
I also felt that the addition of marker light elements (even on a model that wouldn't be lit) would be nice so I decided to add spots where raised elements could be positioned later on the model. And because I wasn't going for a model that would match the Enterprise, I decided to do the Republic and mix-n-match some of my favorite elements from the series and pilot versions of the studio models (including a marker light on the front of the primary hull).
I also decided to move the attachment point of the dorsal to the primary hull back slightly so the back of the dorsal would meet the edge of the primary hull. I removed a small notch from the back of the alignment element at the top of the dorsal, and then filled the gaps at the top of the dorsal so when I glued the dorsal to the primary hull later I would get a nice fit.
And while putting together the nacelles I started in a few detail changes I had wanted to try. First was removing the rear box features (which are misshapen so the parts are easier to remove from the molds) so they can be replaced. I also filled the openings left from cutting off the supports.
Two changes I had wanted to try were shortening the ring behind the domes and shortening the length (and removing the small dome) of the rear nacelle caps. For the rear nacelle caps I decided on using the first pilot features rather than the series features because I wanted the model to stand out a little from my two-thirds replica of the 33 inch Enterprise, and I always liked the pilot version.
Here is how most of those elements turned out during the modifications (and a progress shot of the deflector rings)...
The third party elements I ended up buying for this model were replacements for the box features on the rear of the nacelles, the deflector dish (I decided to get the larger pilot version) and the lower sensor dome assembly.
As the major elements started to come together I started wanting to make sure they were working how I had planned, so I started test assemblies of them. What I had found from previous experience was that the nacelles could be aligned on the supports with the addition of wire from a paper clip and that the nacelle domes could be held in place by rolling up a small piece of paper in the nacelle body.
Here is some progress shots which include some of the additional marker light positions...
I had also added a tube to the secondary hull for a mounting rod and started in on filling the interior with a cellulose-based paper maché pulp to re-enforce the part. These elements are visible in these test assembly shots which don't include the deflector assembly elements.
And here are a few more test assembly shots with the deflector assembly elements in place...
With most of the major aspects of the primary and secondary hulls finished, I glued those elements together (the deflector rings, impulse engines and sensor dome assembly aren't glued in place yet).
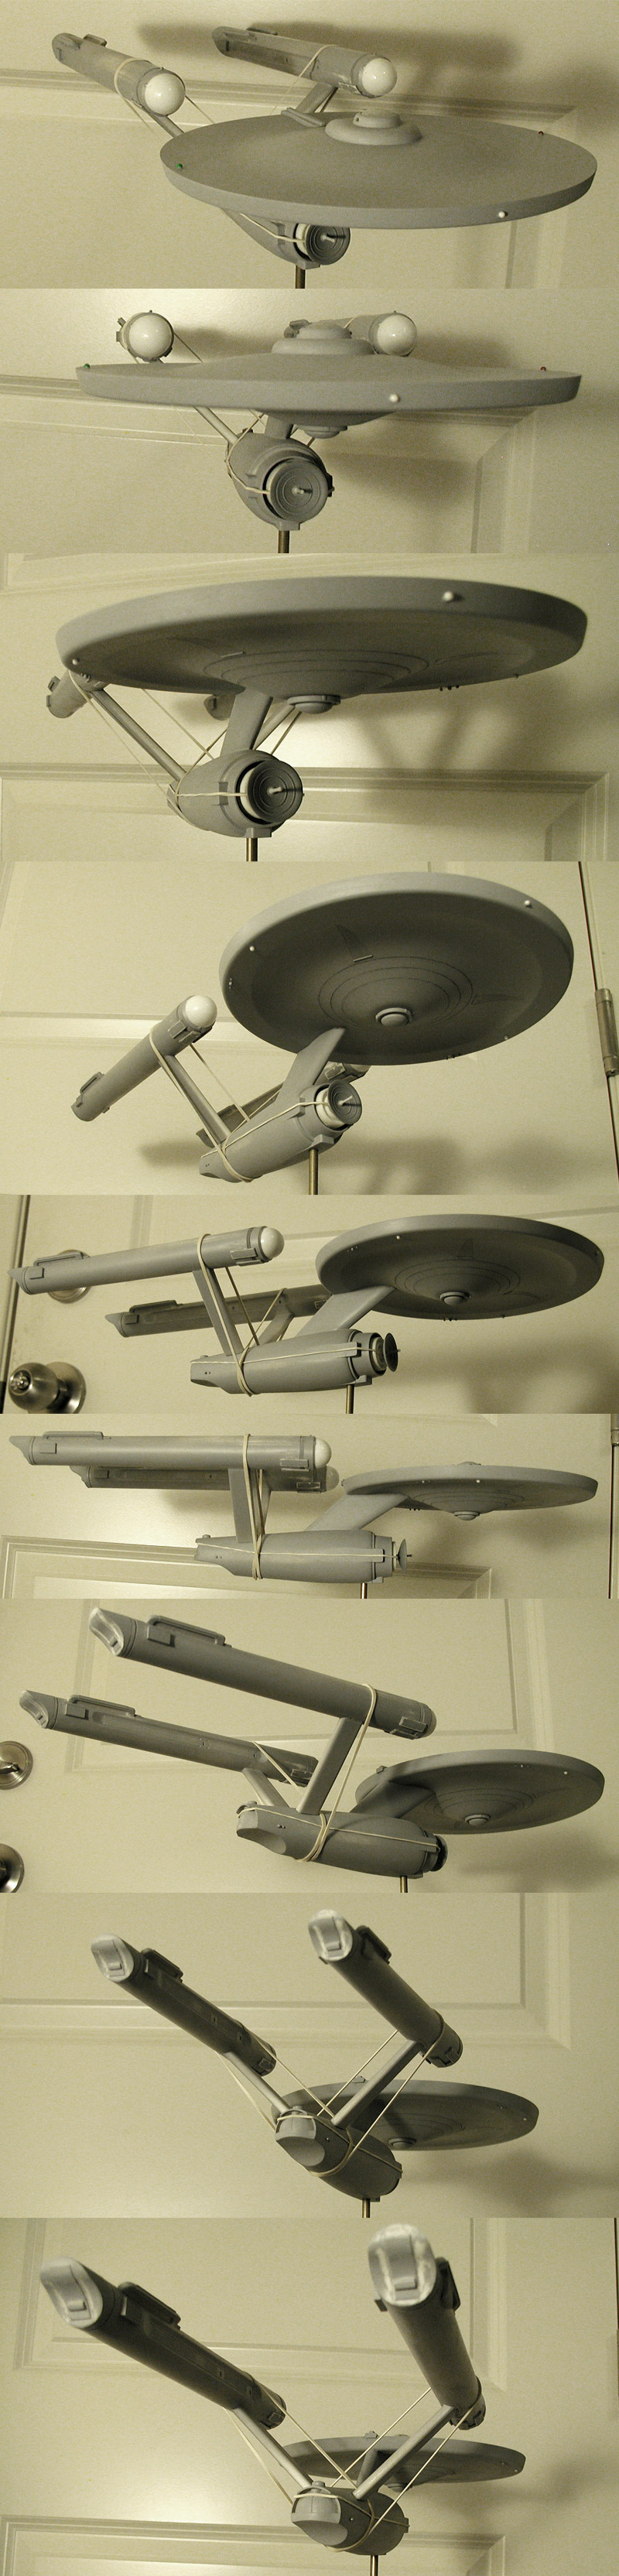
Here are a few more test assembly shots (this time in front of a black background) to see how the piece are working when in place...
Once I was sure I had gotten the length of the supports correct and the tops the right shape to meet the new attachment points on the nacelles, I set in on gluing them to the nacelles. This required getting all of the major elements in their correct positions so that there wouldn't be any alignment issues later on.
This is the rigging I use to glue the supports back onto the nacelles (the photos are flipped so I could make sure everything was aligning the way I wanted).
And after letting the glue cure for a few days, here is a couple test assembly shots with the nacelles and supports holding their own weight.
Unfortunately I was forced to let the model sit like this for a few months while I worked on other projects. But recently I started back in on this model and started applying a primer coat to check for surface defects.
I found a few spots that I'd like to clean up, but I'm pretty happy with how the model is turning out so far. It may not be as interesting a build as my last model of the Enterprise, but it is giving me a chance to practice building models, which I figure is the most important aspect of this build.