Portal Gun Build

Dainbramage546

Well-Known Member
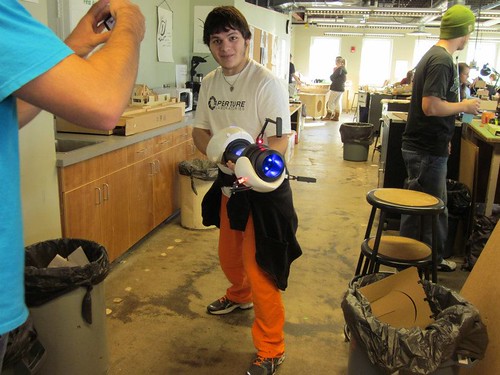
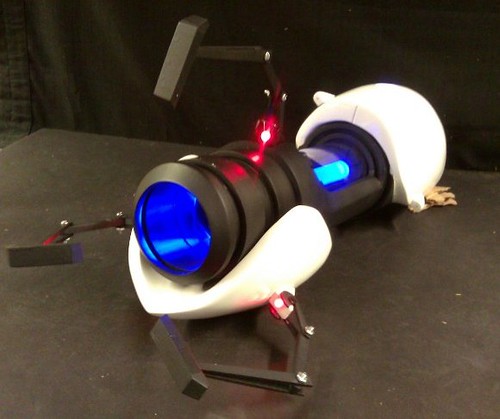
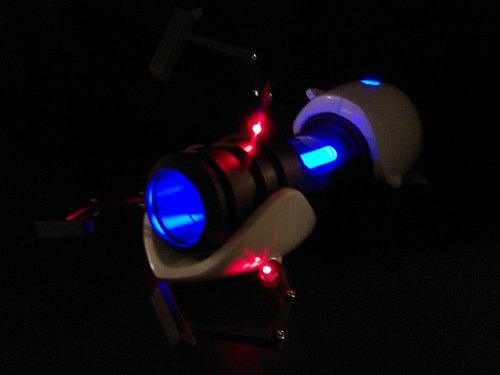
I've been looking around this forum for months and found a lot of helpful information for my first build, an Aperture Science Handheld Portal Device, so I decided to post a work in progress thread.

This was inspired by Volpin's build. Mr. Krix, if you happen to read this, thank you for the inspiration to tackle this project and for not putting too many details into the process, half the fun is building it, the other half is solving the many problems that come up along the way!

I started this a couple months ago and have been working on it on and off since then.

Right now my roommate and I are in the process of molding and casting the shells so we had solid plastic shells instead of papercraft covered by bondo.

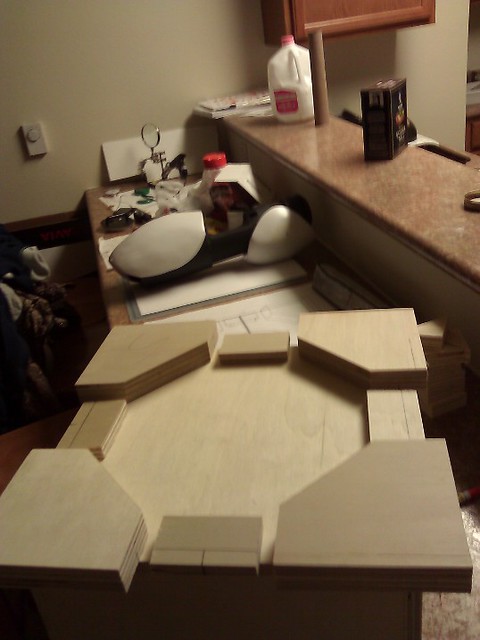
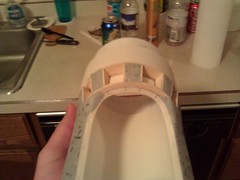
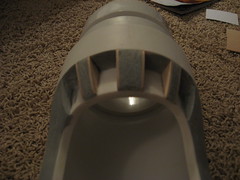
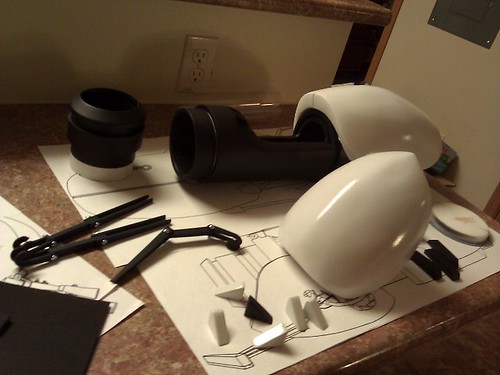
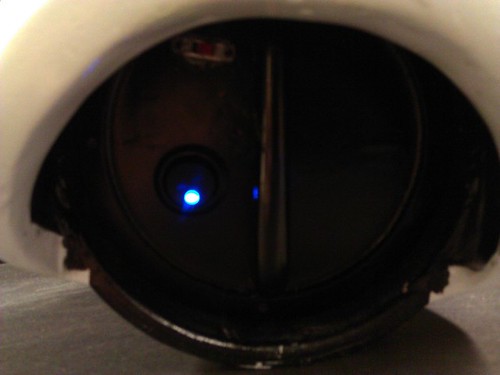
Starting at the beginning, the build started with the front core piece.

A piece of 4" PVC and 3" PVC with the 3" held in with a cut up 3" Coupling.
The indents were made using small piece of basswood and plumbers putty.
6150440317


There are some more pictures of this on my flickr page.


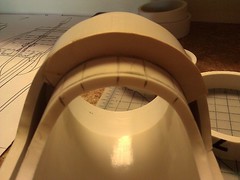
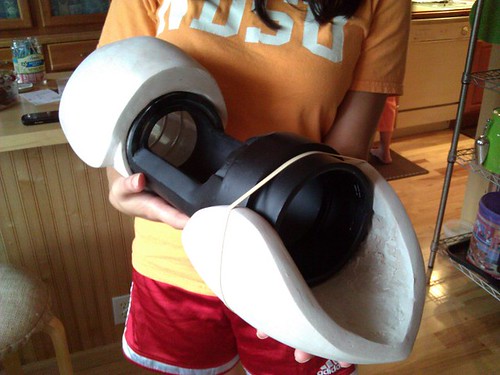
Next I decided to tackle the big shell. That was my first time using bondo and it ended up getting deformed so I scrapped it and tried the little shell instead.

6150440621_dc16459765.jpg

It was made by covering a papercraft shell with bondo, filled with right stuff foam and bondo on the inside.
6150440609_1b30a16735_m.jpg
6150990088_5a04e98752_m.jpg

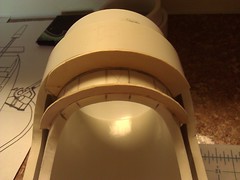
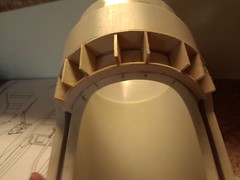
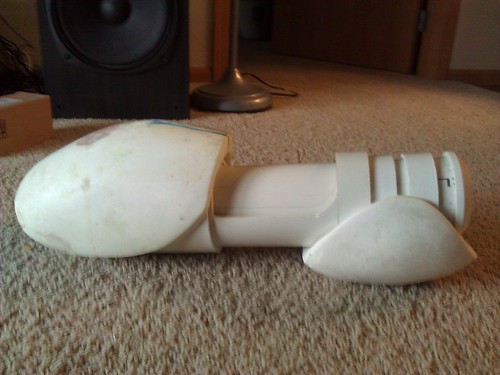
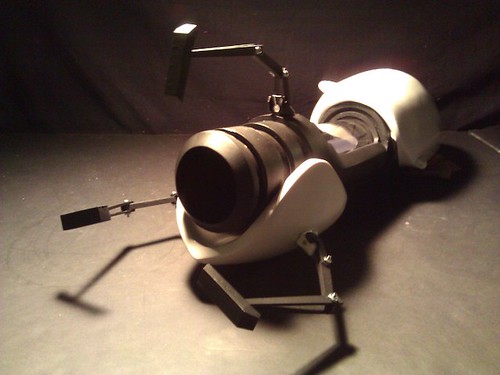
After feeling more confident in my bondo abilities I made the big shell again. Unfortunately I don't have any pictures of the original big shell besides the one below. It was destroyed in the mold making process.
6150440483_96e8bcb9cb.jpg

The front shell looks massive in that picture for some reason.
6150440969_dd38aa477b_m.jpg

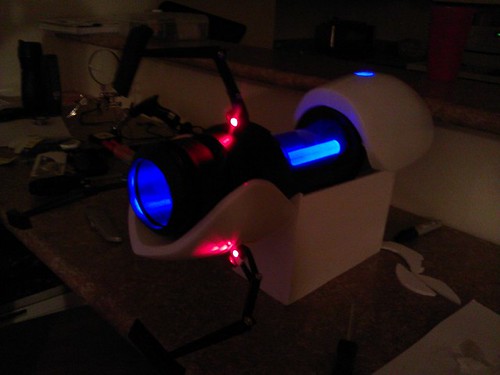
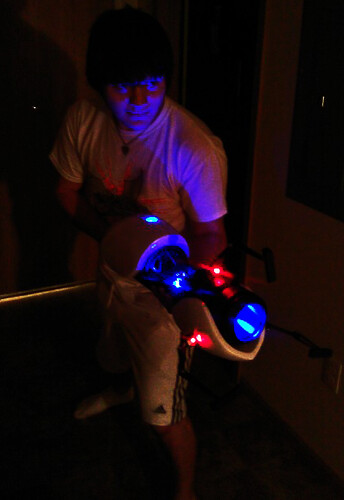
We're finishing up the casting in the next couple days so I'll post more pictures when we're done with that. I'd love to hear feedback on the gun so far!
6150440317
 
Since my last post, we've gotten some more done on the guns.
6173204046_28564522b4.jpg
6173203986_e96bc4f677.jpg


Molding!
We decided to use fiberglass to make our molds. It's rather irritating but the end result was worth it.
6172721679_089d26fc81.jpg

6153165971_701be786a1_m.jpg
6153713582_2967161e74_m.jpg

6173249302_55fe3bd8ab_m.jpg
6173249382_829632c31e_m.jpg

6173249432_edee4a8917_m.jpg
6153714086_daa6723b52_m.jpg


Over the next couple days we're going to try to finish at least one of them.
 
Just a quick update on this, we've got all the parts painted and ready for one of the two guns. Hopefully it'll get finished in the next couple days!

6243877661_1c2f92a29b.jpg

6244395462_505234bde3.jpg
 
Looking good so far. The quality is nice.
Just some constructive criticism since you are not finished yet, and this is in reference to accuracy, not the quality: With the exception of ThrowingChicken, nearly everyone has been following Voplin's example as the basis for the dimensions and accuracy. The problem is, even though Voplin's end result was fantastic, the accuracy was off, by about 20% or more. The front barrel is actually more accurate with a 3" to 2" step down. The inner barrel diameter is actually between 2" and 2.25" ID. This works great with a PVC step down piece from Home Depot. The outer mid section ring of the front barrel should be about 3" OD.
You can see it from this reference pic that the ID of the barrel is the same 2" or so as the acrylic tube:
http://gamingbolt.com/wp-content/uploads/2011/04/Portal-Gun-Blueprint-1024x576.jpg

Additionally, the four indentations should be filled and built up flat (or curved), not like voplin's, but more like Throwing Chicken's. You can still do this with what you have. Take a look here at the indentations:
http://farm3.static.flickr.com/2122/1805318055_cbf96752e7.jpg

And finally, the "Ring Singularity Harness" on the rear barrel (item 4 of the diagram) is the most misrepresented, or missing component on all the builds. It's the hardest to get right because the game doesn't render it correctly, but the diagram above does. It's visible on the gun from the commercials and the Cave Johnson videos. You could actually tack this onto your model right now by building up the bottom of the rear section 1" away from back and front of it. I did it by adding a 4" coupler cut horizontally across the midsection, then tacked it on under the rear barrel. But no one, except Tech Magic has gotten this right (he had access to Valve renderings) so don't sweat it if you skip this. You can kind of see it from the top side in this pic, it looks like a C shaped peice hugging or wrapping around the rear barrel:
http://i5.photobucket.com/albums/y156/xscifigodx/Portal bots/IMG_5958.jpg

But in the end it's your work of art... No Hard Feelings, I Forgive You.
 
Last edited:
Looking good so far. The quality is nice.
Just some constructive criticism since you are not finished yet, and this is in reference to accuracy, not the quality

Thanks! This one's almost done but I'll fix it in the next one.

6265468259_f449706a7f.jpg


6265997596_815a97b6a8.jpg


There's just a few things left to do and we'll be calling this one complete!
 
First off, Happy Halloween everyone! I couldn't resist.
6299770040_14b578e9c3.jpg


Looks really nice for now.
Do you have some picture with more light in the room ?
Last pictures are really dark.

I took a few pictures of it in a small photo booth
6299819898_14e55153de.jpg
6299771016_d5b9db3816.jpg

6299771074_a653cc9213.jpg

6299237493_abd43e9571.jpg
6299771148_a4fdd3ff22.jpg
6299237337_f9e9c51c87.jpg


There's a few things left (the wires connecting the shells, the metal harness for those and a barrel insert) and I'll get around to it eventually.

I made some changes with Version 2 and hopefully that'll get done soon as well. Working on this and finally finishing it up makes me want to start some new projects, it's an addicting hobby. Unfortunately I'm a poor college student haha
 
Just a quick update, I'm still waiting for my lazy roommate to finish wiring up Version 2 with the LEDs so in the mean time I got some plywood and started up a quick new project. Can you guess what? haha
6327471457_5f8bbbea94_z.jpg

V2 is in the background on my counter, sadly waiting.

I changed up the grooves in the front core for this one.
6327472085_e95cf60265_m.jpg
6328222568_a233a61e97_m.jpg

6327472161_9c254ba253_m.jpg
6327472237_d3761c27bc_m.jpg
 
This thread is more than 12 years old.

Your message may be considered spam for the following reasons:

  1. This thread hasn't been active in some time. A new post in this thread might not contribute constructively to this discussion after so long.
If you wish to reply despite these issues, check the box below before replying.
Be aware that malicious compliance may result in more severe penalties.
Back
Top