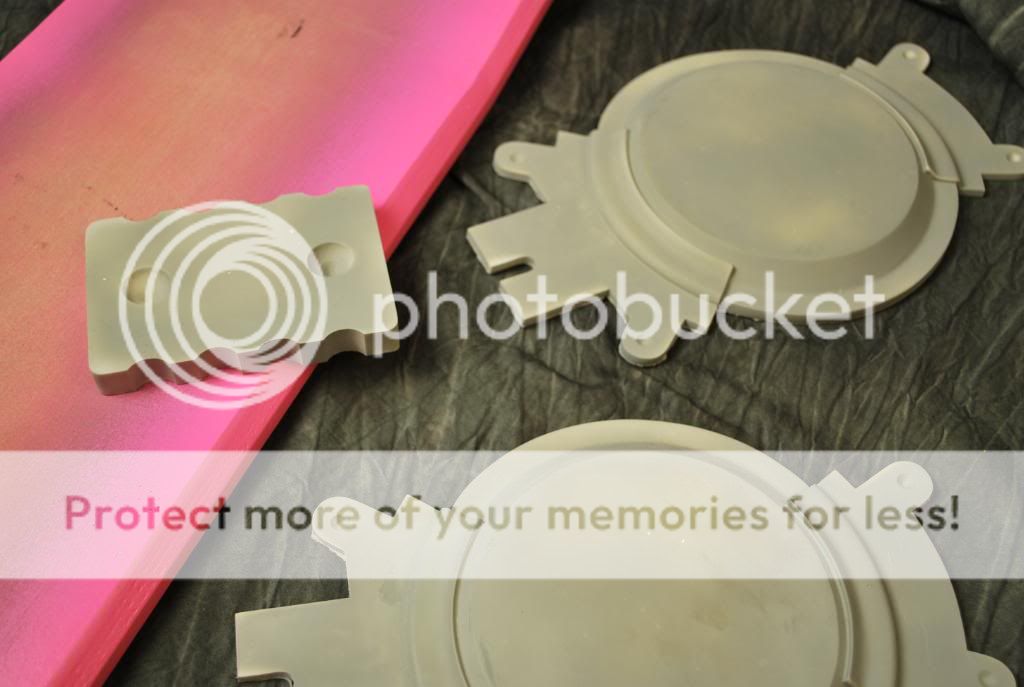
Please help with hoverboard parts

I have it at .110" again just a guess still. (the right side was .25)
So you think both the magnet and the mount look too rounded? I can change both at the same time (gotta love parametric modeling!) I will try and modify to make it look better. Im going to redraw the mount anyway because of the things that I noted.
What height do you have the magnet in your model?
 
I have the magnets at .75" total, with the outer edge being .25" thick. Not sure how accurate those measurements are, but at least it's some reference.
 
parts are looking great, i'd echo what was said above though, the outer "base" edge of the magnet looks too rounded (although i'd say the clamp is looking good for roundness, it's not supposed to be squared off - although the overall clamp does need tweaking a bit), if you compare it to these pics it shows how angular it is (the magnet that is), also the upper "lip" that goes up from the clamp onto the magnet looks a bit short, the bases of the clamps look a bit too thin too when compared to these pics. hopefully these pics will help

419772_10150660489609844_1454332592_n_zpsb0241367.jpg

420159_10150660489554844_406525156_n_zps4183faa2.jpg

423015_10150660490109844_1012938219_n_zps23232495.jpg
 
Last edited:
Wow... your parts are looking fantastic! Sign me up for a full set! :)

I think what you really have to be careful with is taking measurements of of the photos with the tape measure. If you scale it to the tape measure and print it out (which it looks like you have done) the lower disk size and brackets will be slightly smaller than they should be. This is due to the fact that the tape measure was resting on top of the battery box (slightly higher than the base).

Maybe we can get an image of the measuring tape resting on the board itself? Not sure who took that picture originally.

My only current notes would be that the disks need to have more of a bevel - right now they are too vertical. I think this has to do with the fact that you have scaled the bottom of the disks slightly smaller than they should be (due to the measuring tape being higher like I mentioned). This mistake happened with BTTF123'S parts. They look great, but the brackets and bottoms of the disks ended up being scaled smaller than they should be.

Also with the disks - the base circle is a little bit too rounded on the edges.

Also note that a lot of out pictures are from vacuformed parts which gives the edges a rounder look. The original resin molds were a lot sharper - they used these for vacuforming.

Here are some more photos for reference:

grvMD.png

lHtgS.png


The parts below were cast from the original molds which are no longer available:

8eJsI.png
 
Last edited:
Whoops... I just saw you had already mentioned some of the things I said in my post. Great eye! You're on the right track and seem to know what you are doing. ;)
 
Last edited:
And here's a shot of one of the solid -- non-vacuformed -- batteries off of one of the Pitbull boards for further reference, so you can see how sharp the real deals were.

attachment.php


That said, I don't see anything wrong with a slight idealizing of the designs to get the roundness of the edges somewhere between the sharpness of the solid pieces and the roundness of the vacuformed pieces. But you do whichever version you want. With your level of skill, these things will come out beautifully regardless.

-Nick
 
Also, please ignore how crudely this image was cut out in photoshop (especially the battery box). It should just give you a good idea of how the disc bevels should look from the top.

Qfi47.png
 
Again, these were cast from the original molds. This is also what they looked like pre-vacuformed. Note how slightly bigger the brackets and disks bases are in their overall scale. These should be adjusted accordingly. :)

frosty2_zps9b158c9a.jpg
 
That said, I don't see anything wrong with a slight idealizing of the designs to get the roundness of the edges somewhere between the sharpness of the solid pieces and the roundness of the vacuformed pieces. But you do whichever version you want. With your level of skill, these things will come out beautifully regardless.

-Nick

agreed :thumbsup the parts are looking amazing, those 3d printers are an amazing piece of kit
 
BTW: I am VERY excited about how good these parts are looking.

If it took you 45 minutes to make the battery box from scratch, who knows how screen accurate you could make these things look in a week! :love

How long does it take to print a part? (such as a disk)
 
Comparison between the resin parts (top) and vacuformed parts (bottom):

1DZ9w.png

aBxWI.png


An overlay below by TheNickFox:

c-c-machine-hoverboard-screen-shot-2012-12-02-8.50.13-pm.png-130136d1354499580
 
What do you think of the thickness of the parts now that it is coming together? I think the battery pack is a little too thick, but going from .500 to .472 as recommended by other members (through PM) is not going to make a great difference. (for my finalized parts I would redo the thickness)

I like the thickness of the parts on the right. Even though you said it was a failed attempt (and you are right, they are too thick), I like them a bit 'meatier' like that... if they are too thin they will look cheap. Maybe split the difference between the two? I might be alone in thinking this, though.

Don't make the battery box shorter. The height looks good right now. Any less and it will look too thin.
 
So the disc I made using a .650" height, a CD as the top diamter and 6" as the bottom diameter. I agree mine look a little too steep, but I am not sure where to modify right now without some true measurements.

As for the thickness of the hold downs, looking at the pics of Bob Gales hoverboard that razorsharp posted, the thickness I would change to go from .110 to .125/.130, I dont think that the ones on the right look good at all.
I WISH I HAD MATTELS OPPORTUNITY TO USE REAL MEASUREMENTS OF BOBS BOARD!
 
Oh, and lastly, in the end I might take all the bevels off the parts and then vac form them to see how they come out, it might just make it that much more correct. Now I need to get my heater on the vac former working.
 
So the disc I made using a .650" height, a CD as the top diamter and 6" as the bottom diameter. I agree mine look a little too steep, but I am not sure where to modify right now without some true measurements.

As for the thickness of the hold downs, looking at the pics of Bob Gales hoverboard that razorsharp posted, the thickness I would change to go from .110 to .125/.130, I dont think that the ones on the right look good at all.
I WISH I HAD MATTELS OPPORTUNITY TO USE REAL MEASUREMENTS OF BOBS BOARD!

Me too!

Here's something I just realized:

The known measurement for the width of the pink stripes on the bottom is 1.5 inches each. I took a piece of the pink stripe in photoshop and copy pasted it to get an approximate measurement. It looks like the bottom of the disc should be closer to 6.45 than 6.0.

When doing this, please remember to rotate it so it is horizontal. If you pull the measurement from the edge of the board it won't be correct (as the pink stripe is diagonal and will be a bit wider than 1.5).

I just did this quickly, however. I will do a more detailed analysis later. Let me know what you come up with!

Grant
 
Last edited:
I came up with about 6.5" for the bottom of the disc (what can I say, I like round numbers!), so 6.45 would sound about right. Definitely more than 6" imo though.
 
So here is the image... I took the 1.5 inch line (green) and used it to make some measurements.

I found a couple of other interesting points where the brackets (hold down parts) measure 1.5 perfectly.

3jBgV.png
 
Back
Top