Phaser 1 Kit Buildup plus MM P2 Restoration

WOOHOOOOOOOOO!!!!!!

Finally!! Today is the last day of The Gig That Would Not Die Because it Ate Michael Myers!!!!

Tomorrow I start my first staycation in over a year!!! I'm taking at least a month off!!!!

It's back to the shop, RPFeeples!!!!!!

WOOHOOOOOOOOO!!!!!!

And first thing out of the gate: THIS baby goes into Inventor and then gets test-printed! :D

Screenshot 2016-04-07 14.08.33.png

Then I'll finally start on the brass bits for the P2...

WOOHOOOOOOOOO!!!!!!
:D :D :D :D


Screenshot 2016-04-07 14.08.33.png
 
Last edited by a moderator:
A month? holy cow! wish I had your job.....happy vacation bud!..can't wait to see your print's...:thumbsup
 
Can't wait to see pics!
Me neither!! :p

A month? holy cow! wish I had your job.....happy vacation bud!..can't wait to see your print's...:thumbsup
Dude, I don't have my job anymore! I'm between gigs. Finally. I have had one rough year, and I really need the break. There's plenty more work out there, and I'm reading about new foreign corruption scandals involving Spanish-speaking officials, so it looks like there'll be plenty of that sweet, sweet foreign language review money coming my way -- once my sanity is restored. :)

Meanwhile, it's 3 am because I got home at midnight, made a burger, and sat down for my third viewing of SW: TFA. I can't get enough of that movie. :)

Tomorrow (um, today) I split my early day (whenever that is) between the modeling work and a few chores, then I'm off to the shop to do some printing, and possibly some work on my costume. Yay! :)
 
Haven't made it into the shop yet (because coma), but all my stuff's together and ready to be loaded into the Honda Civic of Destiny, and I've finished modeling the emitter slide. So tomorrow I definitely go to the shop and do my test prints! I fully expect to have to come back to the digital drawing board, but it shouldn't be too painful. Once I get this baby properly sized and adjusted, it's up to Shapeways, and we'll see what I get when they finally ship it. :)

Screenshot 2016-04-11 02.27.22.png
 
Ugh, the emitter slide almost did me in. I couldn't get it to work right without making the cradle support piece twice the length of the GJ, anything else didn't have enough travel. I finally came to that conclusion last week, after several months of just trying to solder the thing together. That thing ain't easy to make on a band saw and drill press.
 
Ugh, the emitter slide almost did me in. I couldn't get it to work right without making the cradle support piece twice the length of the GJ, anything else didn't have enough travel. I finally came to that conclusion last week, after several months of just trying to solder the thing together. That thing ain't easy to make on a band saw and drill press.
Nope. The only simple way I can think of is to mill the cradle piece and the support arm as one piece, and then solder that to the cylinder. But screw that, because technology. :p

Screenshot 2016-04-11 02.52.01.png

Fret not though -- once I get this thing just right, I will put it up on Shapeways as cheap as I can make it. Nobody should have to suffer through scratch-building this. :)
 
I got one made finally. I cut the cradle from 1/8 brass and soldered it to the arm, then soldered that to the tube. Tricky but it now works.
 
YAY!! Finally got some work done, and I'm really happy with it! I 3D printed the first proof for the phaser shell, and I've got the dimensions pretty well nailed. I just need to go back to my source images and make a new blueprint template to fix the imperfections I discovered when I compared it to my Wand. But since I've modeled and re-modeled this thing maybe 12 times by now, that's gonna go pretty quick, and before you know it, I'll have a P1 kit up on Shapeways and Thingiverse (for anybody who has access to a 3D printer). Shapeways will be quite cheap -- you'll be surprised how cheap you'll be able to get a custom-printed set of P1 shells. And Thingiverse, of course, is freely downloadable.

Sorry, I can't charge less than free. The Man is oppressing me, and I gotta eat. As it is, I gotta make it up in volume. :p

prototype.png
I probably should have hired a better consultant.
:p

I didn't get to printing out the test for the brass slide, because the Mojo printer was in use. But I took the class when that member was done, so I'll be going back tomorrow whenever the Mojo's free to test out my slide. :D

So, here's what the P1 top shell proof looks like now:

2016-04-15 21.43.46.jpg

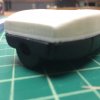
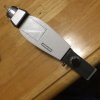
I'm off by 0.035" from the Wand phaser, which is 3.58". It's not a difference I can see when they're side-by-side. But since Shapeways is ± 0.1 - 0.2 mm for every 100 mm, I want to get as close to perfect as I can. But as you can see from this first proof, I'm already pretty damn close. And also bear in mind that the calipers are ± 0.002" or so.

The sight window cutout is actually the correct size, despite how the photos make it look; it's just that the Wand's is
located a hair too far forward. The JL is much closer to the GJ in the location. Obviously I still have some contouring work to do, and scale and shape were the two things I needed to see before continuing with the model. Those side curves are much too wide. I gotta watch that. My fascination with... uh... full-figured women keeps getting in the way. :p

2016-04-15 23.52.41.jpg2016-04-15 23.51.34.jpg

I outlined the indents with a black sharpie just for picture. The crappiness of the lines is because it's a low-res print, so the surface is quite rough. The Shapeways ones will be very, very smooth, and the indents will be cut out already for the hero shells. No sense paying for cubic millimeters of plastic you'll just cut out and throw away. The mid-grade shells will be solid on the outside and I'll mark the surface the way the originals were marked, including the two little squares where the meter window goes.

2016-04-15 21.47.03.jpg

It lines up pretty well with the JL shells. Obviously some contouring to fix, but now that I have my proof-of-concept, it should go pretty quickly. I can be very quick, or so my wife tells me. :p


2016-04-15 23.58.05.jpg2016-04-15 23.54.21.jpg2016-04-15 23.53.30.jpg

Generally speaking, it's lining up very nicely with the Wand. I'm insanely happy to have gotten this close my first time out with flawed blueprints. :)

Flaws.jpg
Yeah, they're kinda all I see.
:p

Back again tomorrow (I hope!) with the proof for the brass slide. WOOHOO!!

2016-04-15 21.43.46.jpg


2016-04-15 23.52.41.jpg


2016-04-15 21.47.03.jpg


2016-04-15 23.51.34.jpg


2016-04-15 23.53.30.jpg


2016-04-15 23.54.21.jpg


2016-04-15 23.58.05.jpg


Flaws.jpg


prototype.png
 
Last edited by a moderator:
So here's my adjusted blueprints for the p1. Turns out I was using the wrong SunKing blueprint. He actually corrected the distortions in his original blueprints, and got it pretty much perfect. I've overlayed the best photos I have of the original prop, plus the top view is from the Wand Co.'s own 3D scan of it. I don't have any useable photos of the bottom (the ones I have are just too distorted), but the rest of the overlays make that unnecessary.

If you're inclined to model this yourself in 3D, you can download it full-sized from my PhotoPhucket here. (Or just build one out of wood, I suppose, you frakking Luddite.) :p

[EDIT -- the preceding link now gives you version 2. I made a slight alteration.]

Now, mind you, the photos are squeezed to fit the blueprints, and the lineup isn't perfect, because they're photos and suffer from perspective distortion. I added them really as a gut check for the blueprints. The Wand scan, though, is orthographic, so it lines up perfectly with the blueprint (amazing job, SunKing -- whoever you are!).

P1layoutCORRECTED02.jpg

Toldja I was quick.

My wife hates me. :p

P1layoutCORRECTED02.jpg
 
Last edited by a moderator:
Nice! But actually I altered the Sunking drawings, rather crudely in a free program called paint.net. The p2 only involved making adjustments to the length to fit the dims I was given. The p1 was almost completely redone. Side view was just adjusted for length, the top view was traced from a GJ photo. I found the best ortho-style image and printed it full size on card stock, cut it out, and traced the right side on paper in pencil. This gave me a clean outline which I scanned, flipped and pasted to make it whole, then panted out Sunkings outline and pasted this one in. Then I resized Sunking's details to match.

Analog rules!
HOLY CRAP! Sorry, I had no idea. Excellent job!! Still kinda digital though. :p

So SunKing sucks then. :p

Lots to post about, tomorrow. I'm wiped out from a day at the shop, and I just got home from picking up Mrs. Law at the damn airport, or as I know it, The Five-Mile Labyrinth of Death and Expensive Parking.

In a nutshell, though, (SPOILERS!) I got the prototype for the brass slide dingus printed on the Mojo, which is pretty cool. And I got a new coat of primer on the pistol, because I just needed to.

Also, some Techshop benefactor with more money than sense donated an industrial CNC mill the size of a minivan. It's called a Haas VF-2. Pictures and video coming, just because it kinda blew my mind. :)
 
Last edited by a moderator:
So, just back from the shop again. Didn't accomplish too much, but I did move the ball forward with some new knowledge and decisions.

But first on to yesterday, which actually happened before today, assuming my mom's dementia isn't contagious and fleeble dogpatch monofloog. :p

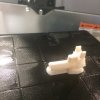
So like I said last night, I got the prototype of the brass slide printed on the Mojo, and I'm very pleased with it. Here's the print just getting started:

2016-04-16 17.25.04.jpg

What you're seeing is two print heads, the one on the right is laying down the support material that goes around the part. The reason for support material is that unless the outside walls of your object go straight up and down from the printing platform -- in other words, if you have overhanging areas -- those need to be supported so they don't just collapse before the plastic can harden.

Muffin Top.jpg
Some overhangs are easier to fix than others.

:p

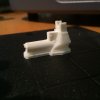
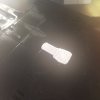
So when it comes out of the Mojo, here's what it looks like:

2016-04-16 17.57.02.jpg2016-04-16 17.58.43.jpg

I wish I'd printed this in red plastic, so you could really see where the plastic ends and the support material begins, but the next pictures should clear that up.

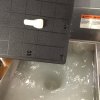
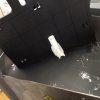
When it's done printing, you've gotta get rid of the support material. It's ABS just like the model material, but it's a little different chemically, so there's a Milky Jacuzzi of Death that drowns your part and stabmurders the support stuff away. And that's my favorite part. Because science. :p

2016-04-16 18.00.08.jpg
RELEASE THE KRAKEN!

2016-04-16 18.00.16.jpg
Shhh. It's almost over, darling. Just close your eyes and
think of being horribly murdered in a searing chemical bath.

:p

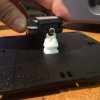
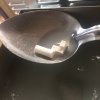
So a few checks over the next hour or so...

2016-04-16 18.55.34.jpg2016-04-16 19.46.42.jpg

2016-04-16 19.47.38.jpg
Phaser soup!

The plastic platform is forever ruined, and that stuff is never coming off. They're $4 a pop, and the Mojo is $6 per cubic inch, so I'm going to use this guy sparingly.

Finally, the test fit...

2016-04-16 20.09.40.jpg2016-04-16 20.10.49.jpg2016-04-16 20.19.10.jpg2016-04-16 20.23.00.jpg

Not too shabby! I had to sand down the cylinder just a hair, and I need to make the walls a bit thicker. It's too close to being a 1mm wall, and the Shapeways minimum wall thickness for brass is 0.8mm. I don't want to cut it that close. Besides, it's just a couple of wires and a GOW bulb that pass through there, so it doesn't need to be cavernous.

Just about this time, I had this uneasy feeling, like... LIKE WE'RE BEING WATCHED!

2016-04-16 19.54.55.jpg
Away put your weapon, I mean you no harm!

Next post tomorrow...
 
Top shell's done after a... uh... solid day of modeling. :p

Not much to say tonight, cuz pooped. Gonna watch Episode VII again. :)

I fixed the blueprints above -- the link now gets you version 2. :)

Bottom shell tomorrow! Then the front window frame.

So here's the front shell remodeled from scratch.

Screenshot 2016-04-18 22.12.50.pngScreenshot 2016-04-18 22.15.28.pngScreenshot 2016-04-19 02.24.45.pngScreenshot 2016-04-19 13.48.03.png

Once I've test-printed both shells and the front frame at the shop, I'll put in the little mounting points for the internal stuff and call 'er done. Then Shapeways and Thingiverse. :)
 
Last edited:
Bottom half coming along, but I'm pooped again.

Gotta do the bump and the various holes, plus the notches in the rear for the catch thingy.

Screen Shot 2016-04-19 at 6.26.24 PM.pngScreen Shot 2016-04-19 at 6.26.41 PM.png

I'm awful pokey these days, but it's coming along nicely! :)

EDIT....

Seriously, I gotta go to bed. At some point.

Thank God for Jethro Tull, s'all I'm sayin.' :p

Screenshot 2016-04-19 22.30.01.png
 
Last edited:
Well, myself and I just had a come-to-Dr. Sevrin meeting, and I've made a decision.

Sevrin.jpg
Yoda can bite me.

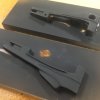
I'm not going to finish this build with the JL shells, at least not the MM pistol shells. Because they suck ass. In fact, I dropped the left shell the other day, and the front face broke. That's why you see the big gap in the third picture below. I've tried a repair with Bondo and Evercoat, but my supply has dried out and the hardner has all separated, and I'm just not willing to drop another $70 replacing all that.

Besides, with all the sanding I've done, I've inadvertently sanded down the side ribs on one side (the left, I think), and now they're too short on that side. I was not looking forward to trying to fix that. I can fix the length issue on the JL P1, though, so the jury's still out on that.
2016-04-16 20.16.13.jpg2016-04-16 20.19.10.jpg2016-04-16 20.23.00.jpg

The interior is a mess. Yes, so was the original, but I've come to learn that the old school way isn't all it's cracked up to be. The original looks like hell, partly because it's 50 years old, but mainly because they didn't have the time, money, or technology in 1966 to do what I can do today sitting on my enormous Cuban ass at home with free software.

big zebra butt.jpg
That's right, ladies. This can all be yours.
:p

It's no accident that this is happening just as I'm modeling the P1 shells. It's made me realize that this process is so much faster, easier, and cheaper, that I'd be a fool to cling on to these old methods.

kang.png
I see what you did there. Stop it.

What I'm trying to say is, life is way too short to take two years to build a phaser.

fruit flies humping.jpg
Okay, maybe not THIS short. YOLO, BABY!!
:p

So once I'm done with this here P1 I'm modeling, I'll be printing off several. For the first one, I'll use some leftover internals from my JL kits, but after that, I'll be printing almost all the brass ones at Shapeways. Everything I create will be available on Shapeways and/or Thingiverse.

And you fellow shop rats, worry not. There will still be lots of gluing, sanding, painting, milling, turning, soldering, and maybe even an amputation or two. It's just not fun and games till somebody loses an eye. :p

When I finally get a working hero done (dear God, let it be soon!), I'll be starting new threads for other props, particularly comms and tricorders. I'm going to be vacuforming my own in Kydex with 3D printed or CNC-carved bucks, but I also have a method in mind that might make it possible to print correctly textured shells at Shapeways... ;)
 
WOOHOO!!!

All the holes are in! Just the rear notches and front window frame to go, and I'll be ready to print out another test of the whole thing!

Haven't installed the mounting points yet in the top half, those are gonna wait till after this next print.

Once the "final" version is up on Shapeways and Thingiverse, it's onto the pistol body. That'll go much faster since I've been getting quicker with Blender every day, and I've watched a few videos on how to make better topology (how the squares and triangles map out on the surface, which affects the smoothness of your shaping, and can make you miserable if you do it wrong).

I might just make it to the shop tonight! :)

Screen Shot 2016-04-21 at 3.06.33 PM.pngScreen Shot 2016-04-21 at 3.06.46 PM.pngScreenshot 2016-04-21 15.45.02.png
 
Last edited:
Back
Top