Obi-Wan Kenobi - Ultimate Weathering Project

cwoodreplicas

Sr Member
RPF PREMIUM MEMBER
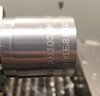
The Romans Obi-Wan ANH Saber is a fantastic replica of a well sought after ‘real parts’ prop. With compatible dimensions, accurate materials and a complete unit, it is a must have in any Star Wars collection.

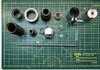
BUT - in my opinion it doesn’t quite have that ‘look’ of a real parts. But with all the fundamentals there - can it? Can it be successfully weathered down to achieve that ‘vintage’ look and fool even the most eagle of eyed collectors?

This thread is to document my quest to achieve weathering perfection on the Obi-Wan, and encourage those who want to give it a go themselves!
 
The OWK kit:

My ROWK is a mixture of his ‘newest’ Static kits with his older 2 piece balance pipe. It has a cold sink knob with the threaded insert, and I have swapped his clamp out for a vintage Graflex one - as nothing quite matches a Graflex like a vintage piece. The clamp card is a cut down WannaWanga.


The Look:

The aim of the this is to replicate a ‘good condition’ realparts OWK. I will not be gouging out the grenade to achieve a pitted appearance, splitting the ring around the grenade and taking big chunks out of the booster. Instead it’ll aim to replicate 60- 100+ year old components which are in a relatively good condition.
 

Attachments

  • 0605415C-22AC-4FAC-B04B-B7B20BA3D717.jpeg
    0605415C-22AC-4FAC-B04B-B7B20BA3D717.jpeg
    1 MB · Views: 321
The Balance Pipe:

This was relatively easy to weather. On inspection of the original Inconel Balance Pipes, the main features to replicate are:

- Carbon Scoring/ pitting/ marking on the outer surface
- Gouges on the outer surface from fitting in the engine
- General dirty appearance
- Polished/Clean Upper Flange


Carbon Scoring:
I achieved what I think is a fairly realistic appearance by applying some black enamel paint and using a blow torch to burn it. Repeating this process enabled me to build up slowly a good layer of burnt paint that was durable and simulated the appearance of the real balance pipes. (This was done last)

Gouges:
Using my lathe at a very low speed, I cut in some uneven gouges in the steel to try and replicate this look.

Dirty Appearance:
Liberal use of a Perma Blue paste, sanding back darkened the steel and produced some grime. Utilising the blowtorch when the part had a light coat of oil helped to build up a realistic appearance of burnt oil and darkened metal.

Polished Flange:
Using the lathe I finished the end and gave it a light polish and wax to prevent rust.


Adjustments.jpg


Adjustments.jpg

Adjustments.jpg

Adjustments.jpg

Adjustments.jpg
 
Sink Knob:

Features of the sink knob to replicate are:

- Light scratches and use (from cleaning, watches and rings on fingers).
- Build up of limescale and some rust/oxidation
- Worn blue ring

Light Scratches:
Using a 3M pad, going over the areas lightly easily achieved this look.

Limescale and Rust:
This was a job for paint. By brushing on some whites and greens, a fairly realistic effect could be achieved. Particular focus was paid to the lettering and ridges where the water from hands would gather easily.


Worn blue ring:
Using some coarse sandpaper to scuff it up, I gave the ring a darker blue wash and then some light dry brushing of whites to give a little limescale finish to it.


Adjustments.jpg

Adjustments.jpg
 
Booster:

A very interesting thing to replicate due to the various different conditions of ANM2 boosters out there. Features of note:

- Battered ridges from use, handling etc
- Weld on one fin
- General wear and tear of steel.

Battered ridges:
To get a ‘realistic’ look, it really needed having a hammer taken to it. By lightly hammering the ridges, I was able to dent and ding them to achieve a worn look. I then took the Dremel wheel to de-burr them. Repeat the process until the effect is achieved. Light weathering is better here. A re-blue is required after the process to get the right look, then take it back slightly with a 3M pad


Weld on one fin:
An easy way to achieve this without welding equipment is just to hammer the edge of the fin down to create a lip and edge. This gave a realistic finish to replicate the weld used to hold the booster on.

General wear and tear:
Nothing will beat weathering steel via natural methods. Use of water, heat and ‘vinegar vapour’ is an effective way to achieve a really good effect. The vinegar vapour generates the rust quickly and using the water and heat will give it a realistic finish. In all these parts I try to consider what the real parts have gone through. So using a blowtorch or a very hot oven will give the steel a slightly different colour. The real parts of these generally are not very rusted so when finished, I gave it a light clean, re-blue and took it back using a 3M pad to create some highlights.

Adjustments.jpg

Adjustments.jpg

Adjustments.jpg

Adjustments.jpg

Adjustments.jpg
 
Very cool project, and the pieces look very close to vintages so far!

If you want to go extra step for the booster, I'd suggest applying satin silver/chrome on the inside.
 
Very cool project, and the pieces look very close to vintages so far!

If you want to go extra step for the booster, I'd suggest applying satin silver/chrome on the inside.


While I did consider this, I opted instead to just polish the inside. The images don't pick it up well.
 
Grenade:

My biggest gripe with the Romans grenade is the outer ring of the vane. It never seems to represent what it should look like for two reasons:

1. It has no writing wrapping it - now whilst the original didn't seem to have the writing also, the lack of it I think really detracts from it looking like a 'real' grenade piece.
2. I don't think the 'flange' is correct. The current model has the flange at about 90degrees to the main ring, I think it should be more angled.

As a result of this, I have decided to model and get a new outer ring made. This ring will have the correct text engraved into it, and have a large angle to the flange. Currently, this is with my CNC machinist who is looking at doing this work for me next week. Depending on how this goes and if some may be interested, I could offer this as a small run in the future.
 
I did something similar with some parts last year and I'll look forward to seeing your end result!

Also:
As a result of this, I have decided to model and get a new outer ring made. This ring will have the correct text engraved into it, and have a large angle to the flange. Currently, this is with my CNC machinist who is looking at doing this work for me next week. Depending on how this goes and if some may be interested, I could offer this as a small run in the future.

Yes please. I've been looking for a replacement ring for a while now.
 
Balance Pipe Adapter:

I’ve never been a huge fan of the steel adapter for the Romans, and in light of the ‘Deep Dive’ by Scottjua, I decided to machine a new one out of aluminium. I believe it to be a close enough representation of the one on screen.

View attachment 1319790
View attachment 1319791
I personally think thats how it is in the movie. I dont see a cone. Especially now watching the movie on Disney + in 4k hdr.
 
Great job so far and thanks for the inspiration! You got me to re finish my balance pipe replica tonight! What's the word on the adapter inside the BP? I think I missed that discussion
 
Transistors:

As far as I can tell (correct me if I’m wrong), no one has yet been able to identify the correct transistor/op-amp types used on the real one. There’s some talk of Solitron or Motorola, but nothing confirmed. Whilst I was planning to use some vintage ones, I thought it might be fun to make up some decals to use on my Romans. These simply screw into the booster which makes them very convenient.

I modelled them up by using the images of the transistors, and either sketching the outline of what I saw and making it a little sharper, or doing a simple scan of it to get the exact shape, If not a little pixelated.

I decided to go with the scanned versions as they came out a little nicer. Sealed with lacquer and a nice bit of weathering to finish.


Adjustments.jpg

IMG_9675.jpg

Adjustments.jpg
 
Some progress being made today on the new wind vane ring. Engraving has been finalised and is a bit of an ‘idealised’ engraving. From my research, the text seemed to vary ever so slightly from piece to piece. Of the grenades I’ve seen, they’ve all had slightly different shape and size of text, with slightly different positioning.

(Note, it’ll not be mirrored.... that was a mistake)
 

Attachments

  • 3BA271F0-A9A0-44B1-80B0-DDA43D777AF9.jpeg
    3BA271F0-A9A0-44B1-80B0-DDA43D777AF9.jpeg
    129.4 KB · Views: 213

Your message may be considered spam for the following reasons:

If you wish to reply despite these issues, check the box below before replying.
Be aware that malicious compliance may result in more severe penalties.
Back
Top