OddViking
New Member
Hello There! I just finished a prop for a fellow cosplayer who is building of of the Kenobi show costumes, and I wanted to share my build, especially the holster pattern and the unusual closure piece for it I discovered. (I did this as a favor, I don't build these on commission or anything).
Blaster parts resin-printed on my Elegoo Saturn, from blaster files by Big Fred's Customs on Etsy. I only did one small modification to the files, in Blender I hollowed out the scope, and left a small ledge to hold lenses, because I love a scope with lenses. Once printed, I did add some threaded "pegs" for strengthening the joints on some parts, but otherwise it all fit together really nicely and only some of the top rail parts needed light sanding to fit. For the holster, I created a pattern around the blaster based on the references, and a pdf for it is linked below.
Blaster color reference:
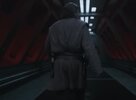
Many people think this blaster is all black, and I think the reason is that one of the only clear images of one of the props is in darker light (from a display at LFL). Once I started getting still frames, especially from the laser-gate scene in full sunlight, I was sure of two things: it is two-toned chrome and dark-metallic black, and there appears to be probably three versions of this prop, and some have different areas that are the brighter tone. It still appears dark in many shots like night scenes, but metallics often do that. If you up the lighting, you can still detect differences in shine level and tone on parts by comparing them to other parts.
The build
The pieces from Big Fred's file all printed well on my Elegoo Saturn resin printer in two prints, and fit together well. Only the tiny squares on the top rail needed minor sanding to fit easily. As I said above, I modified the scope to be hollow with a little shelf to hold lenses once finished. Because some parts like the scope sit out a bit from the blaster, and that part especially bears the weight of the blaster in the holster, I added some "pins" made from clipped bolts to a few places so that they would strengthen the bond better than glue alone. I added a thin brass nail into the trigger as well, because sometimes you wanna pull that trigger a little, and this would keep it from popping off:
A few of the round parts like the main barrel and top rail had some faint print lines, so after a light wet sanding of the parts, I gave those some filler primer for a more perfect finish. I primed the pieces flat black, then spray painted everything with a base gloss black (except the handle plates, which I left primer black and then clear coated with satin clear). I used Alclad 2 chrome airbrush paint on the parts, then clear-coated with Alclad Aquagloss. Once cured, I taped off any two-tone parts, and painted a lighter coat of black Alclad “primer and micro-filler” which is a more transparent black, to get the dark areas darker without completely losing the metallic shine.
Weathering
Next I weathered with Fullers Earth powders (with matte varnish painted in spots as a binder to keep it more permanent). I wanted that Tatooine sand stuck in the crevices to give it an aged look because he hadn't really used it in a long time.
Lenses for the scope were some small 13mm plastic ones I found on Amazon (link: Plastic lenses ) which were nearly the right size, but needed some fine edge sanding to fit, and the tiny front "lens" was from the end of a clear paintbrush handle. Glued using some Testors window glue "Clear Parts Cement and Window Maker" (for trains and other models) that doesn’t fog clear parts like superglue does.
Holster
For the holster, Kenobi un-snaps it in that laser gate scene, and the “snap” was something I hadn’t seen. It had a hole all the way through, with a post that pops in. It took a good deal of searching, but I finally found that exact closure. The one I got was from a leather craft site in Japan, and luckily only took three weeks to arrive to ensure my hunch was right.
Another prop maker from the UK recognized it, and sent this, which names them "Left the dot" fasteners:
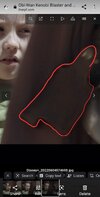
I created a pattern around the completed blaster with cereal box cardboard, and once it fit and matched the references, I cut it out of leather [Update, based on some new reference posted below, I updated the pattern for the blaster to match the lower strap and edge seams- see updates in a post below].
I just created a clean pattern pdf, which was made to fit this Big Fred's Customs blaster (you should be able to adapt it to a similar print, but print it and check first). You can get my Ob--Wan blaster holster pattern here [UPDATE: Someone posted a photo in the comments that alters the bottom a small amount, so I updated the pattern to reflect that detail]: Kenobi Holster Pattern [V2] PDF
I dyed it with Angelus "Dark Brown" leather dye. The way the flap flops open after he un-snaps it, it looked to be well-oiled leather, so I used a few treatments of Neetsfoot oil to achieve that look. Then I used two needles and hand stitched (saddle stitch) the holster closed, the top belt slot, and the small strap. See my pattern for more details.
Setting the "snap" was simple enough, the site I ordered mine from offered a setter for the stud (which has a tube back on this one), which looked like a larger grommet setter, which I already had a few sizes of. Sure enough, one of mine fit it fine. The socket part just needed a hole punched and widened, and then four small slits poked with a hobby blade for the prongs to fit through. I ordered the darker bronze finish version, and once set, used some 600 grit sandpaper to brighten the face a bit to more brass like his holster in the show, while leaving the darker finish as weathering.
Blaster parts resin-printed on my Elegoo Saturn, from blaster files by Big Fred's Customs on Etsy. I only did one small modification to the files, in Blender I hollowed out the scope, and left a small ledge to hold lenses, because I love a scope with lenses. Once printed, I did add some threaded "pegs" for strengthening the joints on some parts, but otherwise it all fit together really nicely and only some of the top rail parts needed light sanding to fit. For the holster, I created a pattern around the blaster based on the references, and a pdf for it is linked below.
Blaster color reference:
Many people think this blaster is all black, and I think the reason is that one of the only clear images of one of the props is in darker light (from a display at LFL). Once I started getting still frames, especially from the laser-gate scene in full sunlight, I was sure of two things: it is two-toned chrome and dark-metallic black, and there appears to be probably three versions of this prop, and some have different areas that are the brighter tone. It still appears dark in many shots like night scenes, but metallics often do that. If you up the lighting, you can still detect differences in shine level and tone on parts by comparing them to other parts.
The build
The pieces from Big Fred's file all printed well on my Elegoo Saturn resin printer in two prints, and fit together well. Only the tiny squares on the top rail needed minor sanding to fit easily. As I said above, I modified the scope to be hollow with a little shelf to hold lenses once finished. Because some parts like the scope sit out a bit from the blaster, and that part especially bears the weight of the blaster in the holster, I added some "pins" made from clipped bolts to a few places so that they would strengthen the bond better than glue alone. I added a thin brass nail into the trigger as well, because sometimes you wanna pull that trigger a little, and this would keep it from popping off:
A few of the round parts like the main barrel and top rail had some faint print lines, so after a light wet sanding of the parts, I gave those some filler primer for a more perfect finish. I primed the pieces flat black, then spray painted everything with a base gloss black (except the handle plates, which I left primer black and then clear coated with satin clear). I used Alclad 2 chrome airbrush paint on the parts, then clear-coated with Alclad Aquagloss. Once cured, I taped off any two-tone parts, and painted a lighter coat of black Alclad “primer and micro-filler” which is a more transparent black, to get the dark areas darker without completely losing the metallic shine.
Weathering
Next I weathered with Fullers Earth powders (with matte varnish painted in spots as a binder to keep it more permanent). I wanted that Tatooine sand stuck in the crevices to give it an aged look because he hadn't really used it in a long time.
Lenses for the scope were some small 13mm plastic ones I found on Amazon (link: Plastic lenses ) which were nearly the right size, but needed some fine edge sanding to fit, and the tiny front "lens" was from the end of a clear paintbrush handle. Glued using some Testors window glue "Clear Parts Cement and Window Maker" (for trains and other models) that doesn’t fog clear parts like superglue does.
Holster
For the holster, Kenobi un-snaps it in that laser gate scene, and the “snap” was something I hadn’t seen. It had a hole all the way through, with a post that pops in. It took a good deal of searching, but I finally found that exact closure. The one I got was from a leather craft site in Japan, and luckily only took three weeks to arrive to ensure my hunch was right.
Another prop maker from the UK recognized it, and sent this, which names them "Left the dot" fasteners:
I created a pattern around the completed blaster with cereal box cardboard, and once it fit and matched the references, I cut it out of leather [Update, based on some new reference posted below, I updated the pattern for the blaster to match the lower strap and edge seams- see updates in a post below].
I just created a clean pattern pdf, which was made to fit this Big Fred's Customs blaster (you should be able to adapt it to a similar print, but print it and check first). You can get my Ob--Wan blaster holster pattern here [UPDATE: Someone posted a photo in the comments that alters the bottom a small amount, so I updated the pattern to reflect that detail]: Kenobi Holster Pattern [V2] PDF
I dyed it with Angelus "Dark Brown" leather dye. The way the flap flops open after he un-snaps it, it looked to be well-oiled leather, so I used a few treatments of Neetsfoot oil to achieve that look. Then I used two needles and hand stitched (saddle stitch) the holster closed, the top belt slot, and the small strap. See my pattern for more details.
Setting the "snap" was simple enough, the site I ordered mine from offered a setter for the stud (which has a tube back on this one), which looked like a larger grommet setter, which I already had a few sizes of. Sure enough, one of mine fit it fine. The socket part just needed a hole punched and widened, and then four small slits poked with a hobby blade for the prongs to fit through. I ordered the darker bronze finish version, and once set, used some 600 grit sandpaper to brighten the face a bit to more brass like his holster in the show, while leaving the darker finish as weathering.
Last edited: