Nice-N Gold Leader Y-Wing - My First Studio Build

PULLED PORKINS

Active Member
RPF PREMIUM MEMBER
I'm a new member since October of 2019 and have started a Gold Leader build and just now starting this thread. I want to say thanks to all who provided me with answers to my questions through The One-Stop Y-Wing Thread, it's been a tremendous help. The subject matter expertise on RPF is off the charts! This build is going to take me some time since I am still working and not quite retired yet but I will get it done eventually. I ran into some paint adhesion issues in the beginning of the build but finally solved the problem with help from members of the RPF. Thanks again guys!
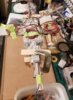
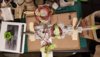
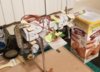
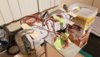
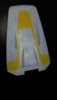
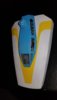
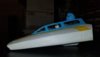
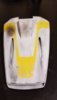
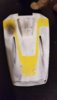
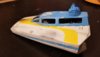
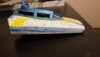
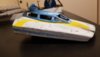
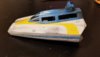
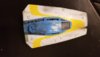
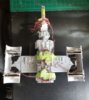
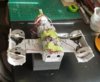
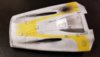
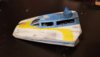
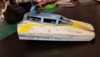
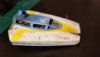
Here are some pictures of the intial buildup. Keep in mind I'm a rookie at this and still learning the tricks of the trade.
 

Attachments

  • Y Wing  Build -1.jpg
    Y Wing Build -1.jpg
    1.2 MB · Views: 513
  • Y Wing - Build 2.jpg
    Y Wing - Build 2.jpg
    2.6 MB · Views: 528
  • Y Wing - Build 3.jpg
    Y Wing - Build 3.jpg
    782 KB · Views: 531
  • Y Wing - Build 4.jpg
    Y Wing - Build 4.jpg
    2.5 MB · Views: 526
Just adding a few more build photo's of the first stage of the paint job. White primer then the semi-flat black and then the Reefer White. The top and bottom stripes were a challenge to say the least. Next up the side stripes then the battle/weathering effects.
 

Attachments

  • Bottom-1.jpg
    Bottom-1.jpg
    672.1 KB · Views: 319
  • Overhead-1.jpg
    Overhead-1.jpg
    715.3 KB · Views: 317
  • Sideview-1.jpg
    Sideview-1.jpg
    2 MB · Views: 354
Just another set of pictures to get to the current state of the build. I had to mix up another batch of the GN Big Sky Blue to try to lighten it up a bit on the cockpit canopy. Shot the canopy again and added the side stripes. Initial stages of battle damage and weathering has been applied through paint extraction and chipping. Still have a lot to do to achieve the dirty space weathered look. Once this is achieved I will move on to the LED lighting of the front instrument panel, it's already to go except installing the bulbs.
 

Attachments

  • 2nd wave effects-6.jpg
    2nd wave effects-6.jpg
    797.3 KB · Views: 310
  • 2nd wave effects-8.jpg
    2nd wave effects-8.jpg
    1 MB · Views: 324
  • 2nd wave effects-10.jpg
    2nd wave effects-10.jpg
    576.9 KB · Views: 338
  • 2nd wave effects-11.jpg
    2nd wave effects-11.jpg
    2.2 MB · Views: 399
  • 2nd wave effects-14.jpg
    2nd wave effects-14.jpg
    2.2 MB · Views: 367
Thank you dtssyst. I can't wait to get it finished but I don't want to rush it which may result in a sloppy job. I only have time on the weekends to work on it so it's going to progress slowly.
No need to rush. I in fact prefer taking the time to build. It makes the hobby more enjoyable.
Please take your time and enjoy your build, there will be plenty of time to sit back and enjoy your craftsmanship once its finished.
 
Just a few pictures after spending a little time on the build (panel line enhancement and gun blast residue from the cockpit cannons) this past weekend. Still have a little more to do on this front. Probably don't need to post so many minor updates to the build but I'm excited with the progression and would surely welcome any feedback along the way, negative or positive.
 

Attachments

  • Final effects-Wave 3 -5.jpg
    Final effects-Wave 3 -5.jpg
    2.3 MB · Views: 346
  • Final effects-Wave 3 -7.jpg
    Final effects-Wave 3 -7.jpg
    2.3 MB · Views: 350
  • Final effects-Wave 3 -10.jpg
    Final effects-Wave 3 -10.jpg
    2.3 MB · Views: 361
  • Final effects-Wave 3 -11.jpg
    Final effects-Wave 3 -11.jpg
    986.3 KB · Views: 366
Did you not prime it? Looks like bare resin in spots?
Yes it was primed with Tamiya white Fine Surface rattle can primer then two light coats of semi-flat black Tamiya applied with an Iwata airbrush. A very light coat of flat clear was then applied followed by the final required top coats (Reefer White, GN Big Sky blue and SP Armor yellow) that were all home grown mixes of Tamiya paint. I had tried on my first attempt using the correct required color's using Badger water based acrylics but really didn't like the way they flowed though my Iwata airbrush. If you're are referring to the top of the cockpit looking like bare resin it might indeed be in spots but it was primed as well. I may have gotten a little too crazy with the chipping effect. The nose or head of the ship still has some weathering effects needed then will get a couple of flat clear coats. I just finished the rest of the panel lines yesterday and they came out great, that black undercoat really makes that process easy. I know the colors are not exact but I think they came out pretty good for a home mix. Do you have any suggestions on any other types of primer that might be better than the Tamiya? I have a "Badger" airbrush brand primer but again I didn't like the way it flowed.
 
Yes it was primed with Tamiya white Fine Surface rattle can primer then two light coats of semi-flat black Tamiya applied with an Iwata airbrush. A very light coat of flat clear was then applied followed by the final required top coats (Reefer White, GN Big Sky blue and SP Armor yellow) that were all home grown mixes of Tamiya paint. I had tried on my first attempt using the correct required color's using Badger water based acrylics but really didn't like the way they flowed though my Iwata airbrush. If you're are referring to the top of the cockpit looking like bare resin it might indeed be in spots but it was primed as well. I may have gotten a little too crazy with the chipping effect. The nose or head of the ship still has some weathering effects needed then will get a couple of flat clear coats. I just finished the rest of the panel lines yesterday and they came out great, that black undercoat really makes that process easy. I know the colors are not exact but I think they came out pretty good for a home mix. Do you have any suggestions on any other types of primer that might be better than the Tamiya? I have a "Badger" airbrush brand primer but again I didn't like the way it flowed.
I am not qualified to give painting advise. Lots of other folks here are.
 
Yeah, Akumazeto, your painting skills are off the charts, highly valued and imitated, and worth every penny RPFers pay you to paint their own models.

So I also beg to differ: YOU are very highly qualified to offer painting advice, and I for one would take note.
 
Yeah, Akumazeto, your painting skills are off the charts, highly valued and imitated, and worth every penny RPFers pay you to paint their own models.

So I also beg to differ: YOU are very highly qualified to offer painting advice, and I for one would take note.
I for one very much appreciate any and all of the advice I have received from the RPF. You guy's are all subject matter experts regarding processes, tips and past experiences of building these fantastic looking works of art. Thank you so much for the education and help.
 
Just a quick update, finished the panel lines on the nose piece and now moving on to the engine nacelles (inner support rings to improve the roundness and strengthen the nacelles overall. Will have to reshape the very rear end of the nacelles with some heat and circular aids to take out some warpage (hope it works).
 

Attachments

  • Engine Nacelle support-1.jpg
    Engine Nacelle support-1.jpg
    1.2 MB · Views: 349
  • Engine Nacelle support-4.jpg
    Engine Nacelle support-4.jpg
    754 KB · Views: 345
  • Final - effects wave 4 -1.jpg
    Final - effects wave 4 -1.jpg
    956.7 KB · Views: 335
  • Final - effects wave 4 -5.jpg
    Final - effects wave 4 -5.jpg
    2.6 MB · Views: 321
  • Final - effects wave 4 -6.jpg
    Final - effects wave 4 -6.jpg
    2.3 MB · Views: 306
  • Final effects wave 4 - 2.jpg
    Final effects wave 4 - 2.jpg
    2.3 MB · Views: 308
  • Final effects wave 4 - 3.jpg
    Final effects wave 4 - 3.jpg
    2.4 MB · Views: 335

Your message may be considered spam for the following reasons:

If you wish to reply despite these issues, check the box below before replying.
Be aware that malicious compliance may result in more severe penalties.
Back
Top