woodywaverider
Sr Member
My blaster came in the post yesterday, so I ordered a few bits and piece to mod it with (no 3d printer unfortunately) mainly aluminium in various sizes/shapes.I actually have a left over target sticker I plan on using, I just need to find the right size glass.. or see if my circut can cut some thin transfer paper
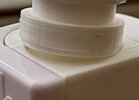
The thread in the scope is 32mm, I ordered a 1.5mm thick flat mineral glass watch face for it.
")