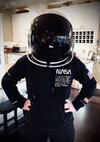
Looks good.
If you have other projects to vacuum form, you should make your frame, bigger than the box or make the box smaller so it's closer to your visor pattern size.
This way you can push the frame past the box and let the hot plastic make the seal. Your current seal has a lot of surface area and you have to make sure the frame is aligned and flat to get a seal. If you put a 1/4" radius on the top edges of the box, then you can push the frame past it and the plastic can stretch over the box some, which will help reduce webbing.
Another trick is to pull a piece of styrene over the pattern and trim it to the base of your pattern. (styrene is much easier to pull, as it stretches much easier than PETG) Then pull your other plastic over this. The styrene will smooth the pattern some and also offer some heat and stick resistance to your pattern.
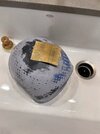
The pattern damage looks to be the paint being affected by the heat. This is happens with rattle can paint.