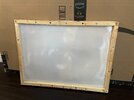
While I have not experienced this before with PETG, I suspect it could be one of a couple of things;
The PETG is recycled and not virgin material, so there is some contamination.
With Acrylic, there are a number of types, This includes two main groups, extruded and cast, Cast versions are not very vacuum formable. I wonder if there is a similar issue with PETG.
It is not PETG.
Water trapped in material typically does not fog the material uniformly, but causes tiny blisters, and does not cause the material to loose elasticity. But, this lack of elasticity is what you get with cast acrylic sheet.
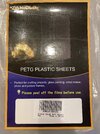
I generally avoid "Hobbyist" versions of materials, as they often are not (strictly speaking) what they claim to be. (I'm basing this on the packaging you show).