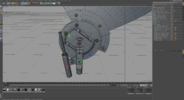
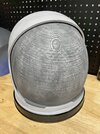
I'm a little confused. The ACES S1035 helmet has only 2 visors; A Pressure visor (clear w/ frp stiffeners) and sun visor (Bronze tinted). Both are on the exterior of the helmet. I assume by "Black out" you are referring to some type of sun shade. The ACES helmet has nothing like this.
Printed pattern: This should be no problem at all. If you were using this as a production tool (Making many visors at a time) you would build up enough heat to be concerned. But, for a couple of pulls, or many pulls with ample time for the pattern to cool, you have nothing t worry about heat wise. The plastic does not carry enough heat to damage the pattern. If you have a vacuum-form machine, where the heating elements are fixed over the platen (where the pattern sits) then heat the plastic, then as it's heating place your pattern. This will keep the pattern from absorbing needless heat. You will want to fill it. Plaster would be a good choice (or most any gypsum , hydrocal, hydrostone...) Depending on what altitude, and how good a vacuum you can apply, you will have 10-14 pounds per square inch, pressing down on the pattern. (A 10'x10 square is 100 sqin, so that's 1000 to 1400 pounds)
Sanding- Skipping from 220- 3000 is a bit silly. The same reason you go from 120 to 220 is still relevant above 220 grit.
220-320-400-600-800 or 1000 is a better approach. Make sure to dry the pattern fully, and inspect for scratches. The water will obscure finer scratches. Thy to switch sanding directions with each grit. This lessens the chances you abrasive will follow the same path as previous grits.
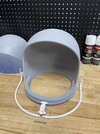
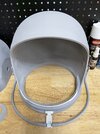
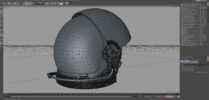
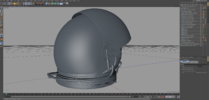
There are 2 pads inside the helmet. One in front of the chin, which looks like it's the big blocky piece printed on the inside of the chin area of the helmet. This pad is about 1/4" thick, and covered with black garment leather. The other pad, is in the back/ upper section of the helmet skull. This is a softer open cell foam. covered in black spandex like fabric, then it is quilted in circumferential rings, about 1/2"-1" apart, to the center of the pad.
Here is a good
PDF about the ACES crew system. You can see a picture here of the back liner/pad.
Here is
another, that was part of the Columbia accident investigation, which has some good details of the ACES system.
Also, if you haven't already done so, check out this
thread.
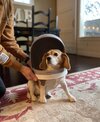
Luckily, I didn't have to mod my Vendel helmet for my dog ;-)
View attachment 1536251