Primrodo
Sr Member
I delayed posting here for a variety of reasons, but better late than never!
I was expecting to have this ready for this weekend but due to quite a number of hold ups (one being weather) it had to forego its unvielling at Polaris 21 and continue to be worked on later.
Basically, since I was a little boy, I fell in love with Doctor Who, and always wanted my very own TARDIS. I even made my own with two cardboard boxes, taped around the tops to make it taller and a strofoam cup for the lamp. Used to take it around outside and pretend to visit other worlds!
When I decided last year that I was going to build one for real, I started gathering all the refence material I could on the New Series Tardis (NST), joined a forum and got quite a number of details hammered out. The NST is a chunkier box and I just really took to it, over the Tom Baker one of my youth.
I first got all the little hardware things I would need, a Yale Cylinder to use with a Canadian night latch, handles from the UK, and the Tea Light used for the new one.
The lamp I got was real close, but was an earlier model, however RPF board member Kylash saved the day and sold me his modded out replica lamp if it was to be destined on top of a full size TARDIS.
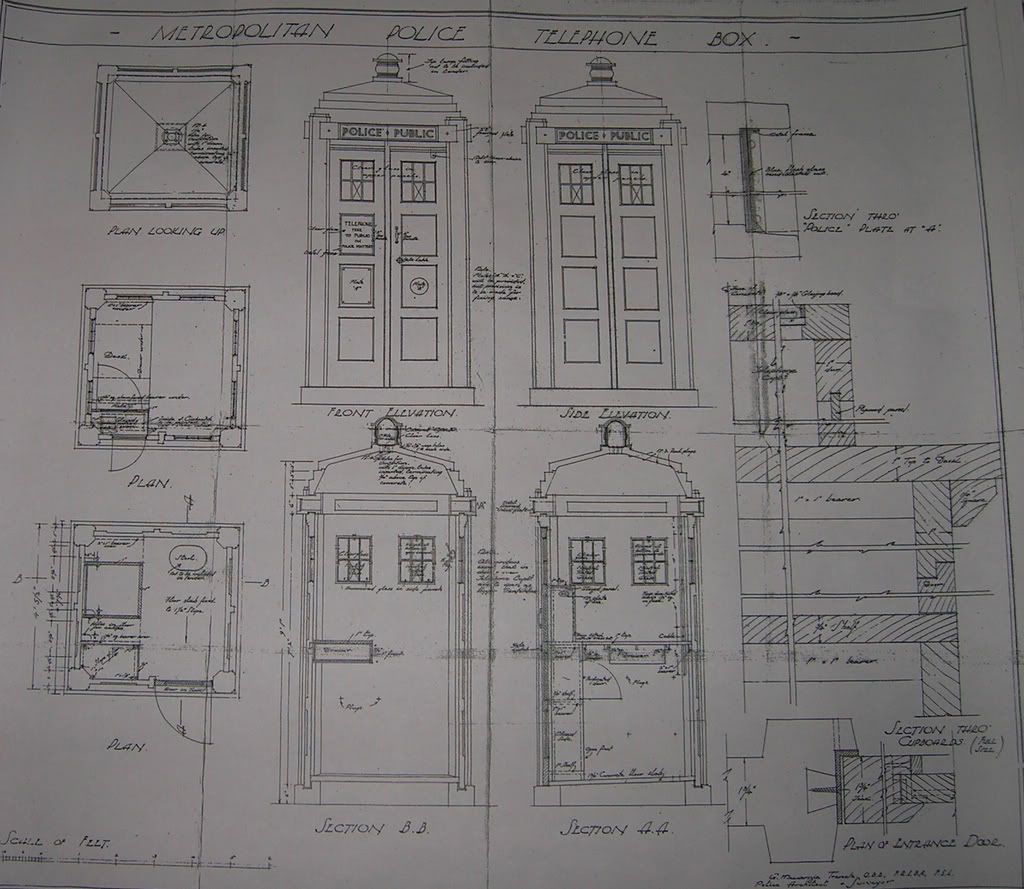
I also had AceRocket here figure me out all the dimentions and even a sort of building guide to help me and whomever was to build it with me a clearer construction guide.

Originally, my wifes uncle was to help me, but recanted the same time I was told that the aforementioned Convention wanted it there this year. I am not tool capable, just a humble graphic artist, so I NEEDED the help.
Thankfully a friend of my wifes side was able to step in and help. John used to build houses and used to be a Doctor Who fan, so it worked out great!
So we started with corners and base about three months ago.


It was off to a decent start!
The next weekend we built two walls fairly quickly, though the first took a bit to get the spaceing etc right.


Another week or so went by and we got the last wall made up, and the base finished up, as well as moved to the drive way.
We set up the walls and posts as a sort of test fit to make sure we were on the right track.


The next weekend we got the base corners fitted and the edges routed. Thankfully John had a great router that has saved alot of time and worked exactly right! Took seconds to get a panel done!


The next weekend we got the doors up and test fitted to make sure again, that we were doing alright. My little brother was loving it, as he got right into Doctor Who!


After this, I posted up about my sign, that turned out fantastically:

The next weekend we got the lock fitted, sign door up, handles up and it was looking mighty awesome!


This was just two weeks and a half ago, or so.
Back at home I made sure to get a tiled poster made for the back wall that turned out great! I took 3 pictures and made it into one and blew it up.

Then the fun part started!
Started to fill and paint some of it to get it moving for the convention this past weekend. I had Friday off, so...


The next day we got even more done!


Then we started making one of the fun things...the sign boxes!
I made these with vinyl from work places on a sanded piece of acrylic sanded front and back, and a clear sheet in front giving it the proper look. We routered the lip for inside and the peices were fitted.


You can see that we also started adding in the post detail, which beefed it up considerably! So we painted those too!


This was just looking awesome...but Sunday we had some complications with weather and the overall roof.
We ended up rebuilding the roof and it worked out ok, though I need to work on getting the edges sealed with fibreglass tape and it shoudl be good as gold.
We mounted it up, added the corner peices and started on the lamp, again thakns to Kylash for that!


We also got the windows up, which was great! I did them up in the same manor, sanding both sides with wet/dry sand paper. Thanks to Barry from MR for that tip! Otherwise I would have painted them white!


We got two sides done, and now all that is needed is the back detail and the front windows installed, along with more paint, weathering, interior door painting and more elctrical.
We did install the lamps light though, which I need to figure out how to get it to flash etc soon!
But this is where I am at so far! Let me know what you all think! I hope Kylash sees this thread and loves seeing his lamp atop my TARDIS!
Thanks for reading!


I was expecting to have this ready for this weekend but due to quite a number of hold ups (one being weather) it had to forego its unvielling at Polaris 21 and continue to be worked on later.
Basically, since I was a little boy, I fell in love with Doctor Who, and always wanted my very own TARDIS. I even made my own with two cardboard boxes, taped around the tops to make it taller and a strofoam cup for the lamp. Used to take it around outside and pretend to visit other worlds!
When I decided last year that I was going to build one for real, I started gathering all the refence material I could on the New Series Tardis (NST), joined a forum and got quite a number of details hammered out. The NST is a chunkier box and I just really took to it, over the Tom Baker one of my youth.
I first got all the little hardware things I would need, a Yale Cylinder to use with a Canadian night latch, handles from the UK, and the Tea Light used for the new one.
The lamp I got was real close, but was an earlier model, however RPF board member Kylash saved the day and sold me his modded out replica lamp if it was to be destined on top of a full size TARDIS.
I also had AceRocket here figure me out all the dimentions and even a sort of building guide to help me and whomever was to build it with me a clearer construction guide.

Originally, my wifes uncle was to help me, but recanted the same time I was told that the aforementioned Convention wanted it there this year. I am not tool capable, just a humble graphic artist, so I NEEDED the help.
Thankfully a friend of my wifes side was able to step in and help. John used to build houses and used to be a Doctor Who fan, so it worked out great!
So we started with corners and base about three months ago.


It was off to a decent start!
The next weekend we built two walls fairly quickly, though the first took a bit to get the spaceing etc right.


Another week or so went by and we got the last wall made up, and the base finished up, as well as moved to the drive way.
We set up the walls and posts as a sort of test fit to make sure we were on the right track.


The next weekend we got the base corners fitted and the edges routed. Thankfully John had a great router that has saved alot of time and worked exactly right! Took seconds to get a panel done!


The next weekend we got the doors up and test fitted to make sure again, that we were doing alright. My little brother was loving it, as he got right into Doctor Who!


After this, I posted up about my sign, that turned out fantastically:

The next weekend we got the lock fitted, sign door up, handles up and it was looking mighty awesome!


This was just two weeks and a half ago, or so.
Back at home I made sure to get a tiled poster made for the back wall that turned out great! I took 3 pictures and made it into one and blew it up.

Then the fun part started!
Started to fill and paint some of it to get it moving for the convention this past weekend. I had Friday off, so...


The next day we got even more done!


Then we started making one of the fun things...the sign boxes!
I made these with vinyl from work places on a sanded piece of acrylic sanded front and back, and a clear sheet in front giving it the proper look. We routered the lip for inside and the peices were fitted.


You can see that we also started adding in the post detail, which beefed it up considerably! So we painted those too!


This was just looking awesome...but Sunday we had some complications with weather and the overall roof.
We ended up rebuilding the roof and it worked out ok, though I need to work on getting the edges sealed with fibreglass tape and it shoudl be good as gold.
We mounted it up, added the corner peices and started on the lamp, again thakns to Kylash for that!


We also got the windows up, which was great! I did them up in the same manor, sanding both sides with wet/dry sand paper. Thanks to Barry from MR for that tip! Otherwise I would have painted them white!


We got two sides done, and now all that is needed is the back detail and the front windows installed, along with more paint, weathering, interior door painting and more elctrical.
We did install the lamps light though, which I need to figure out how to get it to flash etc soon!
But this is where I am at so far! Let me know what you all think! I hope Kylash sees this thread and loves seeing his lamp atop my TARDIS!
Thanks for reading!


Last edited:

