While waiting for a few items to arrive I decided to first give the prop room a tiny, but long-overdue face-lift. I started with the entrance. Have something in mind for inside but that will come later.
Way back in around 2009, this is what the entrance looked like, an archway which I had to shut off due to the cat, basically plastic mesh on a wooden frame.

A few years down the line I utilised that space to hang the Federation Flag & Ghostbusters painting

But the other side was ... yuk

......... not any more

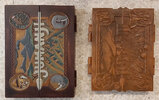
A tribute to one of my favourite Trek characters

(Menu design credit - ooakfolk)
Way back in around 2009, this is what the entrance looked like, an archway which I had to shut off due to the cat, basically plastic mesh on a wooden frame.
A few years down the line I utilised that space to hang the Federation Flag & Ghostbusters painting
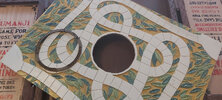
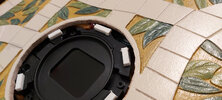
But the other side was ... yuk
......... not any more
A tribute to one of my favourite Trek characters
(Menu design credit - ooakfolk)
Last edited: