CB2001
Master Member
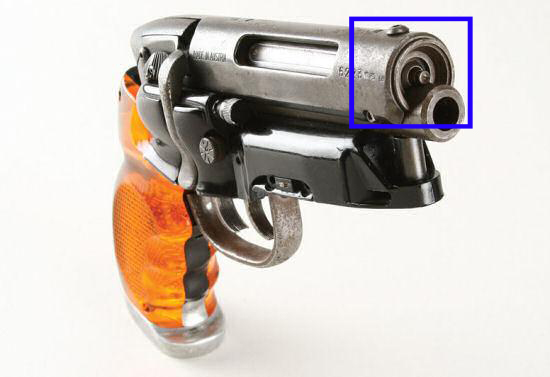
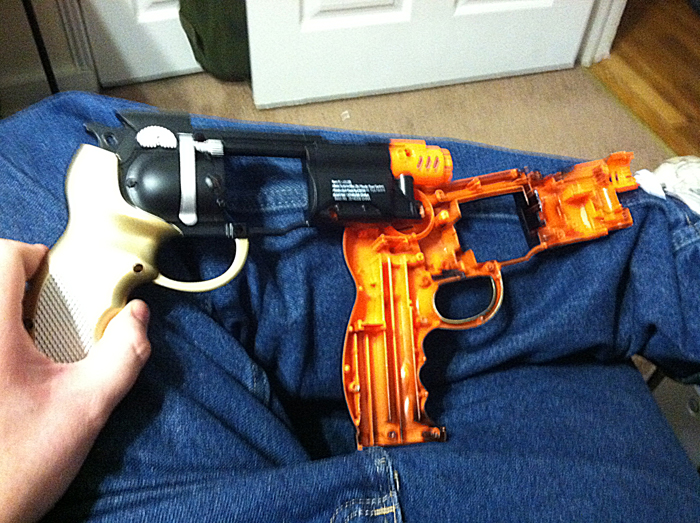
Well, It's been a while since I did a prop (the last one was my not-so-screen-accurate Back to the Future II Hoverboard for my not-so-screen-accuarte Marty McFly costume for Halloween a while ago). I actually began working on designing a prop that was inspired by the TV show/video game Defiance, a prop that is not based on anything from that source but inspired by them and look as if it could be from the world of the show/game. However, while acquiring a Defiance item (a "Arkhunter contract" that came with the Collector's Edition of the game), I finally came across someone who had one of two Chinese knock-off toys that look like Dekkard's blaster from Blade Runner for about $8, so I decided to go ahead and get one to do as my next project.
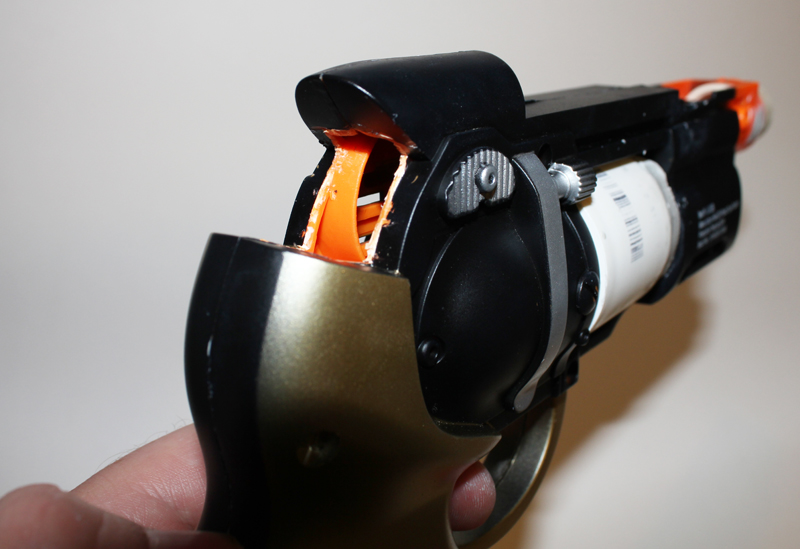
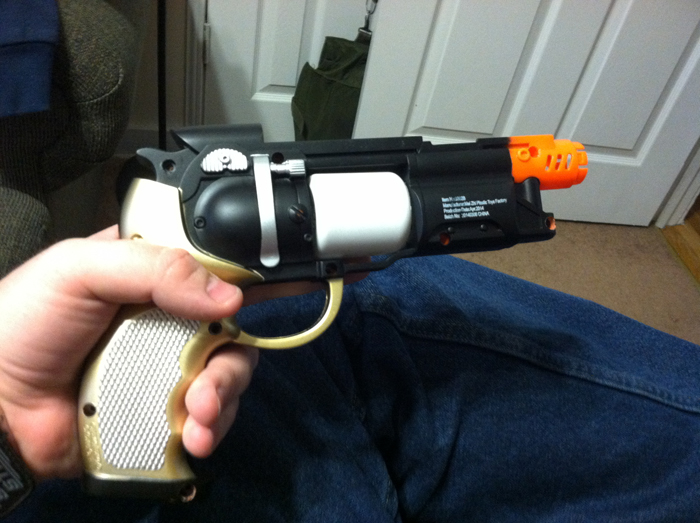
So far, I have the gun torn down, removed the electronics from it and have modified the barrel and am trying to figure out what to put into the gaping hole where the rotating bullets were. I'm not sure how much modifications I want to make to the gun, but so far, I've decided to remove the massive non-moveable hammer from the body, as well as the massive sights at the end of the top barrel. I've got some ideas of modification and pieces that I will use to make the gun look like a complete item. And I'm being inspired by many other similar BR knock-off toy gun mods like the ones featured in posts by Country Paul, SigsegV, Birdie, MrSinistar, baron von blondie, and Cameron1138’s blaster, in one and two pictures. And I am considering on utilizing some websites for information, including PropSummit.com and Mark Raat's WorldCon build for ideas and information on painting and possible detailing.
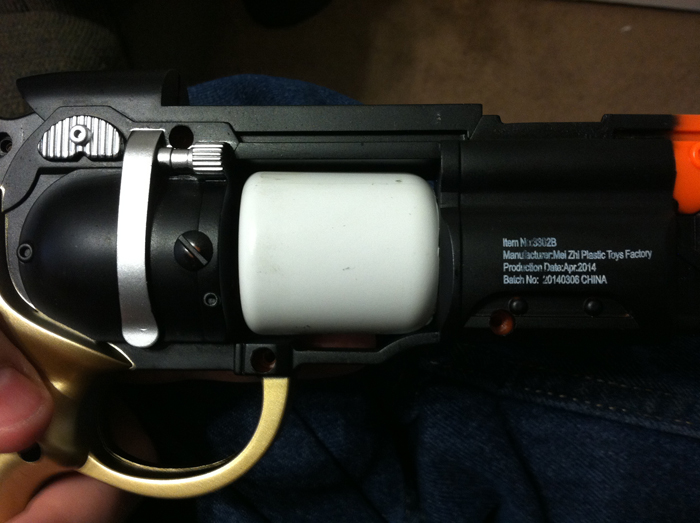
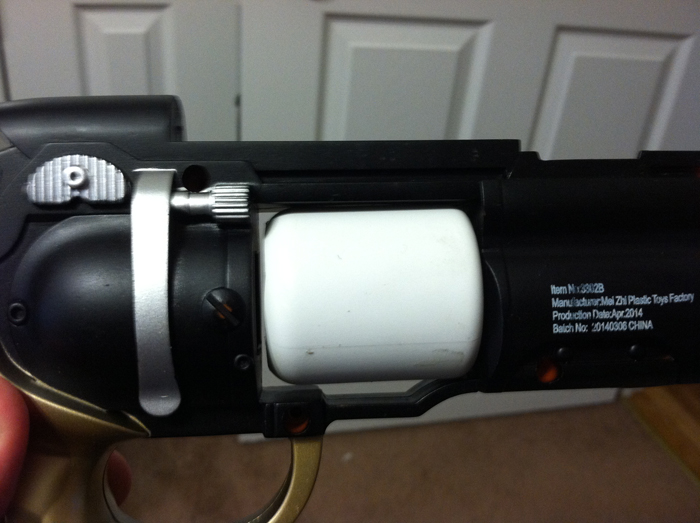
I'll be posting some pictures of the toy gun's modifications and get some feedback on what I am considering and any additional ideas. So far, I haven't decided to the degree of detailing I want to go with (such as if I want to wire up LED lights or if I want to just keep it simple by just painting the bits that look like they could be lights). I will admit, I wasn't aware that there was a screw holding on the battery compartment door, and I ended up breaking pieces of the door during the disassembly, so I would end up having to modify the battery compartment to fit in a small replacement for a power source if I did do the wiring for lights). I also don't know if I want to have the dual triggers or just have the one (I know that doing the dual triggers would result in me having to buy a one or two cheap toy guns to cannibalize for parts). So, any suggestions on parts and advice on detailing or modification would be welcomed. Like I said, I know this won't be screen accurate to the actual prop used in the film (the odds of being as such is also impossible), but I still think it would a great addition to have in my small collection of items.
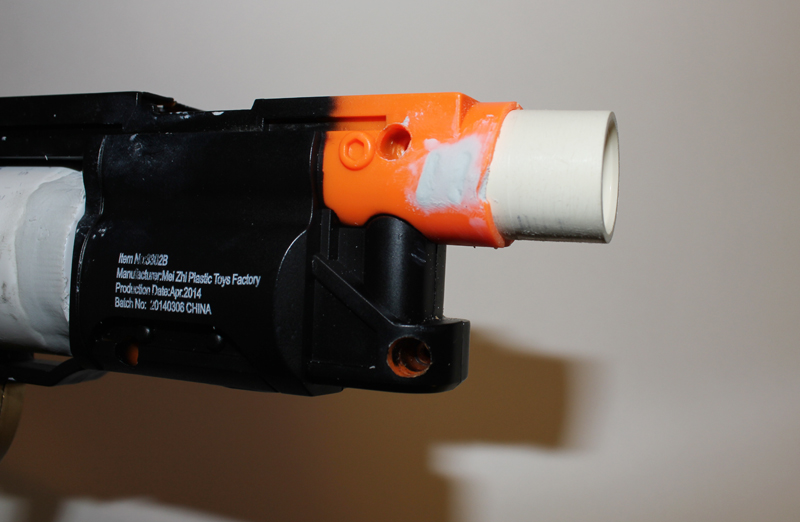
Additional info: I’ve actually chopped off some of the barrel and will have a PVC piece that is going to be the front barrel (I've considered a 5 Hour Energy drink bottle, a PVC coupler, as well as a small pill bottle, which are also pictured). It fits in place without any problems. Looking at PVC pieces and other plastic pieces to put into the middle section where the rotating bullets were. Also, I'm considering on removing the trigger guard that come with the gun and replace it one that looks similar to the film, primarily because it's difficult to grip the gun with the trigger guard that's on it (this is just an idea at this point, I'll wait to see what y'all think)
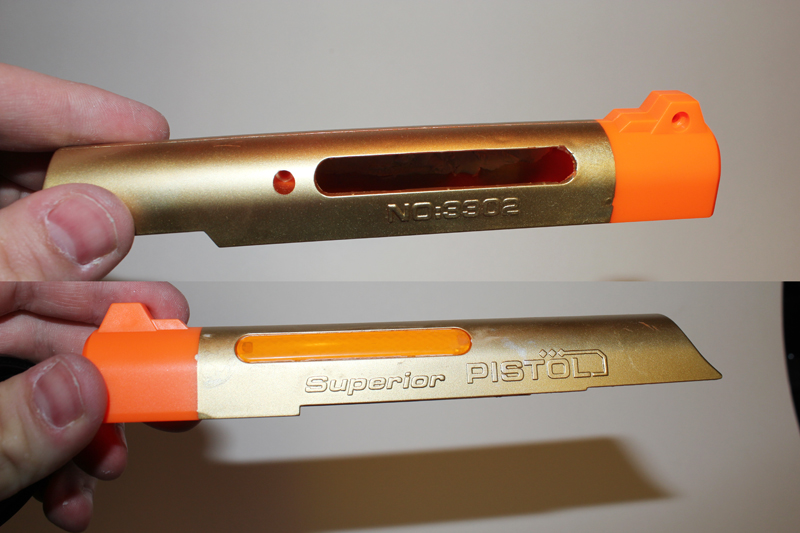
The gun disassembled:
Pill Bottle test
Not sure if it should go this way...
Or this way.
A small piece of PVC to replace the barrel. Planning on filling in those vents with plastic putty. This is the before the modification begins.
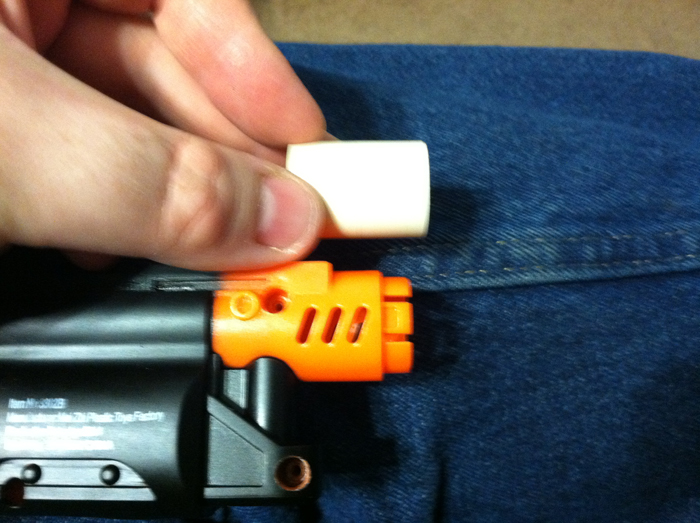
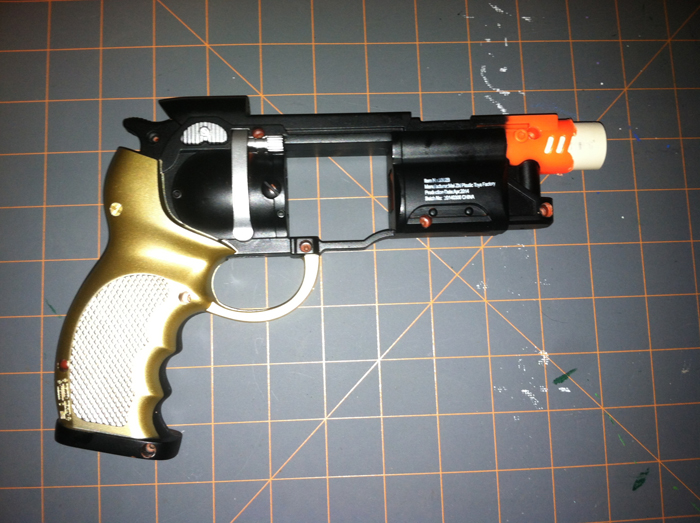
After the barrel modification. Haven't glued the piece in or filled in the vents yet. And I haven't done any sanding yet, but will do that when it comes closer to time for me to paint (as I know I'm going to have to sand off the numbers and letters on the sliding barrel, which I will also have to glue in place)
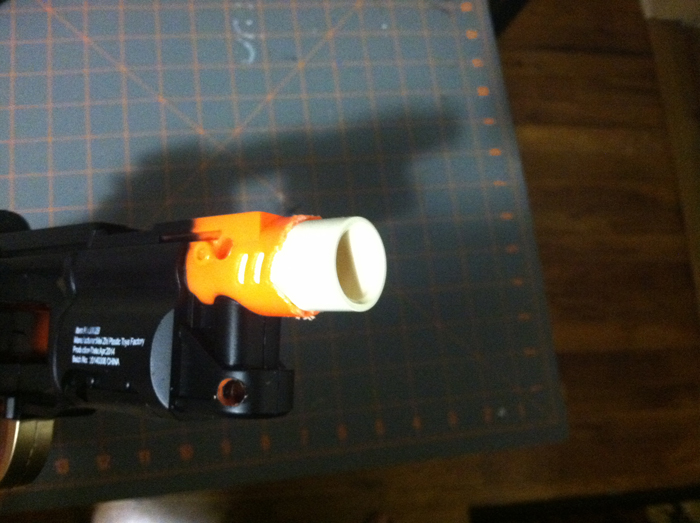
Better shot of the PVC piece in place of the barrel. I've thought about using a washer to glue on the end of that open piece to make it look even closer to the barrel in the film.
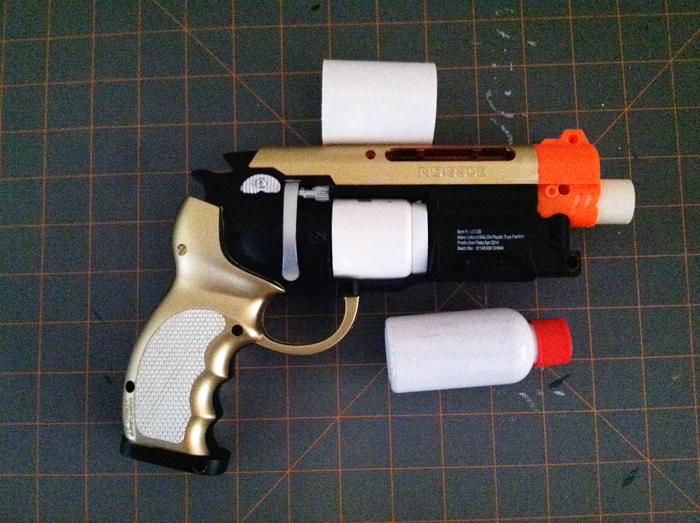
The latest picture. The PVC coupler (up top), a PVC end cap with the cap from the pill bottle in the previous pictures (in the opening) and the 5 Hour Energy Bottle for potentials to use for the opening. I am probably going to use the same plastic putty to fill in that area with no matter which one I go with, and will use it to smooth out some items (like the cap) so that it looks like a solid piece.
So, any advice, suggestions for parts and details, and feedback are welcome.
So far, I have the gun torn down, removed the electronics from it and have modified the barrel and am trying to figure out what to put into the gaping hole where the rotating bullets were. I'm not sure how much modifications I want to make to the gun, but so far, I've decided to remove the massive non-moveable hammer from the body, as well as the massive sights at the end of the top barrel. I've got some ideas of modification and pieces that I will use to make the gun look like a complete item. And I'm being inspired by many other similar BR knock-off toy gun mods like the ones featured in posts by Country Paul, SigsegV, Birdie, MrSinistar, baron von blondie, and Cameron1138’s blaster, in one and two pictures. And I am considering on utilizing some websites for information, including PropSummit.com and Mark Raat's WorldCon build for ideas and information on painting and possible detailing.
I'll be posting some pictures of the toy gun's modifications and get some feedback on what I am considering and any additional ideas. So far, I haven't decided to the degree of detailing I want to go with (such as if I want to wire up LED lights or if I want to just keep it simple by just painting the bits that look like they could be lights). I will admit, I wasn't aware that there was a screw holding on the battery compartment door, and I ended up breaking pieces of the door during the disassembly, so I would end up having to modify the battery compartment to fit in a small replacement for a power source if I did do the wiring for lights). I also don't know if I want to have the dual triggers or just have the one (I know that doing the dual triggers would result in me having to buy a one or two cheap toy guns to cannibalize for parts). So, any suggestions on parts and advice on detailing or modification would be welcomed. Like I said, I know this won't be screen accurate to the actual prop used in the film (the odds of being as such is also impossible), but I still think it would a great addition to have in my small collection of items.
Additional info: I’ve actually chopped off some of the barrel and will have a PVC piece that is going to be the front barrel (I've considered a 5 Hour Energy drink bottle, a PVC coupler, as well as a small pill bottle, which are also pictured). It fits in place without any problems. Looking at PVC pieces and other plastic pieces to put into the middle section where the rotating bullets were. Also, I'm considering on removing the trigger guard that come with the gun and replace it one that looks similar to the film, primarily because it's difficult to grip the gun with the trigger guard that's on it (this is just an idea at this point, I'll wait to see what y'all think)
The gun disassembled:
Pill Bottle test
Not sure if it should go this way...
Or this way.
A small piece of PVC to replace the barrel. Planning on filling in those vents with plastic putty. This is the before the modification begins.
After the barrel modification. Haven't glued the piece in or filled in the vents yet. And I haven't done any sanding yet, but will do that when it comes closer to time for me to paint (as I know I'm going to have to sand off the numbers and letters on the sliding barrel, which I will also have to glue in place)
Better shot of the PVC piece in place of the barrel. I've thought about using a washer to glue on the end of that open piece to make it look even closer to the barrel in the film.
The latest picture. The PVC coupler (up top), a PVC end cap with the cap from the pill bottle in the previous pictures (in the opening) and the 5 Hour Energy Bottle for potentials to use for the opening. I am probably going to use the same plastic putty to fill in that area with no matter which one I go with, and will use it to smooth out some items (like the cap) so that it looks like a solid piece.
So, any advice, suggestions for parts and details, and feedback are welcome.
Last edited:
")