You are using an out of date browser. It may not display this or other websites correctly.
You should upgrade or use an alternative browser.
You should upgrade or use an alternative browser.
My joker progress thread. COMPLETE (PHOTODUMP)
- Thread starter BRRogers
- Start date
Re: My joker progress thread. another new vest pg3
They arrived last week")
do you plan to get the rainbow colored socks too?
They arrived last week
Gearsofhalo
Well-Known Member
Re: My joker progress thread. Coat In progress pg3
wow man! what a true craftsman!!! i love it!
wow man! what a true craftsman!!! i love it!

Phizzle127
Active Member
Re: My joker progress thread. Coat In progress pg3
Looks great man! What color are you using for the coat lining? I went with Salmon, tested it and chose to keep it because it was a very good match. Check it out if you get a chance. Did you decide on gloves yet?
Looks great man! What color are you using for the coat lining? I went with Salmon, tested it and chose to keep it because it was a very good match. Check it out if you get a chance. Did you decide on gloves yet?
SithsPadawan
Sr Member
Re: My joker progress thread. Coat In progress pg3
you know there was some one on ebay selling the perfect pumpkin silk for the lining
i cant remember who though
if i find it ill send you a link
im sure you can find some if you hut around
you know there was some one on ebay selling the perfect pumpkin silk for the lining
i cant remember who though
if i find it ill send you a link
im sure you can find some if you hut around
robo3687
Sr Member
Re: My joker progress thread. Coat In progress pg3
so...a curious question.....would the patterns for this ever be made available in some way?...
because its a costume i've always wanted and i think once i've finished the patterns for my ezio i'll be sick of drawing up my own patterns....lol
so...a curious question.....would the patterns for this ever be made available in some way?...
because its a costume i've always wanted and i think once i've finished the patterns for my ezio i'll be sick of drawing up my own patterns....lol
Re: My joker progress thread. Coat In progress pg3
Well... the patterns for this I have been using existing ones and modifying them to suit my needs.
for instance the vest:
This one I modified by making both the front and back panels in four pieces over-all. I modified the patterns by splitting it where the seam should be and adding the seam allowances. I also added the green strip around the nape of the neck, and changed the pocket style and positioning.
Vogue 7488

The overcoat:
Burda 8275
The over-coat I haven't even finished yet... but so far I've modded this pattern quite a bit, like the collar stand and the lapels. allowing for the addition of the 4 panels instead of two, and altering the position of the pockets to be correct with my shorter frame.

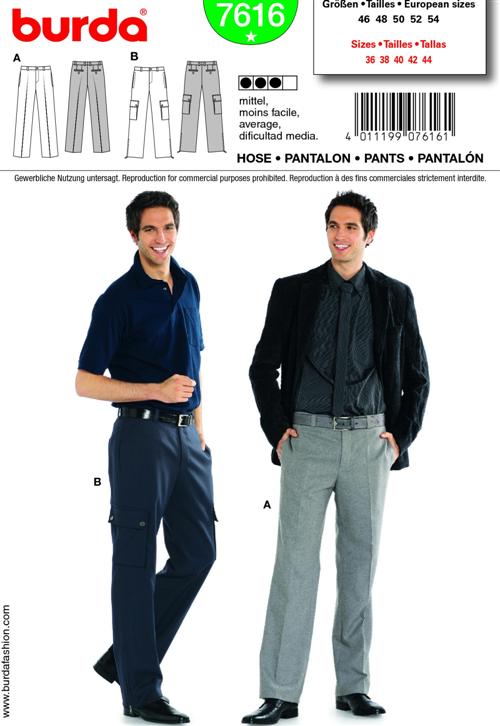
For the pants:
Burda 7616
For this all I really changed was the waistline area, I modified to top of the pants to hit higher on the waist, and I eliminated the belt, and belt loops, I also added the V shape in the back to accommodate the suspender straps. (BTW, I went with a zipper fly on my pants)
For the shirt:
Kwik-Sew 2777:
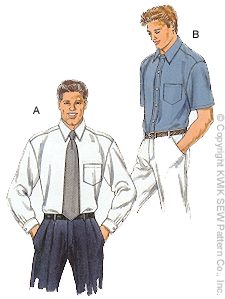
This is a very good, basic shirt pattern.
Needed no modification
All this to say:
Trust the pre-made patterns. I HIGHLY recommend, also... that if you haven't sewn before you start with something very basic and learn how to modify the little things in patterns first. The Burda overcoat is a 4 star pattern, which means that for a garment that has SO MUCH going into it, the pattern directions actually tell you very little about how to do it. You really want to know your terminology and basic garment structure in order to complete it properly.
IE: If you can sew from the pattern, you should be confident enough to make the modifications you want as well. Not vice versa
Well... the patterns for this I have been using existing ones and modifying them to suit my needs.
for instance the vest:
This one I modified by making both the front and back panels in four pieces over-all. I modified the patterns by splitting it where the seam should be and adding the seam allowances. I also added the green strip around the nape of the neck, and changed the pocket style and positioning.
Vogue 7488
The overcoat:
Burda 8275
The over-coat I haven't even finished yet... but so far I've modded this pattern quite a bit, like the collar stand and the lapels. allowing for the addition of the 4 panels instead of two, and altering the position of the pockets to be correct with my shorter frame.
For the pants:
Burda 7616
For this all I really changed was the waistline area, I modified to top of the pants to hit higher on the waist, and I eliminated the belt, and belt loops, I also added the V shape in the back to accommodate the suspender straps. (BTW, I went with a zipper fly on my pants)
For the shirt:
Kwik-Sew 2777:
This is a very good, basic shirt pattern.
Needed no modification
All this to say:
Trust the pre-made patterns. I HIGHLY recommend, also... that if you haven't sewn before you start with something very basic and learn how to modify the little things in patterns first. The Burda overcoat is a 4 star pattern, which means that for a garment that has SO MUCH going into it, the pattern directions actually tell you very little about how to do it. You really want to know your terminology and basic garment structure in order to complete it properly.
IE: If you can sew from the pattern, you should be confident enough to make the modifications you want as well. Not vice versa
Last edited:

SithsPadawan
Sr Member
Re: My joker progress thread. Coat In progress pg3
I HATE THAT GUY!!!
his costume stuff sucks
every thing he makes looks like half-assed s.h.i.t
and he sells it all for way to much money
he says that that costume is SA
i want to find him and kick him in the face for being an insult to the cosplay world
you know he bought an ACME brand product and about a week later started selling one of his own, clamming that ACMES was not SA and he made his own
when its obvious he made a mold from ACMEs to make and sell his own
Jack of All Trades
Active Member
Re: My joker progress thread. Coat In progress pg3
Oh don't even get me started on that guy!!!! I loathe that guy!!!!
Oh don't even get me started on that guy!!!! I loathe that guy!!!!
SithsPadawan
Sr Member
Re: My joker progress thread. Coat In progress pg3
did he do something to you
or does is crap just p.i.s.s you off as well?
did he do something to you
or does is crap just p.i.s.s you off as well?
Rebabaluba
Active Member
Re: My joker progress thread. Coat In progress pg3
I cringe every time I see those pics...
I cringe every time I see those pics...
Phizzle127
Active Member
Re: My joker progress thread. Coat In progress pg3
I remember searching ebay stuff and seeing that pic everywhere... /vomit.
I remember searching ebay stuff and seeing that pic everywhere... /vomit.
Jack of All Trades
Active Member
Re: My joker progress thread. Coat In progress pg3
He didn't do anything to me in particular. It just pisses me off when people are so presumptuous as to charge top dollar for pure crap! :confused How can somebody look at that and think, "yeah...this ensemble is worth $1,000". I mean, I understand that people have different talents and such, but don't pass off your crap as gold. It's just annoying. What's worse is when they bold faced LIE on eBay. Passing off pictures of products that aren't even theirs.
He didn't do anything to me in particular. It just pisses me off when people are so presumptuous as to charge top dollar for pure crap! :confused How can somebody look at that and think, "yeah...this ensemble is worth $1,000". I mean, I understand that people have different talents and such, but don't pass off your crap as gold. It's just annoying. What's worse is when they bold faced LIE on eBay. Passing off pictures of products that aren't even theirs.
spidey4fun
Well-Known Member
Re: My joker progress thread. Coat In progress pg3
Can you tell me anymore about how you pinstriped the fabric for the pants?
Can you tell me anymore about how you pinstriped the fabric for the pants?
Re: My joker progress thread. Coat In progress pg3
Hey Brad: Sorry I forgot to message you back on the BOTB!
The fabric for the pants:
I started with a 'medieval blue' linen. Basically it's Navy blue with a slight amount more of purple.
I got 3 yards of that.
Then I machine dyed it using iDye VIOLET

With fabric dying, color mixing rules apply and you can almost treat it like adding a transparency. I wanted a blueish purple color so that's why I chose a blue fabric and then died it purple. In different lighting and camera settings it appears different.
I like the way it turned out, but in retrospect I think I would have chosen a lighter color blue. Maybe ROYAL.... because the pants are generally rather dark.
I will keep them though since I am happy with the way they turned out (especially considering I spent 8 hours doing the pinstriping).
So that's how I got the color.
For the pinstriping, I left the fabric IN TACT, all 3 yards.
Then I got a white, heavy weight polyester thread. This thread can be described as "extra strength", "topstitching", or "upholstery".
I used Gutermann EXTRA: upholstery thread.
Going down the ENTIRE length of the fabric, I simply used my pressure foot as a guide for straight lines. As long as it was on the edge of the line next to it, it was straight.
Play with the stitch length and thread tension settings on your sewing machine to get to a look that you think appears appropriate for the pinstriping.

As you can see.... up close this process ISN'T perfect.
However, it does provide much better, more professional looking results than dying a previously pinstriped fabric (which washes out the pinstripes), or trying... tackily, to paint them on.

My recommendations for others: Use a lighter fabric as the base for dying. Like a royal blue... it'll help the violet dye stand out.
The thread I chose was pretty thick,... A thinner one might have been more appropriate to get 'closer' to movie accuracy, however whatever you choose needs to be VERY strong. Breaking your thread half-way down a pinstripe sucks.
Be prepared to spend several nights at your sewing machine if you're doing this. It took me 9 hours and I stopped pinstriping about 3/4 of the way through my fabric because I only pinstriped what I needed for my pattern-size. Brad, I know you're taller... so your pinstriping might go for more like .... 10-12 hrs lol.
Also... I wound up using 7-8 spools of thread... probably would've needed 10 if I had finished all three of the yards all the way across.d
Hey Brad: Sorry I forgot to message you back on the BOTB!
The fabric for the pants:
I started with a 'medieval blue' linen. Basically it's Navy blue with a slight amount more of purple.
I got 3 yards of that.
Then I machine dyed it using iDye VIOLET
With fabric dying, color mixing rules apply and you can almost treat it like adding a transparency. I wanted a blueish purple color so that's why I chose a blue fabric and then died it purple. In different lighting and camera settings it appears different.
I like the way it turned out, but in retrospect I think I would have chosen a lighter color blue. Maybe ROYAL.... because the pants are generally rather dark.
I will keep them though since I am happy with the way they turned out (especially considering I spent 8 hours doing the pinstriping).
So that's how I got the color.
For the pinstriping, I left the fabric IN TACT, all 3 yards.
Then I got a white, heavy weight polyester thread. This thread can be described as "extra strength", "topstitching", or "upholstery".
I used Gutermann EXTRA: upholstery thread.
Going down the ENTIRE length of the fabric, I simply used my pressure foot as a guide for straight lines. As long as it was on the edge of the line next to it, it was straight.
Play with the stitch length and thread tension settings on your sewing machine to get to a look that you think appears appropriate for the pinstriping.
As you can see.... up close this process ISN'T perfect.
However, it does provide much better, more professional looking results than dying a previously pinstriped fabric (which washes out the pinstripes), or trying... tackily, to paint them on.
My recommendations for others: Use a lighter fabric as the base for dying. Like a royal blue... it'll help the violet dye stand out.
The thread I chose was pretty thick,... A thinner one might have been more appropriate to get 'closer' to movie accuracy, however whatever you choose needs to be VERY strong. Breaking your thread half-way down a pinstripe sucks.
Be prepared to spend several nights at your sewing machine if you're doing this. It took me 9 hours and I stopped pinstriping about 3/4 of the way through my fabric because I only pinstriped what I needed for my pattern-size. Brad, I know you're taller... so your pinstriping might go for more like .... 10-12 hrs lol.
Also... I wound up using 7-8 spools of thread... probably would've needed 10 if I had finished all three of the yards all the way across.d
Last edited:
Similar threads
- Replies
- 4
- Views
- 3,062
- Replies
- 4
- Views
- 3,769
- Replies
- 9
- Views
- 3,445
- Replies
- 0
- Views
- 3,306
- Replies
- 14
- Views
- 4,963