Danlex9

Well-Known Member
Currently making a mark 41 bones cosplay suit from a hand drawn sketch and a pepakura file for the helmet. I mostly post pics and details of my builds on Instagram but I have finally decided to start contributing to the rpf.
This suit is being made from 2mm and 6mm craft foam, 3D printed parts(some raw and some molded and casted), as well as parts from kit bashing. The only pep file I'm using so far is for the helmet, but I may use other files from previous suits to speed up the building process as long as they work well for the design of this suit.
This is my 3rd iron man suit to date and the 1st one I'm making from scratch.
Hope you folks enjoy my in progress pictures.
Cheers
 
To start off I taped a few sheets of drawing paper together (banner paper would have been better) and outlined my body. Then found the vertical center of my body and made a horizontal center for the arc reactor from tips the armpits.
I then printed out a nice res photo of the hot toys figure in a front facing pose.
Knowing the diameter of the arc reactor I would use on my suit (76mm I think) I then measured the one in the image and divided the two numbers. This gave me the scale from image (think it was 7.09).
Now every part of the suit in the image that I measured I could multiply it by that number and it would give me the life size dimension. This was double checked by measuring the overall height of the suit in the image scaling it by 7.09 and getting 5'11"( my height).
This method works great for front facing parts, however wrap around parts are a different story but this helped me get there. See image below.

fullsizeoutput_3b1.jpeg
 
Last edited:
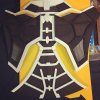
As you can see in the images provided I'm using the 2mm foam as the base suit and using the 6mm as the frame work that is through out the suit to give it all depth. For the upper chest I choose to use the pepakura file from the mk42/43, this was done help form the chest rather than build it from a flat piece and remove and reshape. For the most part anything black will remain black and anything white will be painted with a chocolate bronze color I found and fell in love with for this project. There is also a metallic blue for various parts in this suit that I have a great paint picked out for.

fullsizeoutput_3a7.jpegfullsizeoutput_3a8.jpeg
 
Last edited:
Quick update, finishing up the waist band/butt/lower back section in the next day or two. Should have a wearable "tape test" at that point. Until then here is a visual test of the wire mesh I got for all the grill sections. I'm still thinking I'll coat all the mesh with plastidip to thicken and maybe round off all the holes and then repaint silver.
IMG_7327.JPG
 
Quick update, finishing up the waist band/butt/lower back section in the next day or two. Should have a wearable "tape test" at that point. Until then here is a visual test of the wire mesh I got for all the grill sections. I'm still thinking I'll coat all the mesh with plastidip to thicken and maybe round off all the holes and then repaint silver.
View attachment 712170
cool

Sent from my SM-J7108 using Tapatalk
 
what about the lights

Sent from my SM-J7108 using Tapatalk

There are only lights in the hands chest and eyes on this suit. Using neopixel rings for chest and hands and led strip lights from pepboys auto parts for the eyes. But won't be installing any of them until suit is done and painted.
 
Last edited:
There are only lights in the hands chest and eyes on this suit. Using neopixel rings for chest and hands and led strip lights from pepboys auto parts for the eyes. But won't be installing any of them until suit is done and painted.
how did you size your own body?

Sent from my SM-J7108 using Tapatalk
 
Do to a recent crazy snow storm I still have yet to receive the 12" figure of the mark 41 I ordered. Unfortunately the reference pics out there don't quite give me what I need in order to make the rest of the suit. So, here is the progress so far. Hopefully this figure gets here soon so I can get back to work.
IMG_7375.JPG
 
Last edited:
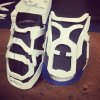
Built the forearms(I'll include a photo) and started the shins. Using a pepakura file, dancin fools iron man mk3, for the shins to make life easier. The mk3s shins seem the simplest in terms of pieces and so far has been easy to modify for the mk41. Also started adding various panel pieces and little bits around the suit. Everything's coming together nicely.
IMG_7390.JPG
 
Update to this project:
I am moving along with the shins nicely, they have a lot of parts so they are taking a bit of time but I will finish them soon.
While working on those I have been 3D printing and casting many of the bits and pieces that make up the interior parts.
I even put together a very ugly sorting box for all those parts(pictured). Last count was just over 250 pieces with model kit bashing still to come. More pics and video(I hope) coming soon.
IMG_7427.JPG
 
Last edited:
This thread is more than 6 years old.

Your message may be considered spam for the following reasons:

  1. This thread hasn't been active in some time. A new post in this thread might not contribute constructively to this discussion after so long.
If you wish to reply despite these issues, check the box below before replying.
Be aware that malicious compliance may result in more severe penalties.
Back
Top