Hello fellow RPFers,
Well thanks to the inspirational builds of fellow members like Volpin, Sorenzo, Thermistor, Firewire and my fascination with Daft Punk and Robots in general, i've decided to finally take the plunge and start my own Guy-Manuel build (and first build). I actually started this a few weeks ago but decided to hold off on starting a thread because i wanted to get past the ''boring'' early stages and wait until i had some progress and pics to share and it looks like i'm finally at the stage of building up outer detailing.
There won't be many surprises in my build to Guy-Man aficionados, i will be using the Volpin Method.Now to the uninitiated ''The Volpin Method'' might sound like some kind of bizarre scandanavian contraception process but to those of us here at the RPF it's known as just a flat out fantastic way to build a helmet. So without further ado....
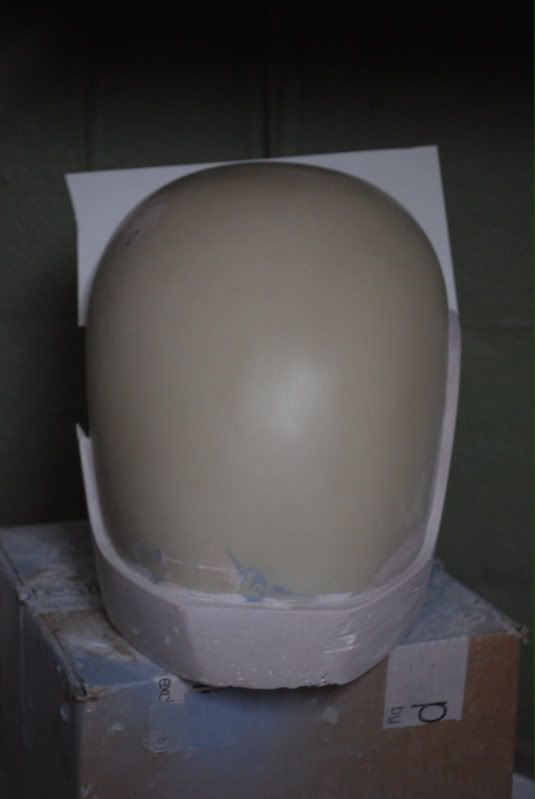
Stage 1
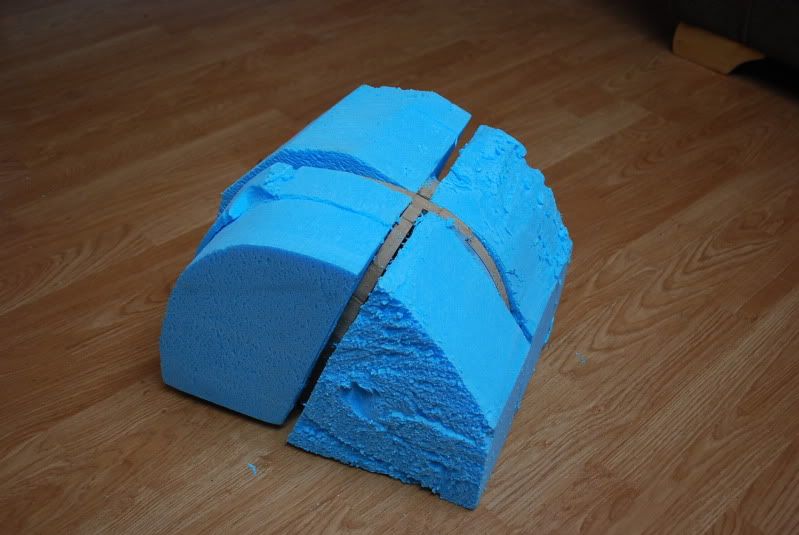
Stage 2
i used unfortunately expensive craft foam here and an orbital sander to get the shape i required, it worked out well and gave me the confidence to proceed with nice little smug grin on my face.
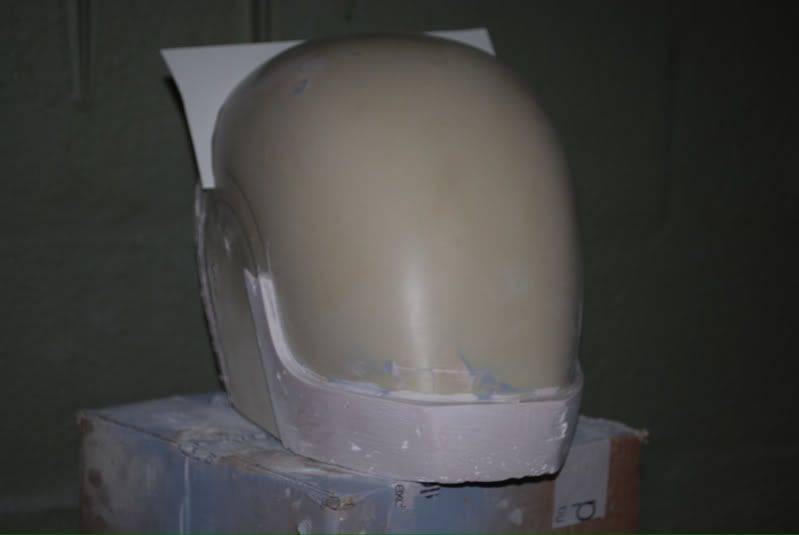
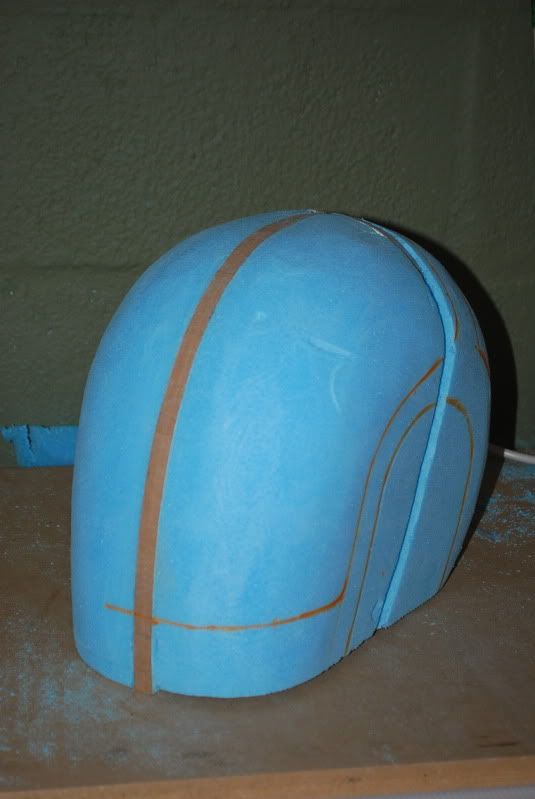
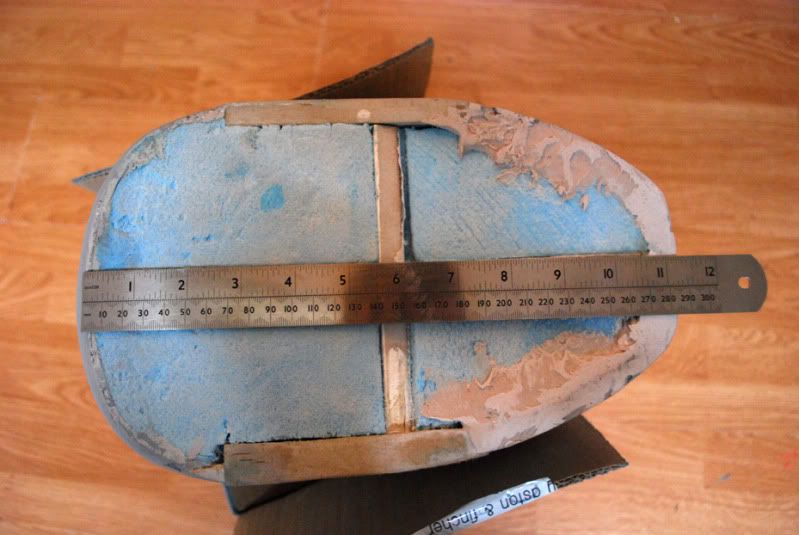
Stage 3
Ear placement holders in and covered in PVA
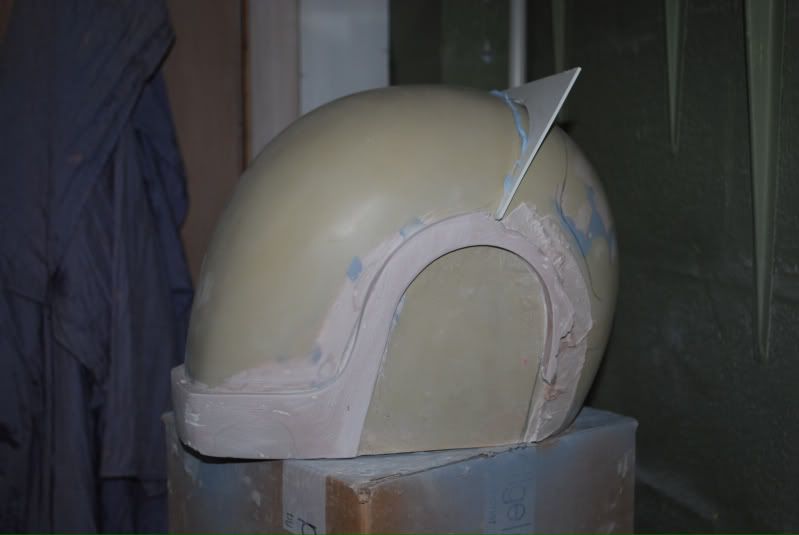
Stage 4
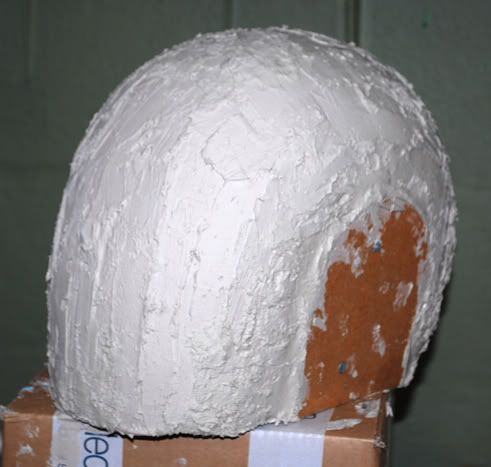
Bondo (or P38 here in the uk) applied and first of many rounds of sanding, starting with 40 grit and working up to about 120grit
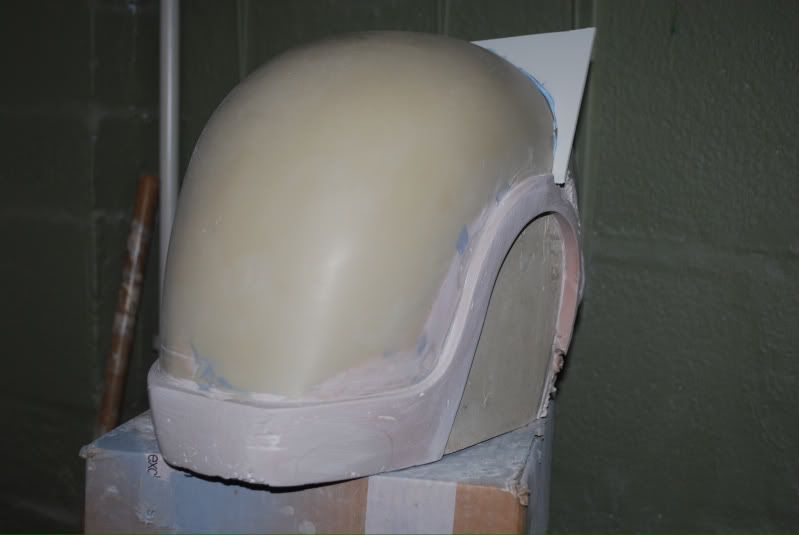
Stage 5
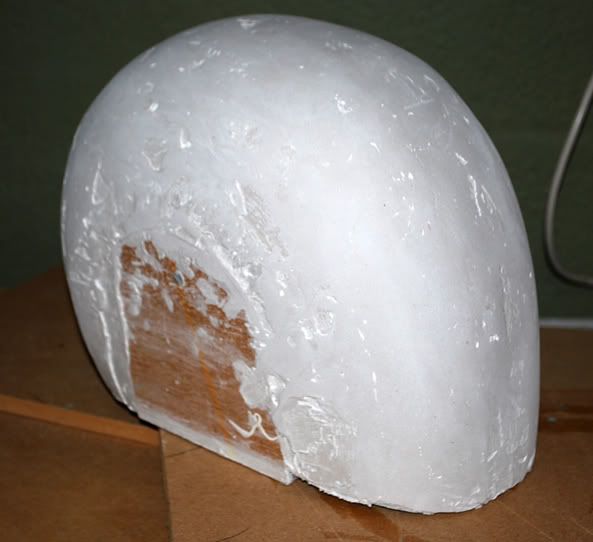
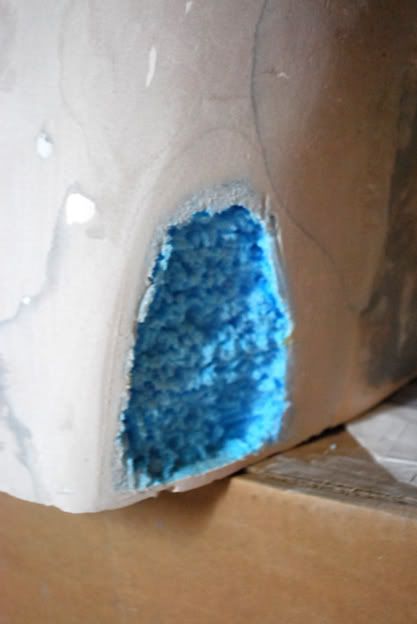
More sanding, this was the point where i became OBSESSED with the chin section and as you can see i kept sanding too far and back to the foam. Still not a happy bunny.
Stage 6
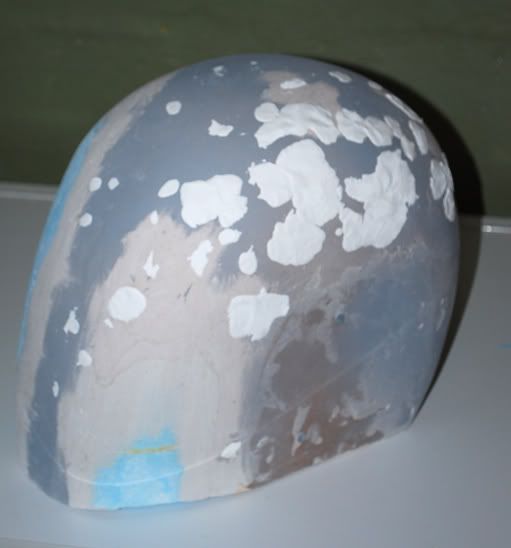
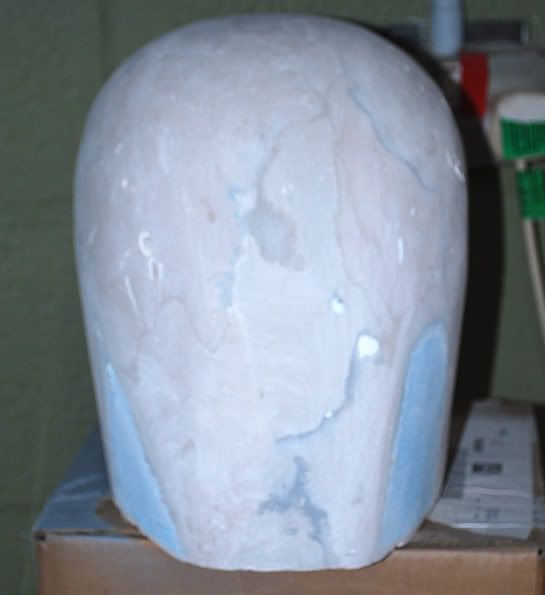
Still going back to the foam every damn time, frustrating to say the least. Sometimes it looked fantastic, other times i hated the way it looked. I did a coat of primer to see if i could get a better look at what was going on. What my problem might have been at this point was knowing when to put the orbital sander down and work by hand. Many good members at the RPF have promoted the virtues of the orbital sander in builds like these and rightly so, my new B&D sander will go through P38 without batting the proverbial eyelid but i now think that if i'd stopped using it a little earlier i might have stopped going through to the foam quite so much. Hey that's how you learn right?
Also the white filler is white extra fine Milliput in an attempt to fill some smaller holes. Now i believe Volpin did mention in his build what a nightmare it was trying to sand two different densities of filler. I can absolutely concur with this statement. For those very small and frustrating holes i found that a very very light skim of P38 worked way better than the milliput.
Stage 7
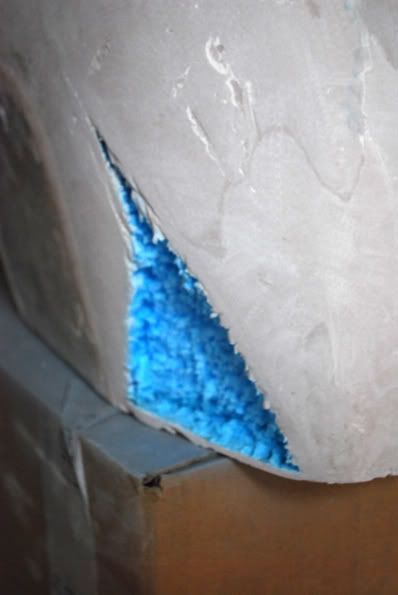
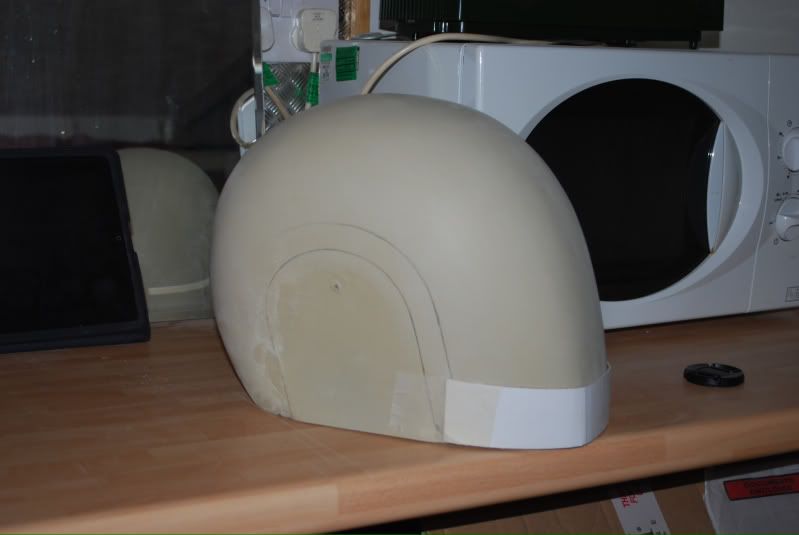
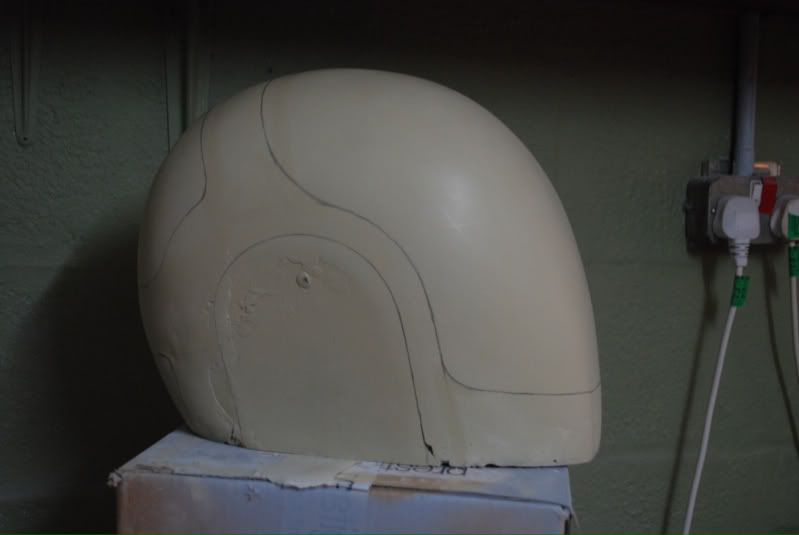
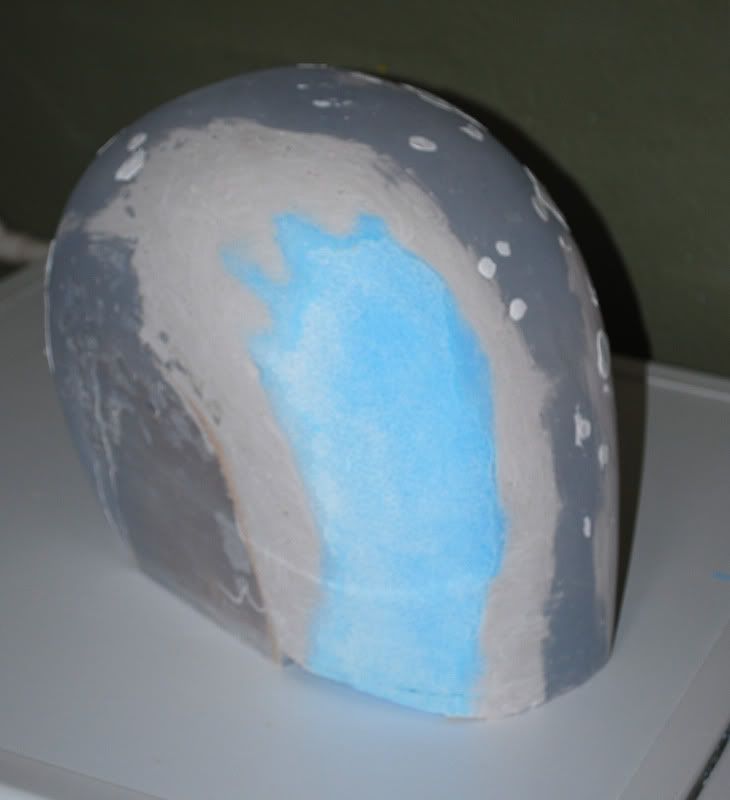
Gouge out those cheek areas that i keep sanding back too and then fill with P38.
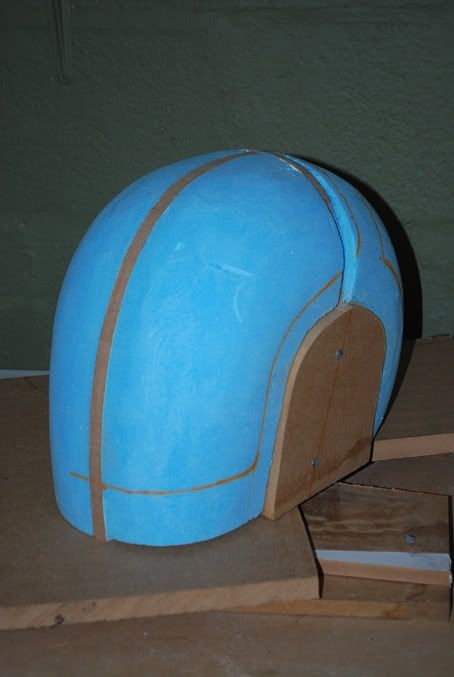
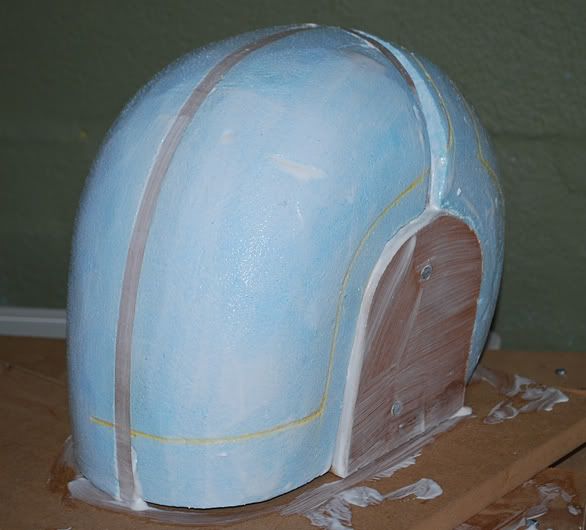
Stage 8
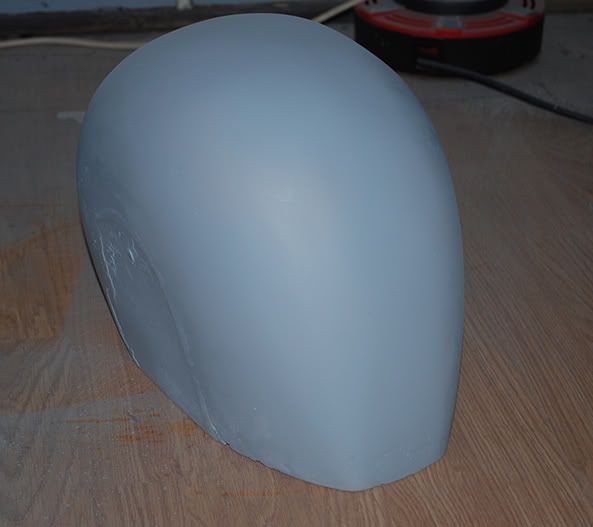
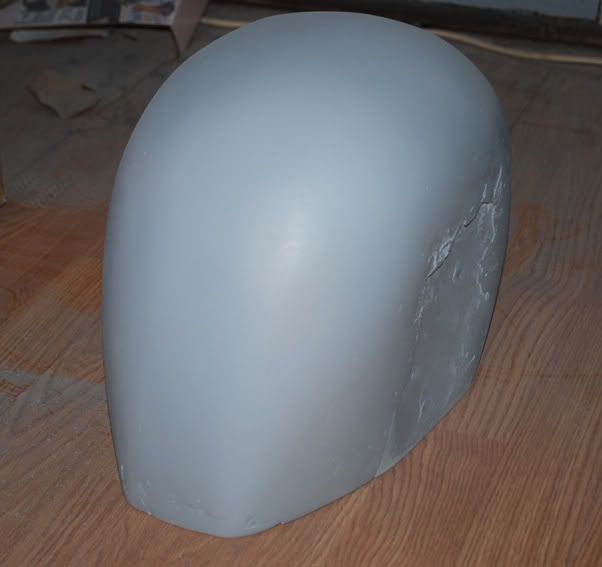
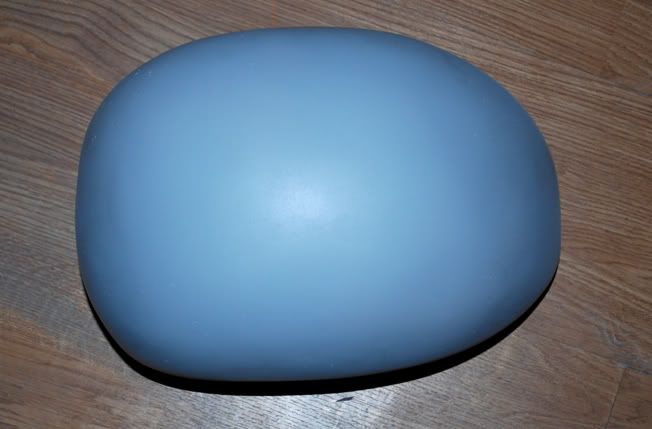
Now we're getting somewhere or at least thats how it feels, pretty happy with the shape in general, few more coats of primer after filling a few more little holes and the sanding has gone from 240grit upto 1000grit i think. I also tried a little ''wet sanding'' just to be sure that ''wet sanding'' was what i thought it was ,sanding with water !!duh!!.......and it was, i now see how that super glossy finished look just prior to moulding is achieved, it's super cool to see my build do what it's supposed to.
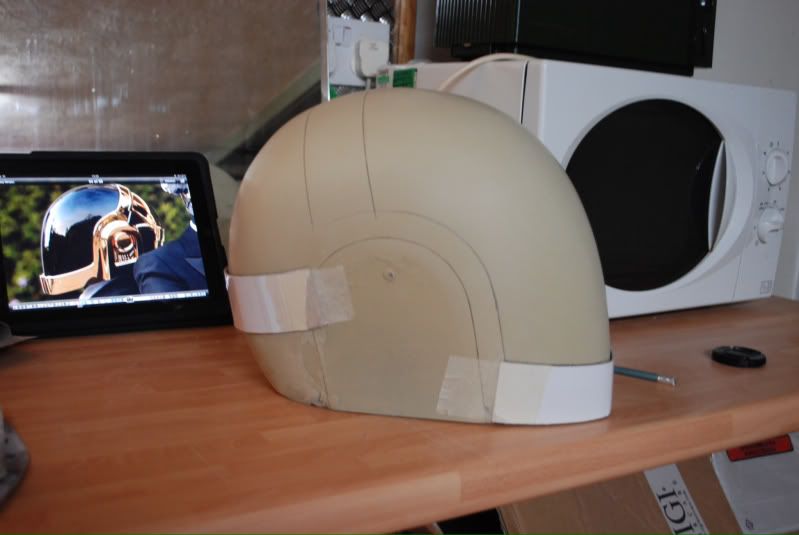
Stage 9
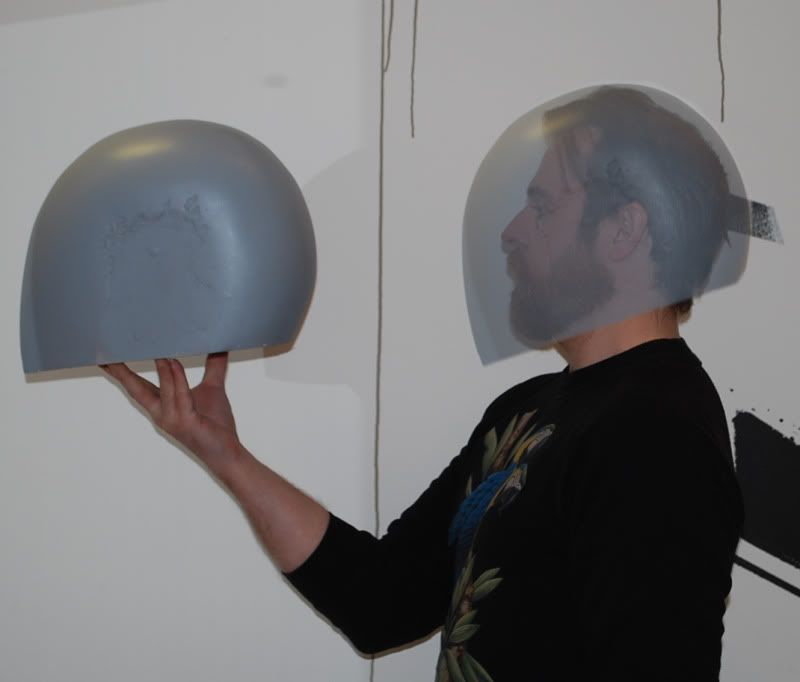
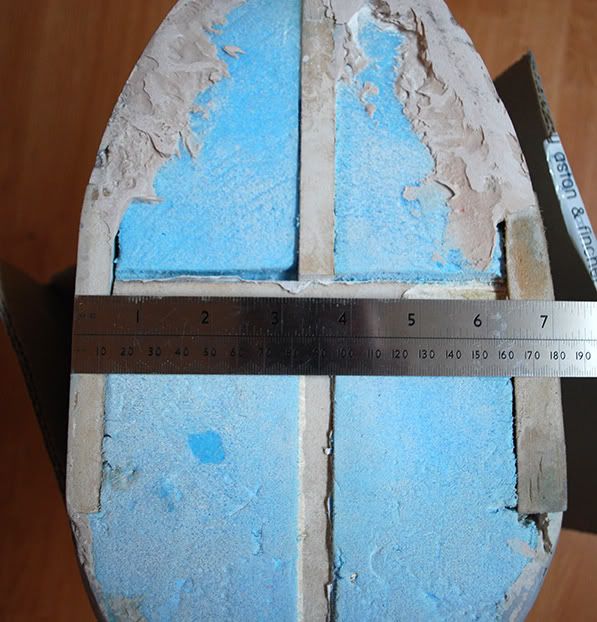
I took some pics of the size of my bucket so far, I'm only 5'8'' and 160lbs so i was worried about the bucket being too big for me. I did a test shot and photoshopped it onto my head for a rough guide and it looks good for me. Since this will be the TRON red carpet bucket i wanted it to be reasonably snug. The behind the scenes pics of DP on set certainly have Guy-Mans head looking like it's filling the bucket nicely or at least his face looks pretty close to the visor to me. Note too that i got one side of my ear templates wet during the wet sanding and it's swollen up a fair bit, i'll either replace it or sand it away, not sure which yet..
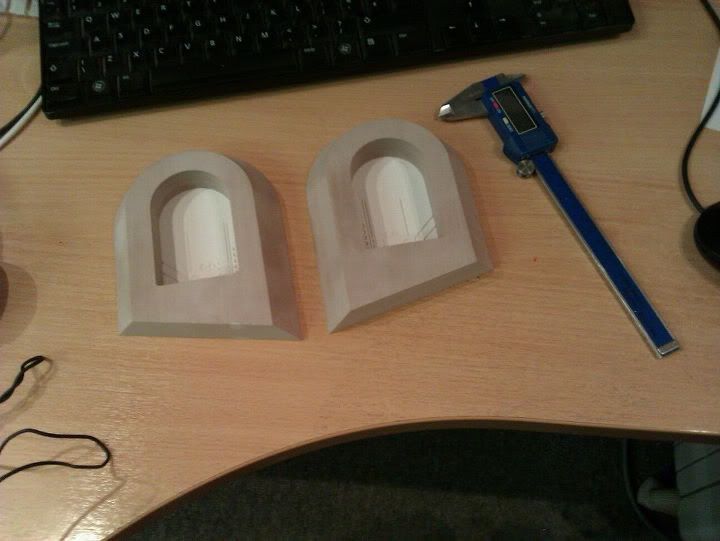
Well thats it so far, i have a carpenter friend knocking me up some ear templates so that i can build up the outer details.
I wrote this in one go so if i've missed anything then please feel free to ask anything you like, also all comments,critiques and help is more than welcome at this point..
Well thanks to the inspirational builds of fellow members like Volpin, Sorenzo, Thermistor, Firewire and my fascination with Daft Punk and Robots in general, i've decided to finally take the plunge and start my own Guy-Manuel build (and first build). I actually started this a few weeks ago but decided to hold off on starting a thread because i wanted to get past the ''boring'' early stages and wait until i had some progress and pics to share and it looks like i'm finally at the stage of building up outer detailing.
There won't be many surprises in my build to Guy-Man aficionados, i will be using the Volpin Method.Now to the uninitiated ''The Volpin Method'' might sound like some kind of bizarre scandanavian contraception process but to those of us here at the RPF it's known as just a flat out fantastic way to build a helmet. So without further ado....
Stage 1
Stage 2
i used unfortunately expensive craft foam here and an orbital sander to get the shape i required, it worked out well and gave me the confidence to proceed with nice little smug grin on my face.
Stage 3
Ear placement holders in and covered in PVA
Stage 4
Bondo (or P38 here in the uk) applied and first of many rounds of sanding, starting with 40 grit and working up to about 120grit
Stage 5
More sanding, this was the point where i became OBSESSED with the chin section and as you can see i kept sanding too far and back to the foam. Still not a happy bunny.
Stage 6
Still going back to the foam every damn time, frustrating to say the least. Sometimes it looked fantastic, other times i hated the way it looked. I did a coat of primer to see if i could get a better look at what was going on. What my problem might have been at this point was knowing when to put the orbital sander down and work by hand. Many good members at the RPF have promoted the virtues of the orbital sander in builds like these and rightly so, my new B&D sander will go through P38 without batting the proverbial eyelid but i now think that if i'd stopped using it a little earlier i might have stopped going through to the foam quite so much. Hey that's how you learn right?
Also the white filler is white extra fine Milliput in an attempt to fill some smaller holes. Now i believe Volpin did mention in his build what a nightmare it was trying to sand two different densities of filler. I can absolutely concur with this statement. For those very small and frustrating holes i found that a very very light skim of P38 worked way better than the milliput.
Stage 7
Gouge out those cheek areas that i keep sanding back too and then fill with P38.
Stage 8
Now we're getting somewhere or at least thats how it feels, pretty happy with the shape in general, few more coats of primer after filling a few more little holes and the sanding has gone from 240grit upto 1000grit i think. I also tried a little ''wet sanding'' just to be sure that ''wet sanding'' was what i thought it was ,sanding with water !!duh!!.......and it was, i now see how that super glossy finished look just prior to moulding is achieved, it's super cool to see my build do what it's supposed to.
Stage 9
I took some pics of the size of my bucket so far, I'm only 5'8'' and 160lbs so i was worried about the bucket being too big for me. I did a test shot and photoshopped it onto my head for a rough guide and it looks good for me. Since this will be the TRON red carpet bucket i wanted it to be reasonably snug. The behind the scenes pics of DP on set certainly have Guy-Mans head looking like it's filling the bucket nicely or at least his face looks pretty close to the visor to me. Note too that i got one side of my ear templates wet during the wet sanding and it's swollen up a fair bit, i'll either replace it or sand it away, not sure which yet..
Well thats it so far, i have a carpenter friend knocking me up some ear templates so that i can build up the outer details.
I wrote this in one go so if i've missed anything then please feel free to ask anything you like, also all comments,critiques and help is more than welcome at this point..