My Adventures in 3D Printing

Spent a good day tweaking various settings. My biggest problem was getting the prints to stay adhered to the print bed. Increasing the nozzle and bed temps seems to have done the trick.

Two-for-two with the test files that were sliced with Cura!
DD6598B3-B5AA-45EE-89E8-FD9A0FFDEBDC.jpeg


I also printed a calibration cube. Good news is my prints seem pretty dead on to the target dimensions!
D504D3A1-1629-4447-9561-8B9201430107.jpeg


Next up - going to try a large print!

Sean
 
After some success with the owl test file, I decided to jump right into the deep end of the pool with a Mando helmet scaled to 85%. This was my first time using the support feature in Cura. Estimated print time was just over 2 days. Unfortunately, the two main support structures both popped off the build plate after ~18 hours.

Center support structure (which was looking nice until it popped off…)
266AFAF2-0565-414F-9DF9-72FBBFB42E17.jpeg


In general, the helmet was looking ok. Some artifacts, which I’m not sure are expected for an FDM print, are visible.
5A9D5407-AB6F-4AA5-97E3-898401B1CE11.jpeg


Been reading a lot on a Vyper FB group, and someone suggested using the reverse side of the build plate, which is a smooth finish. Going to try another, 50% scaled helmet on that side using the tree support function…

Sean
 
I use a 12" mirror that can be purchased from some hardware stores such as Home Depot, and a cheap hairspray for the surface adhesion. The great thing about this technique on my CR-10S is that it very difficult to remove the part when the bed is warm, but after the bed cools, it's very easy to pop of the part.
Score the mirror to trim. Use some PTFE lubricant on the Z-axis screws, just in case they are dry.

TazMan2000
 
After some success with the owl test file, I decided to jump right into the deep end of the pool with a Mando helmet scaled to 85%. This was my first time using the support feature in Cura. Estimated print time was just over 2 days. Unfortunately, the two main support structures both popped off the build plate after ~18 hours.

Center support structure (which was looking nice until it popped off…)
View attachment 1486019

In general, the helmet was looking ok. Some artifacts, which I’m not sure are expected for an FDM print, are visible.
View attachment 1486020

Been reading a lot on a Vyper FB group, and someone suggested using the reverse side of the build plate, which is a smooth finish. Going to try another, 50% scaled helmet on that side using the tree support function…

Sean

Try cutting the model into at least two pieces. One for the crown and the rest, print upside down. This will dramatically reduce the amount of support needed and significantly reduce print times. Use Meshmixer to cut along a seam that can be easily sanded. Plus, if there is a problem on hour 47 of a 48 hour print, you have to do it all over again. With the sliced method, you only have to print whichever part that fails. (Hopefully nothing).

TazMan2000
 
You should read and understand what every feature of Cura does and you will get way better prints. Watch some youtube videos, read some tutorials and you will improve everything a lot, but I really mean it, A LOT. And it will also save you time on printing failures and reprints. I will show here my "standard" configuration when I get back home in a few days.
 
You should read and understand what every feature of Cura does and you will get way better prints. Watch some youtube videos, read some tutorials and you will improve everything a lot, but I really mean it, A LOT. And it will also save you time on printing failures and reprints. I will show here my "standard" configuration when I get back home in a few days.
Thanks! I’ve been making my way through Cura. Also slowly getting through Teching Tech’s printer calibration - https://teachingtechyt.github.io/ca...erC9pNnqM4WZkxzapdVRIzaOEYq187acu3F8e9ugBSnRI

The 50% helmet did finish!
97BF9CB2-DC8B-4B37-9CD5-F70ED26160CF.jpeg


A few printing artifacts I need to investigate like this rough spot…
56FFDD0D-2295-49B9-9524-B5697F156B69.jpeg


The tree supports are a work of art in themselves! This is the chunk that was supporting the dome of the helmet.
4358CE0F-19F2-4089-933A-5F1D986C93B7.jpeg


Going to try printing the Benchy boat - #3DBenchy - The jolly 3D printing torture-test by CreativeTools.se by CreativeTools

Also found a cool mythosaur skull I might try just because. “This is where the fun begins.”

Sean
 
Benchies were a success! Going to use it to further dial in the printer.
FD4CCDE3-2100-42A5-9A2A-A846D015B9F1.jpeg


Mythosaur also finished. Really impressed with how nicely this print came out!
D44C08E0-AFE9-499E-AFC3-677830E94E34.jpeg


Going to print a drip hanger and cover handles for my Mono X resin printer. Then going to start messing around with some other filaments.

The Vyper does PLA, ABS, TPU, PETG, and wood, so curious to see how they all compare.

Sean
 
Feeling fairly confident with PLA, I decided to give ABS a try. Seems ABS prints much hotter than PLA. Took a bit to even get filament to stick to the bed, but finally managed to sneak out another Benchy. Some tweaking needed for sure, but a decent print!

DA10C081-70DE-4E0E-ACD9-C98AA49CD115.jpeg


Going to try some Mando hand plates next!

Sean
 
Good luck!
ABS is the prima donna of filaments. You're usually better off using PETG, since it also sands better than PLA, but doesn't need to be catered to (printer chamber to provide a steady environment temperature and all the other crap).
 
Many don't have that luck with ABS, even with small parts. Usually there is a split someplace. As Iskelderon mentioned, ABS likes a chamber where the temperature is consistent so there is less stress between layers because of temp differences. Hopefully you vented the room while printings as ABS does produce some harmful fumes.

TazMan2000
 
A few printing artifacts I need to investigate like this rough spot…
Hey Sean-- looking at your calibration cube and the print, I see a few areas that I think I can help you hone in on--

1. The cube has "ghosting" on it--the you can see the X is patterned through the side of the cube. That is related to belt tightness, printing speed, acceleration, and jerk.

2. Your vertical corners of the cube are bulged out and create more prominent seams. You can see this on the benchies too-- at the corners of the cabin. Tuning your flow rate should help with this-- print a flow rate cube to test wall thickness accuracy, and explore the settings related to the ending of lines-- cant remember the name of it for the life of me-- might be "enable Coasting" in cura

3. looking at the bottom of the owl prints and the bottom of your cube, along with the other post where you have a pile of prints that came unstuck, it seems your bed leveling is off-- or at least too high. I've always had great success getting the level as close as possible, then micro stepping the z-offset down through the printers tuning menu. Not sure to what extent the Aquila supports that-- I think it is running a modified Marlin firmware so it should through the printing tuning menu.

4. The rough patch on the helmet looks to be under extrusion-- you can see this in the support structure as well it looks like. Calibrate your e-steps and this should help. I know on my printer, the ender 3 v2, the extruder uses a plastic extruder arm that always has to be replaced because it cracks. If the Aquila has a plastic arm, highly recommend replacing it-- its about $5 on amazon.

5. Lots of stringing on your helmet-- tune your retraction rate with a retraction tower test and you should be able to find the sweet spot. I print at 5.5mm retraction, but every printer is different depending on the exact length of the Bowden tube.

If you end up flipping to the smooth side of the bed, I like to use a light layer of purple glue stick on my glass bed. It gives you some grace with leveling, and you can print smaller details on the bed easier-- don't think I've ever had a build come undone using it. If you are having trouble getting the prints off after, just pop the plate in the freezer for a few minutes to let the glass contract a bit and the print should pop right off.

Lastly, when printing helmets, most people can print them with no support on the inside and not have any trouble. The inside will have strings, but the top will look perfect. Should cut off a ton of time and save you a bunch of filament. You can also flip it upside down and support it on the top of the dome, but that will require a lot of sanding and filling.

Good luck! If you run through teaching tech's calibration files that should address most/all of those issues, but hopefully this helps you get at the specific problems more quickly!
 
Good luck!
ABS is the prima donna of filaments. You're usually better off using PETG, since it also sands better than PLA, but doesn't need to be catered to (printer chamber to provide a steady environment temperature and all the other crap).
Thanks, that's good to know! I have some PETG I'm going to be trying soon along with TPU. I don't currently have specific uses for all the different filaments, but I'd like to take advantage of what the printer has to offer.
Hey Sean-- looking at your calibration cube and the print, I see a few areas that I think I can help you hone in on--

1. The cube has "ghosting" on it--the you can see the X is patterned through the side of the cube. That is related to belt tightness, printing speed, acceleration, and jerk.

2. Your vertical corners of the cube are bulged out and create more prominent seams. You can see this on the benchies too-- at the corners of the cabin. Tuning your flow rate should help with this-- print a flow rate cube to test wall thickness accuracy, and explore the settings related to the ending of lines-- cant remember the name of it for the life of me-- might be "enable Coasting" in cura

3. looking at the bottom of the owl prints and the bottom of your cube, along with the other post where you have a pile of prints that came unstuck, it seems your bed leveling is off-- or at least too high. I've always had great success getting the level as close as possible, then micro stepping the z-offset down through the printers tuning menu. Not sure to what extent the Aquila supports that-- I think it is running a modified Marlin firmware so it should through the printing tuning menu.

4. The rough patch on the helmet looks to be under extrusion-- you can see this in the support structure as well it looks like. Calibrate your e-steps and this should help. I know on my printer, the ender 3 v2, the extruder uses a plastic extruder arm that always has to be replaced because it cracks. If the Aquila has a plastic arm, highly recommend replacing it-- its about $5 on amazon.

5. Lots of stringing on your helmet-- tune your retraction rate with a retraction tower test and you should be able to find the sweet spot. I print at 5.5mm retraction, but every printer is different depending on the exact length of the Bowden tube.

If you end up flipping to the smooth side of the bed, I like to use a light layer of purple glue stick on my glass bed. It gives you some grace with leveling, and you can print smaller details on the bed easier-- don't think I've ever had a build come undone using it. If you are having trouble getting the prints off after, just pop the plate in the freezer for a few minutes to let the glass contract a bit and the print should pop right off.

Lastly, when printing helmets, most people can print them with no support on the inside and not have any trouble. The inside will have strings, but the top will look perfect. Should cut off a ton of time and save you a bunch of filament. You can also flip it upside down and support it on the top of the dome, but that will require a lot of sanding and filling.

Good luck! If you run through teaching tech's calibration files that should address most/all of those issues, but hopefully this helps you get at the specific problems more quickly!
Wow! Thank you SO much for detailed feedback! As I'm still learning all of this, my eye is not yet trained to identify these types of issues, so I greatly appreciate you taking the time to post this. I will investigate more and continue to refine the printer settings.

Sean
 
Here are my default settings for an Ender E3. Everything I've printed was as good as I think you could ask for a 120€ 3D printer. If someone knows better, please, let me know so I can modify my settings.

name = E3 Conservative High Quality
definition = creality_base

[metadata]
type = quality_changes
quality_type = standard
setting_version = 16

[values]
adhesion_type = raft
layer_height = 0.12
layer_height_0 = 0.32
support_enable = True
support_structure = normal
support_type = buildplate

[general]
version = 4
name = E3 Conservative High Quality
definition = creality_base

[metadata]
type = quality_changes
quality_type = standard
intent_category = default
position = 0
setting_version = 16

[values]
coasting_enable = True
coasting_volume = 0.256
cool_fan_full_at_height = 1
infill_overlap = 5
infill_pattern = gyroid
infill_sparse_density = 15.0
line_width = 0.44
retract_at_layer_change = True
retraction_amount = 5.5
retraction_speed = 35
speed_equalize_flow_enabled = True
speed_layer_0 = 15
speed_wall = =speed_print / 2
support_angle = 50
support_infill_rate = 15.0
support_interface_density = 80
support_pattern = zigzag
support_tree_angle = 50
support_tree_branch_diameter = 3
support_tree_branch_distance = 0.5
support_z_distance = 0.2
top_bottom_pattern = zigzag
top_bottom_thickness = 0.92
wall_line_count = 2
wall_thickness = 0.88
z_seam_corner = z_seam_corner_inner
z_seam_type = shortest
z_seam_x = 300
z_seam_y = 0
 
Last edited:
Thanks, that's good to know! I have some PETG I'm going to be trying soon along with TPU. I don't currently have specific uses for all the different filaments, but I'd like to take advantage of what the printer has to offer.

Wow! Thank you SO much for detailed feedback! As I'm still learning all of this, my eye is not yet trained to identify these types of issues, so I greatly appreciate you taking the time to post this. I will investigate more and continue to refine the printer settings.

Sean
You're welcome! Good luck! Like I mentioned, if you're already running through teaching tech's calibration process that should get you to where you need to be.

If you plan to keep printing ABS, I would recommend replacing the stock white Bowden tube with "Capricorn" tubing. The white PTFE tube degrades faster with the heat necessary for ABS. Capricorn is much more resilient
 
So I think I mixed water washable resin with regular in my elegoo Saturn, that’s bad right?
I was lucky and able to pre-order the Elegoo Saturn last year. As part of the offer I received a bottle of Elegoo water-washable resin. I used it like their regular resin on a few small projects. When I started running out I just added their standard resin and had no problems with them mixed together.
 

Attachments

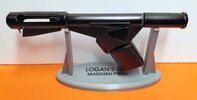
  • LR pistol on stand.jpg
    LR pistol on stand.jpg
    148.7 KB · Views: 76
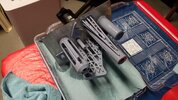
  • LR pistol.jpg
    LR pistol.jpg
    324 KB · Views: 82
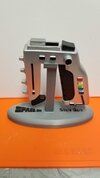
  • S-1999_stun_gun_on_stand.jpg
    S-1999_stun_gun_on_stand.jpg
    47.2 KB · Views: 82
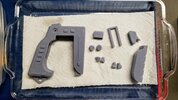
  • S-1999_stun_gun1.jpg
    S-1999_stun_gun1.jpg
    234.8 KB · Views: 78
Had various struggles trying to get the Mando hand plates to print, but finally found an orientation that worked…I think.
C344DA45-C6BD-466B-8295-320076FE2E88.jpeg


I also ordered an Octoprint kit, which I’ll need to do some of the more complicated calibrations described on Teaching Tech’s site.

Sean
 
Last edited:
Had various struggles trying to get the Mando hand plates to print, but finally found an orientation that worked…I think.
That's all you can ask for sometimes, haha. Given the geometry of this piece, this is probably the only way that makes sense, unless you want to wast a ton of filament on supports for similar results.

They look pretty good overall, and you've gotten to my own personal "good enough" state I like to be at where any imperfections can be fixed with 120 grit paper and a knife. Looks like you've dialed in a lot of settings since you posted the benchies. You can clean up the the zits in the faces a little by switching the "z-seam" in cura to "sharpest angle" and they should be hidden better that way, but theyll always be present to some extent. The stringing on the right piece should be fixed whenever you can do your retraction testing.

I also think your z-height could stand to be tuned down a step or two, but only for your sanity more than anything-- looks like you had some trouble with bed adhesion on that brim there! Nothing more frustrating with 3d printing than not getting stuff to stick, even when everything is perfect. When in doubt, I've just started to throw a raft on there, especially with thin pieces like these. Saves so much anger.

Great job! It'll be cool to see these when they're all finished up.

Enjoy octoprint. It has been such a lifesaver with some of its features.
Thanks! I am definitely in the "good enough" camp right now :) Getting semi-consistent prints has been a victory in itself, but I'm hoping to fine tune and optimize things with the Octoprint as I've seen some amazing things come off the Vyper!

Sean
 

Your message may be considered spam for the following reasons:

If you wish to reply despite these issues, check the box below before replying.
Be aware that malicious compliance may result in more severe penalties.
Back
Top