Mutara Nebula DeBoers E and R Build

Update #64

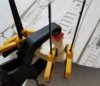
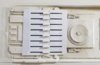
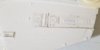
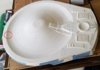
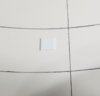
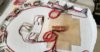
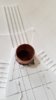
Finished stripping the top saucer, sanded it up to 1500 grit, and lined out all of the panel lines. I got 2 of the 4 nacelles on their last sanding painting step. The area being touched up is very small. Each time I do this, I have about 10% the amount of work from the previous effort. Started stripping the Reliant bottom part. I placed another quart of white on order, I am just about out of it now. I should have enough to touch up the nacelles and 1 or 2 spots on the Enterprise bottom. I do not have enough to start the Enterprise top paint yet. Good progress this week. I am going TDY though for 2 weeks so comms out from me for a while.

Cheers,
James

Slide1.JPG
Slide2.JPG
Slide4.JPG
Slide3.JPG
 
Update #65


I am still alive! I was TDY for a few weeks which slowed down progress on the E and R. However, with the three day weekend a ton of progress this weekend, which is awesome! I did another round of sanding and painting on the upper E saucer section and all 4 nacelles. I think I understand what is going on with why I am having paint issues in small areas of the models. I think the resin is sweating not sure what to call it, or out gassing. This is what is causing the problems. I washed everything long ago, and again before I started painting, but this might be the problem. I know the model was made in the winter, and was delayed due to weather. He could not cast if it was too cold, I wonder if this played a part. The good thing, the paint is getting there, every time I go through this pain, there is 80% less to touch up, I am hoping I am about done with the base coats on these parts. Will know tomorrow when I go over them. On the bright side, I am getting really good at blending in repair paint work, lol!


So I got tired of just doing body work, and went ahead and installed the electronics in the Es saucer section. I love cleaning up the wiring, my inner OCD. One benefit of this is that I am not worried about joints vibrating lose in transit or if the worst happens the model fall over. Every joint is soldered, heat shrinked and then glued down. I need to go back in and add some light blocking in between the RCS thrusters and the light boxes for the hull lighting. I still have the wires for the planetary sensor and the lasers to run. I am still thinking on how to solve the lasers, but have a good idea on how.


I am going to finish cleaning up the bottom of the R hull tomorrow and hopefully get paint back down on it. I have a lot of cooking to do tomorrow, so not sure if I will have time for everything though.


Although there is a pile of white parts, so much has been done on these kits. I have been spending a lot of time recently also working on the bases. I am thinking of not doing the navigation panel style of base. Still thinking on that, a ton of extra work for that.


Cheers,

James

Slide1.JPG
Slide2.JPG
Slide3.JPG
Slide4.JPG
Slide5.JPG
Slide1.JPG
Slide2.JPG
Slide3.JPG
Slide4.JPG
Slide5.JPG
Slide1.JPG Slide2.JPG Slide3.JPG Slide4.JPG Slide5.JPG
 
Yes, I need some for the shuttle bay detail clean up, the arboretum on the E's secondary hull, I need to create a stencil to paint on the sensor bands on both saucers, will probably do some for the air locks. That is all I can come up under such pressure!

Cheers
 
Update #66


Has been a while, some family trauma has limited the build hours lately. Most of what I have been doing though is sanding and cleaning up parts. The first pic is of completed base white parts, got the two Reliant nacelles in there, woohoo! I am on the 7th coat for the top Enterprise saucer. I did a bunch of finish sanding on it and hit it with its last coat, hopefully. I got the Reliant bottom hull sanded out and the first coat of white down. Spent days sanding this guy, while not perfect, close. There were some areas where I would do more damage to try and fix it than what I would end up with. Also realize, I look at all of this through a 4x magnifying glass, so, I create a lot of my own problems. I have talked about the resin and lacquer not playing well with each other, I have a close up of an area that has an issue. My solution is to put down 5 coats of paint, sand flat, add another coat. This seems to get the nice flat finish I am looking for, and there seems to be good adhesion to the resin below. I have done some taping and violent tape removal and all is well. I am down to just a few little touch up areas on the Enterprise nacelles. Super close on those guys also. I have the Reliant top stripped, and I am documenting where and what size all of the greebles are on the top of the hull. I plan on sanding a lot of the top hull flat and putting my own detail back in. Easiest way in the long run to get a super nice finish on this highly visible part.


I am also working with Matt over at Laserfire Creations on the bases. I do wood working as another hobby, and plan on doing veneer work on the base to spruce it up some. Most likely some sort of burl, I love me some burl. Here is a link to some amazing walnut burl.


AAA Walnut Burl Veneer Lot 16.5" x 14" 6 Sheets Per Lot - VeneerSupplies.com


Progress continues. I really look forward to getting the electronics into the Reliant and FINALLY figuring out where I can drill that darn mounting hole!


Cheers,

James


Slide2.JPG
Slide3.JPG
Slide4.JPG
Slide5.JPG
Slide6.JPG
Slide7.JPG
 
Update #67


I have not sanded in a while, but will later this week. I got the last coat on the Reliant base before I go sand it all flat, and then add more paint! Progress, but slow. I really need a bigger airbrush booth, but alas. The picture is of a pile of white parts, that I am almost happy with. Going to wait a few days, then go over the nacelles with a fine tooth comb before declaring them base coated. The last pic is of the mask work I am doing for the sensor dome for both the R and the E. I am ready to cut vinyl, sometime this week. I am concerned about how small the squares are and the cutting blade being able to cut that small, guess we shall see what the machine can do! I have ordered the plastic to redo the greebles on the Reliant top hull. I want as much of the cuts to be machined made as possible to keep everything clean. Cleaned up the hobby tables, and doing work on some of the upcoming photo etch. Oh, also ordered a buffing kit for my drill, the sheen on the E saucer top goes from gloss to semi to satin. I need to buff it all to the same sheen, hopefully this gets me there. Almost time to scratch build the officer mess that goes behind the glass! Will do all of the electronics first, but getting close to needing that next step.


Progress keeps on keeping on.


Cheers,

James


Update #68


More progress! I was actually able to glue a part on the model! Woohoo! I glued on the impulse crystal thingy at the rear of the upper Reliant hull. I have done a ton of sanding on the upper hull, and I have completely replaced the greebles on the left rear portion of the hull. 1 of the pics shows the little alignment templates I made in power point to line up all of the little parallel bits and doodads that go on the hull. I sanded the lower Reliant hull paint down and then have put three coats back on the hull. I still need to blend in that one little area highlighted in the pic. The upper hull is getting closer to being ready for paint, and the lower hull is getting closer to putting electronics in it. Oh, I also got some head light polish, basically aluminum oxide in a paste, and I polished the top of the Enterprise hull. I did this to even out the sheen across the very large very white part. White is a pain in the butt to get even and white across the whole part. I am pretty happy with the polished up version, and I think we will get some really cool lens flare, LOL.


Cheers,

James
 

Attachments

  • Slide1.JPG
    Slide1.JPG
    127 KB · Views: 191
  • Slide2.JPG
    Slide2.JPG
    122.4 KB · Views: 190
  • Slide3.JPG
    Slide3.JPG
    135.3 KB · Views: 196
  • Slide4.JPG
    Slide4.JPG
    72.3 KB · Views: 197
  • Slide5.JPG
    Slide5.JPG
    165.2 KB · Views: 188
Update #69


Progress continues at a decent pace. I have spent the last 1.5 weeks or so getting all of the detail replaced on the top of the Reliant hull. I am now about done with that. I plan on doing one more round of sounding tomorrow, install the masks for all of the windows and I still need to drill two holes. But, that is it, then I can start shooting paint on the part, woohoo! Hopefully will start the painting of the top hull tomorrow. I was unhappy with the molded in squares that represent panels in the top hull, they were not very square like. So looking at the photos from the studio models, there were raised panels on the top hull. Not for these particular panels, but they are there. So I took a little bit o liberty an put a quarter inch square 0.020 thick raised panel on top of each of these cast panels. I am very happy with the outcome of how they look, much better than what was cast in, and not too far off from the studio model.


I ordered a shapeways part for the Enterprise officer lounge. When I get the part, will post all of the information. The artist who designed the part was super supportive in helping me out. His original part was for the Polar Lights kit, he was gracious enough to rescale it for this model. More to come when it gets here. I am excited about getting some modeling done that is not painting something white and sanding things, LOL.


I am still waiting on some price quotes for the bases. Looking forward to getting that back, and the bases on order.


I am close to have the bottom Reliant hull complete enough to install electronics.


Some issues I am working to resolve. How to get the Reliant top hull onto the bottom hull, there are some fitment issues there. I am also thinking about the best way to get the top saucer screwed into the secondary hull. I really want to have the top saucer as a complete assembly, more to come on this also.


A few pics of the redone detail on the Reliant top hull.


I hope everyone had a festive holiday season. I am approaching 1 year on this build, which is NUTS!


Cheers,

James


Slide1.JPG


Slide2.JPG


Slide3.JPG
 

Attachments

  • Slide2.JPG
    Slide2.JPG
    56.2 KB · Views: 172
Update #70


Started painting the top of the Reliant and it is HORRIBLE, not sure what this resin is doing or why, but 60% or so of the top is pooling up. It looks like water on top of a hydrophobic surface, not sure how else to describe it. I think I will strip the whole thing AGAIN and put down adhesion promoter first then paint the white. This part is SUPER frustrating. Will take some pics when the anger has subsided.


Not Cheers,

James
 
So sorry to learn of your set back concerning the lower hull paint. I too am at a loss as to why it keeps happening. I do hope you can figure it out. Good luck.
 
Steve, thanks for the kind words, I got it figured out, well mostly. Duplicolor adhesive promoter fixed the VAST majority of the issue.

Update #71


Well, the first pic is of the disaster that was the lacquer on the resin Reliant upper hull. Imagine 95% of the hull looking like this. Disheartening to say the least. Ok, the next pic is of the stripped hull and three coats of white lacquer back down with all of the areas prepped sanded for the next 3 coats. This repaint was treated with the Duplicolor Adhesive Promoter. AMAZING stuff, super happy. I also did some testing on the strength of the bond, it takes a lot of force to pry the paint off of the resin, so also happy with the bonding strength and what that means for all of the work coming up. I am not sure if you remember back from post #6, lol not sure if that was the one, but almost all of my paints in this project will be lacquer based, for a superior long term and strong finish. No rubbing off and no over coat required on acrylic. I sanded some areas down on the nacelles, not pictured, hit them with adhesion promoter and I am nearing finishing those guys, all 4, for good. At least the base coats. So sure am I that I spent some time completing all of the masks needed for a 5 color finish on both the E and the R. the last pic shows my color pallet on the Reliant, I am going to add one more light grey step in there. You can see the base color and then a light over spray of the base white to show the cut down look. This is how I plan on painting the sensor lines back onto the hull. Another amazing step is that I am happy with the Reliant bottom and started working to put the electronics into the part. Super exciting. After the morale breaking paint disaster, a tremendous amount of progress in the last few days. Helps that I did a staycation, and also got a ton of stuff done around the house and hung out a lot with the kids. Maybe I should no longer work? Oh wait, bills and health insurance :(


Things are looking up!


Cheers,

James

Slide1.JPG


Slide2.JPG


Slide3.JPG

Slide4.JPG

Slide5.JPG


Slide6.JPG
 
Update #72


Lots of great progress over the last few days, woohoo! I received the Shapeway part for the O club in the Enterprise. The part was designed by a guy named Mark2000, he has a TON of great parts for Star Trek, take a look at what he has produced on Shapeway. The first two pics are of the part. It fits quite well into the Enterprise and I look forward to getting it painted, lit and done this week. Next two pics are of getting an idea where the center of mass is for the Reliant. The center point ended up being in a great location on the model to drill a hole. Next two pics are of the hole and the copper T that will need to be hammered out to finish the mounting for the model. I know not very exciting to the majority of people, but this was a huge goal that has taken a long ass time to get to. Next up for the Reliant will be to build the shuttle bays. Next pic shows the fitment issue. I am probably going to have to notch out the top hull piece to get it to seal down. The nacelles will have to be glued into place before the top hull piece can be glued on. Last pic is just seeing how well the roll bar fits, also for some inspiration! So, lots of scratch building over the next few weeks on shuttle bays and O clubs and will continue to finish work on the nacelles, really almost done. Also, need to order more paint to finish up the colors mixing needed for all of the finish work. Progress! Need to check on the base.


Cheers,

James
Slide1.JPG
Slide2.JPG
Slide3.JPG
Slide4.JPG
Slide5.JPG
Slide6.JPG


Slide8.JPG
Slide7.JPG
 

Attachments

  • Slide7.JPG
    Slide7.JPG
    189.1 KB · Views: 173
  • Slide8.JPG
    Slide8.JPG
    51.2 KB · Views: 172
Thanks for the motivation! Lots of great progress in the last few weeks, forward progress is a NICE thing!

Update #73


Lots of fun progress lately. On the models themselves I drilled a very large hole into the Es secondary hull for the mounting point. I also included a pic of the o club with a dude sitting on the chair. He fits the scale fairly well, but the other ones not so much. I am looking have having to cut the legs down to make it work. I am headed up to Dallas this weekend to hang with the family and hammer out the mounting pieces for the E and R. No pics but I have all of the shuttles, work bees, cargo thingies and other shuttles assembled and base coated white. Need to get the bees yellow. All of the other pics are of the shuttle bays going into the Reliant. Have been having a lot of fun getting the shuttle bays built. I used the silhouette to design the masking for the bottom and the top. I am very happy with how the bottom came out, the top will look great when I have diffuse light coming through all of the holes. The side walls are 0.010 thick cut on the Silhouette then glued to a thicker piece of plastic with backing to stiffen it further. I am about down getting the design done for all of photo etch parts. Those should be done this week. The last pic is of the rough fitting of all of the big parts of the shuttle bay. There is a lot of detail left to go into here, but you get the idea. There is some trimming left to get everything to fit properly. Also, not pictured, I have poured some blue tinted resin into all of the windows that should look pretty cool. I saw a shuttle bay that had red, prefer blue. Lots of fun progress, looking forward to getting the detail parts and all of the extra stuff in there.


Cheers,

James


Slide1.JPG
Slide5.JPG
Slide1.JPG
Slide5.JPG
Slide2.JPG
Slide3.JPG
Slide6.JPG
Slide4.JPG
Slide7.JPG
 
Update #74


Progress continues to roll along. Made a trip to Dallas this last weekend and hammered out both copper Ts for the E and R. The Reliant mount is about down, the Enterprise one needs some more work. I am going to do some fill work on the bottom and then fill underneath the mount with epoxy. Let it cure, then do a layer of epoxy and fabric on top of the copper T. Very happy with this progress. The other cool break through was getting a bunch of photo etch to come out properly. Woohoo! I got the first set of parts for one of the shuttle bays complete. Firsts close up is of the little angle support pieces. They came out pretty cool, however, I didn’t make any for the angled floors, only the right angle stuff. So, no cool support brackets over there. Next couple of shots are of the PE going into the wall sections and the last pic is of the detail PE painted and sort of installed. Some of the PE is bent, and will take some more time to get glued down, but overall looking decent. More detailed work required on the walls, and I need to do some drilling for the landing bay lights. Oh, I also have most of the shuttles complete, along with an easter egg. I am trying to get another easter egg completed, but the decals are being a butt pain. Looking to paint the details, but oi, this is really small and not sure of the outcome. So, this might not make it into the shuttle bays.


Cheers,

James

Slide1.JPG
Slide2.JPG
Slide3.JPG
Slide4.JPG
Slide5.JPG
Slide6.JPG
Slide7.JPG
 
Update #75

So, slow painful week of progress. Only 1 minor setback, but the super small detail work is painful and takes me a long time. One pic shows all of the shuttles and Other stuff going into the shuttle bays. I have 6 travel pods left to make, but working with Federation models on a decal issue. Some of the shuttles will have lights in them, so they will need to be completed. Next few pics are of the landing lights in the bottom of the shuttle bay. The controls will control direction and speed of the lights. All 13 pairs may not be used. Once the shuttle bay is complete and in the model you might not be able to see the last few sets, easy to fix in the coding of that processor board. Both models will have the same set of 13 pairs of lights with direction and speed control. Next two pics are of the door control or status indicator lights. I think these are going to be red and green blinking. Not 100% sure. I want to get them more complete with everything lit in the bay before making that decision. I just think it would be nice to have more movement within the shuttle bay. I am pretty sure I will not be adding people, so wanted something extra in there. The setback was I did not spray down the walls with matte spray before assembly, so, had to tape up the floor and matte spray then. I am using the matte spray to knock down the shininess of the superglue that didn’t end up where appropriate. I got so excited about gluing the first shuttle bay up, forgot about the matte spray. Lots of great progress happening. Will finish the second Reliant shuttle bay this week and work on the mounting plate for the Reliant. All of the super small detail stuff took way longer than anticipated. Progress continues.


Cheers,

James


Slide1.JPG
Slide2.JPG
Slide3.JPG
Slide4.JPG
Slide5.JPG
Slide6.JPG
Slide7.JPG
 
Update #76


Quick update. I have done the draft layouts of the front panel for both bases and the top panel. I am working with Laser Fire Creations on getting this done. The panels are really BIG, compared to most of what he creates so Matt is brain storming on how to do this. I did the draft and 1 minute later already had additional switches I needed to add, LOL.


On another note, I use variable voltage regulators so I can tune the lights in the model. I found these on Amazon, I have bought a set, and will do some testing. The cool thing is I can’t buy the parts for the same price as these guys let alone have a PCB to mount them on, super excited on them!


https://www.amazon.com/gp/product/B018U19MN6/ref=ppx_yo_dt_b_asin_title_o00__o00_s00?ie=UTF8&psc=1


Cheers,

James

Slide2.JPG
Slide3.JPG
Slide4.JPG
Slide5.JPG
Slide6.JPG
Slide7.JPG
Slide9.JPG
Slide10.JPG
 
THANKS!!

Update #77


Some more sweet progress and a few setbacks. I have not had any setbacks in a while so was due. First off, you can see the mounting bracket area taped off, I poured 2 ounces of West Systems epoxy in there, and she is curing overnight. Tomorrow I will go back in and add the layer of fiberglass mat and more resin over the coper T, then Saturday, I will drill the 6 holes out for the screws and bolts, bolt her up, put a dot of epoxy on each nut and she is ready for her stand, WOOT! More positive news before the bad though. Next three pics are of the TWO shuttle bays in the Reliant. This is like that one really good golf shot you make that helps you come back another day. Seeing the two shuttle bays in the model really made me happy and restored some of my enthusiasm for the models. So, working on the shuttle bays I needed to get the top of the Reliant set properly onto the bottom. I did a bunch of clean up and thought I had everything squared away, and, NOPE. I realized that there is not as much room on the top hull Reliant piece as there was in the Enterprise top saucer section. So I am going to have to modify how I wire up all of my LED boxes. Once I get the fitment issue sorted, I can start to figure out how to light the shuttle bays. I am also waiting on some decals to finish my last 6 travel pods and I need an 0.30mm drill bit to finish some other travel pods. I am putting 14 FO lines in 4 travel pods, I can do most of the lights seen in the movies. I will have white flashers on top and bottom and green and red on the sides. However, I cannot pull the 0.25mm FO through the 0.25mm hole and make the turns, I keep breaking the FO. SO, going to drill a slightly larger hole to get the FOP pulled. I am having to make a right turn inside a very small space. The kit I bought has 5 bits from 0.25mm to 0.50mm in 0.05mm increments, so can go to a larger hole if needed. The last three pics show some mock ups I did for the tops of the bases, these are some REALLY big pieces of acrylic, 24 inches x 48inches ish. The roll, yaw and pitch will be separate pieces of acrylic that will sit in a cup that will be driven by a motor. The control lights will blink and do controlly type things. The shield area will have the chase LEDs there and will be controlled by the front panel. I am also thinking of a way less complex top panel. Depends on cost. That would just be some graphics and the titles. Will see what Matt comes back with. The last pic is of the front panel. I needed to get the whole thing in a line to help me better visualize what the heck this will look like. So for all three mock ups, I blew up my page size in Power Point to 50 inches by 30 inchess or so. I did all of the graphics in power point also, lol! I also placed a bunch of orders for parts. Most of the parts are coming through DigiKey. Here is that list of parts, people have asked, so listing everything. I spent $152 on parts from, Digikey, with the rotary switches being the expensive part. I am not going to purchase a power supply until the model is about done. I plan on using my desktop power supply and I can go measure what I need. The main reason being I am not sure how many LEDs I will need in the base itself to light her up appropriately. Will list parts later, lol. Too much work tonight to get ported over into my spreadsheet o cost.


Cheers everyone and keep on modeling!


James

Presentation1.jpg
Slide1.JPG
Slide2.JPG
Slide4.JPG
Enterprise Top.jpg
Reliant Top.jpg
Front Panels.jpg
 
Update #78


Quick update, my drill bits came in today, SUPER fast, so I was able to drill out the 0.3mm holes, and my 0.25mm FO pulled very easily through that hole and I was able to pull all of the weird angles, no issues. I also did not break any bits this time, phew. I also got all of the wiring moved in the Reliant hull so I can now close the hull correctly and I can measure how much space I have for the shuttle bay top lighting. Good progress this evening, more tomorrow. I am going to come up with some sort of holder to help get better results on the travel pod to make sure the FO is lined up a little better. Will get there.


Cheers,

James


20190201_201100.jpg
20190201_201156.jpg
Slide1.JPG
Slide2.JPG
Slide3.JPG
Slide4.JPG
 

Attachments

  • 20190201_162809.jpg
    20190201_162809.jpg
    1.9 MB · Views: 149

Your message may be considered spam for the following reasons:

If you wish to reply despite these issues, check the box below before replying.
Be aware that malicious compliance may result in more severe penalties.
Back
Top