Paradox1828
New Member
This is my first post/thread so I tried to make it a good one, enjoy my tutorial! :cool
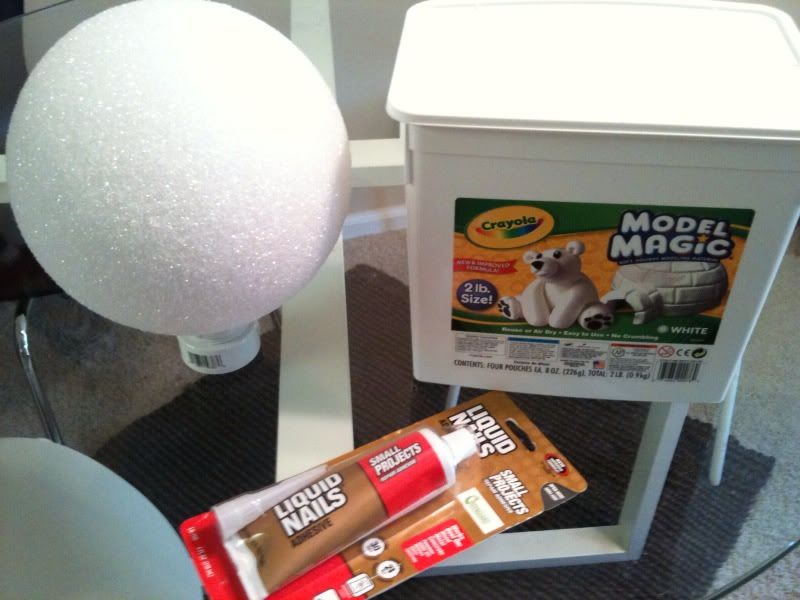
I’m a big fan of MST3k and already have a replica Tom (purchased from eBay) and decided a small meatball was in order to keep him company. Below is a list of the materials I used and some pictures of the project as it came together.

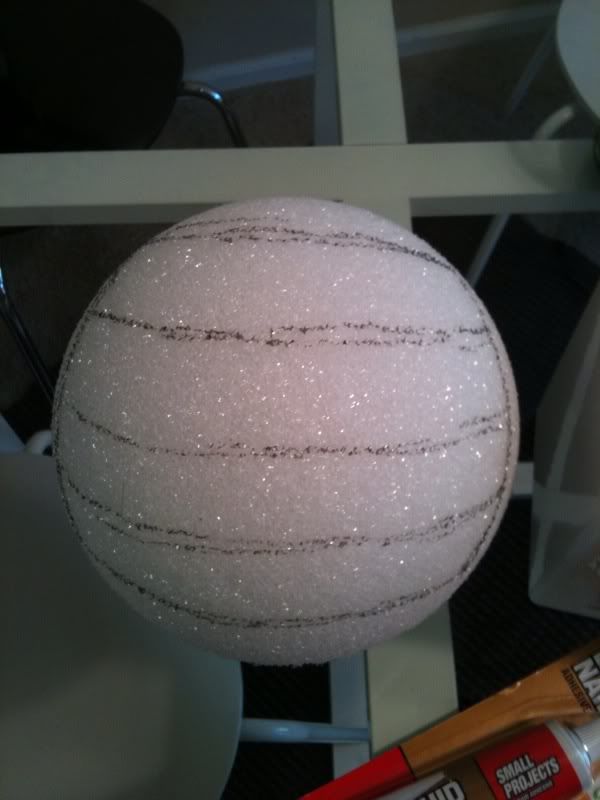
The first step was to find a nice photo of the logo to mimic the lettering style and spacing. I then marked the approximate outline for each word making sure the entire logo could be read without having to spin the globe.

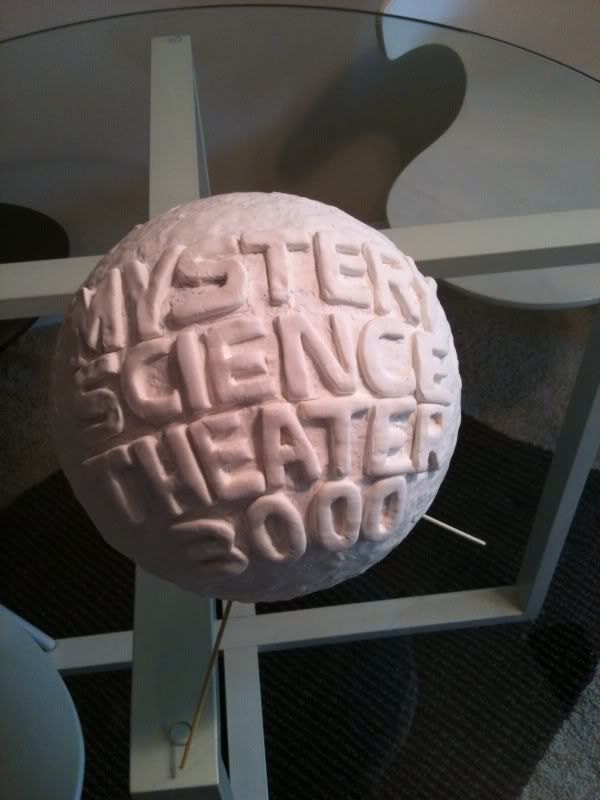
Next I began shaping the letters (this was the most tedious part but the model magic is relatively easy to manipulate with simple tools… like toothpicks and the back end of a paint brush). Don't try to make them perfect because the original globe has somewhat uneven letters that are clearly hand shaped. Allow the letters to dry for one day before moving on to the next step to make sure they aren’t distorted when manipulating the globe.

Finally finish covering the rest of the globe with a thin layer of model magic. Smash it in to the foam as much as possible to make sure it is securely adhered. When the model magic dries it contracts quite a bit making for a fragmented appearance. Most of this cracking will be covered with the liquid nails “spaghetti” so its of no great concern.
Finally, cut a small hole in the tip of the liquid nails and drizzle it on in a random pattern. Allow it to dry and apply several more layers to build up thickness.
The liquid nails says it is paintable on the packaging and it is probably capable of supporting enamel or acrylic paint, but the model magic and the foam underneath probably would be sensitive to anything other than water based acrylic paints… so that what I decided to use. After some searching I found krylon fusion acrylic spray-paint and some inexpensive darker gray acrylic paint tubes (for the exaggerated shadows) at a local craft store.

Below is the final product! The color is a bit blue/gray compared to my sample photo (which is very yellow) but it the shows intro it has a gray color so that’s what I chose to go with.

Thanks!
I’m a big fan of MST3k and already have a replica Tom (purchased from eBay) and decided a small meatball was in order to keep him company. Below is a list of the materials I used and some pictures of the project as it came together.
1) One 8 inch foam globe from a craft store (I can’t believe how much it cost… I think it was around $12)
2) One tub of Crayola model magic (in hindsight I did not need such a large quantity… I only used about 1 of the 4 bags inside the tub)
3) 2 tubes of Liquid nails (purchased from Home Depot)
4) 3 bamboo kabob skewers (to hold the model off the ground as it dried)
2) One tub of Crayola model magic (in hindsight I did not need such a large quantity… I only used about 1 of the 4 bags inside the tub)
3) 2 tubes of Liquid nails (purchased from Home Depot)
4) 3 bamboo kabob skewers (to hold the model off the ground as it dried)

The first step was to find a nice photo of the logo to mimic the lettering style and spacing. I then marked the approximate outline for each word making sure the entire logo could be read without having to spin the globe.

Next I began shaping the letters (this was the most tedious part but the model magic is relatively easy to manipulate with simple tools… like toothpicks and the back end of a paint brush). Don't try to make them perfect because the original globe has somewhat uneven letters that are clearly hand shaped. Allow the letters to dry for one day before moving on to the next step to make sure they aren’t distorted when manipulating the globe.

Finally finish covering the rest of the globe with a thin layer of model magic. Smash it in to the foam as much as possible to make sure it is securely adhered. When the model magic dries it contracts quite a bit making for a fragmented appearance. Most of this cracking will be covered with the liquid nails “spaghetti” so its of no great concern.
Finally, cut a small hole in the tip of the liquid nails and drizzle it on in a random pattern. Allow it to dry and apply several more layers to build up thickness.
The liquid nails says it is paintable on the packaging and it is probably capable of supporting enamel or acrylic paint, but the model magic and the foam underneath probably would be sensitive to anything other than water based acrylic paints… so that what I decided to use. After some searching I found krylon fusion acrylic spray-paint and some inexpensive darker gray acrylic paint tubes (for the exaggerated shadows) at a local craft store.

Below is the final product! The color is a bit blue/gray compared to my sample photo (which is very yellow) but it the shows intro it has a gray color so that’s what I chose to go with.

Thanks!
