Monster Hunter 3 Ultimate. Barioth armor

RoninTavic

New Member
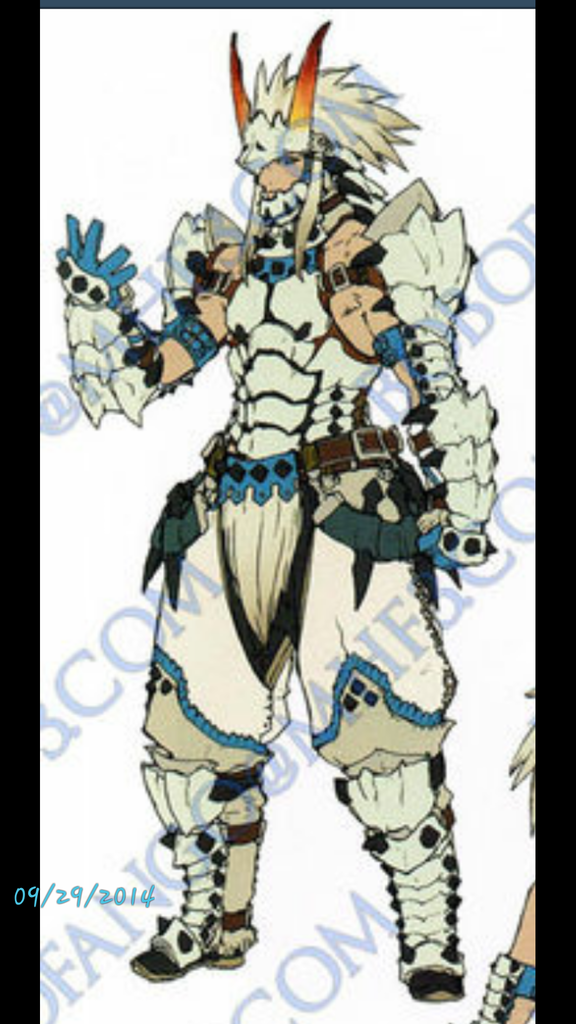
This has been my dream costume since monster hunter first came to the wii. But I had no idea what I was doing yet so it sat on the back burner. Now I have a few costumes under my belt so it's time to give this costume the attention and skill it deserves... I am of course talking about this:


I've been working on it for about a month now. Largely from following kommisar's fantastic build thread here
http://www.therpf.com/f24/monster-hunter-barioth-127614/

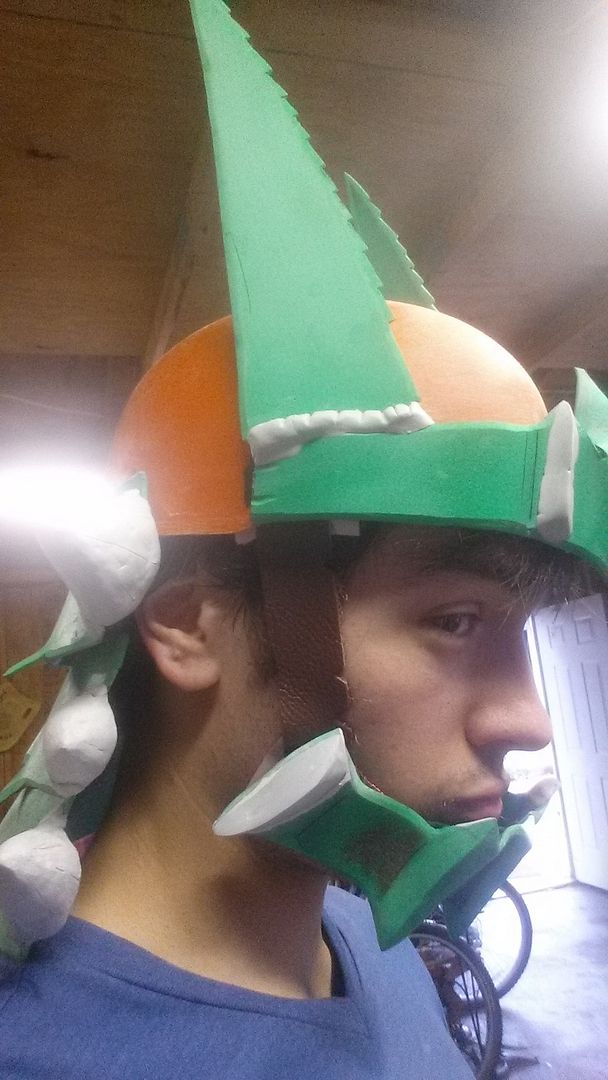
It was a goldmine of info. As of now I'm about here


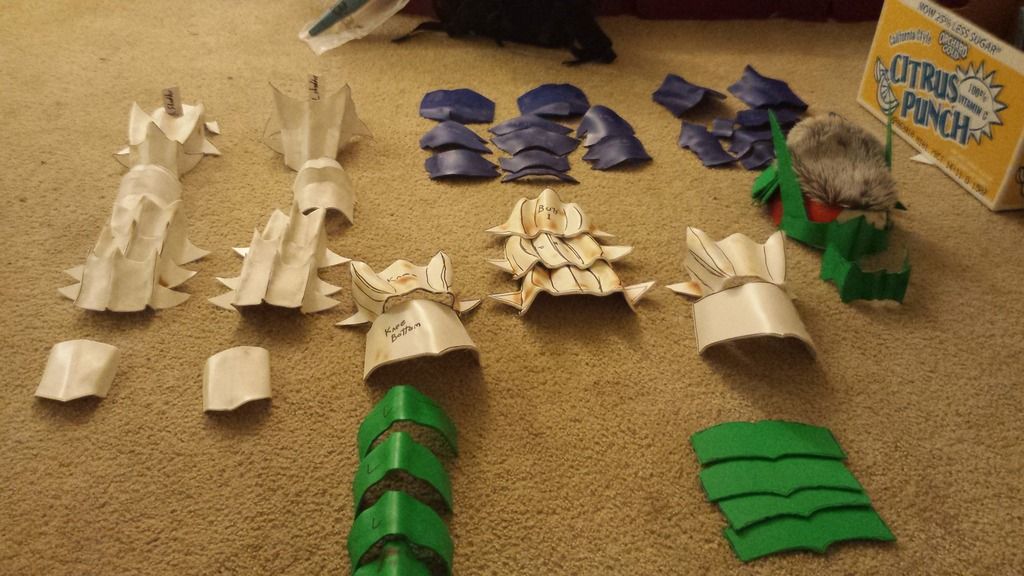
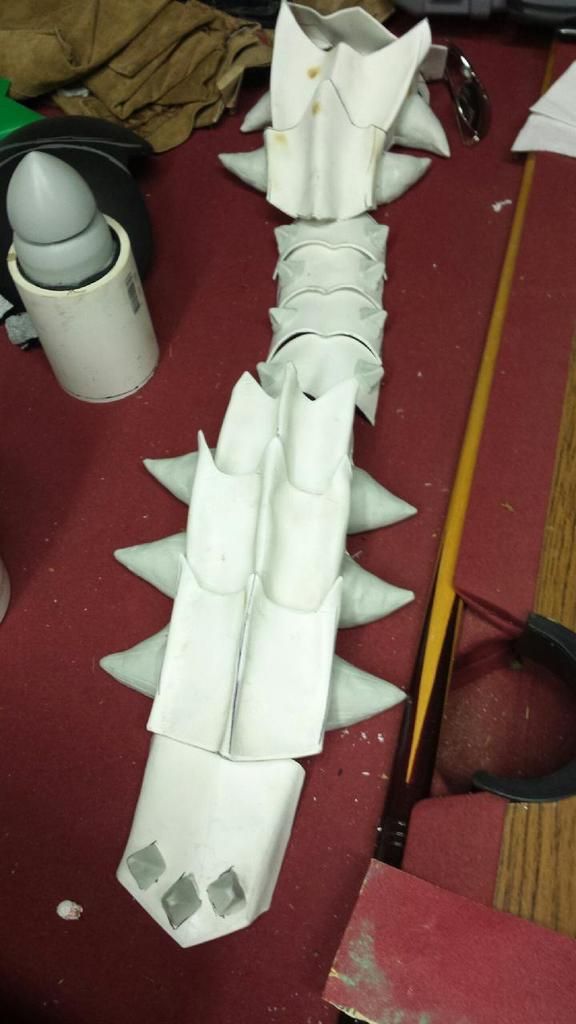
I've had a lot of work done since then. So I'll be posting pics of the progress.

 
alright time for that photodump... I've been tracking my progress the whole time but haven't sat down long enough to update much.. here goes.
paper templates were the beginning


also low res character models will be my downfall.


the difference between flat and shaped

the whole arm piece right there

and shaping the back. which was tricky without a mannequin of any kind..

close up of the back


and all the armor mostly molded


this is how the spikes took shape

foam core, sanded down and with magic-sculpt epoxie to smooth it and given it strength.

close up of the spikes


I reinforced the inside of the gauntlets with a piece of pvc pipe, and made the straps from scrap leather and some buckles I ordered for this... so many buckles... so many,

I GOOPed straps to the helmet so it would still move with me rather than be glued static, cause I like being able to move my head

I started the soft parts, and further proved that sewing hates me. I'm okay wth it, but it hates me personally... first go at the poofy pants


I've since re-cut and re-sewn these much smaller..

this is what they should/will look like.

and finally the last molding, the shin plates.
I also went and added some detail scratches and grooves to the armor


and then it all gets primed..


and that's about where I am now.
 
Well I went ahead and powered through this and actually finished it last week. Still some upgrades t be done, but overall I was super pleased with the outcome. just to give you allan idea of how I got from this pile of plastic and poofy pants to a finished costume.. here's some progress shots.


I used about 5 different reds and oranges and the like to get the amber tusks colored right. I also started with the main orange on the horns since all the pictures of the monster I could find had tints of orange on them,

then everything got the same treatment.

the colors contrast well.

next the white was painted over with ivory.

then everything got an acrylic wash to make it look worn. I used grey and brown(very lightly on the brown.) and then hit the spikes with black.


so all together it looked like this

and then the back


and the legs

thus the painting was done... next step linens!
 
This thread is more than 8 years old.

Your message may be considered spam for the following reasons:

  1. This thread hasn't been active in some time. A new post in this thread might not contribute constructively to this discussion after so long.
If you wish to reply despite these issues, check the box below before replying.
Be aware that malicious compliance may result in more severe penalties.
Back
Top