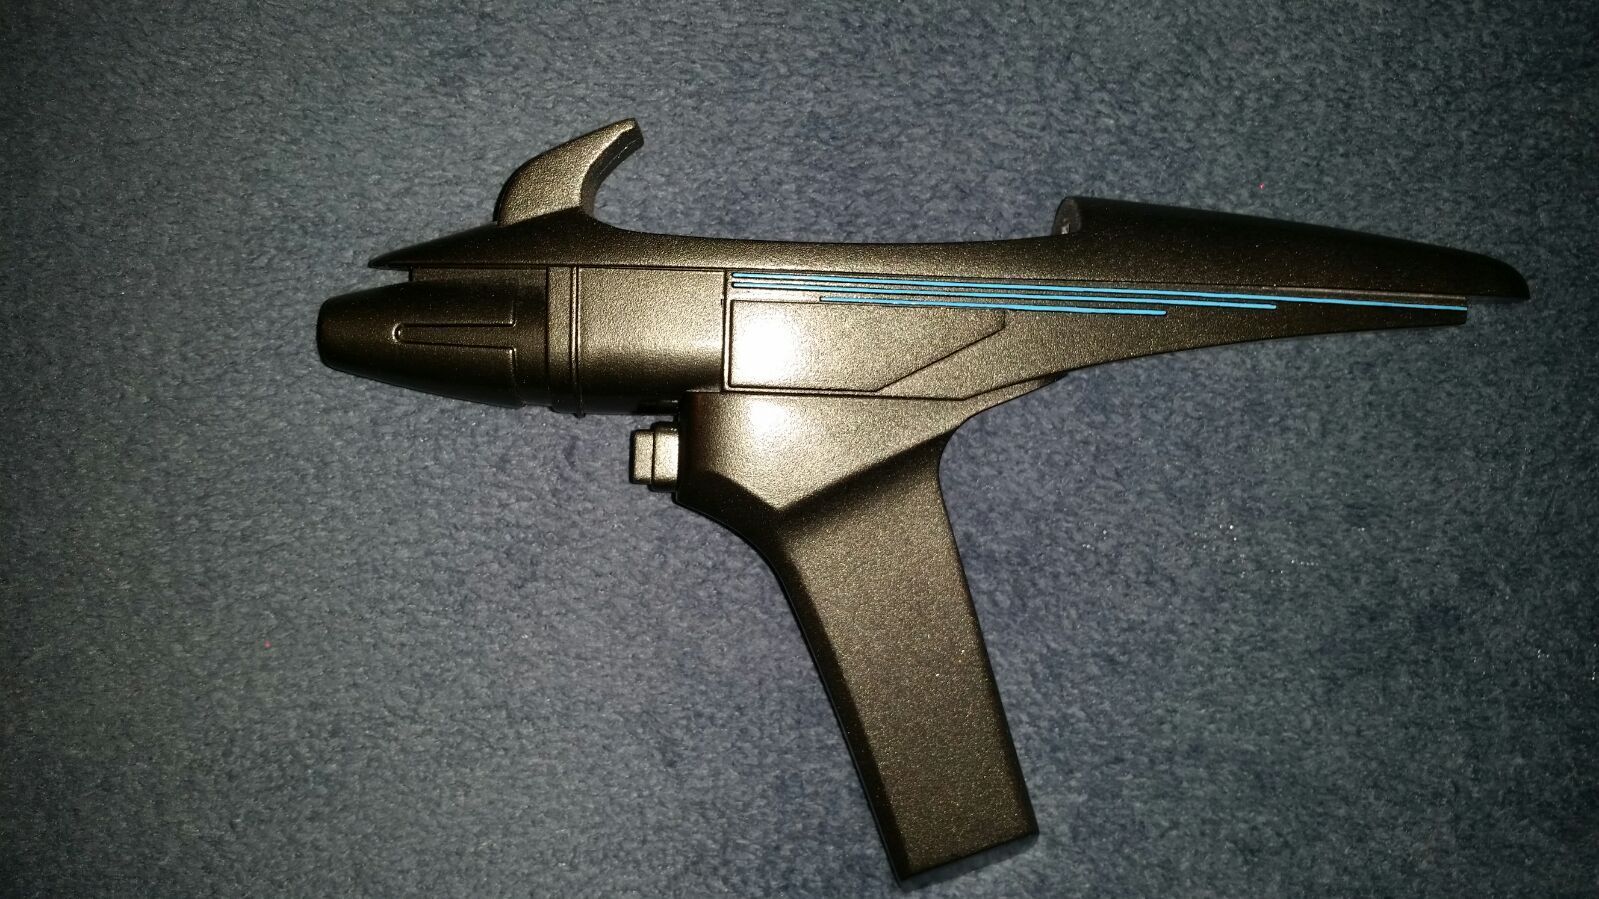
Modifying an AA Star Trek: III Phaser (Mostly done!)

Felgacarb

Sr Member
So, I finally got my Diamond Select ST:III Phaser that I had pre-ordered, so, so long ago.

Overall, I rather like it. Here it is, next to my own 3D printed version:


It looks like the overall dimensions are more accurate than mine. They have an odd contour on the grip that I haven't been able to match in any screen caps- and they clearly left out the groove on the sides of the P1. And, of course, the colors could be slight better-

But that all makes this a great, not-so-expensive replica to modify!


My plan:

Take the dang thing apart. I'll probably have to drill out the screw covers...

Make a pop-out clip, so that I can wear it without a holster. (Heck, If I can make it work well, I may be able to offer that as a clip kit...)


Fill the seam lines and sand- and paint it up properly.


So, more to come...
 
Last edited:
Re: WIP: Modifying an AA Star Trek: III Phaser

So, for just a repaint, this probably isn't needed. But, since I intend to add a retractable clip, I needed to take it apart.

As I feared, I was not able to just pop out the screw covers.

So, I had to drill them and then pry them out...


Here is what they look like inside:


Almost entirely empty space. Great for modding! Great for lightweight costume use!

The next steps will take a lot more time....
 
Re: WIP: Modifying an AA Star Trek: III Phaser

So, on to the P1...

Two goals here: Add the correct groove to the side, and paint it a bit darker.

Here is the disassembly:


To cut a nice, straight groove into the lower shell, what you really need is a tiny router table. I think such things exist for the Dremel. I quickly scratch built one for my rotary tool:


It worked- but I would modify it a bit before I used it again...

The bigger issue is that the shells are darn thin. Cutting the groove kills the edge interfaces.


My first try at a fix for this is to cover the gaps with aluminum tape, and then paint the whole thing:


It might just work.


More to come....
 
Re: WIP: Modifying an AA Star Trek: III Phaser

Greetings, Phaser phans!

Work continues, and the news is mostly good.

First off, the P1 still functions after reassembly:


On to the P2 body- my main goal is to add a self-retracting clip, so that no holster will be required when worn with a monster maroon or pretty much any other Trek outfit.

It can be done, and is in fact my favorite feature of my 3D printed version:


So as a starting point, I disassembled my phaser (much easier than the AA one! Of course, it wasn't designed for mass production, that makes it easier...)

Then I used the pop-out clip as a template to guide the cutting of the toy.


I really hacked it up...


However, it looks like my plan will indeed work-


I'll have to make 3 minor adjustments to the CAD model of my clip, and then have ShapeWays print it for me. (Probably will take more than 2 weeks...) But it is looking good.


One change will allow it to lay flat:


With this toy being so light, it should be perfect for wearing when costuming. Heck, you might even consider cosplaying with it!
 
Re: WIP: Modifying an AA Star Trek: III Phaser

I like It. very nice work. and especially the rotary router improvisation...:thumbsup
 
Re: WIP: Modifying an AA Star Trek: III Phaser

Are you going to mod the P2 body at all to decrease the inevitable paint rub from inserting/removing the P1? It's a very tight fit on mine and I suspect that one removal/insertion will scrape off a good deal of paint.
 
Re: WIP: Modifying an AA Star Trek: III Phaser

Are you going to mod the P2 body at all to decrease the inevitable paint rub from inserting/removing the P1? It's a very tight fit on mine and I suspect that one removal/insertion will scrape off a good deal of paint.

My plan right now is to mask of and just not paint the part of the P2 that rubs against the P1...

So, here is my 3D print belt clip:


And here is my slightly modified version for use with the AA Phaser- I made it a bit narrower to fit in the body, adjusted the spring cavity to match, and extended the slide button a tad:


And then I ordered the new part!


Now I just have to wait for it to arrive.

(Man, I hate waiting....)

In the mean time, I can buy another spring to go with it...
 
Re: WIP: Modifying an AA Star Trek: III Phaser

You need your own 3D printer. I didn't realize these had actually come out, I gotta pick one up.
 
Re: WIP: Modifying an AA Star Trek: III Phaser

Sir, you are my hero.

Thanks!

Ruddigger-

The problem is the current 3D printers are still a bit expensive, and are not quite as good as what you get from Shapeways- especially in this case, where I need a metal part- I don't know of any home/hobbyist powdered stainless steel printers....

But perhaps, soon!
 
Re: WIP: Modifying an AA Star Trek: III Phaser

I love this overall mod! What color will you paint the P2?

And I assume the P1 is now flat black w/ light blue highlights on the front over the beam emitter, right?
 
Re: WIP: Modifying an AA Star Trek: III Phaser

I love this overall mod! What color will you paint the P2?

And I assume the P1 is now flat black w/ light blue highlights on the front over the beam emitter, right?

Thanks, Gamera- you are so right- flat black with light blue:


For the P2, I really like this color: Tamiya Spray on Gunmetal; TS-38. You get it in tiny cans at the hobby store. I have some set aside for this build.

By looking at my older photos, I reconstructed exactly how I did the spring last time. Instead of ordering the spring above (which should work) I picked up a generic spring that was close from the local hardware store (OSH)


And then I shortened it by hand to the correct length:


And it looks like my assembly plan will work-


Now, just more waiting for my 3D printed clip to arrive!
 
Re: WIP: Modifying an AA Star Trek: III Phaser

Any time and thanks for the info. I'd also like to change the white LED under the P1's blue button but not sure how to w/out soldering.
Maybe I could just tint the white LEDs with a yellow and red Sharpie since there are two of them. Keep up the good work!! :)
 
Re: WIP: Modifying an AA Star Trek: III Phaser

Very impressive! And I just added WB Jones Spring Co. to my list of bookmarks. I love this place. :)
 
Re: WIP: Modifying an AA Star Trek: III Phaser

I love seeing this get closer to "real." I bought Mr. Scott's Guide to the Enterprise in '86, Xeroxed the phaser page(s?) and made one cardboard model after another until I could save for a resin kit. Never had the time or money to get one, life intervened, and I figured that was that. I'm so glad it wasn't!
 
Re: WIP: Modifying an AA Star Trek: III Phaser

Here is my Diamond Select 'Star Trek III: The Search for Spock' Movie Phaser.

It was primed and repainted by myself. The P1 was repainted flat black. (3 coats)
The main body (Phaser 2) was painted dark metallic copper. (3 coats)

The beam emitter, curved top plate, and trim was painted a custom, dark, metallic blue.
(Testor's gloss medium dark blue, flat black, and bright silver; about 3 drops of each color, mixed thoroughly and applied by hand w/ a small brush)

I need to repaint the pinstripes on each side though...

star_trek_iii_movie_phaser_repaint_by_gamera68_by_gamera68-d924osf.jpg
 
Last edited by a moderator:
Re: WIP: Modifying an AA Star Trek: III Phaser

That metallic copper color looks great! I wouldn't have expected that.

I'm not in love with the blue on the emitter or top, but that is one of the great things about having this toy available- you can customize as you like.

Nice work!
 
Re: WIP: Modifying an AA Star Trek: III Phaser

How is it possible to even DO the pinstripes? "A careful brush" wouldn't seem to cut it.
 
This thread is more than 6 years old.

Your message may be considered spam for the following reasons:

  1. This thread hasn't been active in some time. A new post in this thread might not contribute constructively to this discussion after so long.
If you wish to reply despite these issues, check the box below before replying.
Be aware that malicious compliance may result in more severe penalties.
Back
Top