You are using an out of date browser. It may not display this or other websites correctly.
You should upgrade or use an alternative browser.
You should upgrade or use an alternative browser.
Mission Impossible II - Oakley Delivery Rocket
- Thread starter PHArchivist
- Start date
PHArchivist
Master Member
Progress so far...
With any luck, I should be able to make if "functional". That is, with the rear tail fin portion removable and the center tube capable of carrying a pair of $400 Oakleys.
Doing this all on screen caps and best-guess estimates. Have never come across the original (not sure if PropStore or Profiles ever sold it), and have no actual dimensions. But most proportions are probably within 75% - 90% correct, and I'm good with that. Didn't bother looking for any metal inserts, so what appears to be metal will be silver-painted plastic.
Need some ideas for the spike on the nose (check the first screen cap). Could just use a very large nail, but I think the actual spike was bigger in diameter than even the biggest nails, and appears to be polished steel.

Grey
Sr Member
The spike reminds me of metal tent stakes. Ex: http://www.amazon.com/Vargo-Titanium-Nail-Peg/dp/B004RZ59IC
PHArchivist
Master Member
The spike reminds me of metal tent stakes. Ex: http://www.amazon.com/Vargo-Titanium-Nail-Peg/dp/B004RZ59IC
Good call - that may work...
PHArchivist
Master Member
Cool - is that hollow or solid?
Solid aluminum. I can turn the diameter down a bit if you need it, and can drill and tap for a bolt too.
PHArchivist
Master Member
3/4 is a bit fat, I think... Probabaly 3/8 is ideal per the proportions of the overall prop.
If you coud do that, that would be great! Need a bit more $$ for time...?
Can email at PHarchivist@aol.com
If you coud do that, that would be great! Need a bit more $$ for time...?
Can email at PHarchivist@aol.com
PHArchivist
Master Member
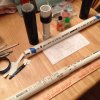
A bit more progress...
The main tube seems a little narrow, but a pair of glasses fits in just about the same as on the actual prop.
A few things to consider:
--I think the actual prop may have been slightly fatter in diameter but not a lot, and not nearly as much as the next sized tube
--Many shots of the prop are 3/4 shots, shortening (and fattening) the tube
--Adding the fins and completing the rocket will "fatten it up"
--I've anticipated and accepted that not all proportions will be dead-on accurate


Last edited:
Just be careful traveling with that! :lol
PHArchivist
Master Member
Not looking forward to doing the fins, especially the larger tail fins...
My techniques are pretty simple; Exacto along steel straight edge. My estimate is that the fins are about 1/8" thick, which is a fair amount of styrene to get through with an Exacto. Not sure I even have styrene that thick, so an alternative to cutting through a difficult thickness is to do two or three layers, laminated together. But then I'm cutting 8 or 12 fins...
I do like the idea of styrene though. Two-part epoxies can be sloppy in application, and for the fine line required for the tail fins, I don't see it happening. There are properties of CA glue that lead me away from that as well. But instinct and experience tells me that if I lightly sand the PVC, then using a solvent styrene glue, I should be able to get a rock solid plastic weld.
Plus it should set up fairly quick - say a minute or two, maybe three max - which is important as one of the challenging aspects of rocket fins is ensuring the fins stand straight up off the body. Achieving this without driving yourself insane seems to me to require a glue that sets up in just the right amount of time - not too quick, and certainly not too slow. I think styrene solvent cement is the answer.
I also have thought about slotting the PVC pipe, and creating the four-fin set-up out of two pieces of plastic (two fins per piece, connected across the diameter of the rocket). The two pieces could slot together, then the whole rig could slip into slots in the PVC. But that is more compliceted than I want to be, and I'm not confident I can cut the existing PVC part properly, accurately, and without cracking or shattering it.
PHArchivist
Master Member
A bit more progress...
The main tube seems a little narrow, but a pair of glasses fits in just about the same as on the actual prop.
A few things to consider:
--I think the actual prop may have been slightly fatter in diameter but not a lot, and not nearly as much as the next sized tube
--Many shots of the prop are 3/4 shots, shortening (and fattening) the tube
--Adding the fins and completing the rocket will "fatten it up"
--I've anticipated and accepted that not all proportions will be dead-on accurate
Scratch all that...
After re-calculating and further examining pics, I've shortened the main tube by an inch (about 10%), shortened the tail fin pipe half an inch and replaced the tail fin pipe with a more narrow diameter pipe.
This all helps "fatten" it up a bit...
PHArchivist
Master Member
PHArchivist
Master Member
Man I remember when I saw that trailer I was obsessed with the Oakleys inside there. Very cool project!
~$450.00 on eBay these days, but found a decent knock off for $14.95!
BTTFSpencer
Sr Member
This is a super idea. Following.
PHArchivist
Master Member
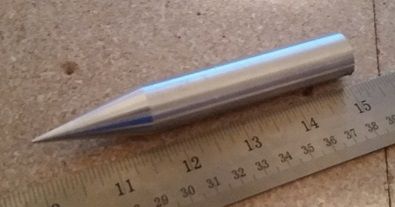
I have this laying around from a previous project. Cover shipping and it's yours.
It's 3/4" in diameter and about 5 inches long. I knew saving it would come in handy...
[URL]http://i51.photobucket.com/albums/f374/drewsmith007/20150803_004145.jpg[/URL]
After further studying the original, my conclusion is that the spike is not a whole lot fatter than a standard pencil. Coincidentally, that is not too far off from the 3/8" esitmate.
I don't know, it looks at least as wide as his fingernail, and mine is closer to 5/8".
I'm 99% sure this is the base launcher, actually a dart gun with the barrel removed and plugged. Maybe they could help you out with dimensions? The spike looks close to what the barrel would be, if it was still there.
http://www.dan-inject.com/CO2-Injection-rifles/model-jm-standard.html
I'm 99% sure this is the base launcher, actually a dart gun with the barrel removed and plugged. Maybe they could help you out with dimensions? The spike looks close to what the barrel would be, if it was still there.
http://www.dan-inject.com/CO2-Injection-rifles/model-jm-standard.html
Actually, I might be able to scale it in cad when I get home from work. It states 11mm bore, and I can scale to the 105cm length listed.
Here's what I came up with using their 105cm length. I dropped the image into autocad, drew a line 41.3386 inches (105cm) long, then scaled the image to match.
Next, I drew lines at what I thought was the edges of the barrel. The dimension shown is derived from those lines.
I also drew in a reference of 0.4330 inches (11mm) to show what the barrel bore would look like. Also included is the dimension of the part the shooter is holding, to offer scale for the next image.

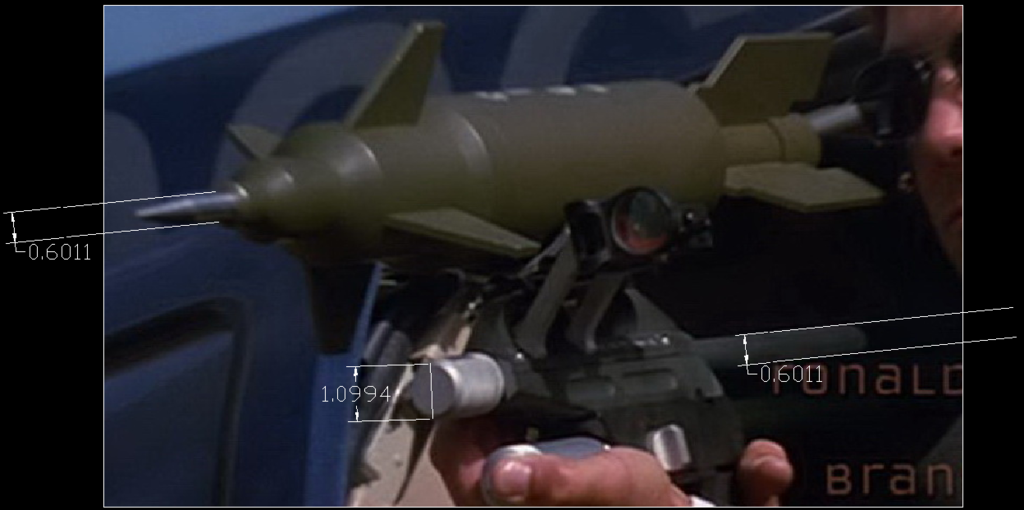
The next image shows the similarity in diameter of the spike and the rear barrel portion. The parallel white lines are the same distance apart on both the spike and the rear barrel.
I scaled this image based on the dimension of the hand hold, and came up with the diameter of the spike = 0.6011 inches.

Next, I drew lines at what I thought was the edges of the barrel. The dimension shown is derived from those lines.
I also drew in a reference of 0.4330 inches (11mm) to show what the barrel bore would look like. Also included is the dimension of the part the shooter is holding, to offer scale for the next image.

The next image shows the similarity in diameter of the spike and the rear barrel portion. The parallel white lines are the same distance apart on both the spike and the rear barrel.
I scaled this image based on the dimension of the hand hold, and came up with the diameter of the spike = 0.6011 inches.

Similar threads
- Replies
- 2
- Views
- 802


