Mass Effect: Threshy the Thresher Maw

sidheman

New Member
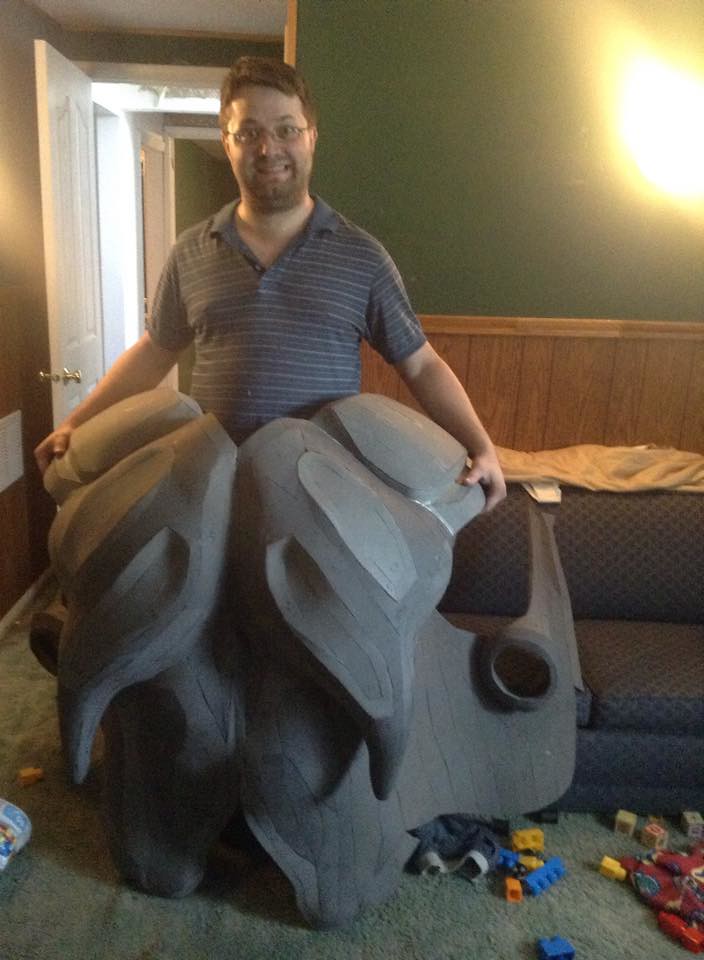
Hi all! This year will be my first year attending DragonCon, and I wanted to make something really cool to bring along so that I wasn't wearing just my Terminus armor I made last year for it. At that same time, the N7 Elite costuming group posted that they wanted to do something epic for the parade: a gigantic Thresher Maw done in the style of a Chinese Dragon! So, being a masochist, I volunteered to make the head.


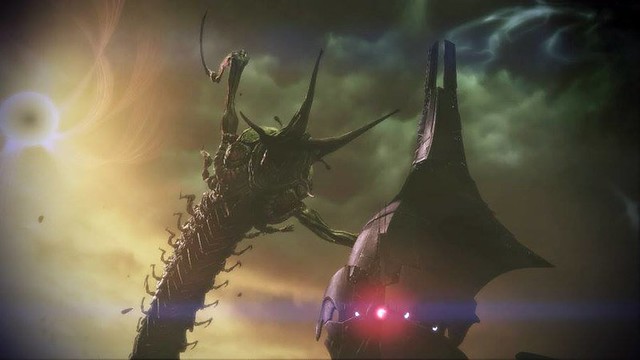
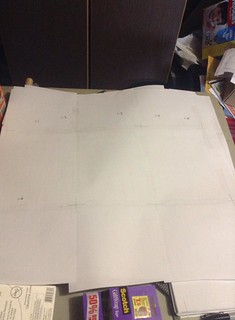
Finding references were remarkably easy, though at the same time I have very little time between starting and DragonCon, so I opted for a quicker route: foam pep. Took forever finding even a basic 3D file, but finally I managed a couple versions made for use in Gary's Mod. After discovering you could set up the pages to a custom measurement (only been using the program for 3 years and STILL learning the useful stuff), I set it up to the width of the foam sheets and started unfolding!


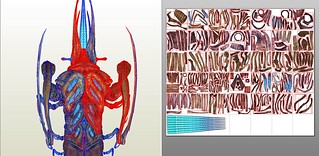
Having everything organazied to fit a sheet of foam made things much easier to organize, rather than guess where to cut a piece so that it'd fit on it. I still had to print it out on regular paper, but this made things soooooo much easier. This also gave me a good guestimate on how much foam I was going to need, so I went out and bought 18 packs of it!


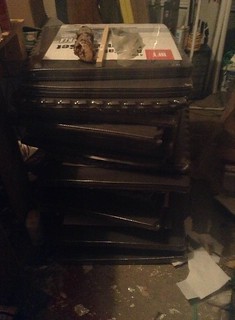
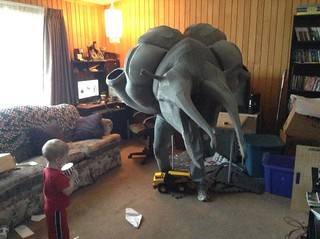
That's right: I'm going to need at least 70 sheets of foam to make this monstrosity, give or take a few. Not truly full size, but still friggin huge! Going to chop up this write-up into the five rows of 7 pairs, just to make it easier for you guys to follow along where I'm at. :)

***********************************

Row 1


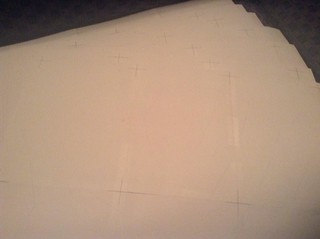
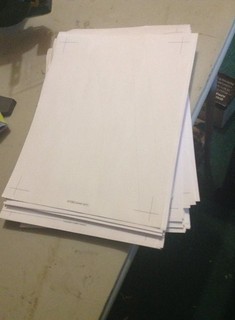
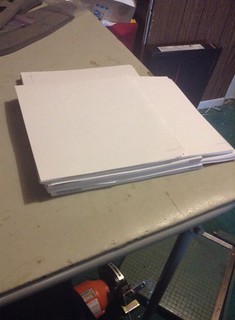
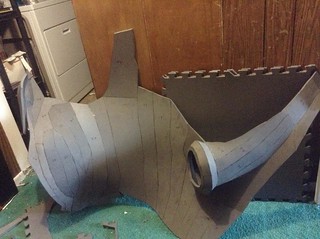
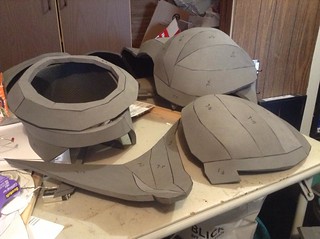
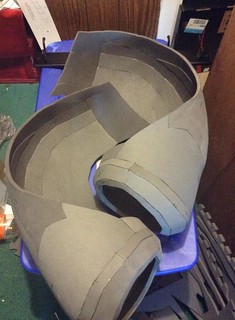
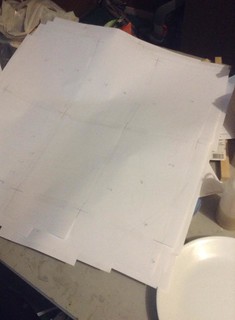
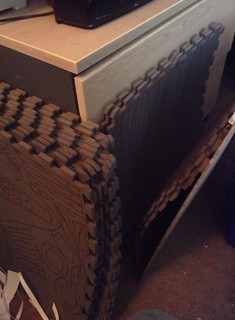
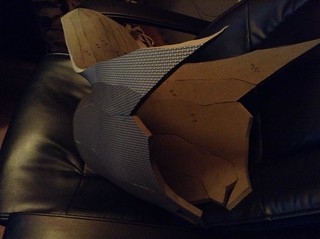
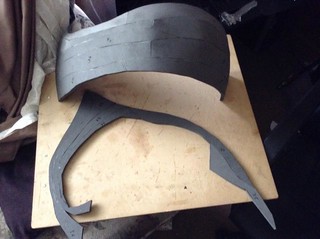
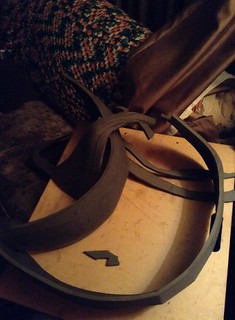
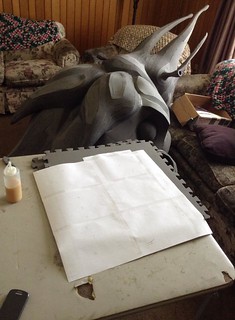
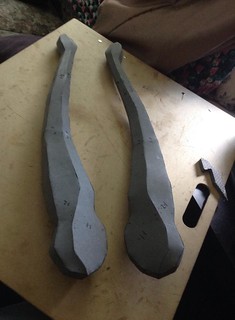
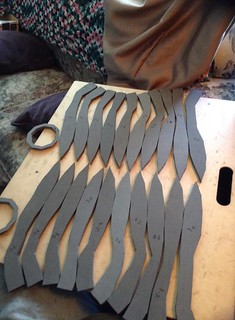
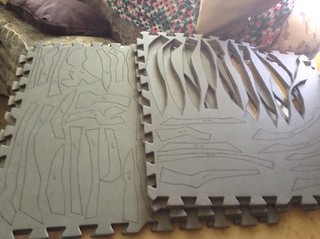
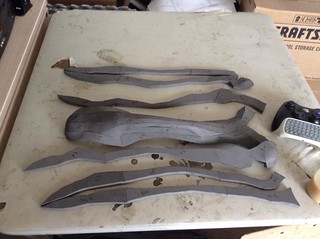
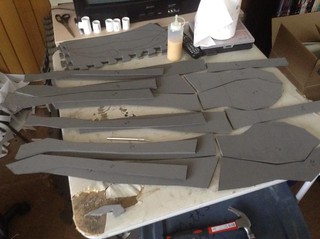
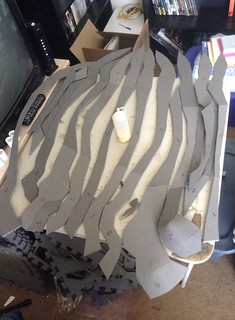
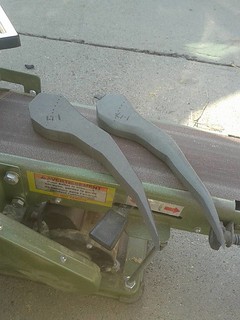
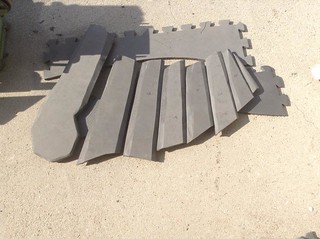
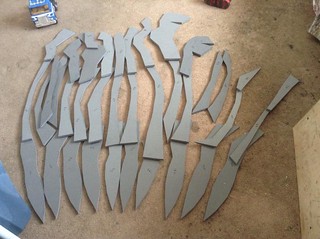
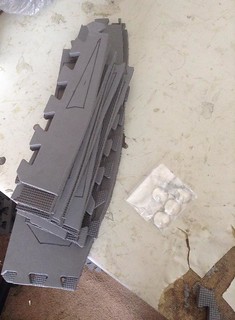
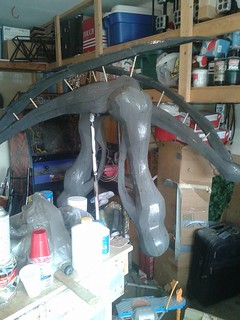
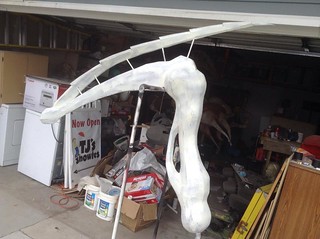
Got the first row printed, taped, and cut for each foam sheet. Each row of paper is 22 pages long, ending at 66 pages for the first row and **264** for all the parts. I doubled up as many parts as humanly possible, though some of them aren't doubled and others, like the claws, will need more. Now that the first row is ready, time to trace!


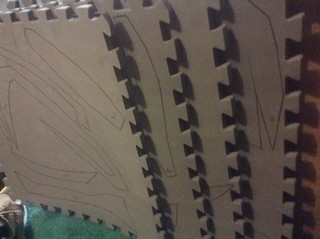
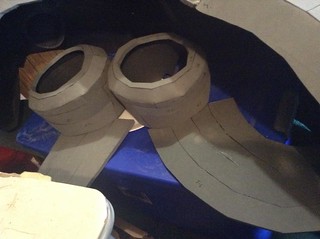
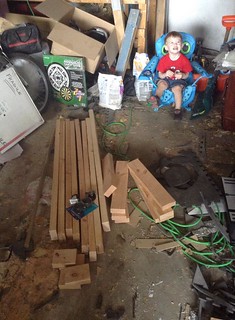
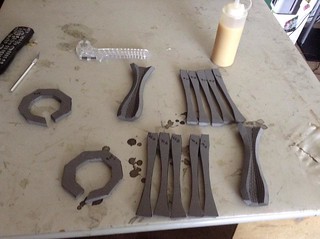
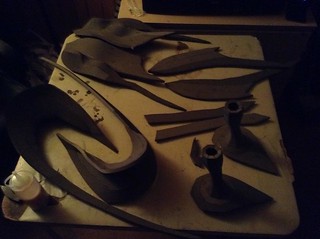
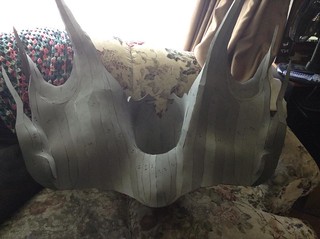
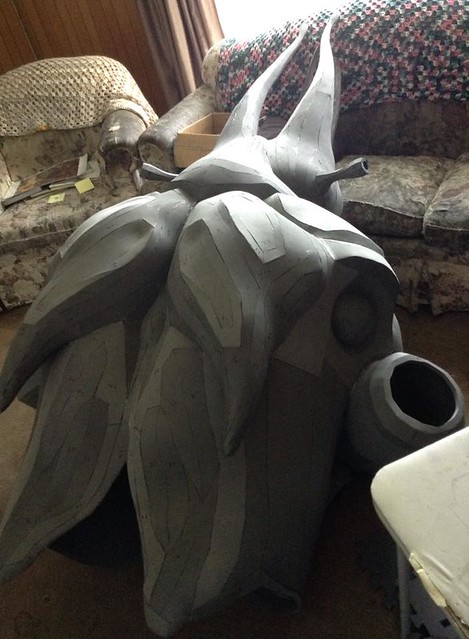
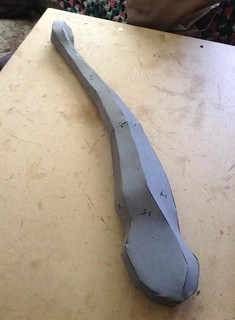
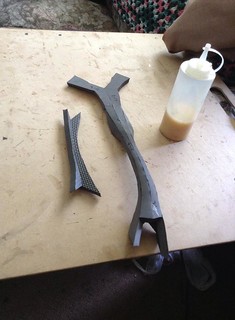
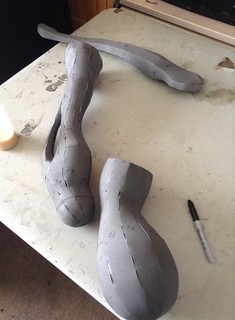
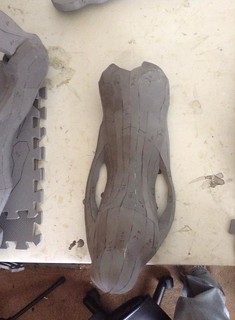
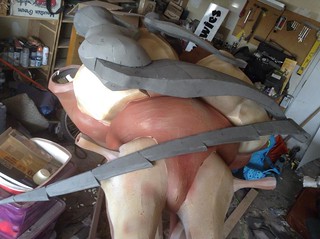
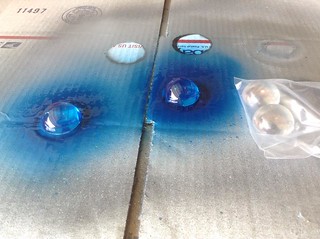
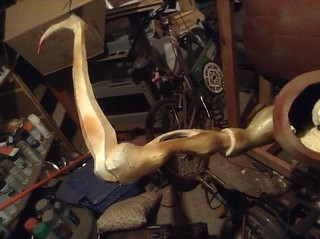
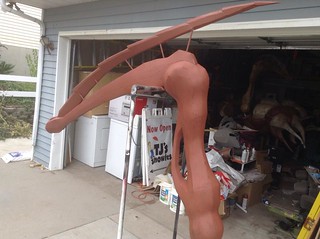
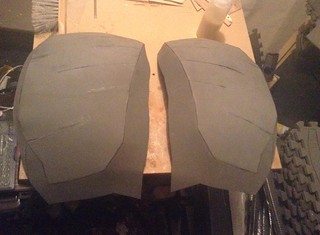
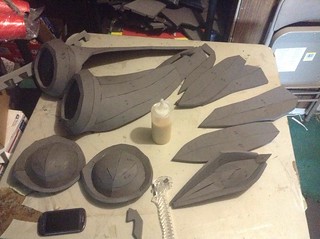
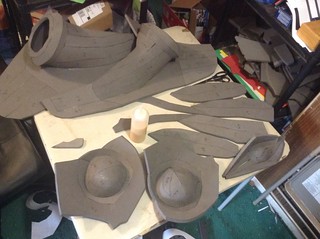
Due to the fact that I can't work in the garage as much as I used to, since I'm watching our son while my wife is at work, I'll be cutting the whole thing out with an xacto knife (with some exceptions, again the claws and whatnot). I organized the unfold as best I could, keeping sections that went together as close to each other as possible. First came the shoulders, then what I originally thought were the eyes, then the upper carapace.


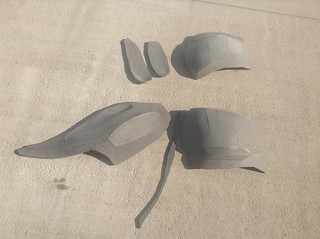
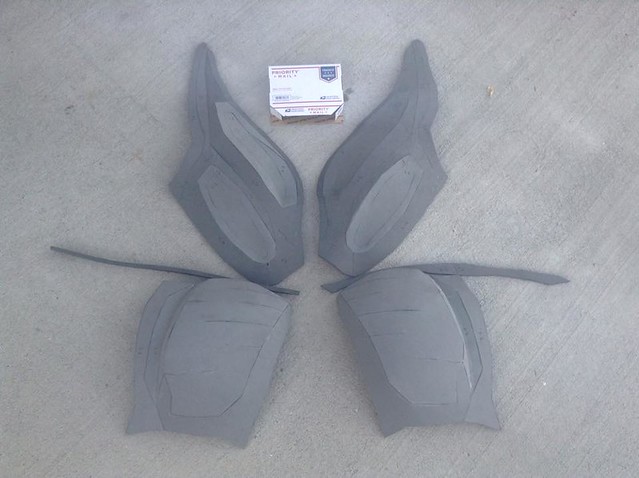
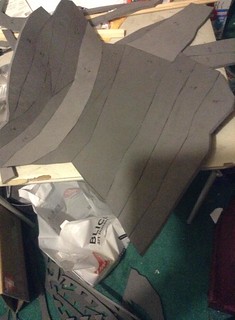
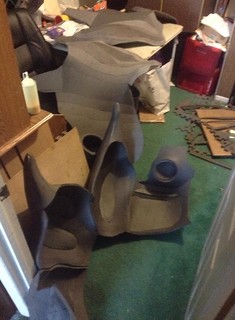
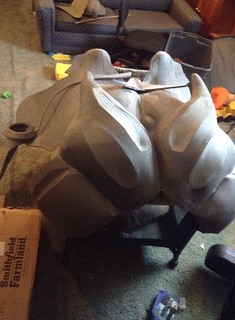
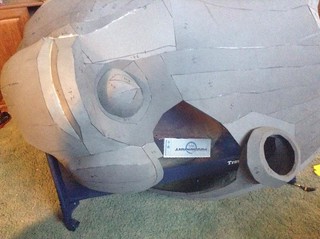
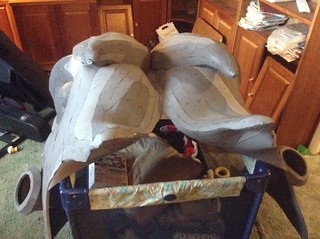
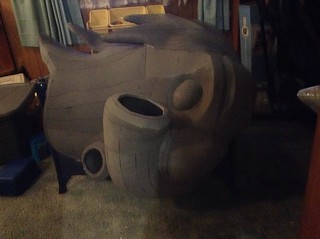
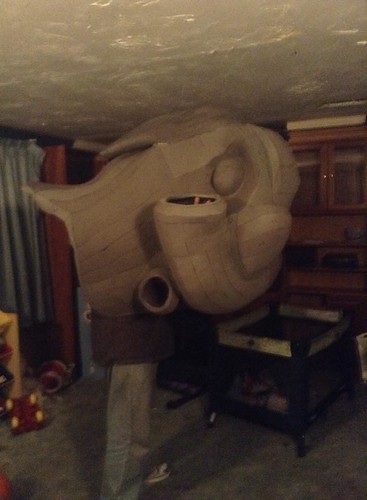
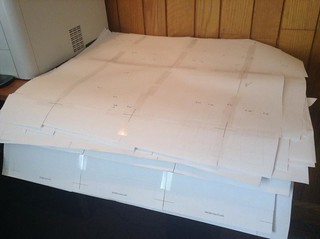
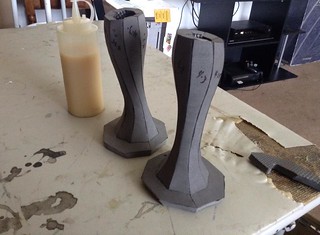
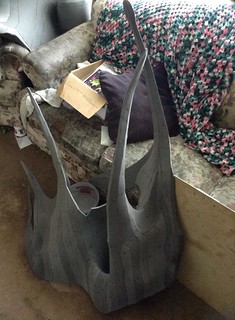
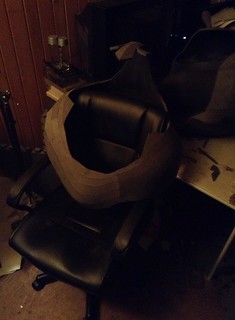
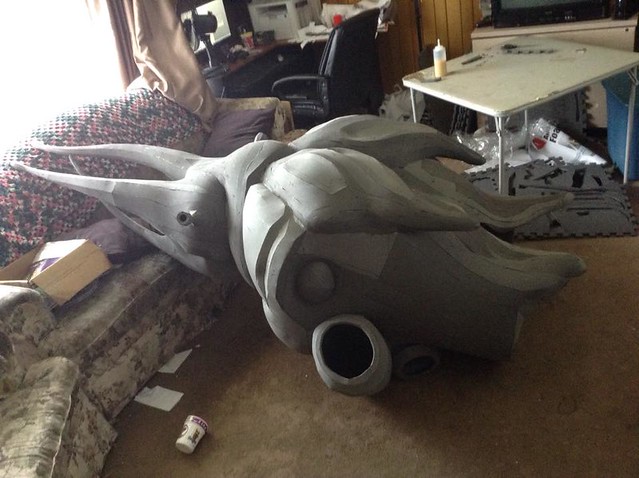
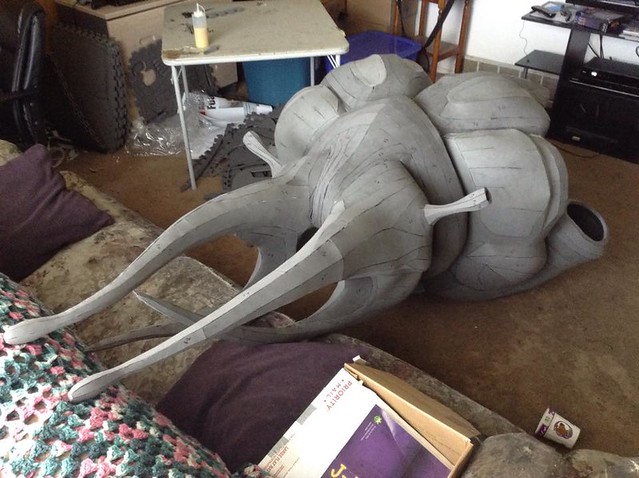
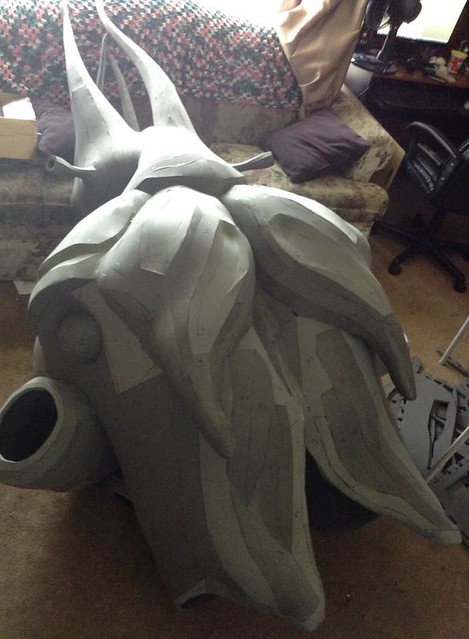
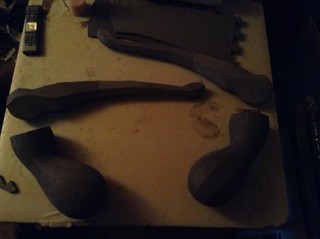
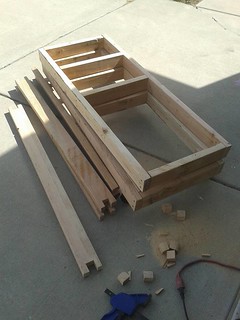
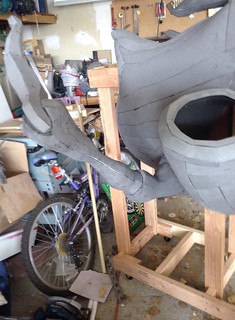
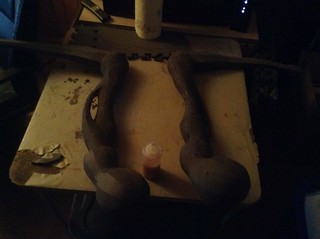
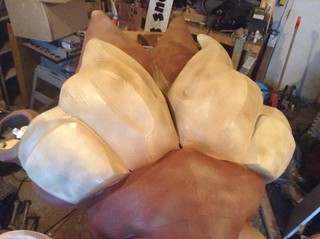
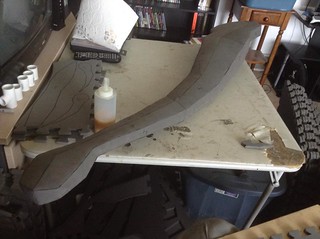
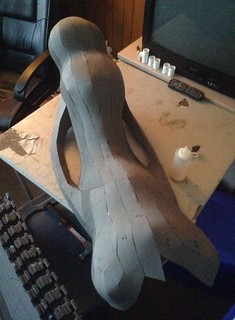
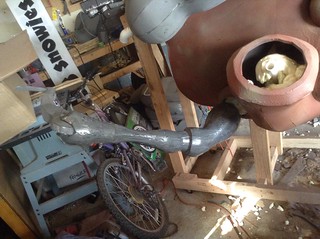
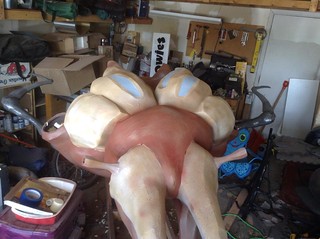
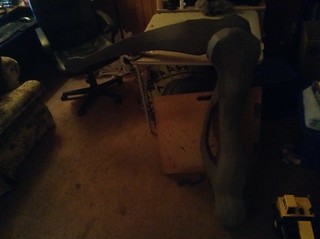
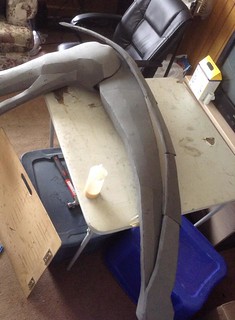
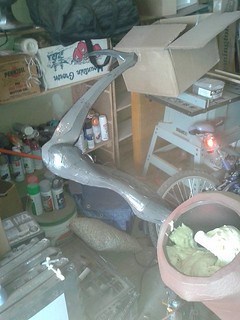
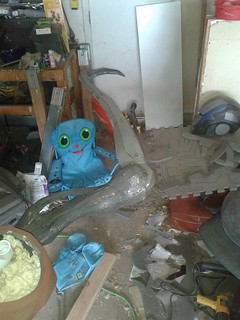
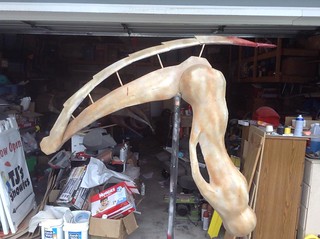
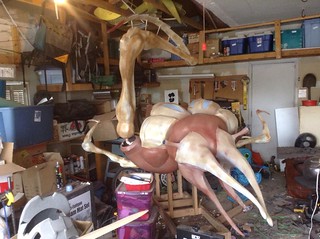
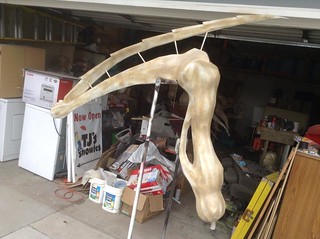
Small flat-rate box for scale, to give you an idea of how big this is going to be. Once all the next sheet was cut and assembled, all the parts could finally begin being attached:


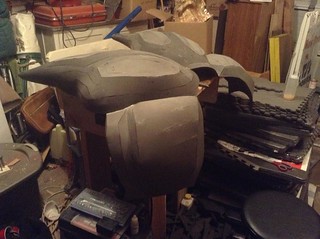
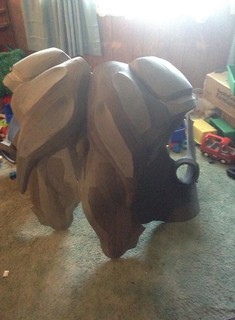
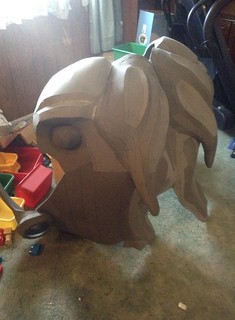
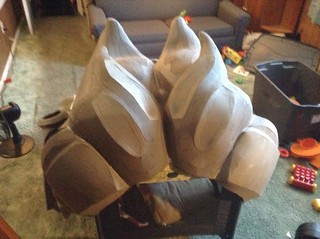
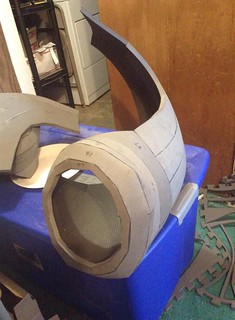
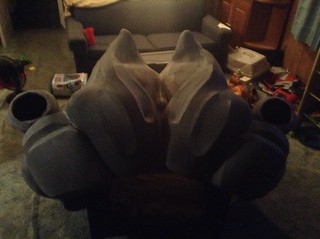
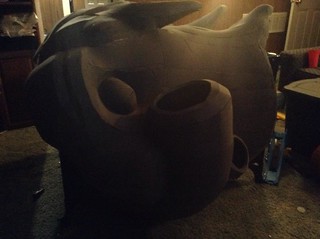
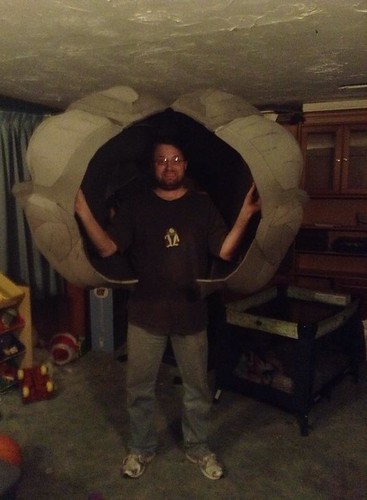
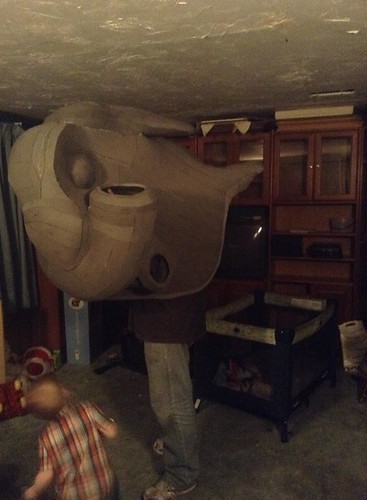
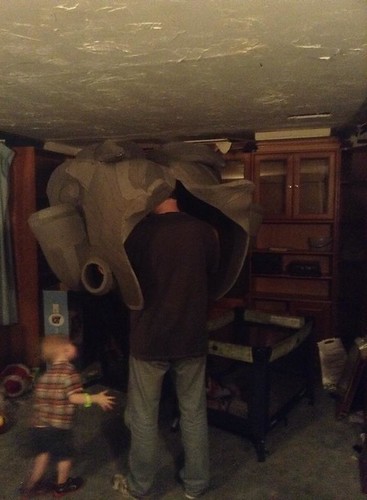
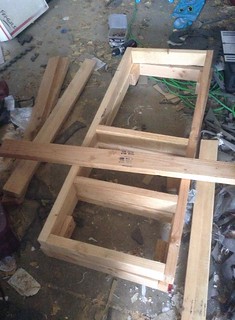
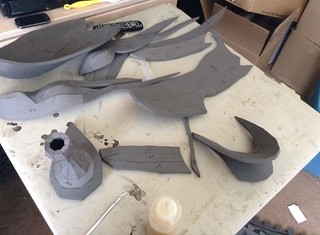
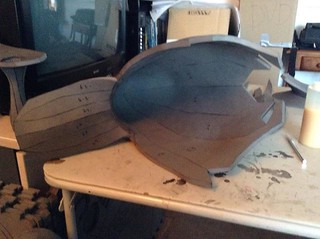
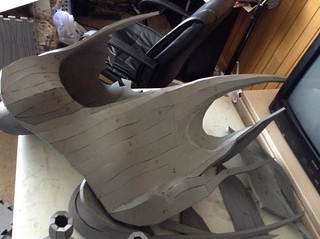
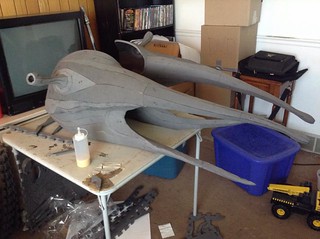
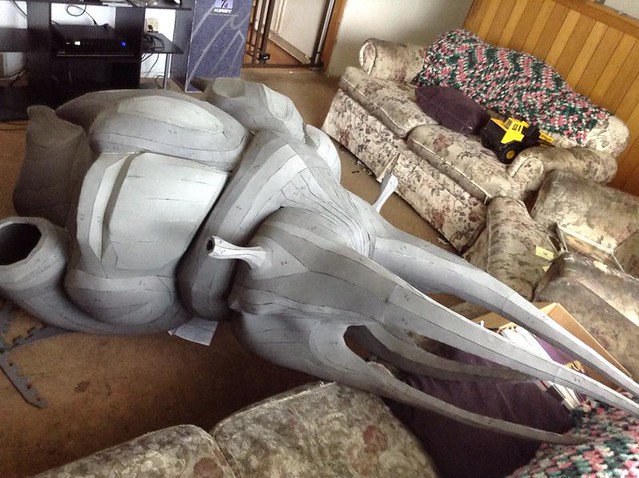
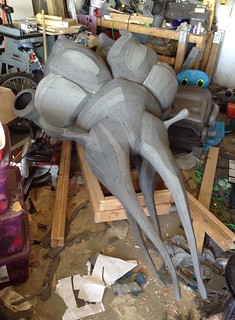
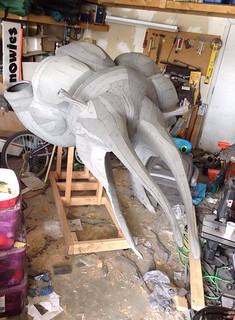
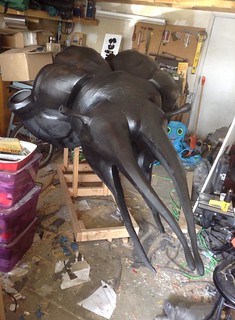
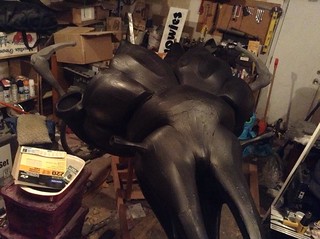
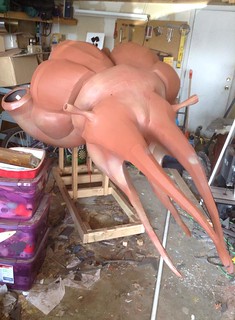
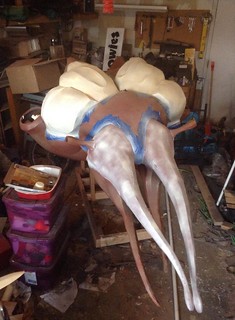
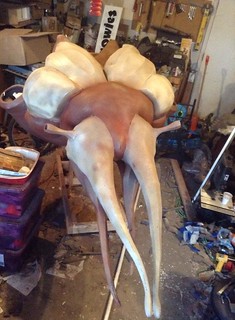
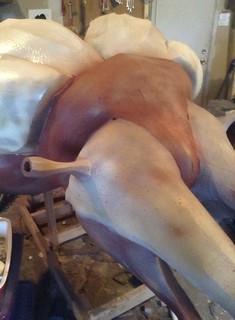
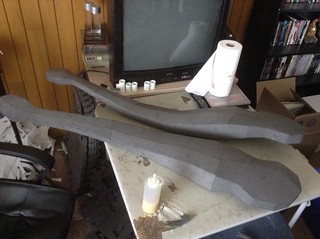
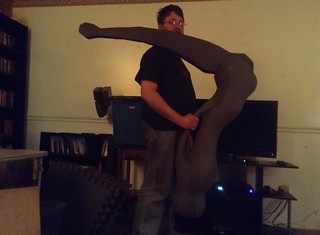
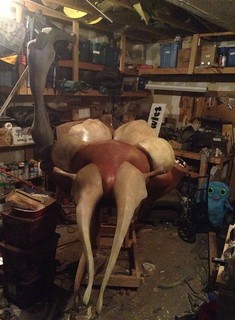
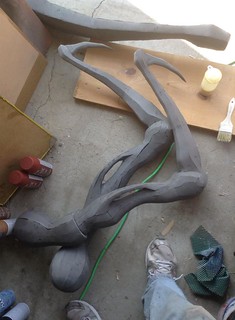
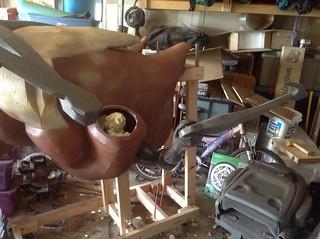
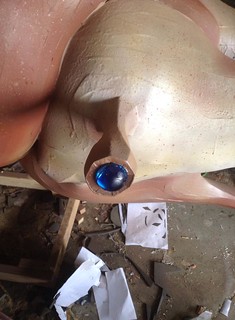
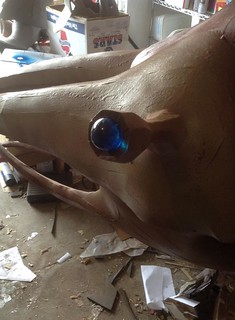
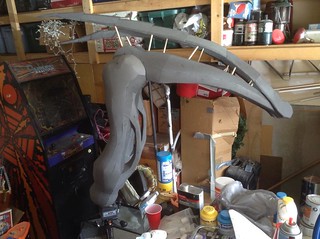
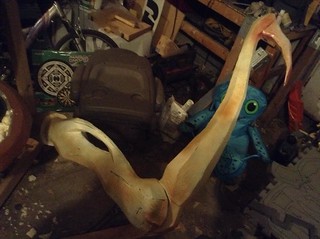
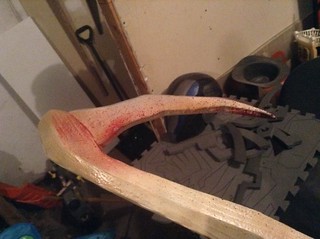
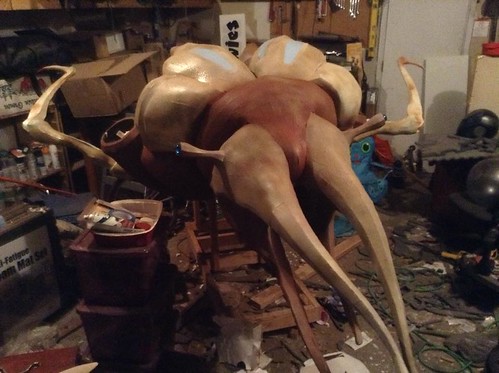
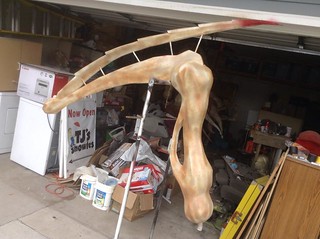
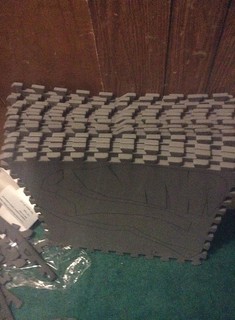
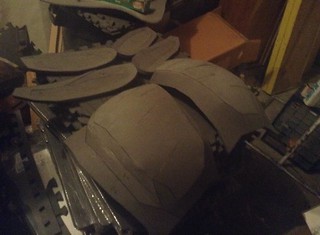
Now we're starting to see some resemblance! After that was done, all that was left were more fake eye things (yay survival thingies!), the section where the small pair of claws attach, and some other bits and bobs that can't quite be attached as of yet.


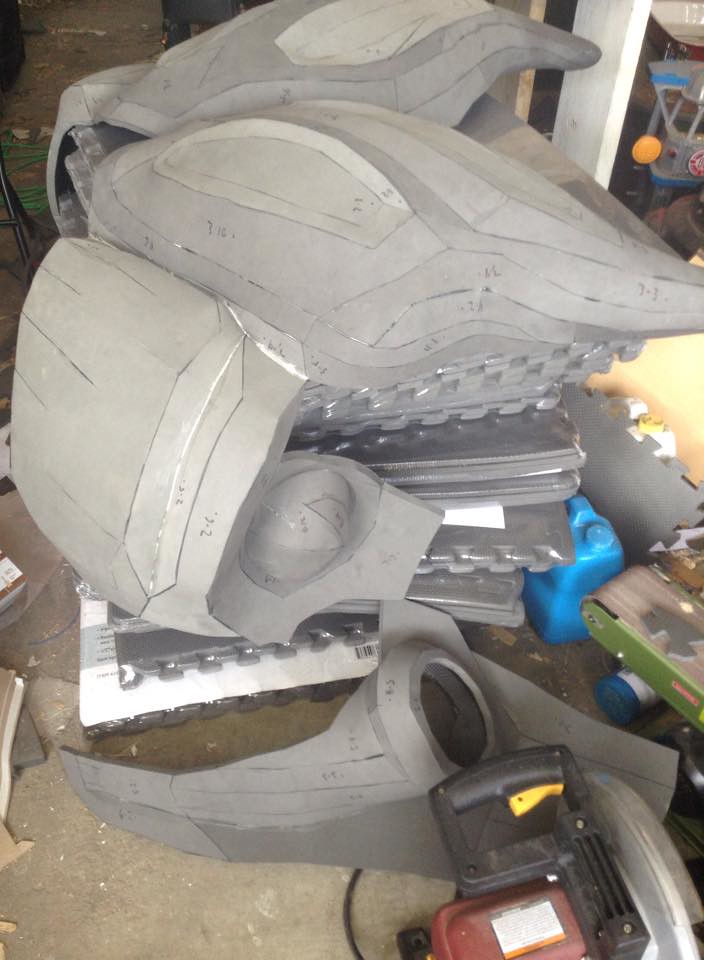
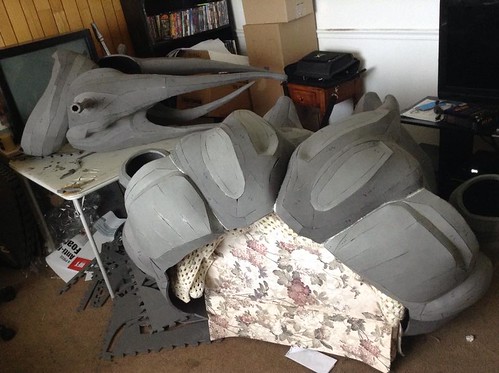
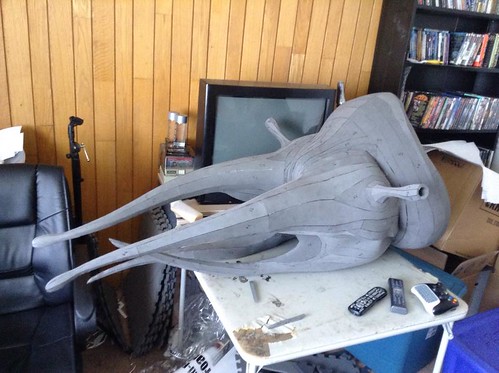
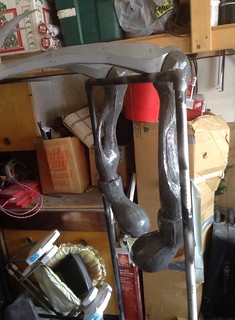
And that brings us to the End of Row 1! 14 sheets down, 56 remain.
 
Row 2


Finally was able to replace the toner in my printer (been borrowing my dad's super slow one), so I printed out all the remaining pages! You're looking at 67-264, basically the rest of the ream of paper I started with plus some pages. Spent a day chopping them and taping Row 2. Trying something a little different here, only tracing a couple sheets at a time, since the bulk of the row is more body sections and I want to get the shape of this thing set so I can build an inner frame and get the measurements to my partner in crime who is building the body section for this. Can't have a Chinese parade dragon without the snake-like body!

Anyway, started cutting and assembling once again.


Remember that diamond shaped thing in the last post? It connects part of the upper and lower halves together, but I opted to wait to attach it to the bottom section since it is more a part of it than the upper. It's also a good registration mark, as it were, so I can align it easier. Got both halves done, connected them, then got ready for the moment of truth: attaching these two massive pieces together.


Absolutely nerve-wracking, especially since I didn't yet have a frame for it to hold it up while I worked. Eventually though, I got it up and attached!


(Me for scale this time - I'm 5'10")

Aaaaaaaand that's where we are currently! Still working on Row 2, with DragonCon looming. I will update here at least once a week with progress, but if you want to follow along as I build it feel free to pop over to my Facebook page for regular updates: https://www.facebook.com/AscensionProps
 
Lots of respect for taking on this project. Definitely looking forward to seeing more.

:D Thanks!

This is fantastic!! It's also going to be massively massive. Can't wait to see row 2!!

Going to be? Already is! ;) So excited!

Keeping an eye on this it's looking great. I'm envious of the big foam builds. One of these days.

Do eeeeet! :D

:lol That's pure genius! You need a little MAKO bouncing crazily along after you.

:D Thanks! Actually Laura, one of the admins of the group, has an RC Mako she named Bruce. I'm-a totally gonna eat it. XD
 
Been about a week and a half, and not a large amount of updates unfortunately. Parents moved out of the house into their new house, and we're staying here to rent the place from them, so at least 5 of the last 10 were spent moving instead of working.

ANYWAY! On to the updates! :D Started up on the next bits for Row 2.


Also commandeered my son's playpen/crib, since it's literally the only thing able to hold this thing up safely at this point. Finished off the bottom's outside edges, attached the shoulder bump thing, and added the underside to the rear carapace to give it it's proper lifted shape.


Now comes the fun part: the spot for the large claws. Relatively simple to assemble, a pain in the literally everywhere to attach it to the head.


I wanted to do a running gag of photos with these two things, because they took on so many silly forms: gigantic mustache, horns, Queen Amidala's hair.... So many possibilities! Alas, no one else was home to help me, and I couldn't afford to waste time waiting, so on they went. Attaching these was even worse than attaching the two carapace sections together.....


Really starting to look like a Thresher Maw now! Unfortunately these pics were super dark, so when my wife got home I had her take some better ones - with the bonus of me wearing it!


I'm holding it at about the shape it'll be. Not as ridiculously huge as it looks in the other pics, but still pretty freaking big.

End of Row 2! (Well, sorta. 2 sheets left, but it's part of the giant claw and I want to do that at the end. If I have time to work out a moving mechanism I really want to add that.)

**********************************

Row 4

Yes, I know, Row 3 comes after 2. The entirety of row 3 is also the huge claw, as are the first three sheets of Row 4 (which also includes the smaller claw), so I'm skipping past those to finish the head. All that I've done so far on this is finish taping up rows 4 and 5, meaning that every single page is now taped together and no longer loose! Yay!


Today however, I did actually get some work done on this. I've decided to make a cart out in the garage/shop, to both better store Threshy and to use as a safer place to glue stuff on.


Made of 2x4s with casters on the bottom. The idea is to make the cart collapsible so that it can fit in the van for the trip to DragonCon, and still leave room for Threshy, my Terminus armor, and a few other things I'll be bringing along for other people. I need to cut out slots on the two frame sections and the four boards still, for a simple bit of joinery, and I'm not sure if I'll need a bungee cord or something to secure it on without it tipping forward while Threshy is on it, but the cart will make it easy for someone in costume to still push the head around as needed without having to carry it by hand.
 
Squee!

Keep going! you're almost done! (giggle)

I know, right? :D

*************************

UPDATE TIME! Got a lot done in the past week, and I think you guys are gonna love this.

Traced out the rest of Row 4, then got to cutting as per usual.


Remember those things on the carapace that I mentioned earlier that aren't actually eyes, but we all think they are? Well those two stalks you see are actually the eyes. That whole survival thing I guess. Until I started messing around with the unfolding, I never even noticed them in game! Granted I was busy dodging claws and acid spit, but still....


Thus concluded what I was able to get done this past Sunday. Didn't get to work a lot on it during the day, but still got a fair amount done! Monday, however, I got a crapton done. Bill over at Punished Props did a 16 hour livestream day in the shop, and since my wife stayed home sick so she could watch our sick son, I got to work the entire time along with them!


Didn't take as many progress shots during that time as I was doing as much as I could, but in these next few shots you can really see it all coming together. What I really like about the foam is that the pieces start to shape themselves once you glue the right ones together!

End of Row 4

Row 5


Those last two shots are ones I took the next day, since the late night ones were pretty dark. Still though, that entire face portion was finished during those 16 hours, of which I am extremely proud of myself. That literally puts me a week ahead of where I expected to be!

Tuesday the wifey went to work again and I had to keep an eye on the kiddo, but I got to work on the last half of Row 5, which is the neck scarf thing.


End of Row 5

**************************

Now comes the reeeally fun part.... mass assembly!


As you can see, Threshy has taken over the living room at this point. Totally worth it though! You can see the three sections: the face, the neck scarf thing, and the head carapace. Today (Wednesday) I took the plunge and started connecting them.


First I did the face and neck, which I thought was easier overall. I probably should have done the neck and the head first, just so I could get better grips and angles on the pieces, but I naturally didn't think about that until well after I had gotten it all together.

Attaching the face/neck to the head was absolutely insane, especially since I was completely on my own (and wrangling a 2 year old), but I prevailed!


Guys, meet Threshy the Thresher Maw! Threshy, please don't eat the nice people. XD He measures nearly 8 feet long from the upper tendrils to the back point on the carapace, and is currently about 5 feet wide at the large claw holes. Here's a couple shots of me wearing him again:


The next step is to finish up the cart, then work out a simple frame to help hold Threshy up so the wearer can carry him easier. That will also make it easier to paint him while I get going on the claws!
 
1045054_504840476255911_786746461_n.jpg
Remote Controlled Mako reporting for duty! Bruce will be ready for the showdown against Threshy at Dragon Con... after I get his batteries charged!
 
View attachment 514326
Remote Controlled Mako reporting for duty! Bruce will be ready for the showdown against Threshy at Dragon Con... after I get his batteries charged!

YUS! Can't wait! That idea of yours is gonna make us famous or something. XD

****************************************

Big huge mass of UPDATES! Sorry guys, been pushing to get this done, since DragonCon is literally next week. Got so much done that I've got another 83 photos to put up, though I might skip a fair number of them and make it a tad quicker. So, if you want to see more of the progress shots, feel free to check out the Flickr album here: https://www.flickr.com/photos/88803735@N08/? or my Facebook page here: https://www.facebook.com/AscensionProps

On with the show!

Row 4 (cont.)


The entirety of the last three sheets on Row 4 are the small claws, which made things easy to organize. The upper and lower sections came together fairly quickly.


Again, apologies, many of the progress updates happened late at night and the lighting sucks for photos in that room. Anyway, got each side done, then started work on the middle sections!


Bit of a jump around in progress here - this update happened on my wife's birthday, the day in which I promised that her present from me was getting Threshy out of her living room and into his proper home, the garage. A good friend of mine let me use his jigsaw, and I got right to work on the cart!


Didn't quite have enough time to finish it up, but got enough done that I could do the rest at home with my circular saw. Meantime, got Threshy outside safely! Also picked up a metric buttload of paint for later.


And with that, and once the party was done, it was right back to work!


You'll notice the claw isn't on it just yet - planned to do them all at once since I needed to layer the foam, cut them out with the bandsaw, then hand shape them on the belt sander. Opted to do that all last, in one big go since I don't have a ton of time during the day to work.

Pulled out the circular saw, and sharpened up my chisels, then got the cart all done!


Threshy now has a sweet ride! It's a simple set-up, and not the greatest, but I need to be able to push him around Atlanta in full costume if travels call for it, and I need to be able to take it all down so everything can fit in the van for the trip. Here's a test shot with the first claw:


Since I also need to be able to remove the claws for transport, I started work on the inner frame. I also started covering Threshy's head with Mod Podge, and then Epsilon, all to hopefully strengthen the seams and give him a slightly harder shell on the carapace.


Once that was all dry, I put on three full layers of Plasti Dip. I would have gone straight to primer, but there were sections of foam I left uncovered (in particular the part someone stands in) to keep its flexibility, and I also wanted to make sure if I missed any foam areas they would be covered well enough for the paint to not seep through.

That and I know how Plasti Dip works for me, and since I don't have a lot of time I went with what I know.


In the midst of all this (since I can paint, then go inside and cut/glue while it dries), I got going on the other middle claw section, and had a startling thought:


Green Lantern's..... Maw? XD That's literally the first thought I had when I put the middle bit together like this. ;) Got that put together, assembled the second claw, then threw them on Threshy to see how they look.


End of Row 4 (completely)

Lookin' good so far! Next I threw on the primer, a darker brown I would also be using for the base skin color.


Also got more work done on the inner frame, and realized that I should have made that first.


Since it was raining that day, I had opted to go out, measure, come back in, cut, then assemble it and toss it inside Threshy. I also had planned to use the backpack frame I used way back when for my Giant Robot contraption, to help hold Threshy up while walking. Too thin, unfortunately. Had to remove it, extend the upper beams, then everything fit better.


This frame still has its issues, but it'll be much easier to carry Threshy around this way. Once that was done, I got to work on painting the skin areas.


A little hard to tell here, but I went for a mottled skin effect with the spray paints. Hard to do well, especially for someone like me who isn't very skilled at that sort of thing (especially with spray cans), but I think it turned out pretty well. Started with that primer base, then dusted areas with various lighter browns. Not entirely, some areas more than others, and some more lightly speckled than dusted in an attempt to make it more flesh-like.

Then, I masked around the edges of the carapace, and went to town again.


Didn't tape off a lot, because I wasn't worried at all about overspray. It was easy enough to cover that back up using the same methods I applied earlier. Since the carapace is more bone-like, I started with an ivory as a base, then to age and weather it I covered most of that with a khaki brown, and highlighted some areas with a dark brown on top. Then I went over the whole skin area again, with the lighter browns, and ever so slightly pressed down on the spray tip, making it only spurt out droplets.


You can see it best in the second pic, and I think it made it a touch more realistic. Again, not the prettiest job, but I'm learning! :)

Gonna stop here and split the post into two, as not to clog the post with pictures. Stay tuned!
 
Row 2 and 3 (cont.)

Most of the rest of Row 2 are the pointy bits of the large claws, but I'm gonna include it anyway. The large claws are basically the exact same as the small ones, but with only 2 sections and a much larger pointy.


The upper section was simple, if huge, and both sides came together quickly.


The lower section was a bit more complicated, but made easier than the smaller version again because of its size.


Can we say Krogan scythe? XD I've gotta make one of these again for when I do Garm next year. Anyway, in that last shot the claw isn't really attached, it's just resting on the frame bit and being held up by the PVC pipe I'll be adding to it later. The next day after this was done, my wife was home all day, so I decided to push out all the pointy bits and get them done and ready.


Started up the Epsilon on the small claws now that they are fully assembled, and added some dowels to the large one to hold the pointy end in shape. Much floppier than I expected, unfortunately.


These large claws are as big as Threshy. It's insane. :D Put in the pipes into the three claws, then put them in place for a shot.


Ended up securing the pipes inside with Great Stuff expanding foam, so they didn't twist around. Still needs more support to sit still though, so I'm thinking fishing wire.

In the midst of all this, Threshy wasn't looking quite right. Something important was missing, and unless I got it done it was going to bug me forever. So I painted in the fake eyes. XD


There. NOW I can focus on the claws without being distracted. Time for the second claw!


I stopped by my local acrylics dealer as well, to pick up a wonderful bit of awesomeness to add, which finished off the head completely.


Go for the eyes, Boo! Go for the eyes!! RrraaaAAGHGHH!!!! I used a transparent blue spray paint by Testors, which worked swimmingly for these half-round spheres. Still lets light in, and looks amazing! Really sets off the full effect.

Finished off the other large claw with its support dowels, then got to Epsilon'ing everything.


​Row 2 and 3 complete (finally)

Once that was dry, it's paint time!


Nice close-up of the blood spatter there. Really like the effect. The claws were painted the same way as the carapace earlier.


Unfortunately the pipe connection on this one twisted while drying, so I'll need to cut that off and fix it. No biggie though. For those wanting a nice, in-depth step by step on the painting on these, I decided to take a shot of each step on the last claw.

1 - First, three layers of Plasti Dip, followed by the primer base coat.


2 - Once that dried, a single coat of the Ivory, being a bit lenient in coverage (about 95-99%).


3 - Immediately after finishing with the Ivory, spray on the khaki layer. This helped the blending, and once again no need to cover the entire area. Quick, light sprays preferred, keeping the coverage uneven.


4 - Once again, immediately after finishing the khaki layer, spot-spray a darker brown with much less area coverage. This gives it a fuller effect, and really makes the coloring pop. Add blood spray as needed. ;)


And with that, I'm calling this 99% done! I've got someone coming over tonight to help me add support to these claws in the form of fishing line, and to help re-angle them a bit. Better pics later; for now, enjoy Threshy's (nearly) final form!

 
So! Threshy survived DragonCon for the most part. One of the pointy bits of the left side large claw broke a little in transit (1880 miles, wooo!), and broke off fully just before the parade started. The frame didn't stay together much at all, and even with the rope I got the large claws still eventually pulled off and helped with making the frame fall apart.

All in all though, he did what he was made for! Here's some pics of the parade and group shot, with the rest of the body attached!

EGOPhotography.jpg(Photo by EGO Photography)
MarkParianiProductions1.jpg(Photo by Mark Pariani Productions)
SuperHeroHypeThreshy.jpg(Photo by SuperHeroHype)
VividDisasterStudios.jpg(Photo by Vivid Disaster Studios)
Laura_Ducros.jpg(Photo by Laura Ducros)

That last one is actually Mark Meer in a Vorcha, so that was epic. I ended up giving him the broken claw piece the Jack is holding, which works as a great little knife for his costume!

More photos can be found on my Facebook page here: https://www.facebook.com/media/set/?set=a.952307434825986.1073741865.307237782666291&type=3

Big thanks to Laura at Rebel Among the Stars Studios for coming up with the idea, Lexi at Keelah Monster Cosplay for making the body, the N7 Elite for funding the materials, and HUGE thanks to the handlers (Ryan, Alonzo, Chase, Kate, Matthew, Jesse, Heather, and Robert)! If it weren't for the handlers Threshy never would have even marched, and they did an awesome job of it.

Threshy had a lot of problems, but for a 600+ hour build crammed into two months done solo, he turned out pretty good. He was also repairable, given some time, which meant that if I didn't get Threshy 2.0 completed in time I could send this one along to use. Unfortunately, thanks to a hissy fit thrown by my brother, Threshy has been damaged well beyond repair (or at least beyond the point where I can fix him to a similar quality to when he was first made). Stay tuned for Threshy 2.0!
 
This thread is more than 8 years old.

Your message may be considered spam for the following reasons:

  1. This thread hasn't been active in some time. A new post in this thread might not contribute constructively to this discussion after so long.
If you wish to reply despite these issues, check the box below before replying.
Be aware that malicious compliance may result in more severe penalties.
Back
Top