Making my own original design spacesuit - Multi-Year Project

tomekdersuaaron

New Member
For the past years I've been working on designing and fabricating a spacesuit I’m going to use in a project called the Ceres program. I think I must have read everything on this forum involving spacesuits, starting with Ryan Nagata’s Apollo A7L build, so I must thank you for all your knowledge and learnings.
It felt only fair I would make a thread of my own, to hopefully share some insight of what I’ve learned so far.

I want to use this thread to track the progress so this first post might be a long one.
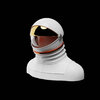
This is where we currently are at:

jiehT2kaJGBiO3evou4zBmw=w879-h1319-s-no?authuser=0.jpg
2023-04-07 18_43_14-Photo in Ceres program __ Ceres I - Google Photos.png
2023-04-07 18_42_56-Photo in Ceres program __ Ceres I - Google Photos.png

But let me backup a bit to show where we started.

The Project
My whole youth was basically shaped by science fiction, I loved both Star Wars and Star Trek and from a young age I had a subscription to a science magazine that would always feature some facts about the universe. One thing that I’ve always noticed that even in these fantastical distant worlds, our own world always seemed to surprise and amaze me more. I’m making this suit with a friend for a project called Ceres program. The goal is to travel the world and photograph all the beautiful and diverse places our planet has to offer through a sci-fi lens from the point of view of astronauts looking for another planet for humanity.

other-world-Tomek-Dersu-Aaron-01.jpg
other-world-Tomek-Dersu-Aaron-02.jpg
other-world-Tomek-Dersu-Aaron-03.jpg
other-world-Tomek-Dersu-Aaron-04.jpg
other-world-Tomek-Dersu-Aaron-05.jpg
other-world-Tomek-Dersu-Aaron-06.jpg
Examples of pictures I've taken on holidays

nasa-apollo-01.jpg
nasa-apollo-02.jpg
nasa-apollo-03.jpg
andrew-struder-space-to-roam.jpg
interstellar.jpg
star-wars-a-new-hope.jpg
Examples of astronauts visiting other worlds

Design overview
The reason I give this backstory is because then you understand our design has to be both aesthetic and functional. It doesn’t have to survive a vacuum, but it does have to be usable on multiple trips.
Design-wise it has to look in line with the current gen NASA EMU, but also distinct enough that it fits our own fiction.
First we started with a rough sketch of all the parts we would have to make.
We decided very early on to start with the pants first, because it seemed to need the least machines to fabricate.
ceres-program-sketches.jpg

Early sketches
 
Last edited:
Pants
ceres-program-pants.jpg

A few things we decided on for the pants where integrated boots and the joints had to be flexible while under positive pressure. We got our inspiration from these real space suits.

image38.jpg
image26.jpg
image31.jpg
We started sewing each piece as we went, with a rough idea where we wanted to end up. As a base we bought some boots that we modified. Because leaving footprints is a very important part of exploration, we wanted to have a Apollo reminiscent but distinct footprint. In the first sketches you can see two ideas of a honeycomb grid or overlapping stripes.
image15.jpg

image18.jpg
image3.jpg
image23.jpg
image13.jpg
image9.jpg
Underneath the outer layer is a thick layer of foam that is used for costumes. This is to simulate the balloon effect that real spacesuits have. I always hate it when movies have deflated spacesuits. This will make the suit very hot, so to prevent us from overheating we will have to make a cooling garment.

The footprints actually took a long time to make, we first had to make a vacuum former, which I will go into detail on later. Then we made a puck out of foamcore, which worked surprisingly well. We made a mold from the puck and then filled it with polyurethane casting rubber (Shore A 75).
image8.jpg
image33.jpg
image25.jpg
image2.jpg
image11.jpg
2020-05-19 13_57_31-_2020-05-12_ceres-program_progress-flats.psd @ 174% (torso pants, RGB_8) _.png
DSC05701.jpg
_2020-09-07_Ceres_Tomek-Dersu-Aaron_017.jpg
_2020-09-07_Ceres_Tomek-Dersu-Aaron_029.jpg
_2020-09-07_Ceres_Tomek-Dersu-Aaron_023.jpg
 
Last edited:
Torso

To get a feel of the size of the torso we first traced a bomber jacket on some pattern paper. This gave a rough indication of what size we should be thinking about since the spacesuit should have a bulky feel. Afterwards we started sewing together pieces of unbleached cotton for making a toile. Two important pieces to consider were the connections with the rest of the suit and allowing it to still bend in certain places.

_bz1F8JR0lttlLeOAmk1_ADgT7coCShDmYUv4t6hp2pDV4qKDA.png
oHEo7uUxsBA6-jp8VGjU19RBDWIhYZiQTXHUl2Vcs6Sx5FaUSg.png
9CYbtG_4DKBktcnD-pO3xSwFliHtW5rEeFI2ODkHNFRlgt8Owg.png

During a visit to a space expo I noticed that some space suits feature these folded pieces of fabric to allow for some movement. So we added those to the shoulders and elbows. For the time being I’ve created some MDF rings to sub for the metal bayonets that will be attached later.
The neck also features a convolute joint type of pattern so the helmet that will be attached to the head later has the ability to move.

O6rhOTO23DjPKRvX3e5XNzthi3G6rpPWccYTcE0yolXU7EdlNw.png
tn93vky9fvnu5BLj6s7uOaeVMa8mylpD92SdI8Z_qfiyfcFeDw.png
pgLkWrq3p9ph1v2qCJtU3CEtYAKaGCVD97cjYzSIAHPj_W1V_Q.png
k1qjjX0nzAkaMj3nvpXhKaI7bRqJjjKn2JBhziehLEWMTMPztQ.png
3j4zxL9nR-3BfZSZVvUhxCrBJmqPvZcT6mljbPvyhONkEgztTg.png
PsnlYFq9yVEFloThK8Mkb1RMAcXEMkJkgpA2t2Cvk0NCQ5nGdg.png
ceres-program-torso.jpg
sNwhIspSRCggY-zWUj5olfvCM1aC5SPaX6VXglpgRpz-HrrbgQ.png
EKFpIbtjUU1AydH3eXKxv6g-dOhi_8czjX-JpoBozo8Fc7qW0Q.png
 
Last edited:
External Carrying System [ECS]

Before we started on the bags we had to design a system to attach the bags to. We knew we wanted some sort of modular attachment system, that is how we decided on what we call the External Carrying System or ECS. Basically the ECS is made from two different types of parts. The webbing and the connectors. For the webbing we chose Edelrid X-Tube, they describe it as flat tubular webbing made of robust and durable polyamide. It has an insane load capacity of 20 Kn, that’s about 2000kg. For the connection hardware we chose to use the legendary Cobra connectors from AustriAlpin.

Later we will add tags everywhere to easily discern left from right and what connects to what when putting it on.

I-IxpniYW8K742jFt2k2tQ_NZsejRxBzZ6x561O28Vzd-azXyQ.png
JfJp6PYJqBA9D57rrwG8GbLgWxWf_rKEWMBaJDY66dCIkvOxfg.png
1vxo9AdgazlfqexWZLip3HG1ez8d-PzyfQeZXNDb26DA284y_g.png
IusYrIdwGXtNtG-9ZnaVPyMPM9_1P_UY92gYXIdPLJ0V8CUFtw.png
-yt2sn2bfKlN1SuVvUX5Bran7Nhc6w79UV0lEPubmacBlgKgoA.png
wN09Mv49AIkdc3VyRypAIZYgo-HJEFiIJcq61HqZMNnv5H0sOw.png
B-OgElfdaiTLb70s54vyy0AkItpJmeLC0xBzqBlMriQdnQcLHg.png
B8GO4dp2WwbzI8fNybJ1Uarv0Swn-oSwQYr0C6yaAWY5-_vr5g.png
f3-GArTYgFldwTuTvzE3lBsH9GvC5JAn8Bfj5gbmeiULqHmX1Q.png
 
Last edited:
Gloves

I know starting out that the gloves would be a though one. A few features I wanted them to have.
First we are going to have to manipulate small items not created for usage with gloves. So sturdy nails are going to be important. There are some Gemini gloves that have those, I have to look them up in a book. Secondly, another Gemini feature, LED lights in the fingertips.
Then a strap to tighten the gloves around the hand, grippy palms and of course big rubbery finger tips.

The LED was easy enough to figure out, I have a small Fenix flashlight with a USB rechargeable battery. I bought a few of those. And this is actually the first thing I’ve designed in 3D and 3D printed.

8cf4mn8U0GPVXYVIZ9FIhitovZ8_0egK93L3QhvShrJNppZNyw.png
rg_VCC1pVDVmSIulCHHHLY5Cw29hUD_Tt2zmaqjgxB9UNIkpBg.png
DfG_tPl2Ngbow0TVC_TyhHxopEfPhza0fr9xWpQ64YDbVKjdzQ.png
7A2LpPI-eSXT748SuKHM-BhfwQ41rbkW1gk6oHCZ1vg8VOOtAQ.png
HhLZWWrR9Z2Msy3I1wt3fm7kvfwd1VlTf4_1U4vxgEKvkipKag.png
WOr1A3hjPZqFTL5FILtjE1QjHz_S7hXSMCXozimSBwFzMYDOXg.png

For the finger tips I’ve tested several different materials. The biggest problem I ran into was how to securely connect them to the rest of the glove. Since taking off a glove is impossible without pulling directly on the fingertips. I landed on using Silicone Rubber Shore 40 and immediately had to solve two more problems. Silicone Rubber doesn’t stick to anything. I must have bought 10 different glues to test. And I needed to add nails to the fingertips. One day I got inspired by my toothbrush which seemed to have silicone mechanically connected to the hard plastic parts. Turns out it’s a fancy molding technique called 2K injection molding. So I’ve made a 3 part mold that fits a plastic fingertip with holes for the silicone rubber.

Ruows5xMEM6gvf-xks56Zl6910LN5MD3VFpA3J4jtp8KELCOWA.png
6-_I-sHEy_Sf5AMZyA7T7j140pXa69ldFqlxgwDdojeT3THAOw.png
ZEcoGXg8LHYtbfzMMf1qfy8yLKoJlOniB_9OXJwEjC9L5iTw5w.png
1GnBeMrkTJ2DN1TgVQuLuz8dBJ3VUnpiI3gi7tkiQKPkYuUuVA.png
Akw-ZfV-SRw1s31TM2xEOfWjDiGNq8qjzbN3DOO4gsQAUUPM9w.png
8IPbdVATO-zvLJiMwDi8CTKqEbhGv_R2Xk8Lp-2IyVniRc8rhw.png
vc-mUuXKR4dGAD14wrX0doYsxjmlaODOlEKrWbfQAXGZidmXCQ.png
oLXmPAU492tjvzW9FB3MCckqxrJkGS68ePipzxfQ6ShAJ-A4Hg.png
AxJbRv1gbR6qWBGZs5OGqo0RuxbO2Th0ORSRmjb4ZMZSJmKchg.png
Dv6m0k9Bb8rHrfVACh_hcIfD9pNfbTvjEioz1eevw1CP59zt_g.png
dQtne0HAnKMyb6pc6B1cirTWMqKORUyo5I96boQ1RcZZMvcURw.png
HBl4Kgpo38mulTW-ugYdDbHCcC6zeWyGH0-oTUIsrRpF9SEfgg.png
PtEmo69-yikW8GYI4X9VrrN7KZ2hJEdIFihYU1u7oYP3xLmbZw.png
-dKGIjCZ3b-LPcHVR70Hmvi3iX4WJ0ho2m04LTdKncgsm8GHrw.png

SLzIsOhVNVR4-JcglrKLmO7ptk0LMjEUAtootb_zqOdOm1ImeA.png
 
Last edited:
Spacecraft

We chose the classic silhouette reminiscent of the Space Shuttle in the seal for the program. But these 'missions' are on exoplanets far away from earth so for the fiction for program we have to design our own spacecrafts. For the making of the spacecraft I've 3D scanned a bunch of people to work in my virtual Orbital Spacecraft Processing Facility.

logo.png
_RfBfJIeO7ZHmaY0wvs--A=w1278-h1278-s-no?authuser=0.jpg
 
Last edited:

Your message may be considered spam for the following reasons:

If you wish to reply despite these issues, check the box below before replying.
Be aware that malicious compliance may result in more severe penalties.
Back
Top