LumberZach gets choppin away at a Mau5head

LumberZach

New Member
First and foremost I would like to thank Giz for helping me out. He answered any questions I asked him. I also used alot of his ideas and processes for construction, so If something looks familiar, that's who I got it from.

On with the pics.

IMG_20110822_232238.jpg

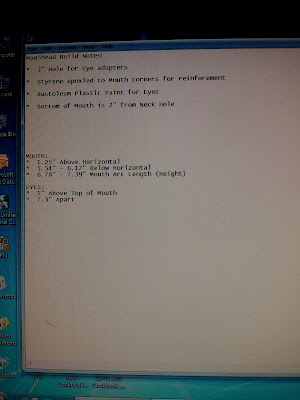
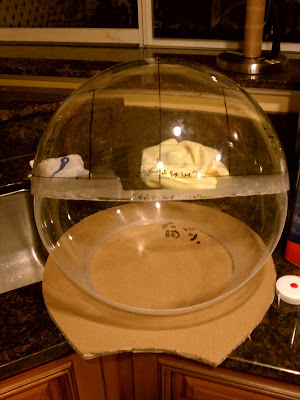
Notes and measurements.


IMG_20110822_232358.jpg

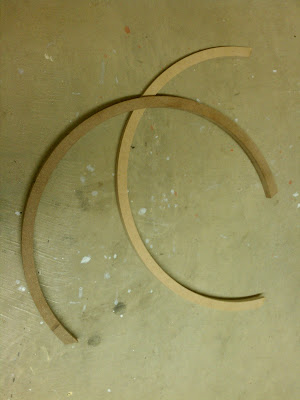
1/2" MDF lips I cut out with a router and circle jig.


IMG_20110825_161320.jpg

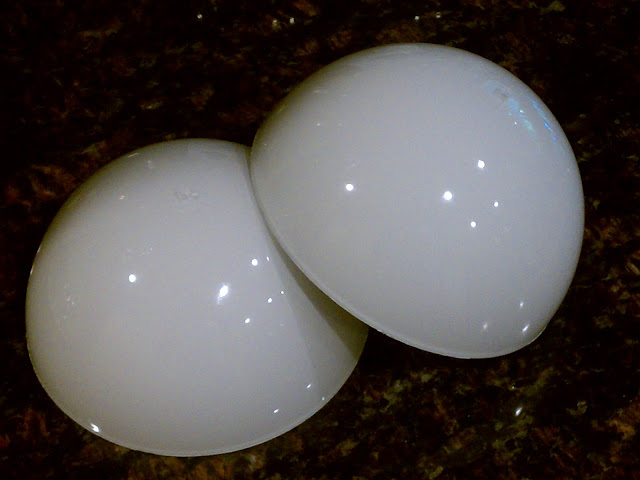
4.5" acrylic hemispheres painted (on the inside)


IMG_20110830_213554.jpg

Measurements and markings on the 14" acrylic globe.


IMG_20110830_213640.jpg

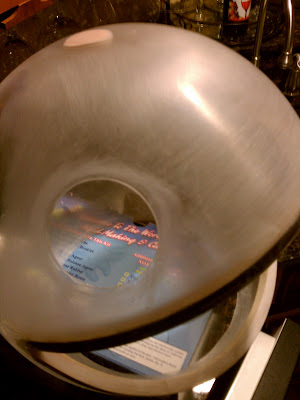
Head hole is cut and sanded. Cut out using a Dremel with a fiberglass cutting disc.


IMG_20110830_214137.jpg

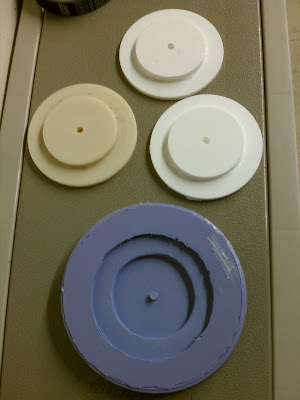
Eye bracket template, the mold, and the two resin casts.


IMG_20110831_202028.jpg

Mouth is cut out and edges are sanded.


IMG_20110831_202339.jpg

Corners of the mouth were reinforced with styrene to prevent cracking.


IMG_20110901_161855.jpg

Lips are epoxied in.
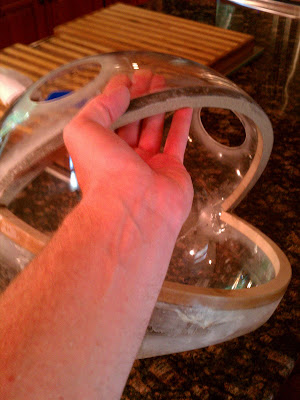

IMG_20110901_161911.jpg

Another angle.


IMG_20110901_214401.jpg

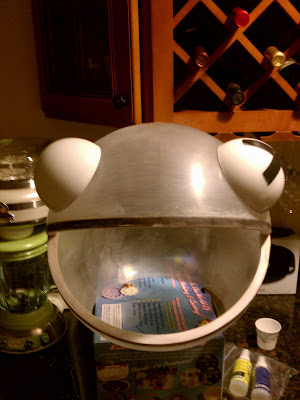
Just wanted to see how it would look.


IMG_20110901_214451.jpg

Bondo'ed the top dimple and the lips...sanded smooth.
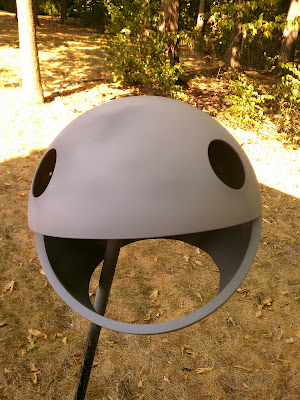

IMG_20110902_101106.jpg

Primered.


That's where I'm at now. Hope to sand the head down today, and Bondo any remaining imperfections. Should have it colored by this weekend.

Hope you guys enjoy. More progess pics to come.
 
Alright, got some more things finished. Plan on flocking the main head this weekend.


293291_10150309857529559_515804558_7916276_2112700531_n.jpg

Got the ears cut and coated. Awaiting primer.


302786_10150309857819559_515804558_7916277_460156132_n.jpg

Got the mouth section cutout, reinforce, and edges sanded. Need to buff it and cover it in fabric.


313096_10150309857974559_515804558_7916278_516239354_n.jpg

1 watt led's are epoxied to the eye brackets.


301263_10150310047139559_515804558_7917156_276072376_n.jpg

Temporarily attached the eyes to test the led's.


319518_10150310047229559_515804558_7917157_519141488_n.jpg

These suckers are bright.


Stay tuned, more to come.
 
Got some things done this weekend.


305698_10150311106209559_515804558_7921675_1875548345_n.jpg


Got the mouth covered with athletic mesh.


306705_10150311106419559_515804558_7921678_1835876694_n.jpg


Mock-up with eyes on and mouth piece in...looking decent.


293241_10150313912464559_515804558_7941451_1374245730_n.jpg


Flock!


304396_10150313912549559_515804558_7941452_1698756751_n.jpg


Closer look.


Now that I have to let the head cure, I have time to do a final sanding of the ears, install the studs, and get those flocked as well. The head should be complete by the end of this week.

Stay tuned for completion.
 
Okay, the flocking on the main head is cured. Now I just need to flock the ears and this bad boy will be finished.


312734_10150316155879559_515804558_7955866_1328687453_n.jpg


Installed the eyes and mouth piece.


314504_10150316156129559_515804558_7955867_1053298663_n.jpg


Another angle.


I plan of flocking the ears this weekend, so I should have pictures of this thing completed by mid next week.

Stay tuned...almost finished.
 
The head is done! Here are some more pics leading up to completion. Sorry I don't have a good completed shot, but should get some this weekend.


312448_10150316296724559_515804558_7956740_1555976338_n.jpg


Where the frick are my ears?


313494_10150317645214559_515804558_7962787_977666176_n.jpg


Inside view.


318532_10150323259349559_515804558_7997825_880090388_n.jpg


Done.


319196_10150323259544559_515804558_7997826_32957734_n.jpg
 
Visibility is actually pretty good. I unveiled my head at a bonfire last Friday and wore it pretty much all night to get used to it and I had no problems seeing things.
 
The head looks great. How did you use the styrene? Was it a spray or was it something you had to lay down?

Thanks


Thanks LazyT. The styrene I cut from a sheet. The styrene itself is 1/16" thick. That seems thin, but once you get it epoxied to the corners, it makes a world of difference. Make sure you have some good clamps to hold the styrene in while the epoxy dries.
 
Thanks LazyT. The styrene I cut from a sheet. The styrene itself is 1/16" thick. That seems thin, but once you get it epoxied to the corners, it makes a world of difference. Make sure you have some good clamps to hold the styrene in while the epoxy dries.


Cool, thanks. I am going to attempt to fix my crack with that stuff unless I find something else during my search. What in the world did you use for the eyes? Yours having the perfect depth to them, almost looks like a rubber ball cut in half. I am hoping to find something during my search today (have to get material for the lip as well).
 
Last edited:
Cool, thanks. I am going to attempt to fix my crack with that stuff unless I find something else during my search. What in the world did you use for the eyes? Yours having the perfect depth to them, almost looks like a rubber ball cut in half. I am hoping to find something during my search today (have to get material for the lip as well).

Holy crap dude. You may just want to start over on a new globe. That crack is going to be a ***** to repair.

I pm'ed you about the eyes.
 
Holy crap dude. You may just want to start over on a new globe. That crack is going to be a ***** to repair.

I pm'ed you about the eyes.

yeah thats what i was afraid of. I MAY be able to salvage it. My buddy did some research on repairing plastic for the fairings on his bike and it seemed to be feasible. If it can fix those then I don't see why it can't fix this. We'll see!
 
that is an amazing mau5 head. What really impressed me is the flocking. I have always covered mine in fabric(its a real pita and no a fan of the seems). Could you possibly point me in the right direction to learn the process you used to flock that? Ive done a google search and only comes up with small scale stuff(like scrap booking)
 
that is an amazing mau5 head. What really impressed me is the flocking. I have always covered mine in fabric(its a real pita and no a fan of the seems). Could you possibly point me in the right direction to learn the process you used to flock that? Ive done a google search and only comes up with small scale stuff(like scrap booking)

I learned on the fly. I bought all my flocking materials from Don Jer. I also bought the air assisted flocking gun...made flocking the mask a breeze. Not to mention that I also bought a cheap $15 paint spray gun from Harbor Freight to apply the flocking adhesive.


Howd you get the measuresments for where all the eye,ear and mouth pieces go? Sorry im new

Allot of research and messing around in Photoshop. There are also a few threads on here that mention measurements.
 
Last edited:
That's a very nice mau5head. I like the wooden lips, I should have used that on mine... the flocking is very well done as well!

Thanks!


LumberZach your Mau5head looks wicked. What material did you cut the ears out of? Also do your eyes just snap onto those brackets you made?

Thanks Edgar! I used a 1" thick EPS foam sheet you can get from Home Depot. I had to coat it with gesso first before I sprayed primer on them. If you don't coat the foam first, any kind of spray paint/primer will eat at the foam.

The eye brackets are epoxied to the inside of the eyes. All the epoxy/glue I used on my head was either LocTite 5-minute epoxy or Gorilla Glue.
 
Last edited:
This thread is more than 12 years old.

Your message may be considered spam for the following reasons:

  1. This thread hasn't been active in some time. A new post in this thread might not contribute constructively to this discussion after so long.
If you wish to reply despite these issues, check the box below before replying.
Be aware that malicious compliance may result in more severe penalties.
Back
Top