Limited Run Luke ROTJ Hero Lightsaber Kit.( Run closed )

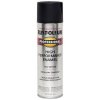
Well I primed and painted my grenade piece with Rustoleum for metal, and when I went to lightly sand the rings, I still got paint chips in a few edges. Anyone have luck with something particular?

i think it comes down to roughing it up a little prior to painting and then using a good etch primer. don't go cheap on your paint's and instead of using different grades of sand paper start with your high and keep it wet and be very patient. i wrapped a very worn piece of sandpaper around it and went in one direction rather than using a sanding block
 
Yeah I used this stuff, not cheap. Though its not self etching.

a4c34003-ba9b-4310-a120-135dbf6055b4_300.jpg

I'll try scuffing the metal up a bit first, and cleaning it with alcohol to degrease it as well. Second time Ive had to strip it now.
 
Last edited:
I used the same brand and type primer as well, so I did prime it, it's just not etching primer. Which I will try now.
 
How did you clean it before painting?

Clean it with acetone, sand with 250 or lower (within reason), then clean it a couple more times with acetone immediately before painting.

Also, don't use nail polisher removal as your acetone for cleaning (it has its uses, but too dilute for thorough cleaning like you need), get some at Lowes, Home Depot, etc. should be in a metal can. Use gloves, I use nitrile (which it will dissolve, but not so fast that it's a real problem).
 
Last edited:
The Rustoleum self-etching primer combined with VHT Aluminum Rim Satin black from Autozone worked out great in the end, no chipping when I sanded the rings.
 
I couldn't get a darker copper on my windvane after trying a few aging methods, so I decided to paint it and it's drying overnight. But I wanted to show the rest so far. I had to strip and repainted my grip section 3 times before I was happy with it. Once I get some copper tape for the control box bars, that will be done as well. The board I'm using for inside is from an early Motorola phone (The Sliders one to be exact). I'm pretty happy with how the triangle LEDs turned out. The ring was darkened with SuperBlue.

The paint paint job isn't perfect, but neither is the original, especially in its current condition with quite a few paint chips on the ring edges, but I didn't want to go that far since a lot of that damage was probably done after the fact.

IMG_9983.JPGIMG_9982.JPGIMG_9981.JPGIMG_9980.JPGIMG_9984.JPG
 
Last edited:
  • Like
Reactions: MCM
Used Rustoleum Antique Gold on the collar, looks really dull in some light, and much brighter in others, so I like it. All that's left is the copper control box bars!

IMG_9990.JPGIMG_9991.JPGIMG_9992.JPGIMG_9997.JPG
 
Last edited:
When trying to sand the paint off the rings, I overdid it a bit...

Anyone got any hints for removing them from the metal? I feel rather silly.
 
d505645754b2d30c9be1e9f74ee19516.jpg
a11af9f3ebd49bb930dc9474b9bf6547.jpg

I finally got around to finishing saber this afternoon. The triangle placement isn't quite perfect, but I'm willing to accept them for now. Believe it or not, I painted the neck with gold Rustoleum then dry brushed some antique brass acrylic over top of that. The pictures make it look like copper! Maybe this offers insight into why it's such an urban legend that the hero prop had a copper neck (it's totally painted brass). I don't remember where the circuit board originated, but I do plan on replacing it with something visually more interesting.

As I'm posting this, I realize that still need to darken the triangle ring [emoji13]

All in all, this was an incredibly fun project. Thanks so much to nicksdad and everyone else involved in putting this project together! My only regret is that I don't have another one to work on.

Sent from my SM-J700P using Tapatalk
 
Last edited:
I decided I was happy with the look of ammonia aged brass rails for the control box, so I finally glued them down and called it done.

IMG_0285.JPGIMG_0290.JPGIMG_0291.JPGIMG_0283.JPGIMG_0284.JPGIMG_0287.JPGIMG_0288.JPGIMG_0289.JPG

Family picture! Romans Empire Obi, Anakin Starkiller V2, Nicksdad ROTJ Hero

IMG_0292.JPG
 
Very, very cool! I love that family picture. The brass rails are on point!

Sent from my SM-J700P using Tapatalk
 
Any chance of a second run?

This is the official sales thread for the Luke ROTJ saber kit that I have had an interest thread going for a while.
I am pretty happy with the overall look and aside from a few tweaks I am ready to start making parts.
I have decided to go with copper for the front neck part as per my other thread. Copper is at a premium right now so it will affect the original kit price.
I have also decided to provide the tri ring, red and green acrylic arrows for the control box, and the top detail of the control box making this a complete kit.
This will also add to the kit price but will make it easier for everyone in the long run.
The new adjusted kit price is 159.00 plus 14.00 shipping in the U.S., which I think is a bargain for what we are getting.
Now, I want to discuss the time frame a bit. I am shooting for 6 to 8 weeks but I have never had my machinist deliver on time.
The run could be shorter or longer, just please be advised up front that if it does take longer you have been made aware of this possibility.
For tracking the run more effectively I am going to ask for payment up front. It just seems that the last few runs I have done the drop out rate was more than I was comfortable with. I hope you understand.
I will post pics of the control box a little later. I am shooting for the slider version. It will definitely have the separate side plate.
If you are in, please paypal 173.00 for one kit shipped in the U.S. to ( run closed ).
If you are international please just paypal 159.00 for the kit and when I know shipping costs you can pay them then.
I want to thank everyone that has given invaluable insight into this prop along with fantastic pics and even a shrunken casting to examine.
I will post progress pics as the run progresses.
Please make sure your address and board name is on the paypal payment.
View attachment 624359
View attachment 624360
View attachment 624361
View attachment 624362
View attachment 624363
 
Back
Top