Coz
Sr Member
Buddy of mine is having a superhero costume party for his 32nd birthday.
After some deliberation on crash dieting, DIY lypo or tapeworms, I finally decided to go as Bluntman (hey, he's a superhero in the comicbooks, alright? ).
).
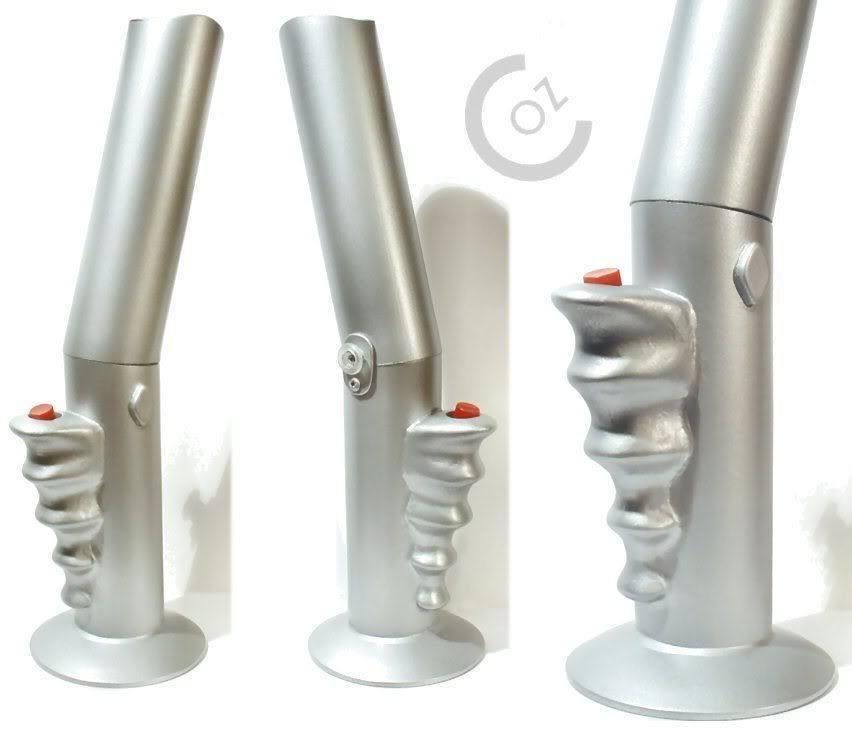
Anyhoo- First order of business was Bluntmans' highly experimental Bongsaber (costume gear is on the way).
Took a couple of days )and I only used what I had laying around) but I think it looks at least recognisable!

Used white PVC tube (1 1/2" dia) and bottom of the stem from a plastic ice-cream sundae bowl for the base, which is epoxied on.
The PVC tube is a PITA to shape and sand without getting chewed up or ragged! Managed to shape the 'mouth' opening, and cut the tube at an angle tho.
Finger-grip was made from a thick piece of balsawood shaped with a dremel with a sanding drum. It's quick, but it's messy!
Coated it in superglue to give it a little more strength, and to make painting and sanding go better.
In the 'bowl' there's a pushbutton switch (I hollowed out the back of the grip for it), which is soldered to a 4.5v battery pack and an ultrabright 10mm white LED in a flashlight / torch head.
Yep, would have prefered to have the button on the side, but as thats where the flashlight head is, I had to improvise.
A Rubies TPM Obi saber has since donated its pale blue blade for the cause - the only puchase I made for this prop!
The button on the side is exactly that (from a fabric store), while on the other side I opted to add a covertec-type wheel from an old cellphone case, so I can have both hands free to hold beer.
A few coats of primer an a blast of silver spraypaint finished it off.
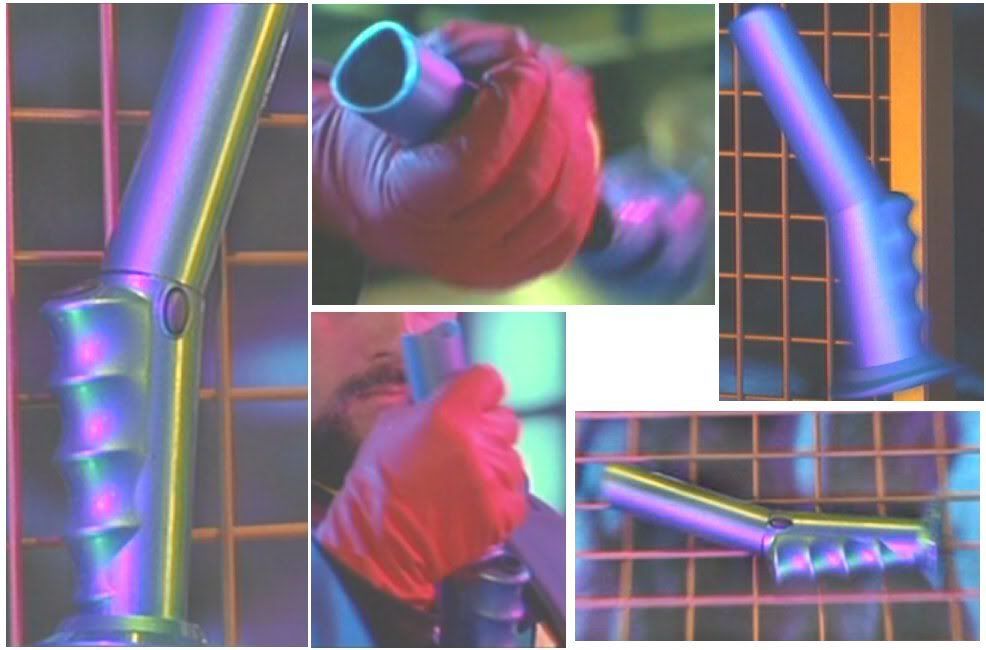
I know it's not exactly accurate, but it has given me the urge to make a more accurate version sometime!
As always, any comments welcome! And if there are bongsabers out there, lets see 'em!
C.
After some deliberation on crash dieting, DIY lypo or tapeworms, I finally decided to go as Bluntman (hey, he's a superhero in the comicbooks, alright?
Anyhoo- First order of business was Bluntmans' highly experimental Bongsaber (costume gear is on the way).
Took a couple of days )and I only used what I had laying around) but I think it looks at least recognisable!

Used white PVC tube (1 1/2" dia) and bottom of the stem from a plastic ice-cream sundae bowl for the base, which is epoxied on.
The PVC tube is a PITA to shape and sand without getting chewed up or ragged! Managed to shape the 'mouth' opening, and cut the tube at an angle tho.
Finger-grip was made from a thick piece of balsawood shaped with a dremel with a sanding drum. It's quick, but it's messy!
Coated it in superglue to give it a little more strength, and to make painting and sanding go better.
In the 'bowl' there's a pushbutton switch (I hollowed out the back of the grip for it), which is soldered to a 4.5v battery pack and an ultrabright 10mm white LED in a flashlight / torch head.
Yep, would have prefered to have the button on the side, but as thats where the flashlight head is, I had to improvise.
A Rubies TPM Obi saber has since donated its pale blue blade for the cause - the only puchase I made for this prop!
The button on the side is exactly that (from a fabric store), while on the other side I opted to add a covertec-type wheel from an old cellphone case, so I can have both hands free to hold beer.
A few coats of primer an a blast of silver spraypaint finished it off.
I know it's not exactly accurate, but it has given me the urge to make a more accurate version sometime!
As always, any comments welcome! And if there are bongsabers out there, lets see 'em!
C.

