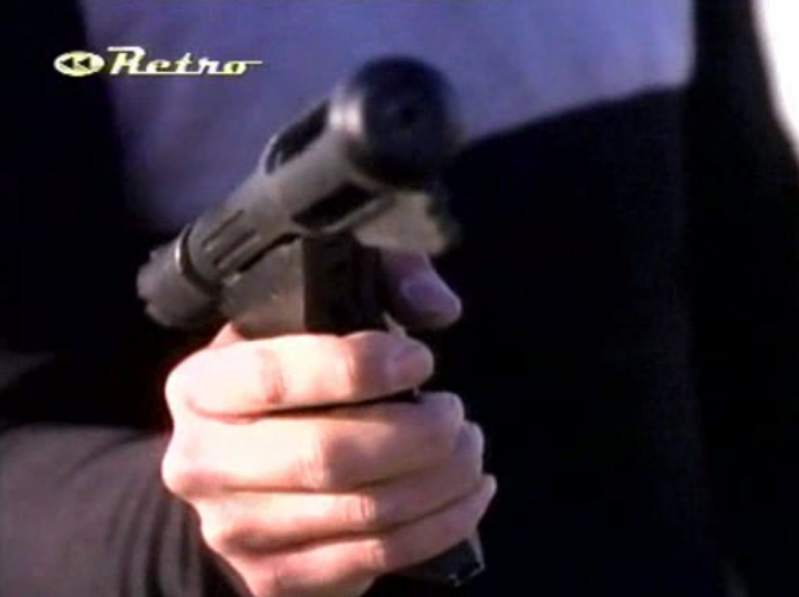
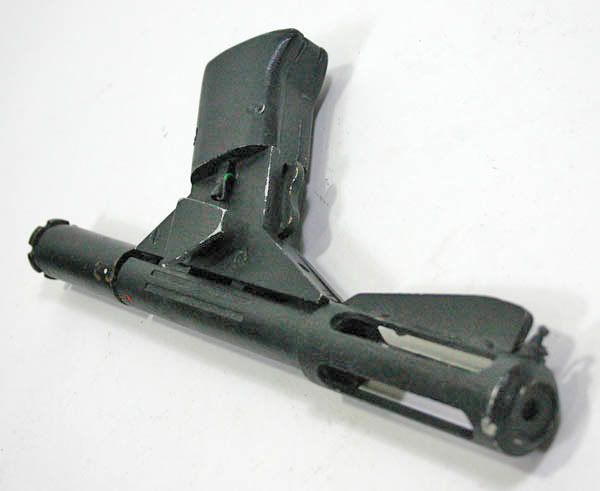
Logan's Run DS Gun - TV version

maxspr1

Well-Known Member
This is my first thread, and I wanted to show off a project I've been working on for a few months which has turned out far better than I ever hoped.

I've always wanted a screen accurate DS Gun, but I never had the money when either the Australian DS Props version or a Rylo version were being made--they're the best I've seen in years of looking. Early this year, however, I was able to get a good deal on a used DS Props version from a seller here on the RPF (thanks, Howard!!). The replica was externally pretty darn close to accurate, and the seller had started to make some modifications before selling it, but I knew I'd be modifying the thing even more once I had it in my hands.

Here's a pic of the prop as I received it:
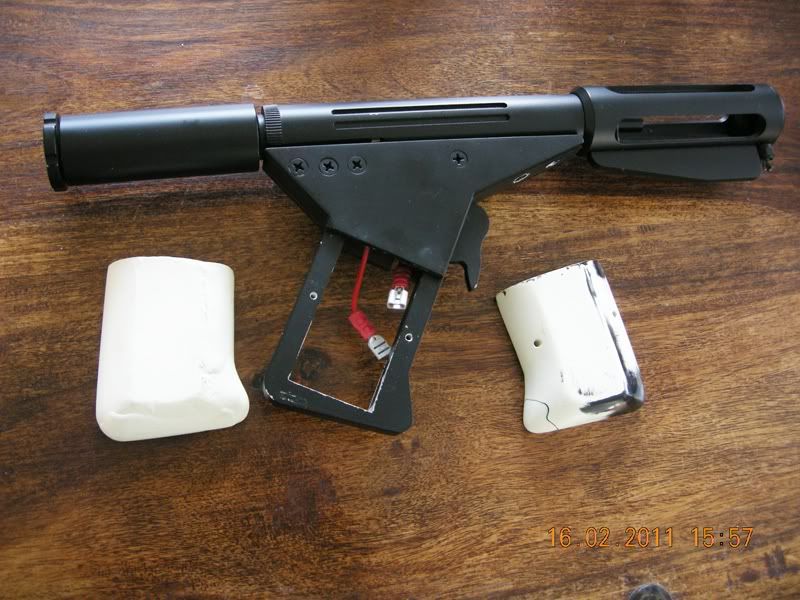
ds4n.jpg


While I preferred the movie version of the gun over the TV version, the shape of the trigger and my complete inability to fabricate anything from metal dictated that I'd have to make this a TV version of the prop. So, first I gathered as much reference as I could find.

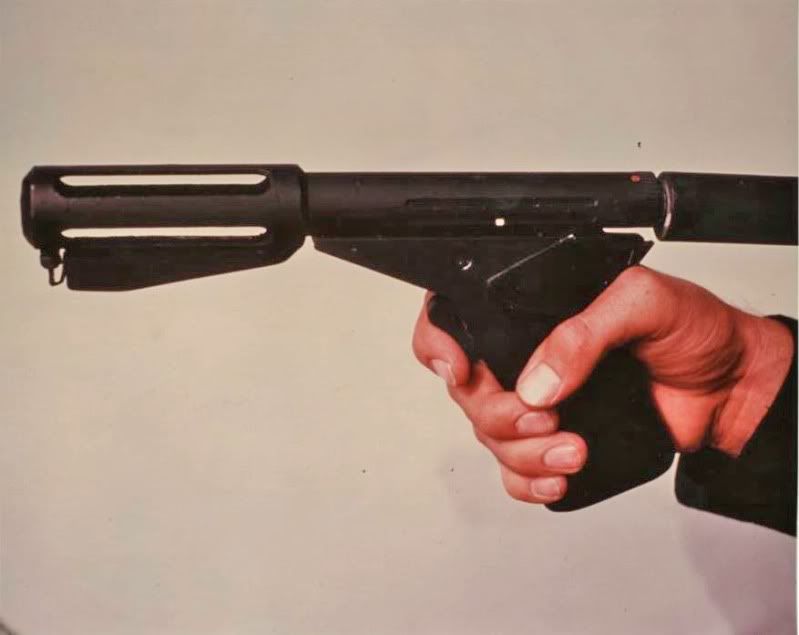
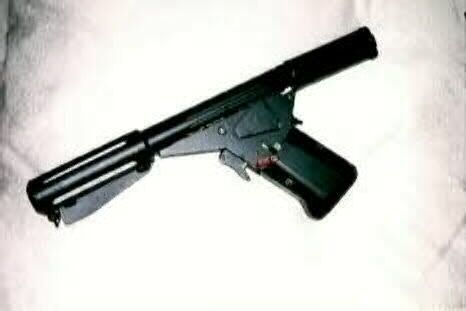
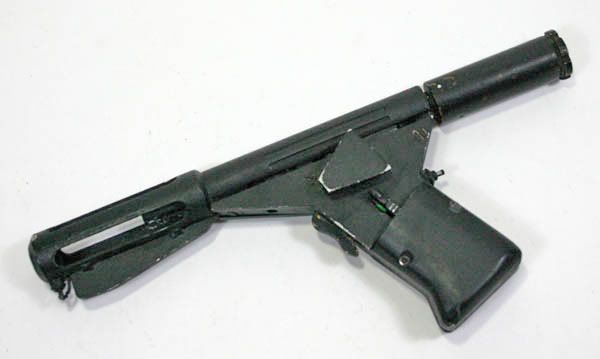
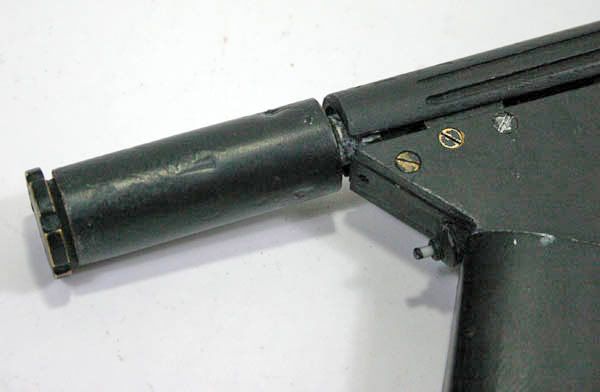
Below are some of the many reference photos I used when making my modifications, clearly showing some of the changes I needed to make, namely:
1) the shape of the fin
2) raising the point at which the wire to the glow plug comes out of the front of the fin (unaltered, it came straight out of the middle when it should have been coming out at the top of the front edge of the fin where it meets the barrel)
3) the 2 "mystery bumps" on each side of the fin
4) installing the correct switch in the rear of the grip frame
5) replacing the phillips head screws with the correct slotted screws
6) filing down/opening up the open area at the bottom of the main body tube
7) drilling the retaining screw hole in the back of the grip frame
8) restoring the grips
9) repainting the prop with Krylon semi-flat black spray paint (this proved to be the most difficult part of the enetire process!)

There were a few things I knew I couldn't attempt (at least not now) due to a lack of concrete info and certain tools. I was reluctant to drill into the main body tube/barrel without a drill press and vise, and I couldn't change any of the internal components due to my previously stated inability to fabricate anything in metal. This meant I couldn't change the location of the screws holding the gas chamber to the right side panel (they're higher up on the actual props) and I couldn't drill the hole on the side of the tube seen in some of the photos. I also couldn't tell from the reference photos if the colored dots on the top of the prop were paint applied to indentations or just paint by itself, but since not every prop had this feature (based on photos and screen grabs), I decided I could live without the color dots until I find better info/reference.
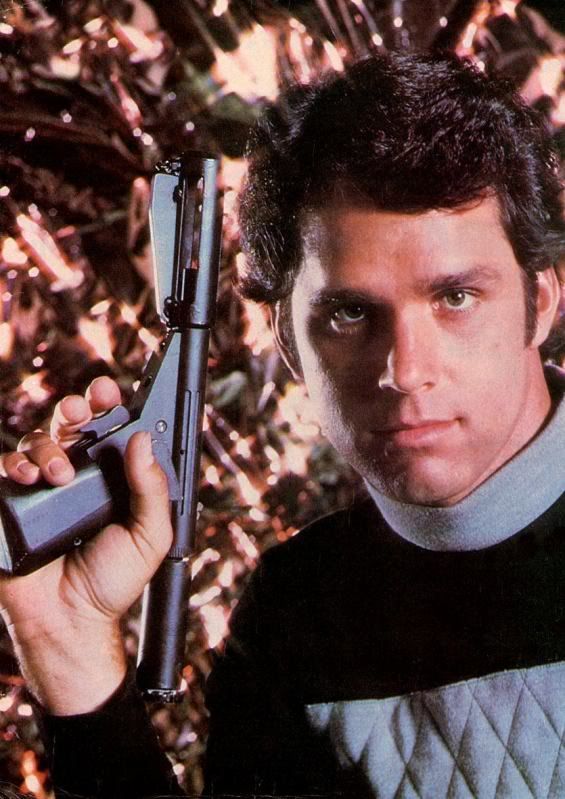
logan1b.jpg


upe3065.jpg


TVDSGun1A.jpg


log_sand_05.jpg


log_sand_07.jpg


More to come...
 
Ah my favorite science-fiction weapon, I just love a good DS thread. If you want to make it screen accurate you have many choices as there were many variations of the DS gun used during the short run of the TV series.

Here’s Logan using the movie version in the pilot. I guess my movie version could also be a TV version:
Logan.jpg


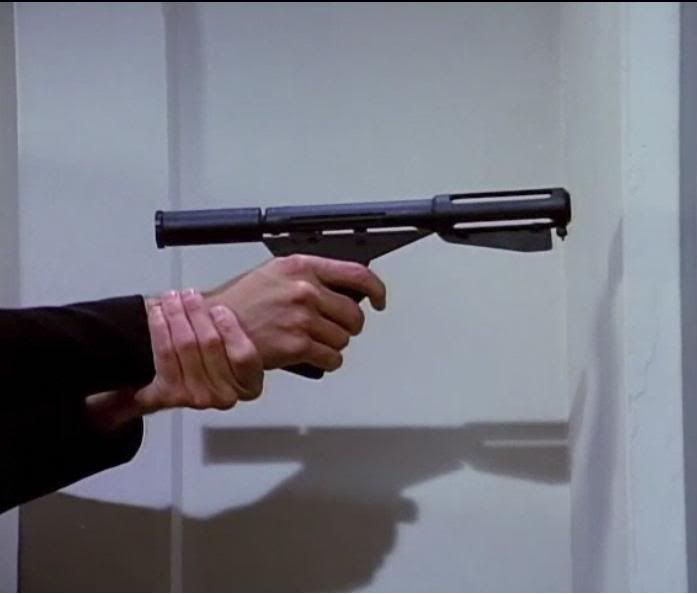
Here’s Logan using the TV version in the pilot:
LoganIII.jpg


Francis uses a version in the pilot with a shorter fin or the fin is set back slightly:
LoganII.jpg


This one has no dots:
LoganIX.jpg


So I guess it could be screen accurate a number of different ways. Looking forward to the updates.
 
Since I never thought I'd get a crack at owning one of these props again, I wanted to take my time and do everything right. Right to me means as close to what's seen on screen as possible--I really wanted accuracy. I decided to work on some features I've never seen done exactly right on other replicas. that doesn't mean I'm absolutely right in what I did or anyone else is wrong--I just wanted to do the research and get as close as I could with the info I could dig up. Rylo's props and the Australian DS props are extremely well done, well-made beautiful replicas which i wouldn't touch at all if I was lucky enough to own one pre-built. I'm a bit of a tinkerer, though, and since this piece was a bit of a fixer-upper to begin with, I went for it...

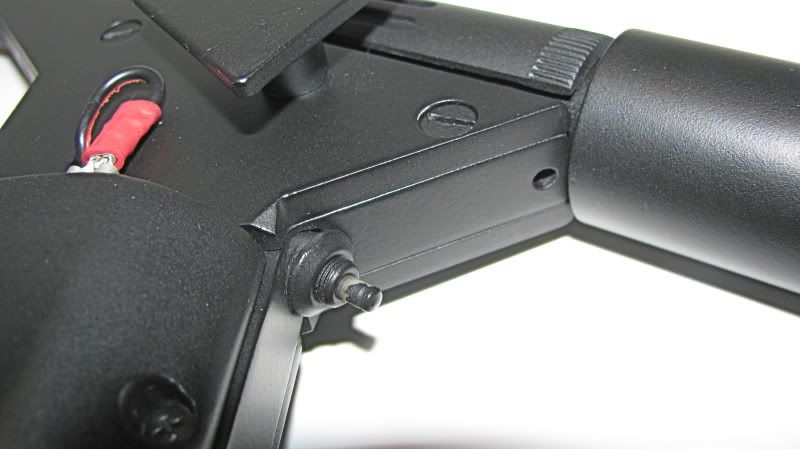
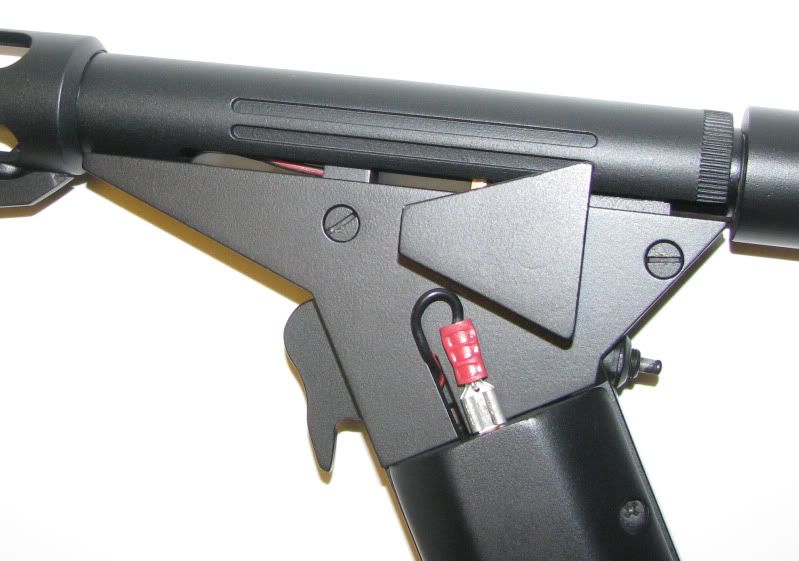
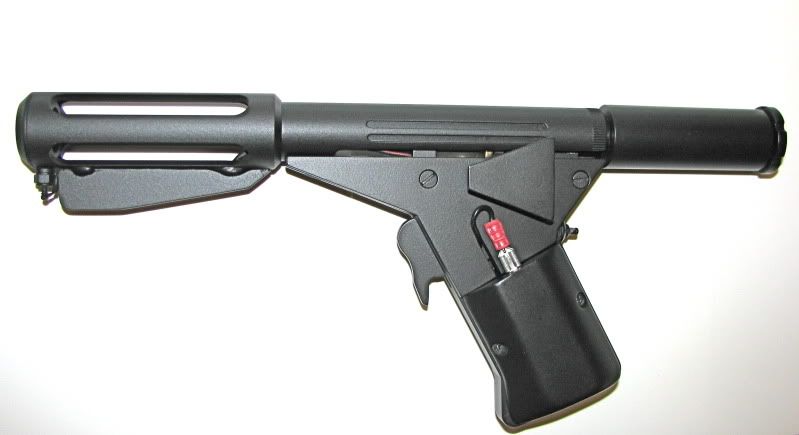
First up was the glow plug switch. I tracked down the exact kind of switch used after searching for weeks on ebay--I knew exactly what it looked like because it was the same cheap 1970's home electronics switch found on many of the screen-used Buck Rogers props I own, an Alcoswitch brand momentary push button switch(I couldn't find a part number). On the original TV props, the switches were apparently placed in either of two positions as seen in the reference photos above: either flush with the back of the frame and pointing down at an angle or inserted straight into the frame parallel with the body tube/barrel. I picked the second option since the internal works on my replica made the other placement almost impossible. After drilling the frame and epoxying the switch in place, it looked exactly as in the photos. Here's how it looks on the finished replica (with the paint wearing off the nylon in the same way as the original prop--a nice bonus discovery!):
IMG_4001.jpg
 
Hi, Mola Rob--
just saw your post after submitting my second one. I'm with you: there were many versions used so there's a lot of wiggle room/latitude for matching "screen accuracy." I pretty much decided on a combination of the one in the Azarian Collection (which I believe is the one Gregory Harrison is holding in that publicity photo i posted) and the other one I posted close-up photos of with the parallel switch. Incidentally, i was going to use that same screen cap of Francis holding the gun to illustrate what I meant when i referred to the open area under the body tube!
 
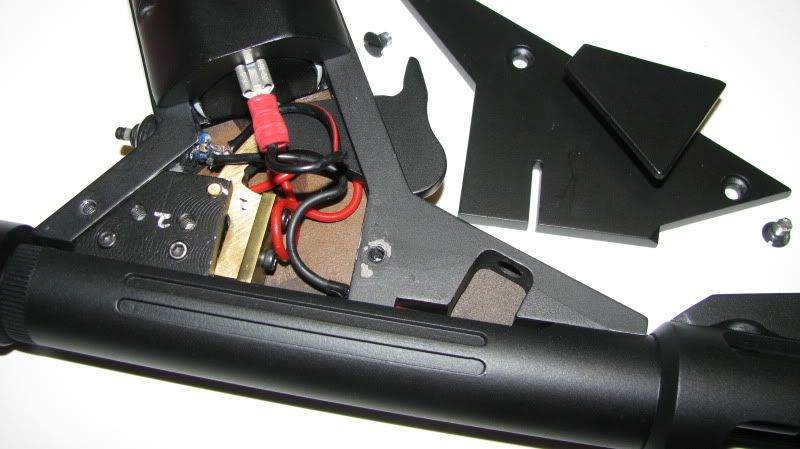
Here's a photo of the inside of the finished prop replica. You can see how beaten up the vintage switch is (still works, though!) and why I had to install it parallel with the body instead of flush with the back of the frame. You can also get a peek at the unpainted underside of the phenolic resin side panels underneath all the wires. The phenolic matches the panels in the interior photos of one of the original movie props Richard Coyle has up on his site pretty well. Click HERE to see. I didn't know what phenolic resin was, but the material looked familiar. Thanks to Wikipedia, I now know that that's because circuit boards are made from the stuff. Apparently it can withstand extreme temperatures--pretty handy when making a prop that fires flame! I've heard a lot of negative comments about the guy in Australia who made these replicas, but kudos to whoever he is for getting at least that kind of detail correct even though not too many people would ever see it.

IMG_4013.jpg


After getting the switch in, I removed the putty the previous owner had applied to the grips(see that first photo I posted above). It looked like he was going for a beefier more rounded style, but I liked the style with the flattened down sides, which is how this replica was originally made. In my reference photos, it looked as if the TV prop makers had just sanded down the movie props' more rounded grips, at least on a few pieces, and that's the look I was going for. Like I mentioned above, I was picking and choosing my favorite or the easiest to replicate bits from all the originals I had photos of. Lots of sweat, dremel tool use and sanding later, and the grips were good to go. They seem a little small compared to the photos of the screen-used pieces, but until I can get some replacements or make new ones myself (unlikely), they're as close as I can get for now.

IMG_3988.jpg


I should mention that the paint looks better in person than it does in the photos I'm posting. It's smoother and darker, but the flash on my camera seems to be bringing out the orange peel effect (and every fleck of dust, too). I should also apologize now for the fact that there aren't any in-progress photos--I never thought I'd be posting about this project until at the end when it all started to come together. All my pics are from just after I finished the final assembly.
 
Last edited:
Looking good. I have one of Ry's movie guns but I always loved the T.V. Gun.

You are lucky to have one of the Guns from down under as he left a whole lot of people who paid but never got their gun. :unsure
 
I have a Rylo movie version as well. It's interesting to see the differences in the inner workings between his and the DS Props version.

Since I have a working movie gun I would love a dummy TV version to go along with it. I just need an inexhaustible supply of money for all those wonderful props waiting to be purchased.
 
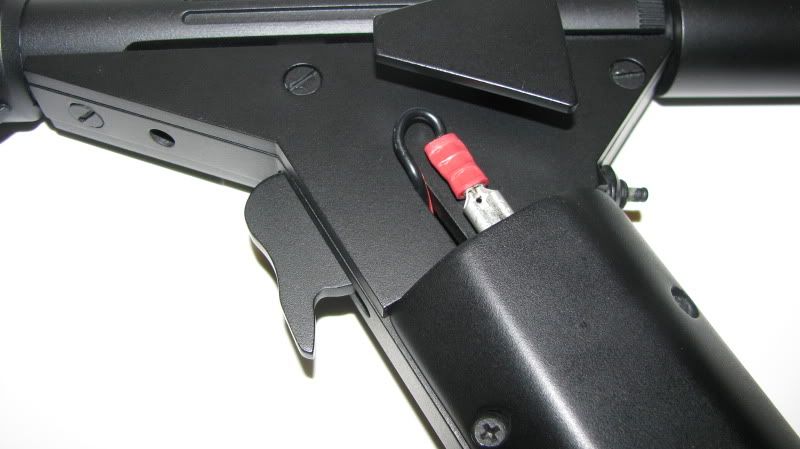
Next up was filing the fin to a more accurate shape and relocating the hole where the glow plug wire comes out so that it was at the top of that front edge of the fin. The wire that came pre-installed on the kit seems a little thicker than the wire in the photos, but since it's embedded in the fin itself or running through a very tight channel drilled into the fin, I didn't want to risk trying to yank it out and possibly ending up breaking the wire. A minor quibble and another compromise I can live with! Speaking of which, some of the original TV props look like they have the back end of the wire coming out of the back of the fin on the outside of the prop (as opposed to up through the barrel and then back into the guts of the piece through the middle tube/body tube as it is in the movie versions), and continuing into the main body tube through a hole drilled in the bottom. I had no confidence in my ability to hand drill accurately into a metal tube without a drill press and clamps, so I kept the wire as-is, or movie-style.

Then there was the most vexing part of this project: those little globby bumps on either side of the fin where it attaches to the barrel. I've always wondered exactly what they were and why they aren't found on the movie versions of the prop. Some sort of hardware to hold the fin on? Not likely, as they're very irregular in size and shape. Solder or evidence of welding to reinforce the fin attachment? A good guess. Epoxy? Maybe...I was able to see an original TV gun in person several years ago, and some photos of that very prop were posted here on the RPF not too long ago, so i got a fairly good look at these features in detail. My best guess as to what they are: um...globby bumps of something:lol. I did some trial and error with solder (doesn't stick to phenolic resin, at least not when I tried it, which makes sense as per its use as the inert part of circuit boards) and then with epoxy. I decided epoxy was the best way to go if I was going to recreate those things. I tried out various types and methods, but a happy accident and common sense led me to what I ended up doing (which I am by no means certain is what was done on the originals). I was mixing up gel epoxy with popsicle sticks and got a blob of gel on the edge of a stick. I set the stick down (gel side down) on a piece of cardboard and the way it looked set off a little light bulb over my head. I turned the cardboard upside down while holding the stick in place, and the gel slowly oozed out around the side of the stick a little bit. it looked very similar as is to what you can see in some of the reference photos--with no added effort from me, and it had the added bonus of creating a nice strong bond when I used this technique on the prop's fin. Simple and practical. I'm not saying this is how the prop guys in 1976/77 did it, but if I were a prop person with no budget and no time tasked with quickly modifying and reinforcing some well-worn movie props, I might do it this way. If anyone out there can shed some light on this part of the TV DS Gun, I'd love it! Anyway, I was pretty pleased with how the whole fin assembly turned out in the end. I'd never seen anyone attempt this before, probably because it may look a little sloppy to some people, but I wanted a replica that was as close as possible to what the actors used, warts and all--not a pristine idealized Master Replicas kind of piece.
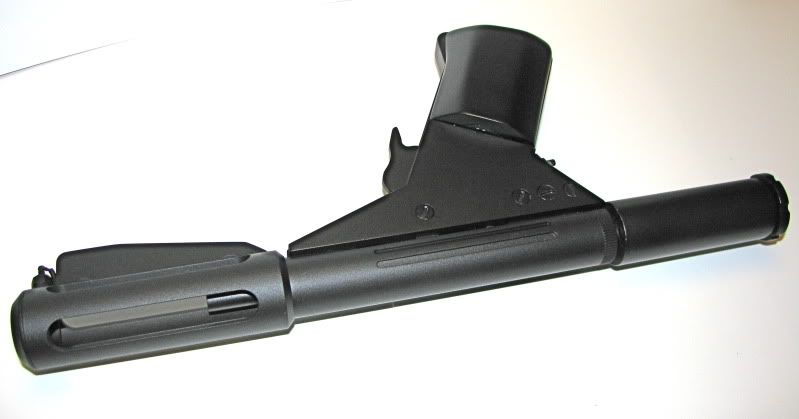
IMG_3992.jpg

The finished barrel and fin assembly (the photo's been lightened up so you can see the globby things better)
 
Rylo might be able to shed some light on the fin.

He is the master DS Armorer.
 
This next step was one I agonized over. HERE is a link to a photo on RACProps that shows how the movie guns had their main body tube cut so that they would slide over the gas firing mechanism. HERE's another. As you can see, there's a chunk about 1/8" deep cut out of the rear of the tube on the bottom where it's open, running about 2" long. I'm probably describing it poorly. Anyway, this is how the prop replica I have was originally made. But as you can see from the following photo (which I'm copying from Mola rob's first post above), on the TV version this cut or opening runs almost the entire length of the tube:
LoganII.jpg


Here's another screencap from my crappy copy of the pilot showing this longer opening:
Screenshot2011-05-10at32308PM.png


Here's a photo of one of the original props where this particular detail can be seen as well, although it doesn't go as far up towards the barrel as the one in the first screencap:
log_sand_04.jpg

Some of the originals (such as the one in the Azarian Collection) appear to have these spaces opened up so far a new screw hole had to be drilled further up the grip frame to attach the tube.

Why the prop makers for the TV series lengthened this cut is a mystery to me at least--airflow or ventilation? To ease repairs? Whatever the reason, I wanted to replicate it, but was afraid I'd botch it. No going back if I did...I even originally finished the project once without doing this alteration, but it bugged me enough that I decided to just go back in and do it. I took it slow and below is a close-up of the final result on my project piece:
IMG_4004.jpg
 
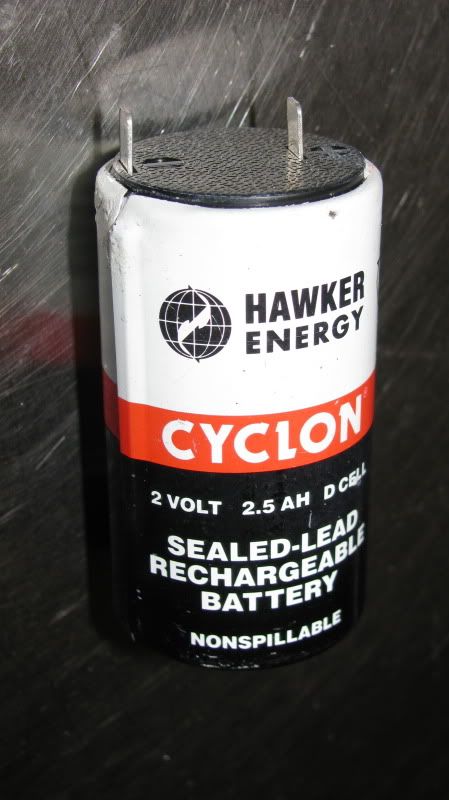
Finding some semi-flat black spray paint was the next obstacle (it's not made for public sale in the US anymore, only for industrial use and available only at select locations), but once that was done and the correct battery purchased on ebay, I did the final painting and assembly.

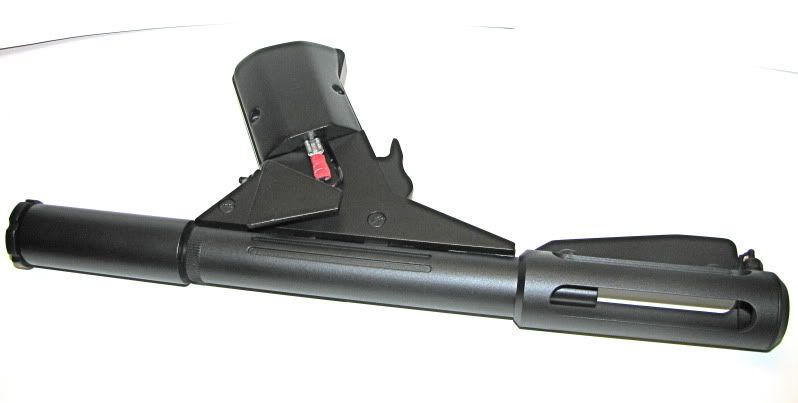
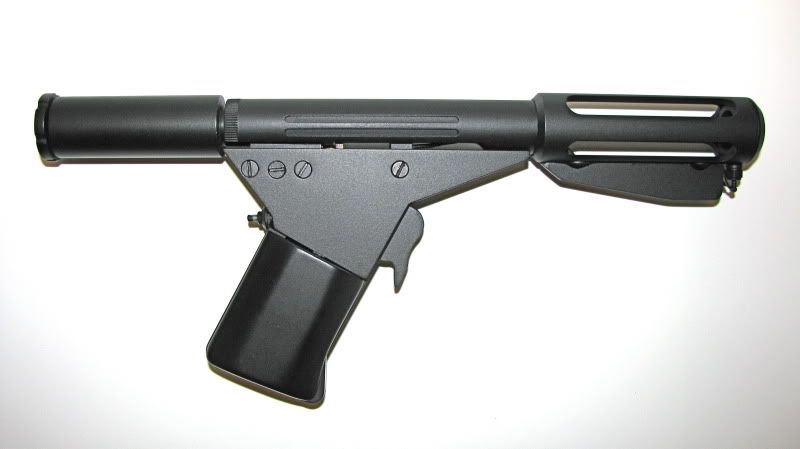
Like I said when I started this thread, it turned out better than I had hoped. Some day I may make some more alterations (the grips, the globs on the fin if I get some better info), but for now it's done. Below is a small gallery of the finished piece plus a shot of the battery I used. The photos have been lightened up in Photoshop a little to show more detail.
IMG_3959.jpg


IMG_3961.jpg


IMG_3996.jpg


IMG_3997.jpg


IMG_3989.jpg


IMG_3991.jpg


IMG_4029.jpg


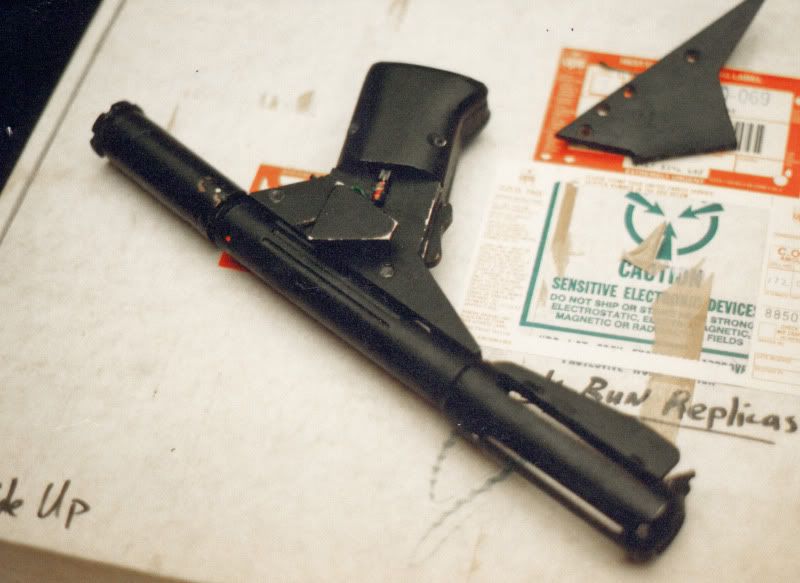
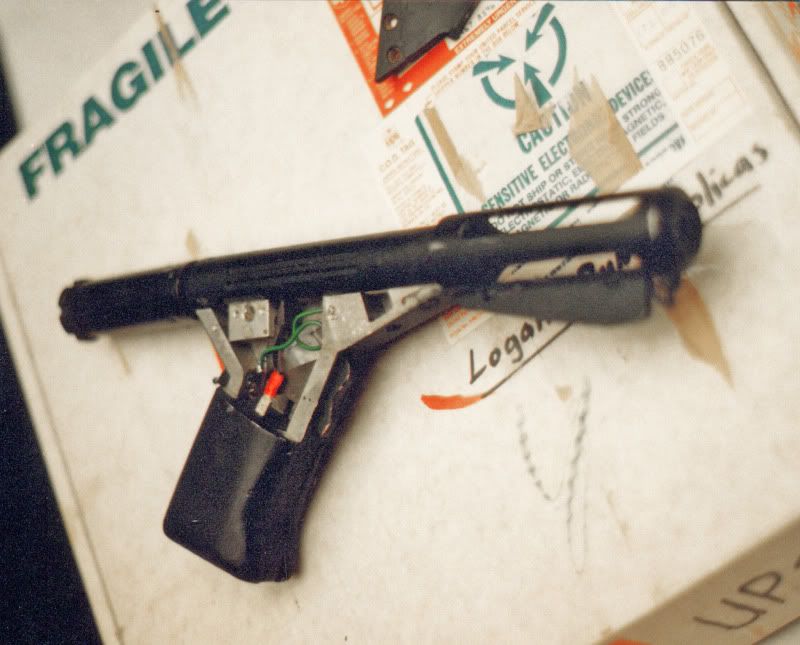
I didn't begin this thread just to show off my replica--I'd love it if people with info about these props chimed in or shared some of their own photos and techniques. I'll start: here's a couple of photos I took of the original prop I saw in person about a decade ago. It's the same one shown a while ago on the RPF that i mentioned earlier, the same one I've posted a few photos of above (the one with the switch mounted parallel to the body). I believe it's changed hands at least twice since I saw it at a scifi con in Pennsylvania all those years ago...
SandmanWeapon4a.jpg


SandmanWeapon4b.jpg

I believe the "Logan's Run Replicas" written on the box under the gun doesn't have anything to do with the gun, but had something to do with Follower kits I think he was trying to sell at the time. It's been a while, so I don't remember for sure...
 
That'll have to wait for a little while. The batteries I bought are both stone dead and I haven't started looking into where to get calcium carbide yet. I know it's pretty anticlimactic! Sorry!
 
That is amazing work you've done there.
I too have waited a lifetime to have one of these and soon I will.
 
That'll have to wait for a little while. The batteries I bought are both stone dead and I haven't started looking into where to get calcium carbide yet. I know it's pretty anticlimactic! Sorry!

I have a full can of calcium carbide. Not sure on the restrictions on shipping it though. I got it off a member here a few years ago.
 
Dude, throw a couple AAA's in there and be done with it.

No need to mess with that Gates battery. Even if you get a fresh one, it will still have to be maintained. Get yourself a tripple A battery pack and simply swamp them out when you feel like hunting runners.

Nice swap out on your parts. :thumbsup


That'll have to wait for a little while. The batteries I bought are both stone dead and I haven't started looking into where to get calcium carbide yet. I know it's pretty anticlimactic! Sorry!
 
How'd I miss this thread? I LOVE DS guns! :$ After original Trek props, the Sandman gun was one of my first prop obsessions. It was actually the first prop I built. Since I was in, probably, 4th grade, it didn't look super great, but I've still got it. I built another couple maybe 15 years ago, long before there was any info I could find on the web. I wasn't even on the web (if it existed as such back then) when I built those; I wound up modifying the Shane Johnson (I think) blueprints. And I've been wondering where that bloody thing is for the last couple months....

Thanks for all the great pics and all the details! Do you have any pictures of that switch you installed, before you installed it? Even if it's not the actual one you put in there, some reference would be nice.

From those later pictures you've got of the original sitting on a box at a convention... the gun wasn't actually bent like that, was it? I presume it's some kind of lens distortion, but it looks a little weird.
 
Thanks for all the comments! I'm working on adapting a set of Nicksdad's grips for this prop right now--they're a little larger and match the replica I based this refurb on a lot better. I'll post more pics when it's all done. As for the switch, I'll try to take some more photos of the one in this DS gun or some of the switches in my Buck Rogers props. The photos of that original are a little warped by my old lens, but the back screw on tank is a little droopy in reality, angled down a bit.
 
Back
Top