Well said, BRRogers. Amazing work. Thanks for your dedication to this project, PoopaPapaPalps, vadermania, and LOM.Awesome work.
Major gratitude to you; vadermania and LOM for a multifaceted understanding of this prop composition, geometry, and casting process
You are using an out of date browser. It may not display this or other websites correctly.
You should upgrade or use an alternative browser.
You should upgrade or use an alternative browser.
Lineage Foundry Cast ANH Kenobi Stunt Hilts
With my update to my project run, I thought I'd post a little bit about what's happened leading up to it during my trials.

First off, the wood master had a lot more character to it than I could have possibly ever imagined. One of the things that needed to be worked out when restoring vadermania's cast was identifying was a blemish caused from casting and what was something inherent to the master. When I was able to discern what was a result from shrinking or soft-spots and rectified them, what was left really left me surprised. There are so many little details I would've never been able to find without had I not had the model in hand: many undercuts are concaved, the angles of the surfaces slope different to another, the grenade ring cuts are slightly hooked/humped, the emitter plate is at an angle and slightly dished, the clamp section being slightly bell-shaped, how genuinely oblong the booster is; there's so much I could go on about! These details were important to find out because that ultimately informs how much the respective hilts (v2/v3) were cleaned or not.
The V3 was pretty straight-forward and there wasn't much different to how I approached it this time around with the lineage cast. It's the V2 that always gives me pause. I know that the V3 isn't as clean and polished as the V2 is based on the surface finish and how much of the flashing and gravel-like texture from the sand casting still remains. The trick then, and has always been for me, how much do I take off the V2? Was it machined at all?
Ultimately, I concluded that the V2 was not machined but cleaned with a rasp and sandpaper--like the V3 but more than the V3 was subject to. I may be really late to reach this conclusion, but the collage that DaveP had done for his project and the research by Halliwax backed it all up. The rings looked like the cast's and much of the proportions remained intact even after casting. I was machining my earlier pieces because it was what was said at the time by Alinger and what everyone pretty much held true, and it all worked with the measurements taken from replica pieces that were available. It was exhilarating and disheartening to know my hilts were coming out a little too thin than actuality.
Apologies to everyone on the earlier runs!


This then lead to the clamp for the V2 as now the lever for it no longer fit! Something that I went and solved all the while--had I waited-- roygilsing concurrently solved with his 2.0 version of the clamp lever assembly! Not knowing this however, I had to fix this issue myself and making it harder for myself, I wanted to address the quibbles I've had between the previous clamp levers offered.
I've always felt that the clamps levers made were too thick, too clean, and too shiny. Between the chrome plated pieces to the bare aluminium that some offered; it never looked quite right to me. It being comparatively thin on the real thing, and still being sturdy, I settled on steel as the material to use for the piece and the local hardware store had the perfect sized sheet of galvanized steel to use.
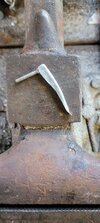
I made positive masters out of wood and plaster to mold and sand-cast dies to quickly and evenly produce these. They're a certain size and profile so I can remove the excess material away on my grindstone into the proper lever shape. The post and square lock nut are custom made out of steel as well to now better suit the lever thickness. A simple finishing nail acts as the bolt to hinge the lever and post together. Here is an early test piece dry-fitted together before reaching the final result:


The rest of the V2 after settling on filing over machining it was pretty straight forward. I do find that because I'm working on something with genuine heritage, I am a little too gentle when it comes to cleaning out the grenade rings for the V2. I need to hog more out to get the right ring thickness but I always just pull back a little too soon for worry of irreparably going too far; it's better to have a little more than a little less, I feel. Currently, any way. Once I steady my hands and my nerves to do it, it shouldn't be a problem.
My one concession and failure to remedy I've come to accept during all this is the emitter. Rather, the damage to it on the V2. I've burned through four good emitters to try and get it, but I can't. I've tried all sorts to get to match the real thing, I've even created a separate die just for it similar to how I made one for the lever, but my casting alloy is just not strong enough to handle the stress of bending the emitter face to angle without damage. It irks me to no end to come to terms with it. The brazing wire originally used to make the real production casts are or had to be stronger than what I can currently get my hands on if they can warp as they did without surface damage (or flat out chipping off). I've quenched, I've annealed; I've quenched and annealed; hammered and pressed without any success. I can ding it, I can beat it up to a certain point, but the casting aluminium available to me is just not strong enough to achieve that one detail. I've crossed the finish line of the marathon but keep losing a shoe, it feels like.
One plus is that I've settled on the paint application of the stunt hilts as they were first done up. I always felt it was doing too much if I was mixing specific, hard-to-find colors together. It didn't feel authentic to something that was dictated by having little time and money to produce. It need to be something simple and fast, and that turned out to be just an airbrushing of brass enamel over black, and then dry-brushed with black on top and calling it quits.
Not too bad, I think.


The V2 I've made in the photos here and on the project run will be leaving my possession pretty soon. This is a pro-bono gift to vadermania for all he's done not just for the project but for the runs before and after mine, what with all he's shared freely. It will also come with a little bonus.

First off, the wood master had a lot more character to it than I could have possibly ever imagined. One of the things that needed to be worked out when restoring vadermania's cast was identifying was a blemish caused from casting and what was something inherent to the master. When I was able to discern what was a result from shrinking or soft-spots and rectified them, what was left really left me surprised. There are so many little details I would've never been able to find without had I not had the model in hand: many undercuts are concaved, the angles of the surfaces slope different to another, the grenade ring cuts are slightly hooked/humped, the emitter plate is at an angle and slightly dished, the clamp section being slightly bell-shaped, how genuinely oblong the booster is; there's so much I could go on about! These details were important to find out because that ultimately informs how much the respective hilts (v2/v3) were cleaned or not.
The V3 was pretty straight-forward and there wasn't much different to how I approached it this time around with the lineage cast. It's the V2 that always gives me pause. I know that the V3 isn't as clean and polished as the V2 is based on the surface finish and how much of the flashing and gravel-like texture from the sand casting still remains. The trick then, and has always been for me, how much do I take off the V2? Was it machined at all?
Ultimately, I concluded that the V2 was not machined but cleaned with a rasp and sandpaper--like the V3 but more than the V3 was subject to. I may be really late to reach this conclusion, but the collage that DaveP had done for his project and the research by Halliwax backed it all up. The rings looked like the cast's and much of the proportions remained intact even after casting. I was machining my earlier pieces because it was what was said at the time by Alinger and what everyone pretty much held true, and it all worked with the measurements taken from replica pieces that were available. It was exhilarating and disheartening to know my hilts were coming out a little too thin than actuality.
Apologies to everyone on the earlier runs!
This then lead to the clamp for the V2 as now the lever for it no longer fit! Something that I went and solved all the while--had I waited-- roygilsing concurrently solved with his 2.0 version of the clamp lever assembly! Not knowing this however, I had to fix this issue myself and making it harder for myself, I wanted to address the quibbles I've had between the previous clamp levers offered.
I've always felt that the clamps levers made were too thick, too clean, and too shiny. Between the chrome plated pieces to the bare aluminium that some offered; it never looked quite right to me. It being comparatively thin on the real thing, and still being sturdy, I settled on steel as the material to use for the piece and the local hardware store had the perfect sized sheet of galvanized steel to use.
I made positive masters out of wood and plaster to mold and sand-cast dies to quickly and evenly produce these. They're a certain size and profile so I can remove the excess material away on my grindstone into the proper lever shape. The post and square lock nut are custom made out of steel as well to now better suit the lever thickness. A simple finishing nail acts as the bolt to hinge the lever and post together. Here is an early test piece dry-fitted together before reaching the final result:
The rest of the V2 after settling on filing over machining it was pretty straight forward. I do find that because I'm working on something with genuine heritage, I am a little too gentle when it comes to cleaning out the grenade rings for the V2. I need to hog more out to get the right ring thickness but I always just pull back a little too soon for worry of irreparably going too far; it's better to have a little more than a little less, I feel. Currently, any way.
Once I steady my hands and my nerves to do it, it shouldn't be a problem.My one concession and failure to remedy I've come to accept during all this is the emitter. Rather, the damage to it on the V2. I've burned through four good emitters to try and get it, but I can't. I've tried all sorts to get to match the real thing, I've even created a separate die just for it similar to how I made one for the lever, but my casting alloy is just not strong enough to handle the stress of bending the emitter face to angle without damage. It irks me to no end to come to terms with it. The brazing wire originally used to make the real production casts are or had to be stronger than what I can currently get my hands on if they can warp as they did without surface damage (or flat out chipping off). I've quenched, I've annealed; I've quenched and annealed; hammered and pressed without any success. I can ding it, I can beat it up to a certain point, but the casting aluminium available to me is just not strong enough to achieve that one detail. I've crossed the finish line of the marathon but keep losing a shoe, it feels like.
One plus is that I've settled on the paint application of the stunt hilts as they were first done up. I always felt it was doing too much if I was mixing specific, hard-to-find colors together. It didn't feel authentic to something that was dictated by having little time and money to produce. It need to be something simple and fast, and that turned out to be just an airbrushing of brass enamel over black, and then dry-brushed with black on top and calling it quits.
Not too bad, I think.
The V2 I've made in the photos here and on the project run will be leaving my possession pretty soon. This is a pro-bono gift to vadermania for all he's done not just for the project but for the runs before and after mine, what with all he's shared freely. It will also come with a little bonus.
Attachments
Mr Mold Maker
Master Member
Apologies to everyone on the earlier runs!
No apologies necessary to me.. yes it is a bit disappointing to be an early adopter and have it be outdated instantly, but that’s part of the territory I guess. As for mine, it lives on the shelf and I pick it up every now and then and it makes me happy, hopefully others in the early run feel the same.
Best of luck with your future runs, it sounds like they’ll be getting a better saber in every way and that’s saying something because your first was damn good.
Last edited:
No apologies necessary to me.. yes it is a bit disappointing to be an early adopter and have it he outdated instantly, but that’s part of the territory I guess. As for mine, it lives on the shelf and I pick it up every now and then and it makes me happy, hopefully others in the early run feel the same.
Best of luck with your future runs, it sounds like they’ll be getting a better saber in every way and that’s saying something because your first was damn good.
A part of me wants to offer a refurbishing service where I melt down the earlier ones I made, and cast them into the new ones. I think it only fair and not leave anyone felt left out. The early adopters would have to send them back to me, of course, but I wouldn't know or haven't figured the pricing of such a thing. It's still the same amount of work. It is something I'm considering though.
Incredible work man, this wins “rpf project of the year” in my eyes
It only took four years to get here!
I wish I had kept the very first replica Luke ROTJ lightsaber I made back in 1983. I cut every single grenade ring by hand from a sheet of aluminum, drilled and filed it so that it did fit on a central rod. Emitter and wind vane were shaped out of wood. Can‘t remember what I used for the booster and hand wheel section. But I know one thing for sure - I will call my „old friend“ and get that thing back!The V2 I've made in the photos here and on the project run will be leaving my possession pretty soon. This is a pro-bono gift to vadermania for all he's done not just for the project but for the runs before and after mine, what with all he's shared freely. It will also come with a little bonus.
I knew that it might be possible to create a replica of the screen used lightsaber using „vintage“ production techniques. But I never imagined that someone really decides to tackle such a time-consuming, complicated and costly project, willing to face all those challenges, including the constant dangers of failure and defeats.
It is an honor that I was able to contribute, and of course I did it for free and with joy. The result speaks for itself.
Now I really wish that others are motivated by that and take this as an outstanding example of dedication, passion, reliability and honesty and share their insight and knowledge (as long as they are not bound to an NDA
and lift the community to a higher level of replica prop creation. RPF at its best, thank you Sir!if you consider it..... and find solutions, please let us know!A part of me wants to offer a refurbishing service where I melt down the earlier ones I made, and cast them into the new ones. I think it only fair and not leave anyone felt left out. The early adopters would have to send them back to me, of course, but I wouldn't know or haven't figured the pricing of such a thing. It's still the same amount of work. It is something I'm considering though.
if you consider it..... and find solutions, please let us know!
Already considering it! Just don't know what would be fair because the pommels, nipples, and grub screws would all still be viable parts that can carry over. It's just melting and casting/cleaning the hilts again.
sticklegges
New Member
Just wondering where I might sign up for a v3 cast? 
Just wondering where I might sign up for a v3 cast?
Limited Run - **LINEAGE** Foundry Cast - ANH Kenobi Stunt Hilts (ANH/ROTJ - V2/V3)
Edited: 04/27/22 - More readings about my findings and experiences (and a little more photos) are logged here in my build and research thread. ----------------------------------------------------------------------------------------------------------------- THE ROOTS This idea originally grew...
 www.therpf.com
Man, that was some fun catch-up reading!
Very cool stuff, PPP! I remember being super excited when you were first figuring this whole process out, and trying to get your buck right and the casts clean and nice.
You’ve come so far, and how exciting you’re now offering lineage casts thanks to VM!
I’m gonna need a raw cast at some point, I think, or a V3 or something. I haven’t decided, yet, nor do I have any funds at the moment. But I’m going straight to your project thread from here!
Great work, and keep it up!!
EDIT: I went back and read some of the early stuff in this thread, and remembered we were talking about how to machine the pommel cubes. I never managed to try out your method! Are you still doing them the same way?
Last edited:
EDIT: I went back and read some of the early stuff in this thread, and remembered we were talking about how to machine the pommel cubes. I never managed to try out your method! Are you still doing them the same way?
Slightly more careful these days, but yes, I'm still doing them pretty much the same way. I mark the channels between the cubes and then cut the sides by rotating and flipping the pommel. My mini-mill doesn't have enough real estate to hold the vice plus a rotary dial; it's either/or for those options and it's far too much of a hassle to fully swap the set-ups to do it.
I'm wrapping up the Lineage Cast Project Run in the coming month, a project that has incredibly spirited away 5 years of my life, and while I'm working away on the final hilts, I figured I may as well get to what may be the final nail in the coffin for not just this project but my involvement in any more ANH stunt-cast shenanigans.
Now, for those that don't know, vadermania had his production-made cast X-ray scanned by a process called XRF (Micro X-Ray Fluorescence Analysis) at the Natural History Museum in Berlin. There's more info here by LOM in this post for further reading. From that process, it was deduced that the material composition of the cast was likely to be 4145/4145A, a type alloy for brazing wire.
As anyone following this project knows, halfway through my project run, vadermania provided me a 3D scan of his production-made cast to help with this passion project. I restored that scan back to the original wood buck's specifications and have since been working off of that pattern. While my current cast hilts are as close as possible to what was created then, I openly acknowledge what I offer isn't pinpoint accurate in size and material to the originals. While I make it work, and people seem to be generally happy with what I've done, what has eluded me thence was actually working on a cast that was made of the original material, and learning of all of the quirks and quibbles that it may entail. I've only ever worked off of suppositions and theories that my project has lead to regarding the real things. That was, until tonight.
I've mentioned before in various posts that, after much searching and waiting, I managed to get a very limited supply of 4145 brazing wire. Exactly 10lbs of the stuff, point of fact, and it was almost 1000 bucks shipped. The stuff isn't widely used anymore, as there are subsequently better materials made since 1975, and is heavily regulated due to its high silicon content. Silicon is poisonous when melted and its gasses are released. Well, just yesterday, the weather and winds were favorable; I donned by protective gear and fired up my forge for what feels like 5 years of tinkering has finally lead into being.
The first casts in near 50 years to be made from the original pattern in the original metal alloy. These aren't just replicas like the originals. These are the casts that would've been used to make the Obi Stunt hilts.

There are no more variables for me to contend beyond my own inadequacies as a machinist. These are exactly as they were back in 1976. What I learn from these are now definitive statements and will no longer be conjecture as it has been my experience up until now.
I wish I could say that it was far-sightedness that I kept a hilt from my very first casting experiments with extruded aluminium stock, but it was, frankly, dumb luck that I've not melted it down or parted with it since those early days. It has provided me a control to compare my final casting-alu batch, and the dead-on, balls-accurate period casts to gauge their minute and not-so minute differences.
The first is immediately visual: the color and finish of the period alloy.

(the two on the left are made from casting aluminium alloy; the two on the right are the 4145 casts)
The surface finish on the cast-alu hilts is a glossier, warmer color with a larger "orange peel" surface texture. The patchwork crystal structure of the material is more visually evident on the cast-alu hilts, whereas the texture of the period casts (pictured in the middle below) is more like the extruded alu stock hilt; with a tighter, more compact structure, smaller "orange peel" texture, and cooler and lighter in color, but not as pale as the extruded-alu casts.

The second, is size: while not noticeable (especially in photos) as in person, the size of my period accurate casts strike that middle ground that I figured it might have between my admittedly larger cast-alu hilts, and to my much smaller extruded-alu hilts. I've admitted before that I purposely chose to go with casting aluminium for my project run because it doesn't shrink as much as the extruded aluminium, leading to a host of problems of proportion and sizing when machining hilts, and because it's not a dangerous to work with while maintaining good machining and detail capture (also, it's more affordable and readily available).
The problem, however, is ultimately the same as the extruded-alu casts: proportion and size. Casting alu, what I use currently, has a shrink rate of ~6-8 percent, whereas the extruded-alu casts had a shrink rate from ~11-14%. The period accurate material shrinks ~9-11% from the original negative.
I currently try to cut the minimum as I can away from my casting-alu hilts to retain its original detail as much as I can when it comes to making the kit offerings. Having learned from earlier attempts, better to leave more of what's there than of what can't be changed. I figure it's the lesser of evils.

That's not the case for the period accurate hilts, though. Everything is where it needs to be and there are no longer any vagaries to deal with when it comes to that cast. It makes machining it to match the reference material all the better (and easier) as scale and proportion is no longer a concern. I've already taken the cleaner of the two 4145 casts I have and have started machining it into a V2.
From my experiences with previous builds, I now know where to focus my efforts on first on this hilt and then work the proportions for the rest of the hilt on from there. On this, it is vitally important on getting the clamp section machined to match the tolerance of the clamp seen in the reference material. There isn't much space between the two clamp bars and they're parallel to one another, not bent inwards, so it gives me an idea on what I should be aiming to replicate on the period accurate cast.
What the ensuing machining revealed to me was both elating and depressing as it brought it full circle, back to when I first started this project, with my very first workable casts: my initial instincts were correct half a decade ago. I only now just have the evidence to prove it.
The V2 is a fully machined cast, they cut the entire surface down to get it nice and shiny on a lathe, the rounded undercuts are done with a round needle file and sandpaper. Because the proportions of the 4145 cast is correct, it scaled on the machined cast to the buck; something that's proved a bit of a bugaboo with me working with substitutes, taking either too much off or not enough. It proved that it there isn't too much taken off of the initial casts for the V2 (~.5-.6mm off the clamp section). They are both very similar in size and accounts for the similarities between the scaling of the V2 and V3. This also finally solved the issue with me in how much of the booster section was cleaned on the V2. The answer is: not completely! Because the cast lilts off-center by a few degrees, it just needs to be taken down to match the rest of "unclean" areas to create a semi-circular circumference. The rest is cleaned with a rasp and sandpaper. It isn't symmetrical by any means, but that finally solved for me just how much exactly needs to be done in that area.
The same was applicable to the windvane, another area that always puzzled me on its shapes. The odd angle and transition from the flare/lip into the windvane? The area initially with a groove from a light plunge cut? Initially cut down but mostly cleaned up with sandpaper and a round needle file. That's it.
As there is more to do with this, and as much as I wanted to keep on working, I had to leave it for tonight and this is where it is, at the moment. It also provides a pretty good sense of scale compared to the other hilts (L to R: casting-alu, 4145 cast, 4145 V2 WIP, extruded-alu cast).

One aspect that I'm looking forward to most is what this ultimately proves about the emitter. I've made no bones about my current emitters being too soft to bend without cracking or breaking trying to replicate the dents in the V2 emitter. The metal is just too soft with casting aluminium. Though I'm trying to hold back bias, if the emitter made of 4145 is similarly susceptible to unsuccessfully sustaining such serious, strenuous strikes, that most definitely proves that the V2's emitter was likely make of something else other than cast metal. That opens up another mystery box (which likely hides another mundane answer). That is something I'm seriously looking forward to test, while ultimately dreading having to buy another bar of rolled aluminium to machine a fresh V2 emitter from if my assumption is correct.
There's more to come yet, as the work beckons on the V2, and then the V3!
Now, for those that don't know, vadermania had his production-made cast X-ray scanned by a process called XRF (Micro X-Ray Fluorescence Analysis) at the Natural History Museum in Berlin. There's more info here by LOM in this post for further reading. From that process, it was deduced that the material composition of the cast was likely to be 4145/4145A, a type alloy for brazing wire.
As anyone following this project knows, halfway through my project run, vadermania provided me a 3D scan of his production-made cast to help with this passion project. I restored that scan back to the original wood buck's specifications and have since been working off of that pattern. While my current cast hilts are as close as possible to what was created then, I openly acknowledge what I offer isn't pinpoint accurate in size and material to the originals. While I make it work, and people seem to be generally happy with what I've done, what has eluded me thence was actually working on a cast that was made of the original material, and learning of all of the quirks and quibbles that it may entail. I've only ever worked off of suppositions and theories that my project has lead to regarding the real things. That was, until tonight.
I've mentioned before in various posts that, after much searching and waiting, I managed to get a very limited supply of 4145 brazing wire. Exactly 10lbs of the stuff, point of fact, and it was almost 1000 bucks shipped. The stuff isn't widely used anymore, as there are subsequently better materials made since 1975, and is heavily regulated due to its high silicon content. Silicon is poisonous when melted and its gasses are released. Well, just yesterday, the weather and winds were favorable; I donned by protective gear and fired up my forge for what feels like 5 years of tinkering has finally lead into being.
The first casts in near 50 years to be made from the original pattern in the original metal alloy. These aren't just replicas like the originals. These are the casts that would've been used to make the Obi Stunt hilts.
There are no more variables for me to contend beyond my own inadequacies as a machinist. These are exactly as they were back in 1976. What I learn from these are now definitive statements and will no longer be conjecture as it has been my experience up until now.
I wish I could say that it was far-sightedness that I kept a hilt from my very first casting experiments with extruded aluminium stock, but it was, frankly, dumb luck that I've not melted it down or parted with it since those early days. It has provided me a control to compare my final casting-alu batch, and the dead-on, balls-accurate period casts to gauge their minute and not-so minute differences.
The first is immediately visual: the color and finish of the period alloy.
(the two on the left are made from casting aluminium alloy; the two on the right are the 4145 casts)
The surface finish on the cast-alu hilts is a glossier, warmer color with a larger "orange peel" surface texture. The patchwork crystal structure of the material is more visually evident on the cast-alu hilts, whereas the texture of the period casts (pictured in the middle below) is more like the extruded alu stock hilt; with a tighter, more compact structure, smaller "orange peel" texture, and cooler and lighter in color, but not as pale as the extruded-alu casts.
The second, is size: while not noticeable (especially in photos) as in person, the size of my period accurate casts strike that middle ground that I figured it might have between my admittedly larger cast-alu hilts, and to my much smaller extruded-alu hilts. I've admitted before that I purposely chose to go with casting aluminium for my project run because it doesn't shrink as much as the extruded aluminium, leading to a host of problems of proportion and sizing when machining hilts, and because it's not a dangerous to work with while maintaining good machining and detail capture (also, it's more affordable and readily available).
The problem, however, is ultimately the same as the extruded-alu casts: proportion and size. Casting alu, what I use currently, has a shrink rate of ~6-8 percent, whereas the extruded-alu casts had a shrink rate from ~11-14%. The period accurate material shrinks ~9-11% from the original negative.
I currently try to cut the minimum as I can away from my casting-alu hilts to retain its original detail as much as I can when it comes to making the kit offerings. Having learned from earlier attempts, better to leave more of what's there than of what can't be changed. I figure it's the lesser of evils.
That's not the case for the period accurate hilts, though. Everything is where it needs to be and there are no longer any vagaries to deal with when it comes to that cast. It makes machining it to match the reference material all the better (and easier) as scale and proportion is no longer a concern. I've already taken the cleaner of the two 4145 casts I have and have started machining it into a V2.
From my experiences with previous builds, I now know where to focus my efforts on first on this hilt and then work the proportions for the rest of the hilt on from there. On this, it is vitally important on getting the clamp section machined to match the tolerance of the clamp seen in the reference material. There isn't much space between the two clamp bars and they're parallel to one another, not bent inwards, so it gives me an idea on what I should be aiming to replicate on the period accurate cast.
What the ensuing machining revealed to me was both elating and depressing as it brought it full circle, back to when I first started this project, with my very first workable casts: my initial instincts were correct half a decade ago. I only now just have the evidence to prove it.
The V2 is a fully machined cast, they cut the entire surface down to get it nice and shiny on a lathe, the rounded undercuts are done with a round needle file and sandpaper. Because the proportions of the 4145 cast is correct, it scaled on the machined cast to the buck; something that's proved a bit of a bugaboo with me working with substitutes, taking either too much off or not enough. It proved that it there isn't too much taken off of the initial casts for the V2 (~.5-.6mm off the clamp section). They are both very similar in size and accounts for the similarities between the scaling of the V2 and V3. This also finally solved the issue with me in how much of the booster section was cleaned on the V2. The answer is: not completely! Because the cast lilts off-center by a few degrees, it just needs to be taken down to match the rest of "unclean" areas to create a semi-circular circumference. The rest is cleaned with a rasp and sandpaper. It isn't symmetrical by any means, but that finally solved for me just how much exactly needs to be done in that area.
The same was applicable to the windvane, another area that always puzzled me on its shapes. The odd angle and transition from the flare/lip into the windvane? The area initially with a groove from a light plunge cut? Initially cut down but mostly cleaned up with sandpaper and a round needle file. That's it.
As there is more to do with this, and as much as I wanted to keep on working, I had to leave it for tonight and this is where it is, at the moment. It also provides a pretty good sense of scale compared to the other hilts (L to R: casting-alu, 4145 cast, 4145 V2 WIP, extruded-alu cast).
One aspect that I'm looking forward to most is what this ultimately proves about the emitter. I've made no bones about my current emitters being too soft to bend without cracking or breaking trying to replicate the dents in the V2 emitter. The metal is just too soft with casting aluminium. Though I'm trying to hold back bias, if the emitter made of 4145 is similarly susceptible to unsuccessfully sustaining such serious, strenuous strikes, that most definitely proves that the V2's emitter was likely make of something else other than cast metal. That opens up another mystery box (which likely hides another mundane answer). That is something I'm seriously looking forward to test, while ultimately dreading having to buy another bar of rolled aluminium to machine a fresh V2 emitter from if my assumption is correct.
There's more to come yet, as the work beckons on the V2, and then the V3!
Last edited:
Pure lightsaber science. Love it!
What is better in the new run swords?
The final hilts I'm making for my run, or for my own personal collection using the accurate metal alloy?
To the former, better detail retention using casting aluminium at the cost of accurate sizing (doesn't shrink enough). To the latter, I don't know about its mechanical strength--it cuts and cleans well enough--but it's only "better" because it's the real deal. It'd be like asking what's better between a working replica Graflex flash handle and a working real Graflex flash handle; all in the eye of the beholder. It's using what was used then that puts it above the rest for me.
Similar threads
- Replies
- 1
- Views
- 466
- Replies
- 2
- Views
- 417
- Replies
- 4
- Views
- 564
- Replies
- 234
- Views
- 19,201
- Replies
- 14
- Views
- 1,598