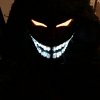
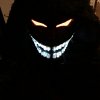
KPAX10's - The Vengeful One - 2015 Halloween Costume Contest Entry

KPAX10

Member
Hello all... I will try to get most posted tonight, but I will try to do some more detailed follow-up posts later.
01c7b1f17cbd08942ddb7b3cc057df701ace789080.jpg

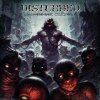
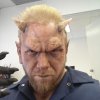
Well, in coming up for an idea for this year's Halloween costume, I've decided to go obscure: "The Guy" mascot from the band Disturbed. Sure it would have been easier to choose something that everyone was familiar with... Batman, Iron Man, Deadpool... but I like a challenge. For those who might not know, the band has been on a five year hiatus and had just released their new album "Immortalized" with the first release being "The Vengeful One" with an accompanying music video. {Cue Music.} And I was hooked! The story in the video is a vengeful spirit, a dark messiah, summoned by the inequities and corruption of corporate greed, represented by the evil demons.

"So sleep soundly in your beds tonight
Judgement falls upon you at first light..."

References:
The most difficult challenge facing me was the lack of reference material. Sure there were prior versions and album covers, even a few hastily put together cosplays. But there was almost nothing in regards to the video - other than the video. Screen capture mode = ON!

05-Fullscreen capture 8292015 60110 PM.jpg06-Fullscreen capture 8292015 60117 PM.jpg09-Fullscreen capture 8292015 60315 PM.jpg11-Fullscreen capture 8292015 60416 PM.jpg14-Fullscreen capture 8292015 60525 PM.jpg

Other references:
411579-disturbed.jpgalbum.jpgdisturbed-175059.pnga7x_disturbed_mix_background_by_di5turb3d_one.jpg


Challenges:
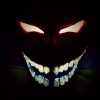
Did I mention that I'm a noob? Well, I'm technically savvy, but still flexing my crafting muscles.To me, the biggest challenge in this build was going to be the face. If you haven't noticed, he's always smiling that all knowing, I will eat you if you misbehave smile - and the glowing eyes. Never blinking, always watching. The nice thing about this version of "The Guy" is that he actually has clothing/costume. While I aim to be accurate with my builds, I always like to put my own spin on things. Another challenge for me was Time; I had to not only obtain all the parts and pieces and fabricate the costume I'm a full time architect with a looming project deadline. Did I also mention that I'm going into surgery on 11/5 for a replacement pacemaker? No pressure! LOL. I did say I love a challenge!


The Build List:
Face/Mask
  • Sculpt or underlying base mask
  • El-Panels (eyes-red & teeth-white) & inverters, wiring
  • El-Wire ('power arm'- blue)
  • Apoxy sculpting putty & tools
  • Teeth

Costume
  • Pattern - robe/coat/shirt
  • Fabric - robe/coat & shirt, hood, poncho
  • Pants
  • Belts
  • Gauntlets
  • Gloves
  • Boots

Accessories
  • Guns - double barrel shotgun, revolver
  • Chains, lots
  • Bandolier for shotgun shells
  • More belts, leather, etc.
  • Motorcycle {...denied by wife}


About a 1/3 of the way into the build, I discovered, by accident, postings on Instagram and their website by the actors who played the characters in the video. They were Chidi Ajufo who played the Guy, and Adam Dunnells who played the Boss Demon. Thank you guys!!!! This material was invaluable!
2.pngdemon.jpgChidi Ajufo.jpgChidi Ajufo 2.jpgChidi Ajufo 3.jpgAdam Dunnells.jpg

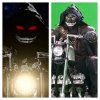
Obviously in the video there was post processing to give it its 'flavor', but now from the main photo, I could see that he looks to be a resurrected biker/cowboy. The coat he is wearing is a ratty Duster, with a ripped poncho and hood that covers his arms and head. This helped a lot in redirecting the flow of the costume.


The Build:
(NOTE: I am going to provide more detailed build information after this initial post and will edit this post)
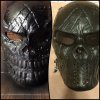
I decided that in the interest of time (or lack thereof) and to be able to 'house' the electronics I would use a pre-built paintball mask as my base and modify it to fit my needs.
01953faecefbd9e8f17238d41c9825028dfecca3f7.jpg011f0a4bfeffe416afcdcc94b99a35929bbda99599.jpg

{magic happens here}

Additional build photos coming!


Final Costume Photos:
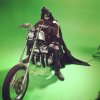
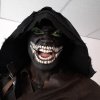
01cd3f975b5c3bc874fbc4331aa14b23e615f8b2f9.jpg013335fc972ac399a8f2b9a3b35c93a69f5edc05e9.jpgImage 1.jpgImage 2.jpgImage 3.jpgImage 4.jpg


Thanks for looking! I had a lot of fun on this build.
-Kyle
 
Last edited:
Re: KPAX10's The Vengeful One - 2015 Halloween Costume Contest Entry

Proof photo
Proof Photo.jpg


The Mask

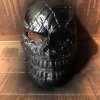
As I stated earlier, I contemplated sculpting a mask, but with the time I had to do this build, I opted for a quicker route. I found a really good paintball mask online that I would modify for my needs; plus I needed to have a good substantial support for the electronics. I would need to reshape the eyes as well as keep a place for me to see as well as remove pieces so that the teeth would be back-lit. With the help of my trusty rotary tool, I got to work! Once done, I temp-fitted the El-panels in the mask to see how it was shaping up.
0121357f468740b729abce87a92722c004d2cff4ca.jpg014e3a1862ba9c868950793c96080f9a3c51f52c29.jpg01b86c3e73505abe7bf40296bc4ad808468ef8cd0c.jpg

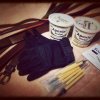
Some of my tools and supplies had come in the mail - Yay! I chose to use Apoxie Sculpt for this build as I knew I needed something quick, permanent and hard on the mask surface. I had NEVER worked with it before, so this was going to be a fun learning experience. Mix parts of A + B equally - you have 3 hours (they say). Hmmmm. After my first few bits I found out that I had even less time than that. I mixed, let set for about 5 minutes, then got to work. I noticed that within about 30-45 minutes it became harder and harder to work- at least for my needs. I had a glass of water nearby that I would occasionally dip my fingers in to smooth the putty, which I did like.
013858910a5c6e9c8fb2543b2116dcb89aa8c764a7.jpg01b3231034649c0b1da200666bba636c77f13fdf6b.jpg

I kept the screen eye protectors, covering them with scotch tape and putting them in reverse to be the support for my bridge sculpt. The Guy has very recognizable eyes, so getting this part was very important to me. Because of the Apoxie work time, I was only able to work on a section (eye) at a time. But it was just enough time to form and then sculpt the fine detail into the 'bone'.
01e32eae5da25bdb8dd98bd35b14e16cfd00453574.jpg016fda44ec4ba0141fe6d3cfcdb7ba2df6da333d2a.jpg010d94fd1ecc5f2f051c42758eeca57c1d02ec7446.jpg

I had always planned on using acrylic nails for the teeth. They're perfect as I can manipulate them and they're a translucent material. I rough laid them out on the mask earlier to get a quantity and idea of layout. I then numbered them to keep track and proceeded to "eat away" at the edges with my Rotary tool. I put some extra teeth in some Apoxie to test run something i wanted to try on the teeth. The characters teeth are white, but the whole face is black, so that posed a problem of painting for me (or it was going to take a lot of extra intricate time.) I coated the teeth with Latex, then sprayed with Black Plasti-Dip. Using a rubber eraser/Pik-up, the latex just peeled off of the teeth! Success! Now... on to sculpting the jawlines.
018078e1bb2a0bc7e7ab3dbdb679f4aecbefa42076.jpg01e72b1278b84270500ca77bcd313065a885f1353b.jpg01710a76444a876b5eda852680fced527bec66087c.jpg01f58ab05f78ffe945bd30d03a27da18146fe7eb36.jpg01355d58d39aee06f841c8c7155ea318a46088eb34.jpg014bc6c5bc68ea009b580c91646a1ed6215cdfe101.jpg


The Teeth
Proceeding as planned, I was able to work on a section at a time, due to the quick setting nature of the Apoxie. While it was still soft, I laid in the cut teeth in the proper order, then made a new batch to be the outer 'gums'. I sculpted the gums to appear as bone and tried to give it a texture that would blend with the mask a little. Then I came in from behind to help close the teeth in, and give extra support where it was cut out. This was intentionally smoothed out as this would be the surface that the El-Panel would be up against. I did this over four days to allow each section to dry and harden. I then added some 'channels' made of Apoxie to hold a side of the El-Panels later on. At this time, I also made chipboard templates for the El's to aid me in cutting out their shapes later.

01cccc5bb6418e00de50b195282c64399e4072cbee.jpg01ccbff0ed61ae5f8d6a9dc391849eb3c97b83231a.jpg01fd4ec51df5c747e730dc6d4e72afc4b677679ab6.jpg013c8c1981b40c30d5618ec82c7f6ea4171ed27d18.jpg01b27cf227644bf15ae54bff04da929ffb6bd038ef.jpg01c60c71f67656949de294c5d5f6035d4b4e3993d7.jpg01b51233a5e50ad5bff6fdc17c227b0477e87fabbb.jpg01c3308eb22e2d422fb4ce203591fd848581859673.jpg


While you can't see anything in the video, I added some additional 'brows' atop the eyes for whimsy.
017d8e0d9ab6c53923d9a5dbf96898eac74f6d13b8.jpg


Thanks,
-kpax10
 
Last edited:
Test Fitting on the head and of the El-Panels.
010ae08f3bfb02bd6bb3e090034dbcfdf9046d17bb.jpg016fbb9060177b7ed864f7c62c2d775391dcc01b8d.jpg01cc8cfcf64ca017c026aa77744deb421f3e9152aa.jpg0179be0aa782db04f2684987b64099485e9f1615aa.jpg01f1c94a177f344484030f34da04aa5dccafffd869.jpg

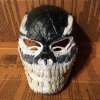
I was happy with how it felt and was looking - now for final painting. I coated the teeth with a good layer of Latex. It was important to not fill the fine detailing with a heavy coat, so I sprayed the mask with multiple light coats of Black Plasti-Dip. making sure to get under and around the nooks and crannies. Once dry, I then used the rubber eraser to remove the paint from the teeth; I had to do some touch ups of course. I then added a light wash of red, dry brushing it on, to the gumline and brows. Why? Sure he's going to be in shadow, but going out I would be under lights. And details matter. The Teeth I decided on a light dry-brush wash of a white acrylic and then a cream acrylic.

01d2b26d416ba8ea3f772a32baecbfa3f3698d6d68.jpg01f92e3ba6f5cc204690ac8a9e2674c1f526bbc23d.jpg016c3a016b18000e6bdec566c156f1600a4175f27c.jpg

El-Panels were attached on the inside using the rails i made earlier and then sealed along the perimeter with electrical tape. Wires were routed along the top and to the side to come out to a custom made 3' extension.
012d8f6403273f24deb61c4513d02d491dd00f262d.jpg


The Costume
The outfit seems to be a ratted cowboy duster with a poncho and a hood. As I said in the first post, I didn't get a good reference shot until 1/3 of the way into the project. I had picked up a robe pattern that I was going to modify. I picked up some awesome fabric from a local store that would help me on my rendition. As I said, this wasn't to be a photocopy. I needed a mannequin, but didn't want to spend $150+ for one, so YouTube to the rescue. With help I made a Duct-Tape & PVC pipe mannequin! Ta-Da!
Gloves and the arm bands were ordered online. Pants (Dickies) were purchased at a local store and weathered.

(sorry for the lack of in-between sewing shots, but i was busy... sewing).

0180346f40f996977311d6eecb310a60a54771f7b9.jpg014702d379027cfd5a4dcd9b8c5cdd4604642ce454.jpg01481447e23f24a9d73919e445eb42682865e3e0e5.jpg0141bfc84f8c939f374ed517ab34b1e0b3d90c511b.jpg01a88622b8d15c5102266a38617bc03b907116340c.jpg

016f33388881fe30f3bf6df1720a0efdc47108e6ed.jpg01dc4b5a432bcd1dfdbf28fd5a29060fd2a932a9e9.jpg0155599ca164ff3a90d1322bf92874468ffe1a3e65.jpg013335fc972ac399a8f2b9a3b35c93a69f5edc05e9.jpg

-KPAX10
 
Last edited:
The Accessories
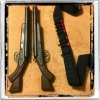
Of course, what costume doesn't come with accessories. The Guy requires only a few... He carries two double barreled shotguns, a revolver, a grenade (not done). Unfortunately i also found out that the real guns used were a replica of a turn of the century 'Street Howitzer' shotgun. These are available on Ebay, but i didn't have $120 for each gun. The $10 toy guns would do.
Not really seen in the video, but seen in the actor picture is a shotgun shell bandolier. While his were worn on his legs, I decided to low sling across the hips.
Oh and chains. Lots of chains.
and belts.. obtained from the Salvation Army.
The guns were torn apart and repainted of course, as well as the tips of the shells and the chains.

01dcd522d2165d01a2b7a4ee3eb47567ce76f171f0.jpg0169876443625fe611d41bbf9be279fa938ad4bbca.jpg01dc88c70fc7cfd35614a94a16fe8f8870bc62614e.jpg0170cd8f66d7969bf4d21cbccd609db687119a5722.jpg
01f443d9c5d26c4107c8cd22c4aaf04a9061f14886.jpg0148af158430a3cdb636cf90bff9af33fca9d7129c.jpg0142350fbc3dd3fe94d0f6a1afbdcfab7dc21131f7.jpg

I also decided to paint the buttons for the coat and the buckles for the arm bands and the shoes. To save the fabric and only get the buckle, I devised a system by drafting ye old paper towel roll to help by cutting a slit just for the buckle and adding some tape.
I had some leather scraps and tacked these across the top of the boots to simulate the strapping he had on his.

0180677888c8ded010d50cdfda1ee3144995441e04.jpg0143c62bcc903b92cf7741595ad06398ff4abe8985.jpg01a5abd9a6b277d9150b3d8efbf1d6d785db8f5018.jpg

Then the putting together all the pieces, strapping and chains to drape the way it was in the video.
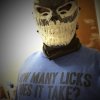
(yes, I'm aware that in the middle photo, i appear more like Van Helsing than my character...) Mask ON!

018ec0d5542e95710cb60369e66284712103e649d3.jpg01cd3f975b5c3bc874fbc4331aa14b23e615f8b2f9.jpg01db66579372db5a719fa06bb6cd862bda5494434c.jpg01f284d6621a1d3f97d78f9c8a14b17d20ba9ce960.jpg01b18e86e9da72bf83a232d6dcb1322ab25d8eed70.jpg


0141a31ef2299640124c18780cbc3b6e59707b1361.jpgImage 3.jpg01c7b1f17cbd08942ddb7b3cc057df701ace789080.jpg

Hope you enjoyed my Disturbed trip into Halloween.
 
Back
Top