Jupiter 2 in 1/72

gt350pony66

Master Member
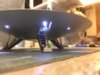
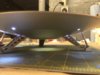
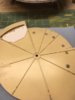
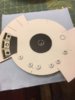
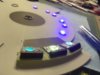
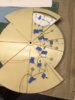
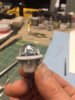
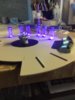
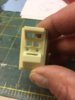
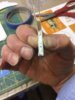
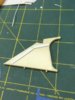
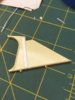
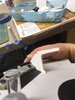
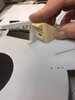
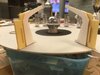
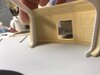
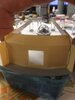
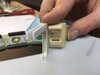
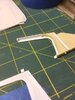
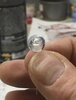
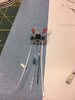
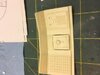
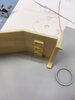
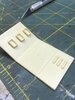
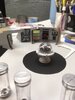
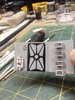
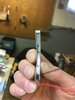
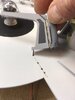
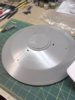
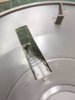
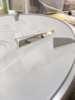
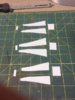
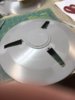
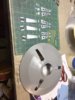
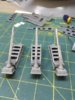
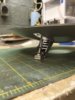
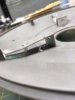
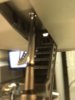
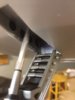
Ok well, here we go on the second J2 build. close to, if not actually 1/72. More challenges with lighting obviously. Had to chop out the landing gear wells and the center for the fusion core. I picked up a core lighting set from a swap meet a couple of years ago for this one. It doesn't work as cool as the larger one but it was cheap enough. The rest of the lighting will need to be done from scratch and in a much smaller space. I still done know how the hell I'm going to do the divider walls due to the size, but I'll figure something out.
 

Attachments

  • plj2a.jpeg
    plj2a.jpeg
    50.7 KB · Views: 142
  • plj2b.jpeg
    plj2b.jpeg
    31.9 KB · Views: 134
  • plj2c.jpeg
    plj2c.jpeg
    27.9 KB · Views: 138
  • plj2d.jpeg
    plj2d.jpeg
    58.3 KB · Views: 139
  • plj2e.jpeg
    plj2e.jpeg
    36.6 KB · Views: 141
  • plj2f.jpeg
    plj2f.jpeg
    40.8 KB · Views: 134
  • plj2g.jpeg
    plj2g.jpeg
    57.8 KB · Views: 134
  • plj2h.jpeg
    plj2h.jpeg
    60.1 KB · Views: 145
I have the Polar Lights kit too, so now I have even more ideas to steal! After following your Moebius build, I think I'll do both J2's at the same time, with the smaller kit being the gears up/in-flight version. Need to finish my refit first, though, and it's taking forever.
 
I have the Polar Lights kit too, so now I have even more ideas to steal! After following your Moebius build, I think I'll do both J2's at the same time, with the smaller kit being the gears up/in-flight version. Need to finish my refit first, though, and it's taking forever.
Cool, I did a lot more today and have pics, but it's late and TV time. You got a thread on your refit? I'd like to see it. I've been pondering a 1/350 1701 but I think I'm leaning towards TOS
 
No thread yet. The progress has been slow, so I wanted to get closer to the end before I make one. I've been documenting it though. My advice would be to go with the TOS-E. It's a much more accurate and well engineered kit. The problem on the 1/350 refit is that literally every piece on the kit is wrong or out of proportion or lacking detail, etc. Every. Single. Piece. It's a nightmare and I decided to try to fix all of it. Save your sanity. Get the TOS.
 
Looking forward to this!

Maybe if the divider walls are thin enough, cut them from clear plastic and put an led on the side? Maybe a material similar to the diffuser part of the PG Falcon?
 
finally got the legs assembled and in place, as well as the scratched up well pieces. I'm sure it's obvious that I used the pieces I cut out of the hull for the ceiling of the gear wells. Either the legs on the Mobi J2 are too thin or these are too fat...I don't know for sure but I used the same aluminum rod for this one. It looks ok so who cares right? Now I'm going to switch gears today and do the lighting for the gear wells and the landing light cans. I did a little work on the control console yesterday. I chopped out the 3 panels, then I cut down the clear pieces that came with the Mobi kit. I masked the round screens and shot the rest black. I plan to sand the back of the screen areas with 1500 grit and then color them with Sharpie, scrape the raised buttons and such so light will pass through and backlight the panels. I'm still mulling whether or not to cut off the 3 plain benches, re-do the floor and scratch the correct looking seats.
 

Attachments

  • j2lg1.jpeg
    j2lg1.jpeg
    49.6 KB · Views: 119
  • j2lg2.jpeg
    j2lg2.jpeg
    34.8 KB · Views: 126
  • j2lg3.jpeg
    j2lg3.jpeg
    32.5 KB · Views: 135
  • j2lg4.jpeg
    j2lg4.jpeg
    32.7 KB · Views: 125
No thread yet. The progress has been slow, so I wanted to get closer to the end before I make one. I've been documenting it though. My advice would be to go with the TOS-E. It's a much more accurate and well engineered kit. The problem on the 1/350 refit is that literally every piece on the kit is wrong or out of proportion or lacking detail, etc. Every. Single. Piece. It's a nightmare and I decided to try to fix all of it. Save your sanity. Get the TOS.
Thanks for the heads up on that, decision made(y)
 
Looking forward to this!

Maybe if the divider walls are thin enough, cut them from clear plastic and put an led on the side? Maybe a material similar to the diffuser part of the PG Falcon?
I hope so, it would seem an imperative to do them lit. I may play around with that today and let you know what I come up with for options(y)
 
oops, forgot the pics, anyway here we are. I decided to chop out the stupid looking benches and scratch correct looking seats. to cover the holes I cut a piece of thin evergreen and painted it black. I think it looks like it belongs there lol. scratching the new seats will be a chore, but if I can scratch a 1/72 snow speeder, I can do a pair of lousy seats, right
 

Attachments

  • smlj2a.jpeg
    smlj2a.jpeg
    75.9 KB · Views: 123
  • smlj2b.jpeg
    smlj2b.jpeg
    87.4 KB · Views: 121
  • smlj2c.jpeg
    smlj2c.jpeg
    38 KB · Views: 130
  • smlj2d.jpeg
    smlj2d.jpeg
    40.2 KB · Views: 132
  • smlj2e.jpeg
    smlj2e.jpeg
    36.3 KB · Views: 144
  • smlj2f.jpeg
    smlj2f.jpeg
    58.7 KB · Views: 128
yes, scratching seats should be a piece of cake after that snowspeeder
I haven't started the seats just yet, but I did dive in on the partition wall lighting. I worked something out that I think will get it done but the scratching on the wall panels has to be precise. The 1/35 wasn't too bad and there was room for slop and error, but 1/72 is tight. the 3mm SMD strip will work for this one too, but just. After dinner I'll post some pics and give ya the run down on the process (y)
 
ok, this is the main floor underside and the center floor do-dad. I drilled it and stuffed a white breather LED up in it and put a 1/4 inch piece of clear rod on top of the LED, then the tiny J2 on the top of that. I cross drilled the center "vase" for .75mm FO and stuck 3/8 to 1/2 inch pieces in the holes.

Now for the walls...the wide part at the front is 4.56mm wide and the SMD strip is 3mm. So I sanded the walls down to 3mm which allows for .75mm evergreen sheet for the new extended wall pieces. I extended the walls out into the floor so there will be room to run the wires up through the floor in the front this time. Granted, something can still go sideways with this, but in theory it ought to work ;)
 

Attachments

  • plj1.jpeg
    plj1.jpeg
    52 KB · Views: 117
  • plj2.jpeg
    plj2.jpeg
    57.3 KB · Views: 124
  • plj3.jpeg
    plj3.jpeg
    43.2 KB · Views: 125
  • plj4.jpeg
    plj4.jpeg
    44.2 KB · Views: 124
  • plj5.jpeg
    plj5.jpeg
    38 KB · Views: 118
  • plj6.jpeg
    plj6.jpeg
    44.2 KB · Views: 128
  • plj7.jpeg
    plj7.jpeg
    43.1 KB · Views: 120
  • plj8.jpeg
    plj8.jpeg
    41.7 KB · Views: 114
Oh yeah...in pic 7 and 8, I cut strips of the .75 sheet and glued it to the stock walls as shims for something for the new wall panels to glue to, to keep everything even steven
 
I'm not seeing it. I'm going to assume you mean 1960s Barbara Eden, not 88-year-old Babs. But if that's what you're into, no judgements here. You to you!
Oh yeah...60's Barbara...bikini, sitting on the ground, body twisted, hands on the ground and the twins, hanging there in ALL their glory:p
 
A little more progress, nothing spectacular. I keep finding things I can do to make it better, most things are working out well, but one or two were a waster of time LOL
 

Attachments

  • jupiter1a.jpeg
    jupiter1a.jpeg
    45.6 KB · Views: 108
  • jupiter2a.jpeg
    jupiter2a.jpeg
    27.8 KB · Views: 105
  • jupiter3a.jpeg
    jupiter3a.jpeg
    76.9 KB · Views: 103
  • jupiter4a.jpeg
    jupiter4a.jpeg
    28.6 KB · Views: 98
  • jupiter5a.jpeg
    jupiter5a.jpeg
    34.5 KB · Views: 98
  • jupiter6a.jpeg
    jupiter6a.jpeg
    70.7 KB · Views: 101
  • jupiter7a.jpeg
    jupiter7a.jpeg
    45.5 KB · Views: 92
I found some acrylic half domes in my greebly stash...perfect size for the pulsing red gyro thing. the wall that sits in was pretty bland, so I chopped it up a little. The next outer wall over where the ladder is had the rungs molded in and there was no hole in the floor, well I took care of that. I had some 1/8 inch light diffusing acrylic sheet so I cut a piece and hash lined it for that one logic circuit panel and I've started setting the walls. The elevator railing is a clear tube with ribs, I guess they mean for one to paint the ribs silver...please. Dinner break is over, my home made chili freakin' rules!
ack to the basement...
 

Attachments

  • J2APR41.jpeg
    J2APR41.jpeg
    298 KB · Views: 104
  • J2APR42.jpeg
    J2APR42.jpeg
    39 KB · Views: 118
  • J2APR43.jpeg
    J2APR43.jpeg
    86.1 KB · Views: 124
  • J2APR44.jpeg
    J2APR44.jpeg
    22.1 KB · Views: 105
  • J2APR45.jpeg
    J2APR45.jpeg
    48.5 KB · Views: 116
  • J2APR46.jpeg
    J2APR46.jpeg
    41.7 KB · Views: 121
  • J2APR47.jpeg
    J2APR47.jpeg
    58.6 KB · Views: 118
  • J2APR48.jpeg
    J2APR48.jpeg
    39 KB · Views: 114
  • J2APR49.jpeg
    J2APR49.jpeg
    35.5 KB · Views: 125
This thread is more than 4 years old.

Your message may be considered spam for the following reasons:

  1. This thread hasn't been active in some time. A new post in this thread might not contribute constructively to this discussion after so long.
If you wish to reply despite these issues, check the box below before replying.
Be aware that malicious compliance may result in more severe penalties.
Back
Top