Many moons ago I got a Denix LeMat for cheap off ebay (this was before the factory burned down and they became somewhat limited), and I began the process to turn it into a super accurate replica of Jayne's gun. I spent much time pouring over screen grabs, publicity photos, and prop photos. I created my own set of diagrams for the parts, and looked for places to get some or the LeMat parts I needed to make it accurate. Thanks to Paradox for pointing me to VTI Gun Parts for better prices than I had found before.
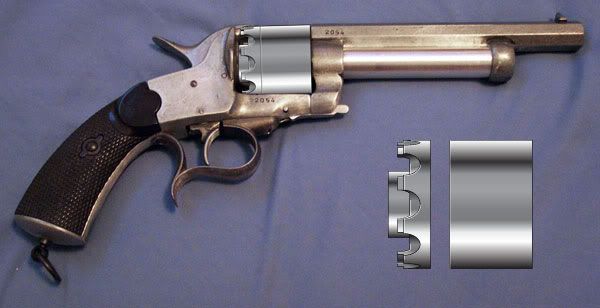
My goal was to first make all the changes to turn the Denix Navy version LeMat to a Cavalry version, then to convert it from that to Jayne's gun, and in doing so hopefully be super accurate in both form and function. I am not mostly done the Cavalry conversion so I thought I'd post my progress pics.
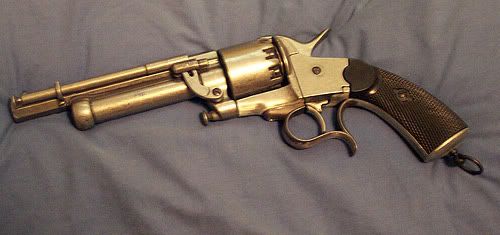
Here's the Denix, unchanged.

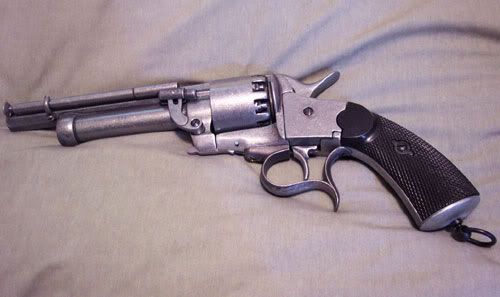
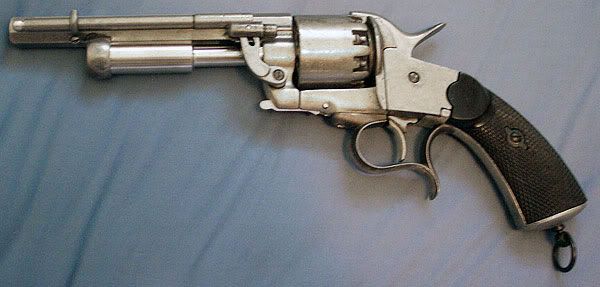
As has been said by others performing similar conversion on their Denix replicas, it is not for the faint of heart and it requires the right tools. Here are the first few mods, the triggerguard and lanyard ring.
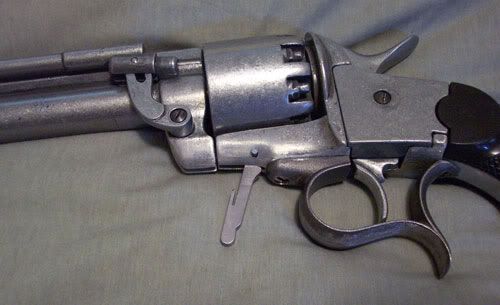
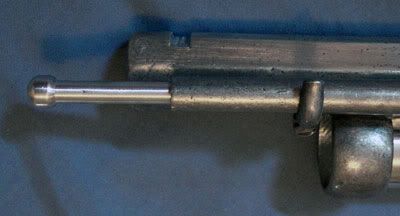
Next up was the take down lever. I wanted it to be functional so I milled a notch for it, and drilled the hole for the pin. It now performs the same function as the real take down lever.
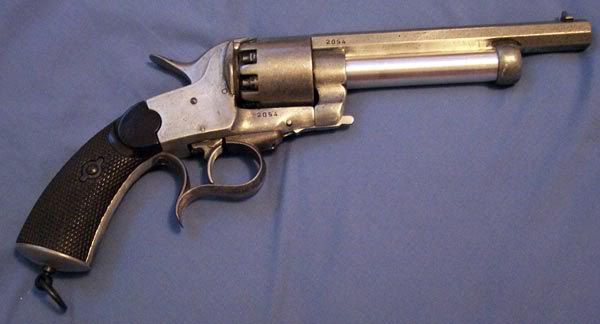
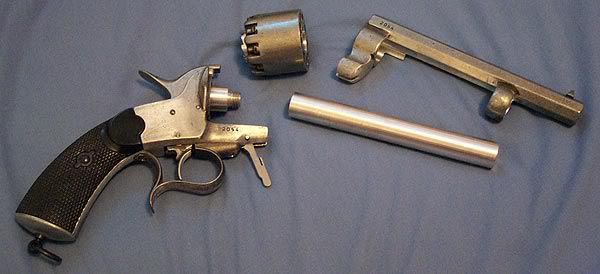
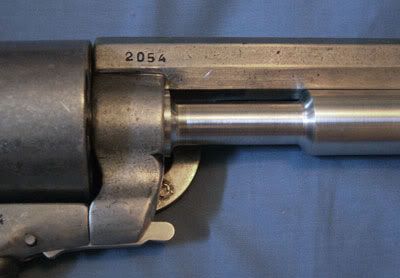
That pretty much covered making it look like the Cavalry model, but I also want it to take down like a real LeMat/Jayne's gun. So the entire shot barrel was bored out leaving the correct dished shape on the bottom of the main barrel. The original shot barel has been replaced with a solid aluminum rod that will later become the inner rod for Jayne's gun, no need hollowing out the shot barrel because I have no plan to leave it as a Cavalry LeMat.
To have it take down like Jayne's gun I had to add in a threaded piece, it's not exactly as the threaded breech plug that the shot barrel is screwed onto on a real LeMat...I had to cut some corners here because of limitations to my machines/tools. In the end it will take down exactly like Jayne's gun on the show, the only difference being that the inner rod on mine will not be as long, but that is hidden by the cylinder when assembled so I was willing to let it slide...unless I get REALLY ambitious and try to make it even more accurate in that regard.
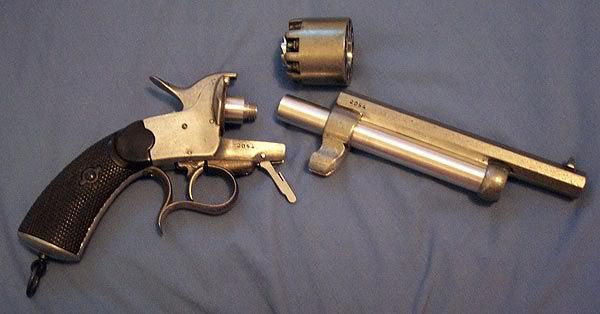
Here's a shot of it with the rod removed. It will later be held in the main barrel assembly by the outer sleeve and nose cap. I also had to bore out the hole through the centre of the cylinder so that it would fit over the more correctly sized aluminum rod.
So, you are probably saying, why go to such lengths when there are easier ways to mod the Denix into Jayne's gun? Well...simply because I am loopy. I want to try and make the ultimate replica, and I say that with all manner or respect to the other replicas that have been made, because they kick ass...I just want mind to take down and be as close as possible to the hero gun.
As if all those mods weren't enough, I have more planned. They include, but are not limited to, as well as the ones completed:
")
UPDATE: June 28, 2006
More things checked off the checklist and more progress pics.
I've modified the "inner rod", removed the old ram rod end, created a new one (shorter than the real one) and modified the loading lever to accept it.
A pic of the new ram rod partly pulled out.
And a close up of the modified "inner rod"
UPDATE: July 20, 2006
I have not had a chance to get much work done but I do have some progress. I got started on a custom cylinder to match the screen used gun. I had done diagrams for it quite a while back and have started work on actually making it...unfortunately I am having camera problems so no photos of it...so you'll have to settle for a render of what it'll look like.
It'll be a 2 part cylinder like in the show, made to hold 38 special shells. The only part I will use from the Denix cylinder will be the ratchet (the part with the "teeth" used to rotate the cylinder).
My goal was to first make all the changes to turn the Denix Navy version LeMat to a Cavalry version, then to convert it from that to Jayne's gun, and in doing so hopefully be super accurate in both form and function. I am not mostly done the Cavalry conversion so I thought I'd post my progress pics.
Here's the Denix, unchanged.
As has been said by others performing similar conversion on their Denix replicas, it is not for the faint of heart and it requires the right tools. Here are the first few mods, the triggerguard and lanyard ring.
Next up was the take down lever. I wanted it to be functional so I milled a notch for it, and drilled the hole for the pin. It now performs the same function as the real take down lever.
That pretty much covered making it look like the Cavalry model, but I also want it to take down like a real LeMat/Jayne's gun. So the entire shot barrel was bored out leaving the correct dished shape on the bottom of the main barrel. The original shot barel has been replaced with a solid aluminum rod that will later become the inner rod for Jayne's gun, no need hollowing out the shot barrel because I have no plan to leave it as a Cavalry LeMat.
To have it take down like Jayne's gun I had to add in a threaded piece, it's not exactly as the threaded breech plug that the shot barrel is screwed onto on a real LeMat...I had to cut some corners here because of limitations to my machines/tools. In the end it will take down exactly like Jayne's gun on the show, the only difference being that the inner rod on mine will not be as long, but that is hidden by the cylinder when assembled so I was willing to let it slide...unless I get REALLY ambitious and try to make it even more accurate in that regard.
Here's a shot of it with the rod removed. It will later be held in the main barrel assembly by the outer sleeve and nose cap. I also had to bore out the hole through the centre of the cylinder so that it would fit over the more correctly sized aluminum rod.
So, you are probably saying, why go to such lengths when there are easier ways to mod the Denix into Jayne's gun? Well...simply because I am loopy. I want to try and make the ultimate replica, and I say that with all manner or respect to the other replicas that have been made, because they kick ass...I just want mind to take down and be as close as possible to the hero gun.
As if all those mods weren't enough, I have more planned. They include, but are not limited to, as well as the ones completed:
- <strike>remove old triggerguard
- install Cavalry triggerguard
- remove Navy "laynard"
- install Cavalry lanyard
- remove takedown "thumbscrew"
- install takedown lever
- remove shot barrel
- create threaded base for "inner rod"
- create "inner rod"
- adjust cylinder to fit on "inner rod"
- remove front sight
- remove ram rod end
- modifiy loading arm to accept partial ram rod</strike>
- remove faux grip nuts and fill back of grips to accept new grip nuts
- make grips more accurate to Jayne's gun grips
- create and install "scope rail"
- <strike>modify "inner rod"</strike>
- create and install "outer sleeve"
- create and install "nose cap"
- create and install take down lever "thingie"
- add sight groove to top of hammer
- possibly replace some of the screws with more accurate ones
- custom 2 part cylinder
UPDATE: June 28, 2006
More things checked off the checklist and more progress pics.
I've modified the "inner rod", removed the old ram rod end, created a new one (shorter than the real one) and modified the loading lever to accept it.
A pic of the new ram rod partly pulled out.
And a close up of the modified "inner rod"
UPDATE: July 20, 2006
I have not had a chance to get much work done but I do have some progress. I got started on a custom cylinder to match the screen used gun. I had done diagrams for it quite a while back and have started work on actually making it...unfortunately I am having camera problems so no photos of it...so you'll have to settle for a render of what it'll look like.
It'll be a 2 part cylinder like in the show, made to hold 38 special shells. The only part I will use from the Denix cylinder will be the ratchet (the part with the "teeth" used to rotate the cylinder).