Jamie Lannister Sword - or - WTF Am I Doing?

FuzzyDrawings

Active Member
Greetings!

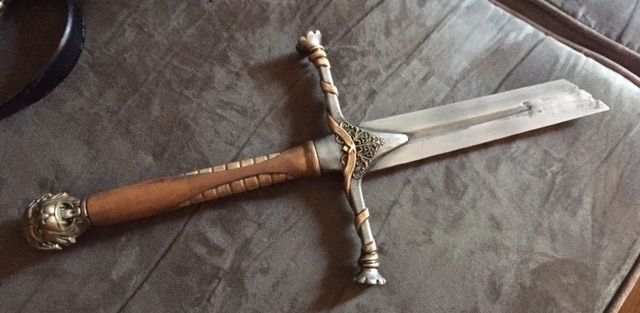
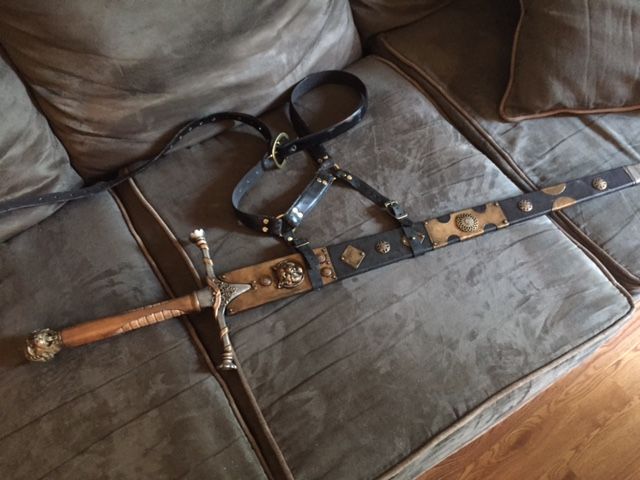
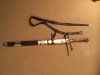
I recently became the owner of the official Jamie Lannister sword replica. I'm very excited about it and want to use it to complete my Kingsguard armor (which you can view here).

IMG_2986_zpsatkxkj4g.jpg


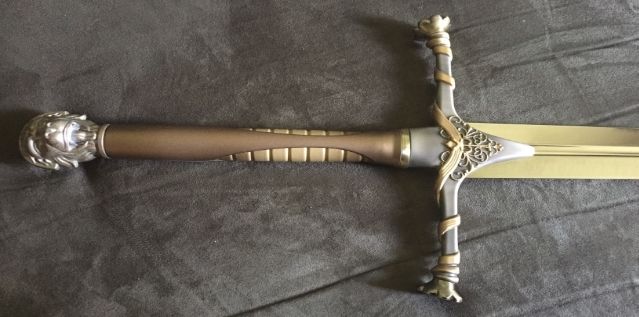
The problem is, I want to be able to have it at conventions, but most cons have a very strict "no metal weapons" policy. With that in mind, I've decided to try my hand at molding/casting. Like with my Kingsguard armor, I'm new to this whole enterprise. so this will definitely be a learning process. I've never molded or cast anything before, so I plan on testing things out on smaller knives to avoid wasting material if things go horribly wrong.

This will be my WIP thread, but being an absolute beginner, I do have questions that I'd hope some of you fine people might have the time to answer. I've watched a couple videos (most notably the lightsaber hilt video on tested.com) for some starting points, but there's still a lot of holes to fill...

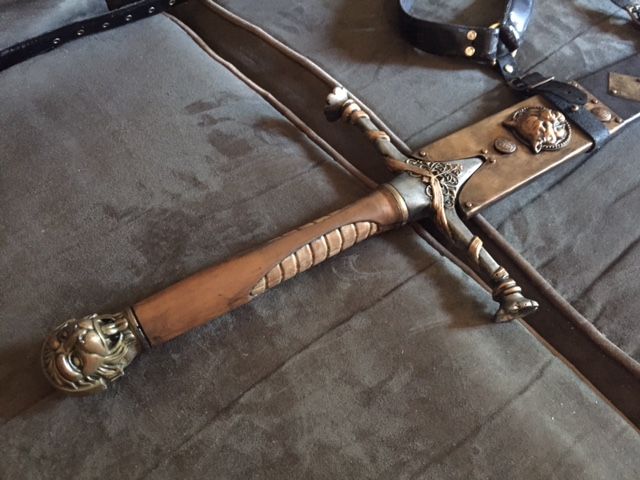
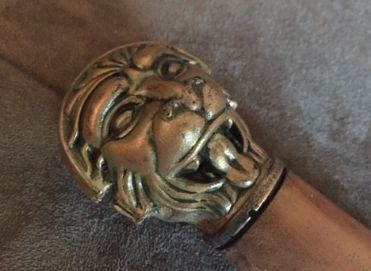
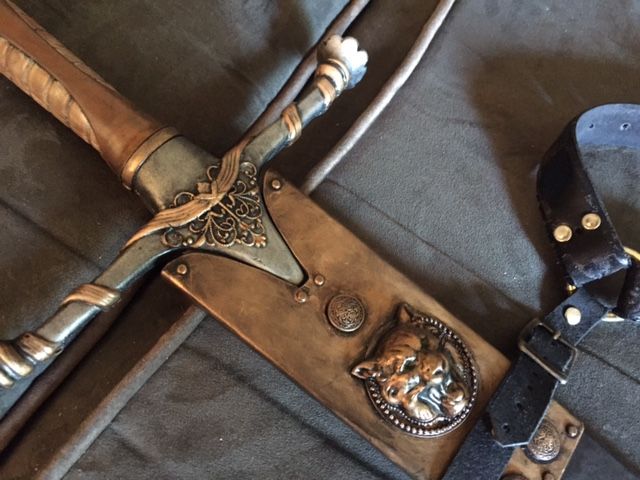
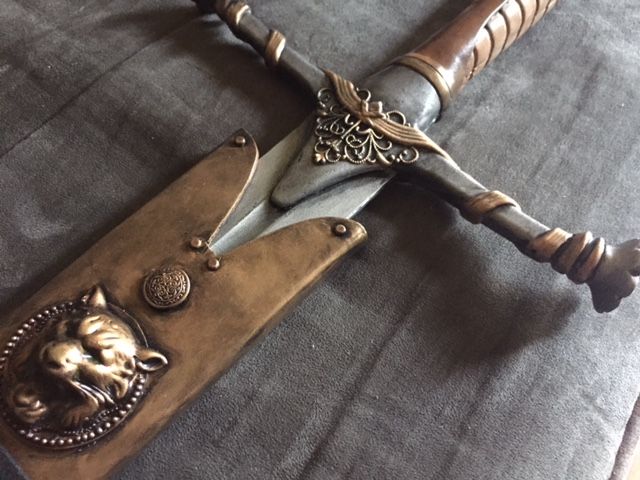
To start off with, there are several spots in the sword where there are gaps, like so:

IMG_2987_zpsmy8ozju9.jpg


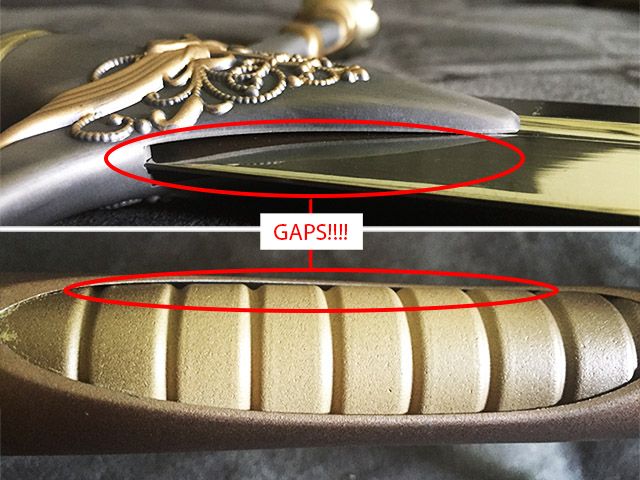
Are these gaps something that I will need to block off when I go to make a mold? If so, what's the best method for filling in gaps without running the risk of damaging the original?

A few other questions:

  • Should I use a clear-coat or some other spray to protect the sword? Is this something but can be removed afterwards, or at least won't affect the look/shine of the blade and paint?
  • I want the final prop to be hard and durable (I don't plan on fencing with it of course, but I do want it to survive cons and travel). Are there any specific casting materials that are more dependable?
  • The blade is rather thin, so I figure this is something that might cause me trouble. Is there anything I can do to reduce the coming headaches?
  • Any generic tips and tricks for molding swords?

I'm excited but pretty nervous about starting! It seems there's an overabundance of information online, that can be helpful, but is at times overwhelming and even contradictory, so I appreciate any advice anyone can give on this project! :)
 
I don't have much advice to offer but this seems like an awesome project that you will learn a lot from! The idea of molding and casting the blade seems a bit daunting to me because of the size, but I'm sure some of the masters around here will have good guidance to give. Did you plan to cast it all as one or do the crossguard/grip/pommel separate from the blade?

edit: just found a link from Smooth-On showing the process of casting a sword, might be helpful http://www.smooth-on.com/gallery.php?galleryid=084
 
I have an idea that might work. You could try lightly shoving some silicone putty into the gaps. Then when you coat it in silicone to make a mold, it should bond to the putty. This way it lets you keep the gap detail in the mold as opposed to filling it flat with clay. It will make the de-mold a little trickier but as long as you aren't shoving the putty in there hard, then it should work alright. If you don't have putty, then see about getting some thixotropic additive from smooth-on.
 
I have an idea that might work. You could try lightly shoving some silicone putty into the gaps. Then when you coat it in silicone to make a mold, it should bond to the putty. This way it lets you keep the gap detail in the mold as opposed to filling it flat with clay. It will make the de-mold a little trickier but as long as you aren't shoving the putty in there hard, then it should work alright. If you don't have putty, then see about getting some thixotropic additive from smooth-on.

So would something like Poyo Silicone Putty work with OOMOO 30 (both from smooth-on)?
 
So the other day I ordered everything I needed from Smooth-On and Amazon. I received one item today, something that I did NOT order. Naturally I was worried about the order - what else was screwed up? Where was the rest of my order? Was I charged for this? In my experience, this type of thing is a huge headache when trying to fix over the phone, so I was prepared for a fight, but damn, Smooth-on's customer service was AMAZING. That was the nicest, most pleasant experience I've ever had dealing with any rep over the phone. Long story short, they didn't screw up my order, they just accidentally sent me something extra. They told me to go ahead and keep it (free of charge) or "sell it on ebay" if I didn't have a use for it, lol. So now I have a free batch of Skin Tite Silicone.
 
The silicone in that gap might go a bit floppy as the space is quite fine, and it will be parallel to the surface of the hilt so I would worry about it touching the outside of the mold after you take the sword out. I would shove some clay in there, at least in the narrowest parts of the gap.

I've never molded anything that big though, so I may be wrong.
 
Ok, so it's been a few weeks, but I've been a busy, busy man. Not only did I get the sword molded, cast and painted, but I also made a scabbard! I'll go through the sword process now, and will talk about the scabbard in my next post.


This was my first time ever molding anything - it was definitely a trial by fire. Looking back now, there were a few things I could/should have done differently, but all things considered, it was a good learning experience.

Products used
OOMOO 25 silicone mold
Smooth-Cast 305 Resin
Ease Release 200 spray
Water-based clay from a local pottery store
Generic Silicone Putty (used to fill in any gaps in the sword that might make molding a hassle)

IMG_3055_zpsfbf1pzq3.jpg

I made a two-part mold of the sword. I thought about doing the pour-on/fiberglass technique so I could mold the entire sword, but since this was for a con, I was concerned about getting hassled about a full sword, as well as the strength of the long and thin blade, so I opted to only mold enough of the blade to get it into a scabbard. I think I screwed up big time at this step - the clay wasn't as perfectly flat as I thought, and I probably should have created a "moat" around the entire sword - which created a massive problem I'll mention soon.

IMG_3058_zpszw37vrah.jpg

Above is the sword after it's been molded. As you can see, there is quite a bit of broken resin in the background, with crummy seams on the sword itself. This is because the mold LEAKED something fierce. In my first attempt to pour the resin, I didn't notice it was leaking until I heard the "drip-drip" of the resin leaking onto my hardwood floors. This resulted in a minor freakout as I abandoned the casting process to try and salvage my table and floors (I rent my apartment). Thankfully, I got everything cleaned up, but not before all my unused resin was wasted.

My brother (acting as my assistant throughout this whole ordeal took a moment to try and figure out what the hell went wrong, and tried to see if we could salvage the situation. I only had enough resin left for one more attempt, so it was pretty scary. All our tests failed, but we decided to place the mold in a cardboard box. This box collected the leaking resin, and we just kept scooping it up and pouring it into the mold like a leaking boat. This surprisingly (and thankfully) worked.

The next stage was to paint the sword. I used basic krylon spray paint and liquid gold and silver paint. To age the sword, I watered down black acrylic for the hilt and blade, and watered down olive green acrylic for the pommel in order to get an old, oxidized look to the lion's head.


IMG_3070_zpsbbo3liui.jpg
 
To make the scabbard, I used left over sintra and kydex from making the kingsguard armor. I simply traced the sword onto the sintra, cut out front and back parts, and added a layer in between along the edges to give it some thickness. The kydex, being s thinner material was used for the gold details that wrap around the scabbard.

I couldn't find very good reference images for Jaime Lannister's scabbard, so mine it not screen-accurate, but I think I did a decent enough job. I've come into the habit of picking up random odds and ends like jewelry from craft stores in the event anything interesting would become useful, and some thankfully did - the little medallion looking pieces, as well as the lion's head (which initially had some jewels and a terrible crown super-glued to it) all found a fitting home on the scabbard with some modifications and painting.

IMG_3031_zpsvvfmgdps.jpg
The base of the scabbard - made with sintra.

IMG_3037_zpsxm1dviot.jpg
Base coat of black. You can see the layers of thin kydex on it for details. I ended up using a very light layer of hammered-metal spray paint, with faint spackling of grey paint with a sponge to give the black portions a leather-like texture (not pictured here).


IMG_3047_zpsfw25qjnf.jpg
I masked out the black portions and added the craft store medallions, and painted/aged the gold sections using gold liquid metal and black acrylic paint.

IMG_3049_zpsbsnileeb.jpg
The scabbard is (mostly) finished. This is with the original Jaime Sword. It fits perfectly!

IMG_3066_zpsj3mxjxbk.jpg

This is the scabbard with straps attached to my belt. The sword is the finished resin copy. It's a little snug after the paint and satin sealer, but it's better to be snug than risk falling out due to the shortness of the blade.

- - - Updated - - -

Here's a few detailed shots.

IMG_3067_zpss9iybltf.jpg

IMG_3068_zpsfgygksg0.jpg

IMG_3069_zpsljnevbm7.jpg

IMG_3096_zpsajdgkcag.jpg
 
Last edited:
JustIMG_0106.JPGIMG_0100.JPGIMG_0103.JPGIMG_0105.JPGIMG_0100.JPG Just finished Jaime Lamister Belt and Scabbard build for Halloween. Got a little carried away. Laminated plywood, sanded to oval cross section. Suede lined sleeve. Leather wrapped and decorated with Michaels jewelry and foil. The only issue is the gold decorations at end of scabbard I am learning are not decorations, but are counter weights to balance the sword and allow the handle to be further forward on belt.
 

Attachments

  • IMG_0104.JPG
    IMG_0104.JPG
    1.4 MB · Views: 133
  • IMG_0102.JPG
    IMG_0102.JPG
    1.3 MB · Views: 133
  • IMG_0101.JPG
    IMG_0101.JPG
    1.3 MB · Views: 201
That came out beautiful! I keep saying I want to make a "real" scabbard for my Jaime steel sword.

Counterweights are definitely important! My con scabbard had the same issue. I ended up flattening lead fishing weights and plopping them down into the bottom of the scabbard to counterbalance the weight of the plastic sword.
 
I posted a link about Japanese film prop swords, you may be interested in it because I posted about sword blade construction in the film industry.
 
This thread is more than 7 years old.

Your message may be considered spam for the following reasons:

  1. This thread hasn't been active in some time. A new post in this thread might not contribute constructively to this discussion after so long.
If you wish to reply despite these issues, check the box below before replying.
Be aware that malicious compliance may result in more severe penalties.
Back
Top