I've been working on a Sparrow costume for quite some time, and there's an awful lot of resources out there, but most of them are far beyond my current monetary allowance. So...I make do with what I've got. I bought the $8 Jack Sparrow Gear toy set from Target (but you can get it at Amazon, or most other toy-carrying stores), which if memory serves comes with rings, head wrap, sword, belt, and compass. The head wrap was (a)not even close to accurate and (b)far too small anyway, so I tossed that out; the compass wasn't bad for a quick fix, so I decided to re-paint it - I'll make a thread on that sometime when I'm satisfied. The rings are decent fascimiles, but I'll replace them soon. But, I digress.
The belt itself was a terrible rubbery thing, not to mention way too short for me to wrap around, so I just got rid of it. But the buckle was actually - at least for my intents and purposes - fairly accurate. Only problem was that it was cheap-looking silver plastic, and now I've gotten around that.
I didn't take a picture of it before painting, but here's an identical one I found on eBay:

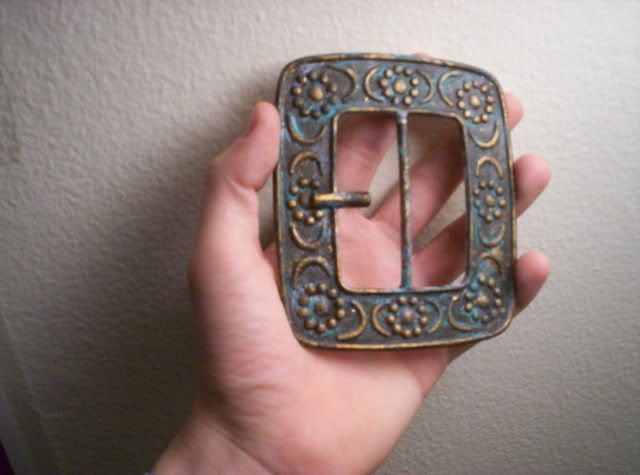
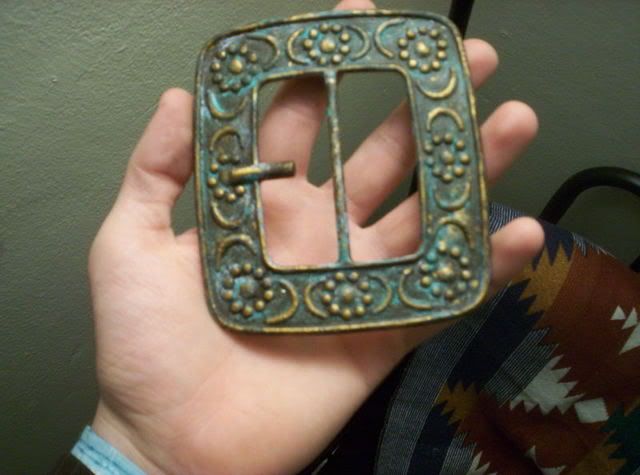
And here is my re-painted buckle, modeled after some limited views I got in the movie, as well as a high-end replica being sold on eBay:


The shots aren't fantastic, but I think/hope they give you a fairly good idea of what it looks like. I started with "renaissance gold" paint, which has a sort of gold and copper combo color. I laid down several coats of that, to make sure that I didn't accidentally expose the base silver later on in the process. Then I did a very light coat of dark brown, then rubbed a lot of it off while it was still semi-wet; the idea was to darken the recessed parts and have the raised parts more clearly golden. Then I did a light coat of very light blue, rubbed much of that off, then a light coat of a more copper-patina-like green-blue, then rubbed much of that off. That process was to give it the look of, well, patina-covered copper, as well as a touch of sea salt corrosion.
Well, what say you - did I do well with what I had?
The belt itself was a terrible rubbery thing, not to mention way too short for me to wrap around, so I just got rid of it. But the buckle was actually - at least for my intents and purposes - fairly accurate. Only problem was that it was cheap-looking silver plastic, and now I've gotten around that.
I didn't take a picture of it before painting, but here's an identical one I found on eBay:
And here is my re-painted buckle, modeled after some limited views I got in the movie, as well as a high-end replica being sold on eBay:


The shots aren't fantastic, but I think/hope they give you a fairly good idea of what it looks like. I started with "renaissance gold" paint, which has a sort of gold and copper combo color. I laid down several coats of that, to make sure that I didn't accidentally expose the base silver later on in the process. Then I did a very light coat of dark brown, then rubbed a lot of it off while it was still semi-wet; the idea was to darken the recessed parts and have the raised parts more clearly golden. Then I did a light coat of very light blue, rubbed much of that off, then a light coat of a more copper-patina-like green-blue, then rubbed much of that off. That process was to give it the look of, well, patina-covered copper, as well as a touch of sea salt corrosion.
Well, what say you - did I do well with what I had?
