Ironman Mark VI - Foam - Australia - First time build

madrick

Active Member
Hey all!
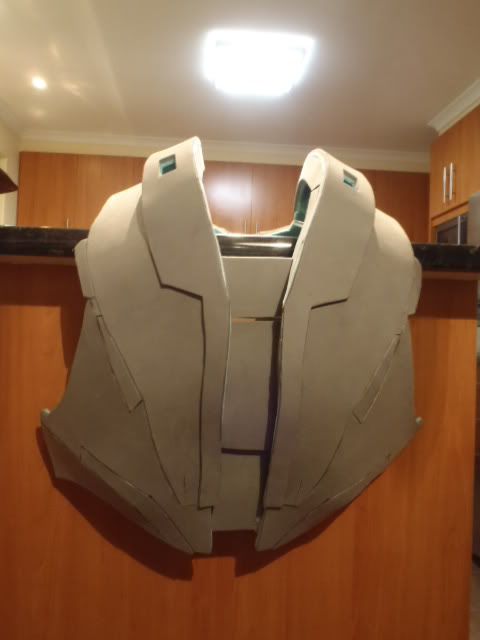
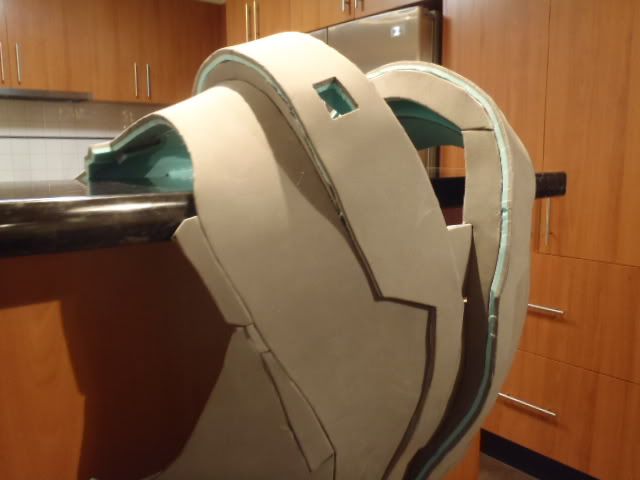
I've been super keen to build an ironman suit FOREVAR! and recently discovered Stealths youtube videos, TheHeroTutorials - YouTube (yeah I know, took me a while), thanks Stealth! Anyway, I thought I'd post my progress and what not.

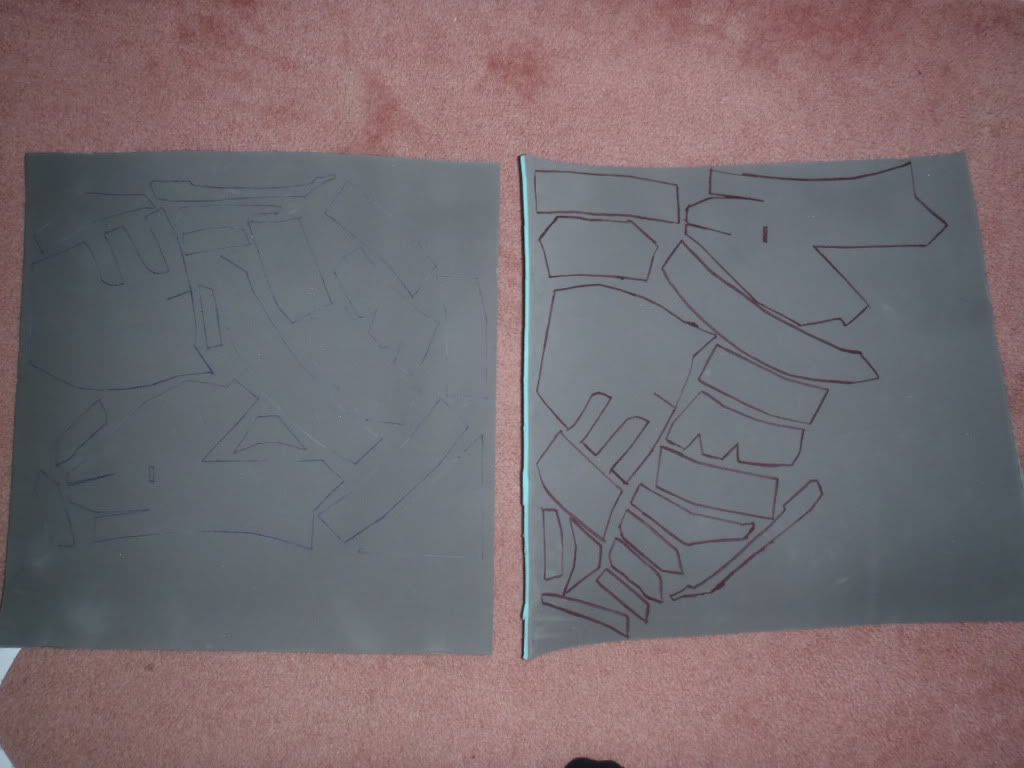
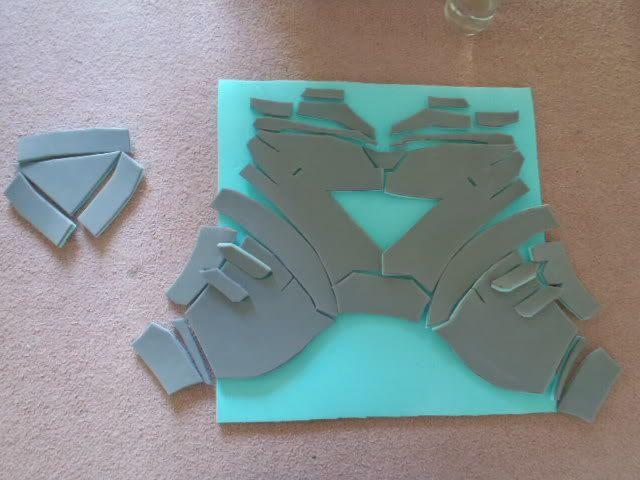
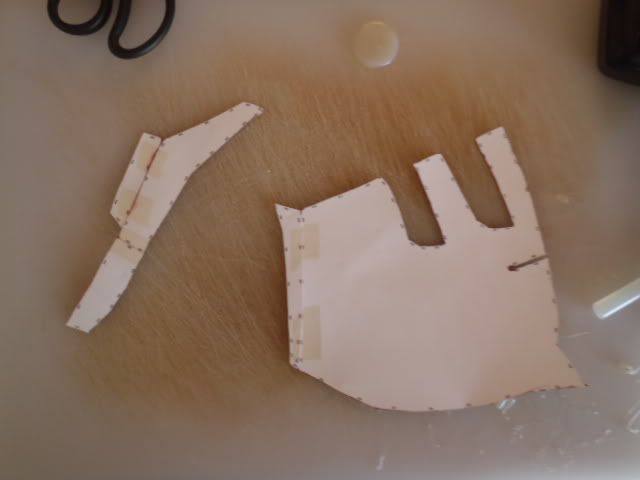
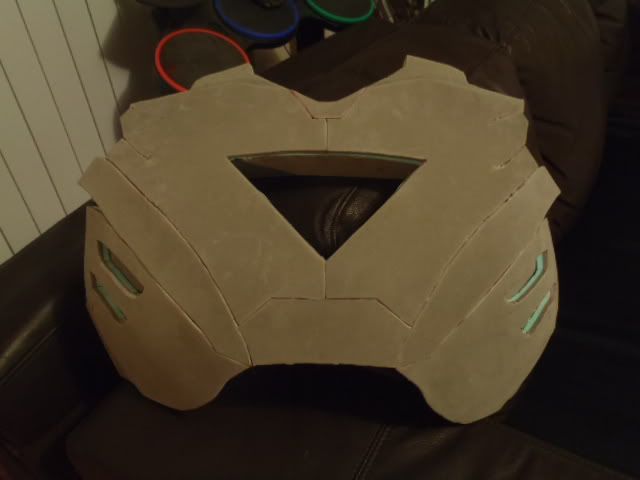
I'm using the Ironman MarkVI foam pepakura templates made by Robo3687 and edited by Stealth (thanks HEAPS guys) that I got from this thread http://www.therpf.com/f24/robo3687-iron-man-mark-4-6-pepakura-128147/

I used the tutorial by XTreme Tactics on scaling the suit How To Scale Your Pepakura Armour-Tutorial

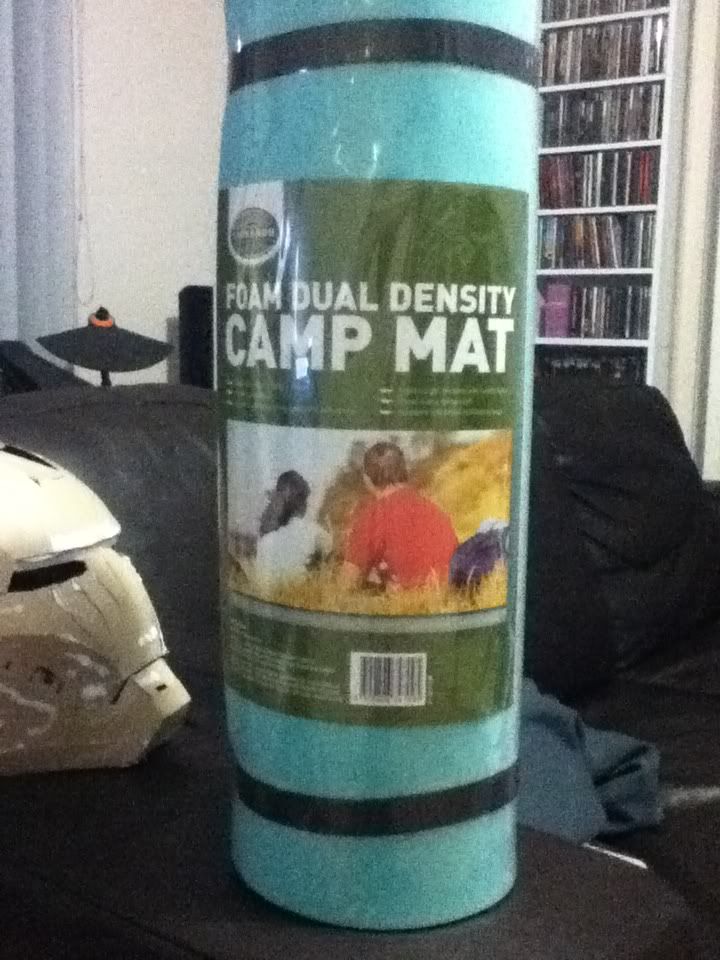
I've gathered all my materials. For all you Aussies out there
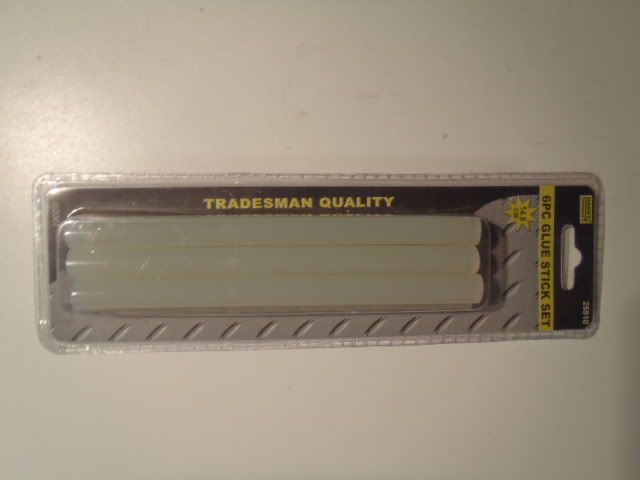
- Hot glue gun and sticks from $2 shop
- Steal ruler, scissors, pins from Officeworks
- A4 210gsm paper (to print pepakura onto) from Officeworks
- Foam from Kmart. It was in the camping section, it's a 10mm thick, EVA camping mat, cost $7. They also have a 5mm thick one for $6.

P5161057.jpg


IMG_0630.jpg


I'll keep you all updated. :)
 
How is the 210gram paper? I know you're building with foam, but if you would build with the paper is it just stiff enough or is it stiffer than needed? I'm thinking about going with 160gram paper as I'm not sure if my printer can handle 200gram (nothing in the manual). But I'm afraid it wont be stiff enough. :/

Good luck btw. ;)
 
The 210gsm paper is quite firm/ like light cardboard. In all honesty I've never built a proper pepakura, so I can't tell you if it is good. For stenciling the designs onto foam though, yeah it's working well.
The paper did get jammed in my printer lol so I had to use the 'standing' paper shoot. (So the paper didn't have to bend in the machine).

Thanks! :D
 
Well I traced out the designs onto the foam. I did one side using pen and the other using a thick permo. The permo is more visible and was easier to use.

P5161061.jpg
 
Alright, so here is my first attempt at making a pepakura costume. I chose to do the chest first and have learnt A LOT from the process.

Here is all the parts cut out (so many)
P5171063.jpg


Here's the chest put together. As you can see my glue work is shocking and pretty rough with cutting.
P5181064.jpg


After the results I wanted to take what I had learnt and redo it. I altered some of the pepakura and attached some of the parts I thought didn't have to be seperate.
P5181067.jpg


I'm currently putting it together now, so we'll see how it goes! :)
 
Nice to see a local off at a good start. Your build looks great; can't wait to see more progress. Started my first project this week... Good luck.
 
Alrighty! So I redid the chest piece, main differences being cleaner glueing and I edited some of the pieces.
P5191070.jpg


Here you can see the side of the chest. I didn't put the hole at the top, I didn't put the slit in the middle and I joined two of the pieces at the bottom.
Untitled.jpg
Untitled2-1.jpg


Here is the top of the chest. One of the sections had 3 seperate pieces, I didn't think this necessary.
P51810662-1.jpg
P5191072.jpg


Whilst I was waiting at the chicken shop yesterday for my order, I ducked over to the $2 shop and found these.
P5191069.jpg


Don't know about you but I sometimes have issues with glue sticks getting stuck in my glue gun (cheap glue gun), I have a feeling these might help. They're just double length gluesticks. 6 for $2! oh yeahhhh
 
Last edited:
Wooo More Aussies!!! Love the progress on that chest piece, Man! What are your plans for surfacing/painting?
 
I actually have no idea on how to paint this. I'll have to do some lurking and see what everyone else is doing and the results they're getting. Any suggestions?
 
Lol, I love how many people have asked where in Australia you are and you keep ignoring them. Awesome!
 
Oh Madrick, what most people do is do a few coats of PVA glue (50% diluted with water, some don't dilute it at all, so maybe test it on some scraps).

Check out XRobots thread on plastic coating foam, that's my plan once I finish assembling my mark 7 armor :)

I've found it hard to get decent Eva foam (except 12 mm thick from clark rubber), how much was yours out of curiosity, and where did you source it?
 
Cheap EVA foam in Oz, I found Crazy Clarks cheap shops camp mats the cheapest around here (Clark Rubber is sooooo overpriced)
 
Hey Rinzler! As I mentioned above I got my foam from Kmart, it's a 10mm thick, EVA camping mat. Cost $8 a roll. They've also got 5mm thick for $6. Not sure if it's at all Kmart though. Should check it out because Clark Rubber is definately a rip.

Thanks venator, I checked out XRobot and he's got some great stuff. I like the outcome of his painting method so I'll probably give it a try when the time comes.


Any of you going to Comic Con this year??? First time in Australia!
 
Well that was a bit of a challenge! I ended up building the back TWICE haha, I just wasn't satisfied. Had to do a little modification to the back because it turned out very curved, kind of like a tortoise shell... but anywho, here is what I have so far!

P5251082.jpg

P5251080.jpg

P5251081.jpg


I'm going to do the abs next.
 
This is brilliant work mate.... Clean pep. I've found it complicated as well.

Im a Aussie as well. In Geelong
 
Last edited:
Back
Top