Iron Man see through LED eyes

dday

Sr Member
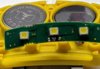
So my Iron Man helmet currently uses the standard setup of solid EL panels that offer perfect lighting but require me to look through a very small slit at the top of the eye socket.

This works ok if the helmet is perfectly aligned on my head, but if anything changes the position of the helmet I'm blind again and not able to adjust my helmet very well while in costume.

So my intention is to redo the eyes with a see-through version where I get the entire visibility of the eye socket.

I have seen the Xrobots video where he does this HERE but I'm wondering if folks here have sorted a better way to do this that doesn't have so much bleed effect of the LED's into your eyes. I'm concerned that over an hour or 2 of looking through these you'd get a killer headache.

So, can anyone tip in and give some advice... or if someone has figured it out and doesn't want to share their secret, I'd buy a set from you.
 
Glad you posted this, just preparing my 3D printed helmet and just in the planning stages of my LED eyes. I also wondered about eye strain and seeing through these defuser lenses just not sure so I'll be anxious to see replies to this thread.
 
If you want both 100% visibility and illumination, you'll have to pick your poison (so to speak)....

While this wont help with the 'headache' aspect.. you could get some acrylic laser etched instead of using an overlay piece....

alternately.. use a camera mounted somewhere instead of the eye sockets.. (although viewing the screen that close is something you'd need to figure out.. and I doubt it'll be cheap)

ie: some sort of mini screens (like from drone FPV goggles) and some negative diopter rated lenses..

This last part is the only 'stop' I have in my current HUD build.. :)

There doesn't seem to be any clear option here, which is unfortunate. As you say you either sacrifice bleed through or illumination of the eyes.
 
I've got two ideas that I haven't had a chance to test out yet. If you have the time and means and are willing to give it a shot, then they might be worth a quick test.

1. Get some polarized filters (something like this) and see if you can have 1 filter above your eye where your light is pointed down and another filter in front of your eye. Ideally the two filters could be rotated so that the light is canceled out, but I've never seen an example trying this with three dimensions involved, so I have no idea if it'll work. $10 to test.

2. It might be possible to get SMD LEDs (very flat, very small, harder to work with than normal LEDs) and arrange them in a checkerboard pattern, while having holes in between them to see out of. For testing the proof of concept, I'd probably get this kit and see how hard they are to work with.

I want to try both of these ideas at some point, if for no other reason than to document them, but "some point" could very easily be a year or more down the road.
 
It doesnt say what size leds it comes with? does it vary?

update: yes they have different size pads/components to practice soldering with..
all the way down to 0402 size!!!

You'd also most likely need SMD resistors as well.. (how many depends on set up [serial vs parallel] and your battery source of course)

I can hand solder down to 0603 by hand fairly well.. (but I have done a lot of soldering before as well.. not sure if one without any experience should jump right to soldering SMD components) :)

If you went with a PCB like you suggest.. it would be flat.. and not curved like the lens..it might not look good/right? Perhaps a flexible pcb approach is warranted?

IMO... if you use say etched acrylic with a grid/hex pattern on it.. it would defintely be visible from the outside people looking at you.. but maybe NOT as hard on the eyes.. since its really like looking at a piece of edge lit acrylic.. (not that bright as a direct led source.)

I have a laser cutter.. and could probably try something out if anyone is interested?

I doubt I'll be going down the 'cut/heat/bend/curve' route for this though.. but if anyone wants a set (in the US).. let me know.


ps:

Shape:
Anyone have any 'eye socket' shape they can provide? I can try it this weekend or tonight if I have time.

Pattern:
What pattern should be used? hex pattern?
 
Last edited:
SMD... surface mounted devices, for best results use silver solder, lower melting point...to much heat will destroy the components.
Here is an idea...fiber optic light transfer, LED supplies enough light to light several fibers...no eye block, several fibers are placed around the eye slots, then routed to the LED...hot glue will contain all fibers over or on the LED...this will send light down the fiber with no spill over, each fiber around the eye slots will then be illuminated. Idea came from fiber optic Christmas trees, I have one I don't use and gutting the fiber to give a try. Hopefully I'll have enough for both slots. I'll post results here, if it's half way workable.

The problem isn't illuminating the edge of the eye, it's illuminating the center while still being able to see out of it. I'm not sure how you'd be able to run enough fiber optics to the center of the eye without the bundle blocking vision. In my opinion, managing that kind of fiber optic array would be more complicated than placing SMD LEDs on the front of the eye.
 
It doesnt say what size leds it comes with? does it vary?
Pattern:
What pattern should be used? hex pattern?

Something like this is what I envisioned.
wkAPqpM.png


Red Line = DC+, Black Line = DC-, Blue rectangle = hole to see out of, Square with Yellow = SMD LED. The LEDs would alternate so they could use the same "lane", and thus be as close together as possible. Having that many LEDs in parallel could be a problem though.
 
Found these Cap Lights for a $1.00 in Wal-Mart sporting goods. These fit well with some space left in the eyes but still a bit obstructed, once gutted they have a reflector and lens that may or may not be used, plus you can run a 3-5 volt setup, and power via a USB aux battery pack or use CR2032 cells.
I've not ruled out "light bending" with fiber optics or lexan yet.
I'm pretty sure the average person could not work with these SMD's as you see how small they are. I've been soldering over 30 plus years and it's rough for me. They are glued in place during assembly, then auto wave soldered during manufacturing.
Off the next 2 days and my 3D helmet is my area of focus, the sections of my suit are in sealing and painting stages, so we'll see if I come up with anything, I wear glasses so that adds to the challenge!
 

Attachments

  • LED-cap-light.jpg
    LED-cap-light.jpg
    380.2 KB · Views: 616
Without seeing them in person... they look like 5050 package sized LEDs... which are much bigger than the ones posted above in the 'solder kit'
 
They are 3528 single-chip LED 2 pads, 5050 are Tri-Chip LED much brighter and 6 pads 2 for each LED.


Still bigger than 1206/0603 resistors/leds

mracole

thats kinda what I was describing above...

are the 'panels' clear or frosted?

Seems like acrylic with an LED on one side?

Same could be done with a CLEAR acrylic and a hex patterns etched into it.. (possibly allowing more/better through vision?)

The panels are clear but have a frosted thin layer of plastic on each side which can easily be pulled off. the LED on the side and the pattern is a series of dots which when lit up cause it to really light up but still be able to see through
 
ahh.. a 'series of dots'.. (I have saw those before as well)


yep.. same approach I mentioned above..

wonder if using hex pattern would be better (or worse?)
 
That's light transfer, same techniques used to edge light a piece of lexan or acrylic...I've etched a few pieces of actual glass for clients that light well and the remainder is clear. The light transfers through the clear then gets distributed in the etched portion. The best effect is when I micro sandblast using white aluminum oxide. I'll try that as well, takes me 5 minutes to Etch/blast a piece of lexan
 
Correct.

I have a laser cutter.. and I do etching for many projects..

https://www.dmstudios.net/misc/drax/drax-1.jpg

https://www.dmstudios.net/misc/Jarvis_Keyboard/IMAG0695.jpg

https://www.dmstudios.net/misc/TASM_display/tasm_display_5.jpg

https://www.dmstudios.net/misc/hellboy_gift.jpg


I only do abrasive blasting on glass mugs..etc (since I dont have a rotary attachment for my laser!)

I also use white (black leaves a stain!) aluminum oxide..

I used to get it in big jars from HarborFreight.. but they seem to no longer sell it.. and online is quite pricey! LOL
 

Your message may be considered spam for the following reasons:

If you wish to reply despite these issues, check the box below before replying.
Be aware that malicious compliance may result in more severe penalties.
Back
Top