You are using an out of date browser. It may not display this or other websites correctly.
You should upgrade or use an alternative browser.
You should upgrade or use an alternative browser.
Iron Man Mark VI (light up eyes + arm on pg2)!
- Thread starter pr3dato8
- Start date
Mr.Engineer
Well-Known Member
Re: IM2 Trianglular chest light and repulsors, help!
Well, I took an Iron Man Toy repulsor and gutted it, then used its innards for my own Iron Man prototype costume.
You can see this on my Website. Not my Blog but my Website: http://chowfookcheong.com/IM%20II%20Repulsor/Repulsor%20001.htm
Well, I took an Iron Man Toy repulsor and gutted it, then used its innards for my own Iron Man prototype costume.
You can see this on my Website. Not my Blog but my Website: http://chowfookcheong.com/IM%20II%20Repulsor/Repulsor%20001.htm
mez7
Sr Member
pr3dato8
Well-Known Member
Re: IM2 Trianglular chest light and repulsors, help!
thanks for sharing. i looked at those but there are problems:
-cutting into desirable shapes
-supplying electricity to it. If I install these sheets in my suit I wont be able to plug the sheets into electricity or a car lighter :confused
any suggestions? I was hoping of having some sort of battery inside the sit which would connect to the sheets.
Mr.Engineer
Well-Known Member
Re: IM2 Trianglular chest light and repulsors, help!
Hey, wow. I love those EL sheets! I wanted to get one of those but I still do not have a project that needs it yet.
Actually, to come up with 12 volts is easy but to get it to constantly pump the currents for long durations, is another matter. In theory, you can connect a series of 8 AA or C cells. And hide them under the suit. But if you look closer in the website, they have inverters from 3 volts to 12 volts. I did try one in the late 90's and the more voltage I put in (12volts), the brighter the EL string.
But for me, I'd still go for the White LEDs after seeing how 'hollow' the IM suit that was given to me to work on. (OK, the suit was crap but it worked)

For this Armour, I just modified the Toy Arc Ractor and stuck it in there. Unfortunately, Hasbro insisted we do not mod any of the LED (bleh) as they're promoting the toys.
Hey, wow. I love those EL sheets! I wanted to get one of those but I still do not have a project that needs it yet.
Actually, to come up with 12 volts is easy but to get it to constantly pump the currents for long durations, is another matter. In theory, you can connect a series of 8 AA or C cells. And hide them under the suit. But if you look closer in the website, they have inverters from 3 volts to 12 volts. I did try one in the late 90's and the more voltage I put in (12volts), the brighter the EL string.
But for me, I'd still go for the White LEDs after seeing how 'hollow' the IM suit that was given to me to work on. (OK, the suit was crap but it worked)

For this Armour, I just modified the Toy Arc Ractor and stuck it in there. Unfortunately, Hasbro insisted we do not mod any of the LED (bleh) as they're promoting the toys.
pr3dato8
Well-Known Member
Re: IM2 Trianglular chest light and repulsors, help!
Thanks for the advise!
Also I do physics here so it wont be a problem to talk with my physics teacher :lol
Thanks for the advise!
Also I do physics here so it wont be a problem to talk with my physics teacher :lol
Hey, wow. I love those EL sheets! I wanted to get one of those but I still do not have a project that needs it yet.
Actually, to come up with 12 volts is easy but to get it to constantly pump the currents for long durations, is another matter. In theory, you can connect a series of 8 AA or C cells. And hide them under the suit. But if you look closer in the website, they have inverters from 3 volts to 12 volts. I did try one in the late 90's and the more voltage I put in (12volts), the brighter the EL string.
But for me, I'd still go for the White LEDs after seeing how 'hollow' the IM suit that was given to me to work on. (OK, the suit was crap but it worked)

For this Armour, I just modified the Toy Arc Ractor and stuck it in there. Unfortunately, Hasbro insisted we do not mod any of the LED (bleh) as they're promoting the toys.
mez7
Sr Member
Re: IM2 Trianglular chest light and repulsors, help!
-you can cut them into any shape you would like, as long as the connections are not cut....you only need to cut a triangle and some circles. get 3 sheets, cut into those shapes its quite easy.
- as alredy said you can hook them up to batteries...
thanks for sharing. i looked at those but there are problems:
-cutting into desirable shapes
-supplying electricity to it. If I install these sheets in my suit I wont be able to plug the sheets into electricity or a car lighter :confused
any suggestions? I was hoping of having some sort of battery inside the sit which would connect to the sheets.
-you can cut them into any shape you would like, as long as the connections are not cut....you only need to cut a triangle and some circles. get 3 sheets, cut into those shapes its quite easy.
- as alredy said you can hook them up to batteries...
pr3dato8
Well-Known Member
Re: IM2 Trianglular chest light and repulsors, help!
sweet! guess this problem is resolved and EL sheets are the solution.
I have a few other problems but i guess i will amek another thread for them or something (helmet hinges, light in helmet eyes so that i could steel see, joints at the elbows, kness and shoulders)
-you can cut them into any shape you would like, as long as the connections are not cut....you only need to cut a triangle and some circles. get 3 sheets, cut into those shapes its quite easy.
- as alredy said you can hook them up to batteries...
sweet!
I have a few other problems but i guess i will amek another thread for them or something (helmet hinges, light in helmet eyes so that i could steel see, joints at the elbows, kness and shoulders)
pr3dato8
Well-Known Member
Iron Man Help with hinges, lights and other stuff...
Hey guys, I am currently in process of starting to get the iron man mark vi pepped together.
I am looking forward to things that I will have to do and I have a problem.
I know about body filler but my body filled stuff just never looks as smooth as all the iron man stuff here on forums.
People keep talking about wet sanding and primer.
Can someone explain specifically what those things are???
And also, can anyone tell me a good body filler for this sort of thing? I just bought one in a car shop but i dont think that it is any good. A tube of spot putty that i abought even seems better than that body filler but using spott putty as a body filler is not an option for me.
Leander
Active Member
Re: Iron Man Help!
first of all sheets of sandpaper have different grits: 40, 80, 150, 240, 600. (which is roughly how many sand particles are on a small part). So basicly the higher the number the smaller the particles are and the smoother/softer the sandpaper is.
Wetsanding is basicly for sandpaper with the highest numbers.. you make the paper wet cause the residu you sand off is very very small (almost dustlike) and the water makes it come off.. the upside of this is that you can make surfaces very very smooth but it takes a lot of patience.
Primer: (WIKI) A primer is a preparatory coating put on materials before painting. Priming ensures better adhesion of paint to the surface, increases paint durability, and provides additional protection for the material being painted.
there is also a bondo spray which sprays bondo on to fill the last holes.. If you want things really smooth this and wetsanding are usually the last stage before primer and painting.
I miyself use a Polyester body filler. which I got from a carshope, but a local hardware store should have it aswell.
TMP
Sr Member
Re: Iron Man Help!
Most of Ironman build related stuff of this kind i belive is already answered in the ironman buildersgroup Stark Industries Weapons Data & Armour Technology. forum.
Very cool to se so many making ironman.
Most of Ironman build related stuff of this kind i belive is already answered in the ironman buildersgroup Stark Industries Weapons Data & Armour Technology. forum.
Very cool to se so many making ironman.
pr3dato8
Well-Known Member
Iron Man Helmet and more later on...
Hey,
Just thought I make a thread where I could post all my work on the helmet and other future Iron man Mark VI stuff.
Here ar a few pics from the past to show what happened to the helmet.
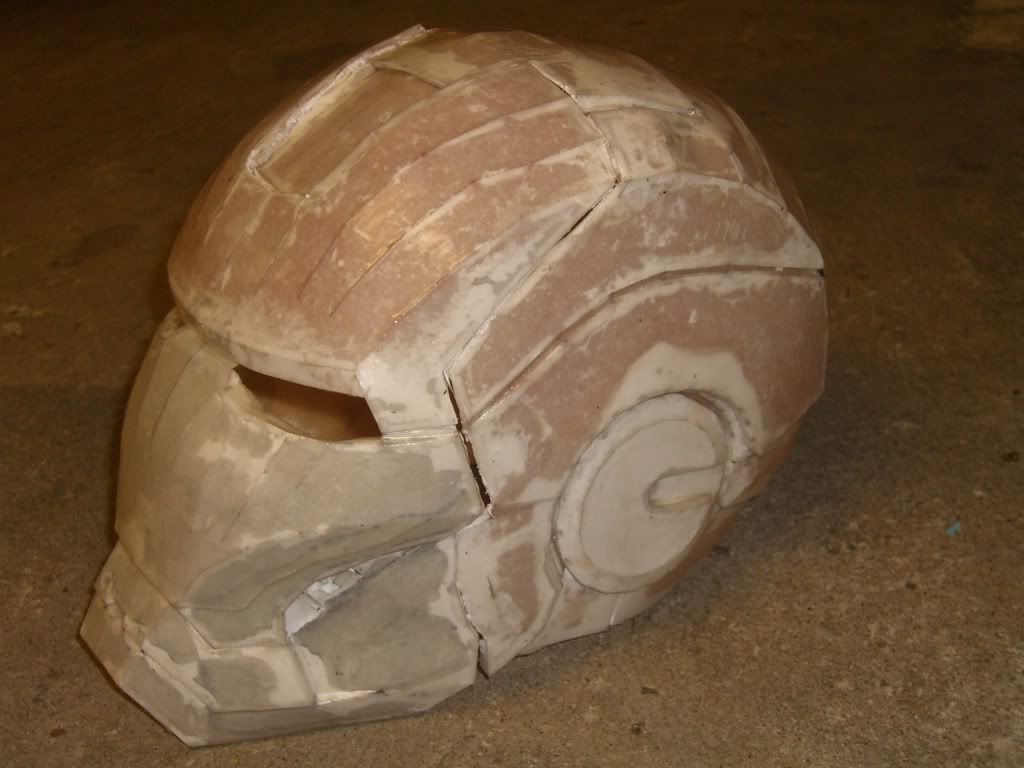
1st of all I pepped it (obviously ):
):

^ the chin and the faceplate are separate pieces. The chin and the back of the helmet didnt line up perfectly but its not too bad.
Next came the fiberglassing and the resinning:
^when resinning I glued the faceplate and the chin to the back ofthe helmet so that they would dry with a right angle
(the pieces were all stretched out in a weird way). I then used a knife to separate them which did the job but broke the nice wall of the faceplate and the chin
Then I quickly applied a bit of bondo (not much as you can see and not very carefully) and spray painted everything in 2-3 coats:
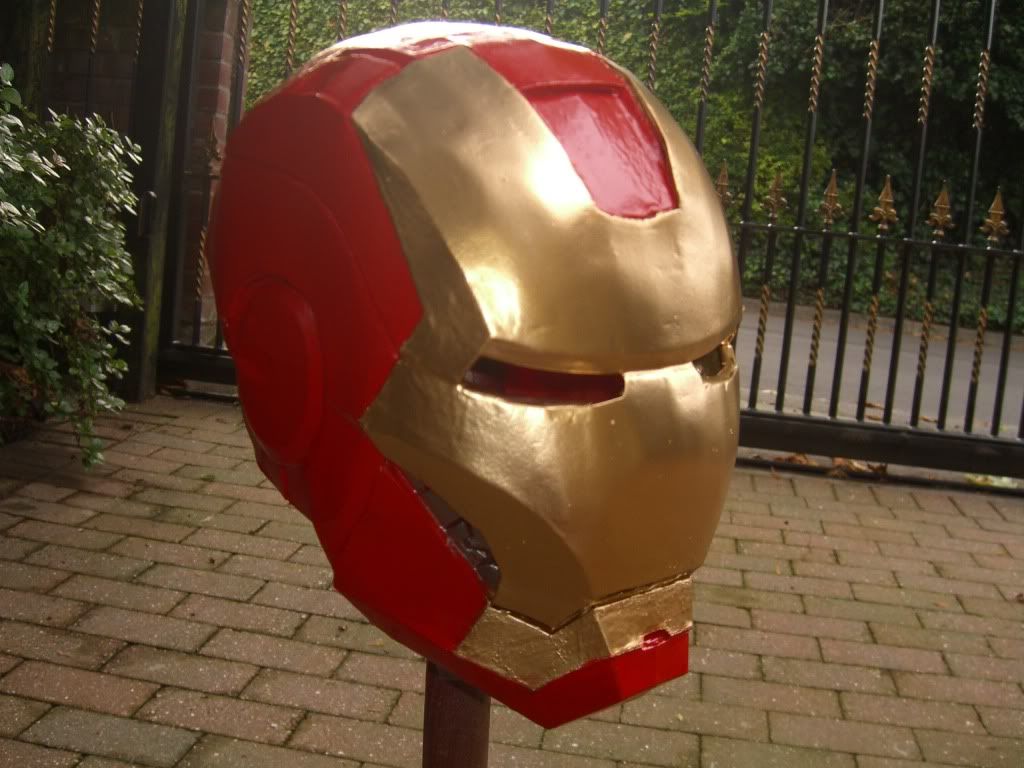
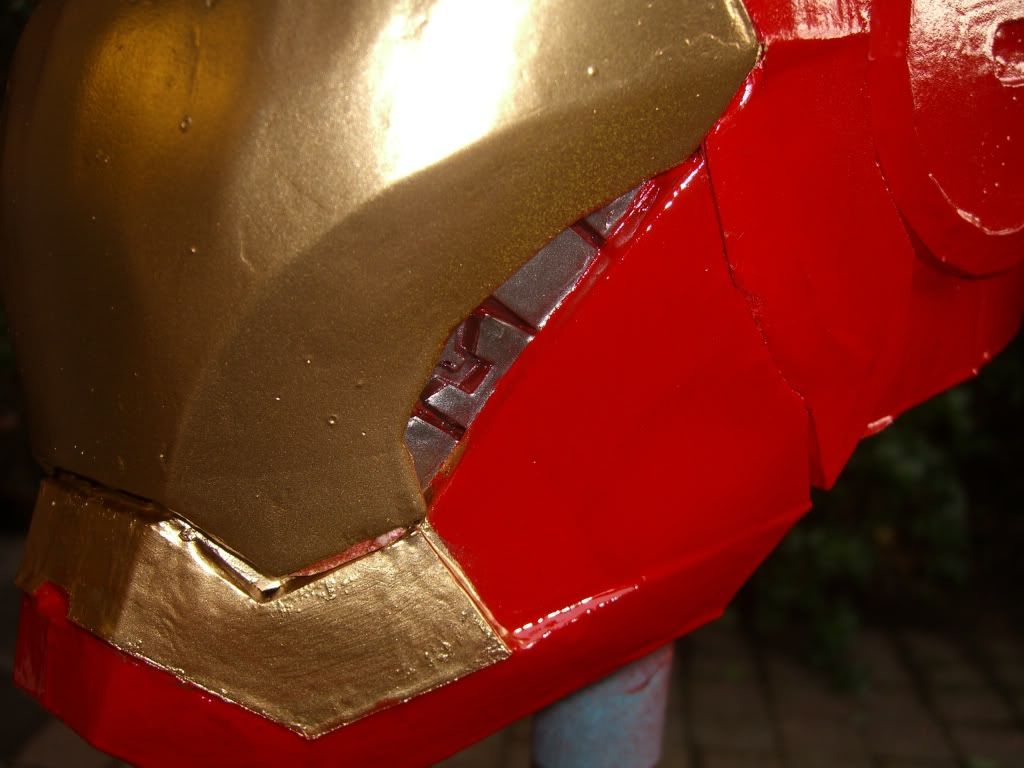
Then installed magnets (5mm by 5mm by 2mm rare earth magnets - very strong!):
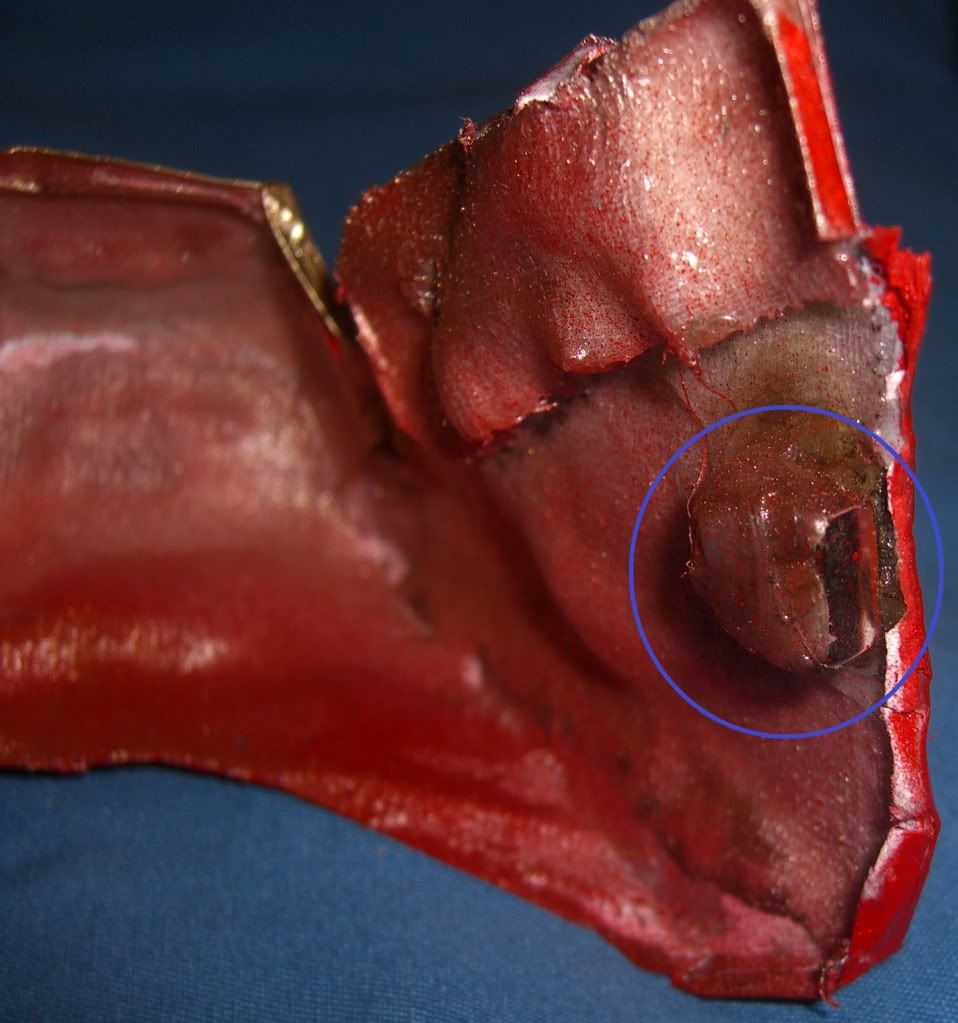
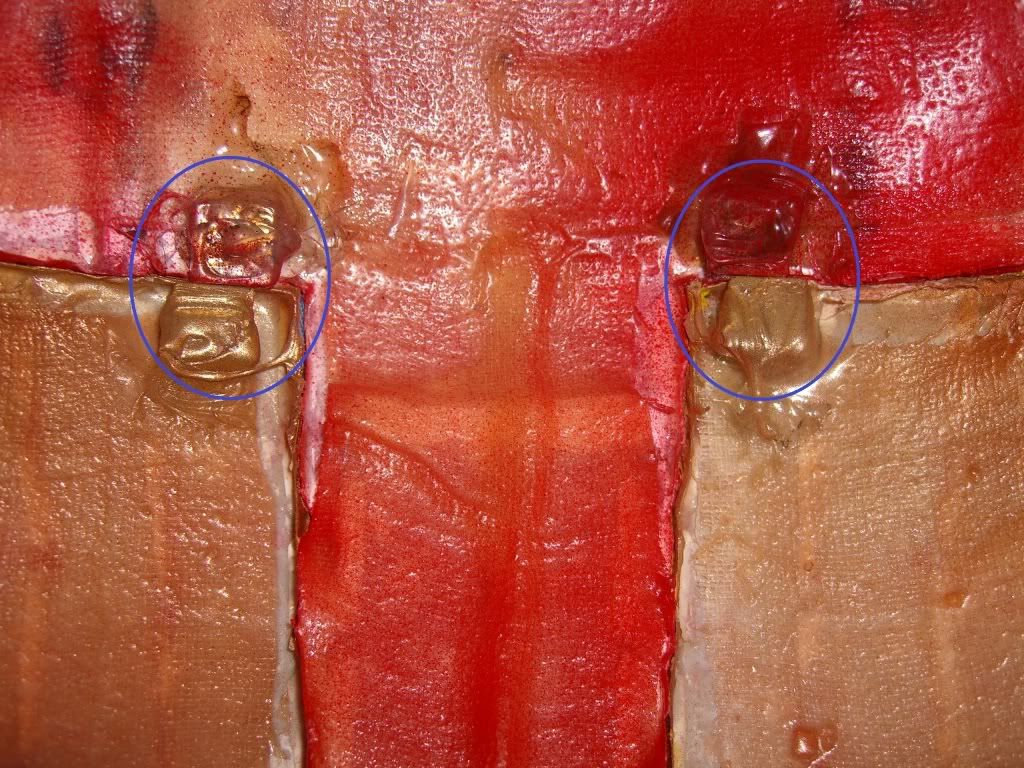
Then I called it a day and decided my work is finished.
-----------------------------------------------------
I have also pepped a mark VI/IV bicep but I want to keep it out of my way while I am working on the helet.
----------------------------------
I also ordered from ebay some White EL sheets, will see how well they will do for the eyes. Here is the link to the search result on Ebay for those sheets:
el sheet panel items - Get great deals on Vehicle Parts Accessories, Consumer Electronics items on eBay UK!
I have also decided to try and design hinges for the faceplate.
So my to-do list so far:
-post pictures of my 2nd bondo work on the facplate and the back
-wait for EL sheets to arrive and test them out
-design and make hinges
-get rid of magnets at the top of the faceplate (they will be replaced with hinges)
-stop writing so much
Hope you like my work!
Any advise or opinons will be greaely appreciated!
Hey,
Just thought I make a thread where I could post all my work on the helmet and other future Iron man Mark VI stuff.
Here ar a few pics from the past to show what happened to the helmet.
1st of all I pepped it (obviously

^ the chin and the faceplate are separate pieces. The chin and the back of the helmet didnt line up perfectly but its not too bad.
Next came the fiberglassing and the resinning:

^when resinning I glued the faceplate and the chin to the back ofthe helmet so that they would dry with a right angle
(the pieces were all stretched out in a weird way). I then used a knife to separate them which did the job but broke the nice wall of the faceplate and the chin
Then I quickly applied a bit of bondo (not much as you can see and not very carefully) and spray painted everything in 2-3 coats:


Then installed magnets (5mm by 5mm by 2mm rare earth magnets - very strong!):


Then I called it a day and decided my work is finished.
-----------------------------------------------------
...Realised that my helmet isnt at its best...far from it actually  and decided to do some more work on it.
I have applied more bondo to the faceplate and the back (will post pictures of that soon) and after making sure that they were very nice and smooth I applied primer paint (hot red).
-----------------------------------------------------I have applied more bondo to the faceplate and the back (will post pictures of that soon) and after making sure that they were very nice and smooth I applied primer paint (hot red).
I have also pepped a mark VI/IV bicep but I want to keep it out of my way while I am working on the helet.
----------------------------------
I also ordered from ebay some White EL sheets, will see how well they will do for the eyes. Here is the link to the search result on Ebay for those sheets:
el sheet panel items - Get great deals on Vehicle Parts Accessories, Consumer Electronics items on eBay UK!
I have also decided to try and design hinges for the faceplate.
So my to-do list so far:
-post pictures of my 2nd bondo work on the facplate and the back
-wait for EL sheets to arrive and test them out
-design and make hinges
-get rid of magnets at the top of the faceplate (they will be replaced with hinges)
-stop writing so much
Hope you like my work!
Any advise or opinons will be greaely appreciated!
Last edited:
pr3dato8
Well-Known Member
Re: Iron Man Helmet and more later on...
Hey,
as promised the pics are attached (they might not be in order but there is a pic for everything that I am about to describe that I did).
This follows up after the pic where the helmet i fully painted ^
Basically I have decided to give the whole helmet a few more layer of bondo since the helmet was not smooth enough and it looked kinda ulgy
I gave the faceplate 3-4 layers of bondo (in spots that I thought needed to be fixed). After that I sprayed it with red as a primer coat and left it like that for now.
The back of the helmet recieved additional 3 layers of bondo (after I have fully painted the helmet shown above). I sanded the 1st layer, then sanded the 2nd layer and then marked all the areas I wanted to bondo further with a black marker (see pics below) which sows that even after a total of 3 layers of bondo th ehlmet still required perfection.
After the bondo I gave the helmet 5 coats of red (the bacl marker coud be seen through, shouldnt have used )
)
As for the faceplate for now I just sanded it down, i will apply a bt of bondo to it, sand it down again and spray paint it soon
Hey,
as promised the pics are attached (they might not be in order but there is a pic for everything that I am about to describe that I did).
This follows up after the pic where the helmet i fully painted ^
Basically I have decided to give the whole helmet a few more layer of bondo since the helmet was not smooth enough and it looked kinda ulgy
I gave the faceplate 3-4 layers of bondo (in spots that I thought needed to be fixed). After that I sprayed it with red as a primer coat and left it like that for now.
The back of the helmet recieved additional 3 layers of bondo (after I have fully painted the helmet shown above). I sanded the 1st layer, then sanded the 2nd layer and then marked all the areas I wanted to bondo further with a black marker (see pics below) which sows that even after a total of 3 layers of bondo th ehlmet still required perfection.
After the bondo I gave the helmet 5 coats of red (the bacl marker coud be seen through, shouldnt have used
As for the faceplate for now I just sanded it down, i will apply a bt of bondo to it, sand it down again and spray paint it soon
Re: Iron Man Helmet and more later on...
It's looking a lot better buddy.
The only point of advice I'd give you is to make sure that when you spray, you use a good matte primer (Halfords red oxide is what I use), it short, fine dust coats in a heated space (i have a three bar heater on if I'm spraying at this time of year).
You should end up doing 5-10 very, very fine coats, waiting 5 minutes between coats. If you do this, you'll spot areas that need attention much better than with a gloss coat.
Then, use the same technique when you come to paint with your top colours. Build it up very gradually, slowly and surely. Then do a grey/brown wash to highlight the runs, rivets and screws. This'll leave a nice, clean, shiny finish that shouldn't require a laquer at all.
Then, if you're really brave, an incredibly fine grit wet sandpaper can be taken over the helmet, to give it a worn-in look. This is purely personal preference though!
I did this technique with my 'battle worn' IM lid recently and it allowed my to make the colours quite 'flat' and worn - if that's the look you're going for.

I wish you all the best of luck!
It's looking a lot better buddy.
The only point of advice I'd give you is to make sure that when you spray, you use a good matte primer (Halfords red oxide is what I use), it short, fine dust coats in a heated space (i have a three bar heater on if I'm spraying at this time of year).
You should end up doing 5-10 very, very fine coats, waiting 5 minutes between coats. If you do this, you'll spot areas that need attention much better than with a gloss coat.
Then, use the same technique when you come to paint with your top colours. Build it up very gradually, slowly and surely. Then do a grey/brown wash to highlight the runs, rivets and screws. This'll leave a nice, clean, shiny finish that shouldn't require a laquer at all.
Then, if you're really brave, an incredibly fine grit wet sandpaper can be taken over the helmet, to give it a worn-in look. This is purely personal preference though!
I did this technique with my 'battle worn' IM lid recently and it allowed my to make the colours quite 'flat' and worn - if that's the look you're going for.

I wish you all the best of luck!
Last edited:
Re: Iron Man Helmet and more later on...
Skor - your helmet looks awesome. I'd love to get such a finished look. But you said...
" Then do a grey/brown wash to highlight the runs, rivets and screws. This'll leave a nice, clean, shiny finish that shouldn't require a laquer at all."
What exactly do you mean by this?
Skor - your helmet looks awesome. I'd love to get such a finished look. But you said...
" Then do a grey/brown wash to highlight the runs, rivets and screws. This'll leave a nice, clean, shiny finish that shouldn't require a laquer at all."
What exactly do you mean by this?
Similar threads
- Replies
- 0
- Views
- 1,029
- Replies
- 0
- Views
- 478
- Replies
- 1
- Views
- 1,796
