jayjayn
Well-Known Member
Well yes this is another Iron Man Foam Build, this is my first costume build and pep job.
I have been on this forum for a few months now and been doing my build since then and now i'm ready to show my progress.
Originally i was working on a pep job of the Mark VI and realized from pictures that a foam build would be more suitable on time
and ease of the build over a fiberglass pep build.
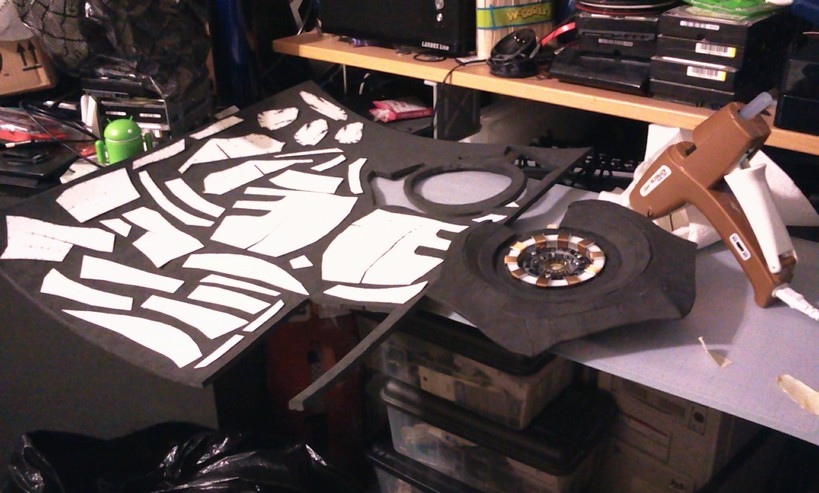
I originally was using the foam mats that stealth recommended but i realized for my Mark IV build i prefered to use a thinner 4mm eva foam as used by Graphic Jordan, and some 2mm, 3mm foam for certain parts of the build. I decided to switch over to the Mark IV build since its easier to get a Arc Reactor for the Mark IV
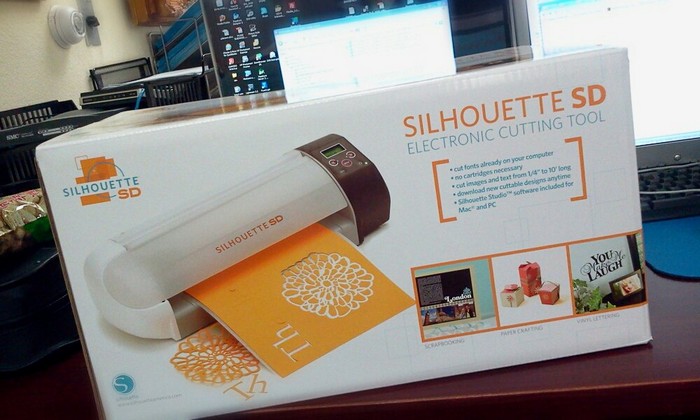
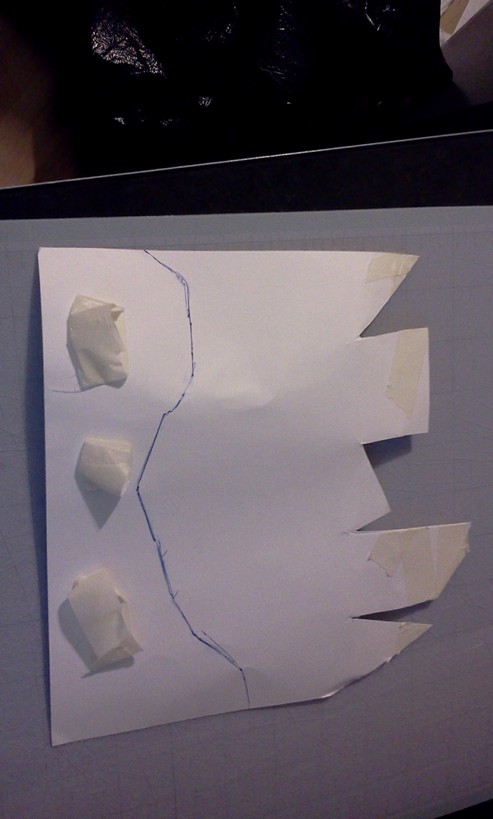
I'm currently using modified robo3687 pep files that i modified to work with foam and my Silhouette SD, i'm also using some files of GLENN TECH's foam files modified to my liking and modified to be cut on my cutter as well.
Thanks to Graphic Jordan and indiefilmgeek if it wasn't for there threads i would have not figured out tips and tricks on what to do in this build. STEALTH's foam build vid's helped alot as well.
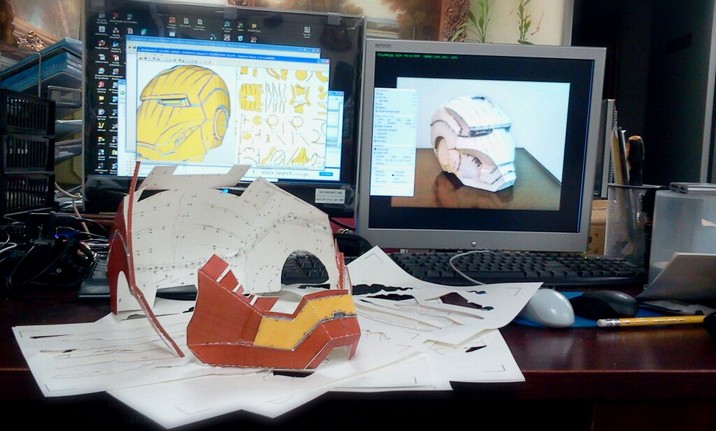
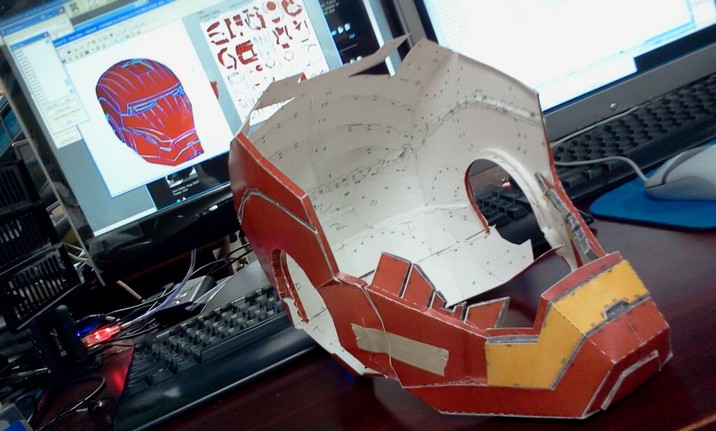
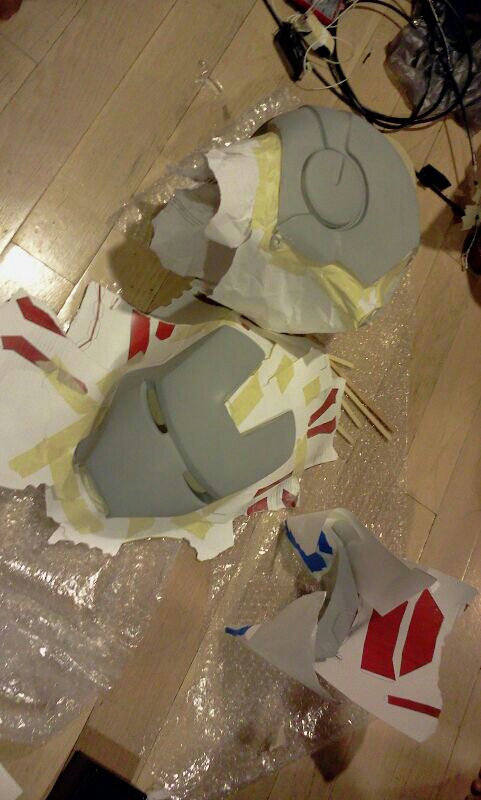
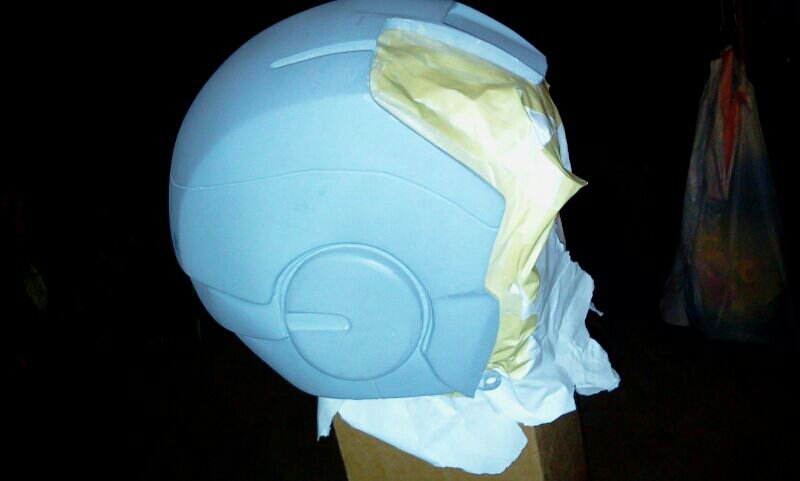
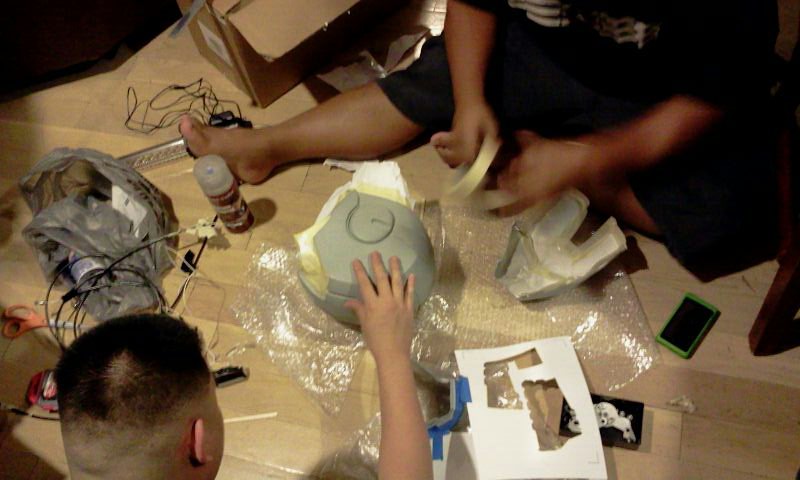
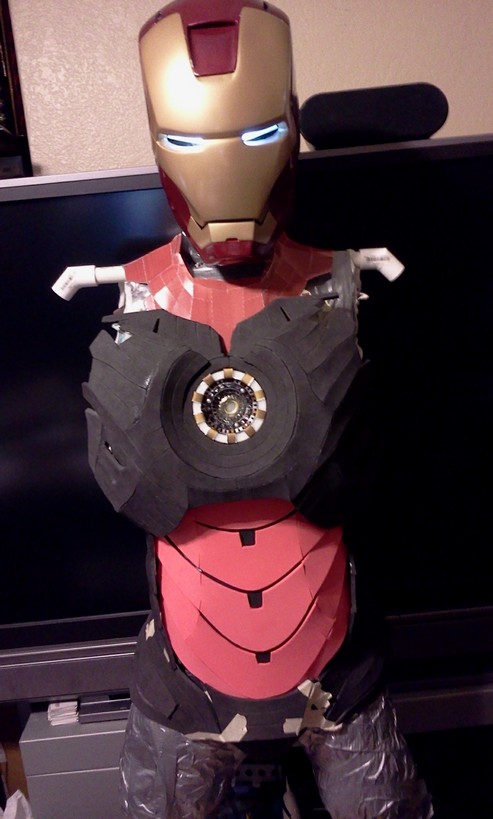
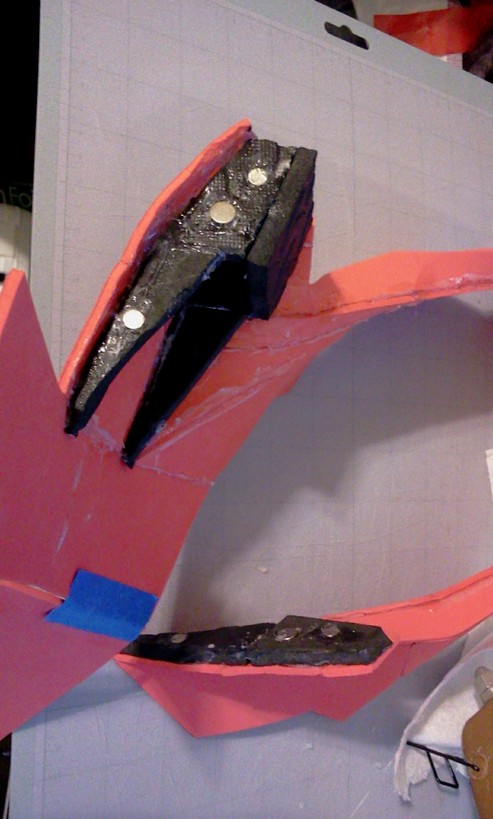
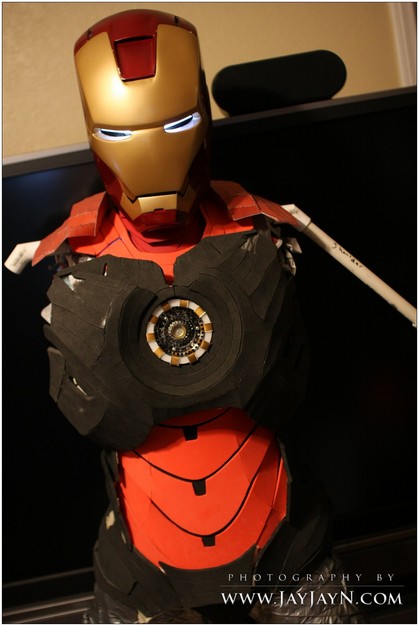
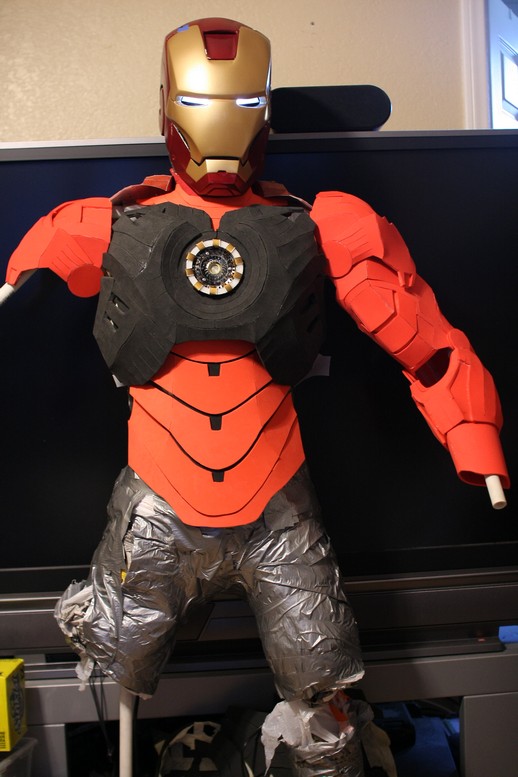
Helmet - MightyJohn's first cast won on ebay and installed his hinges - currently working on a modified version to work with my servo's
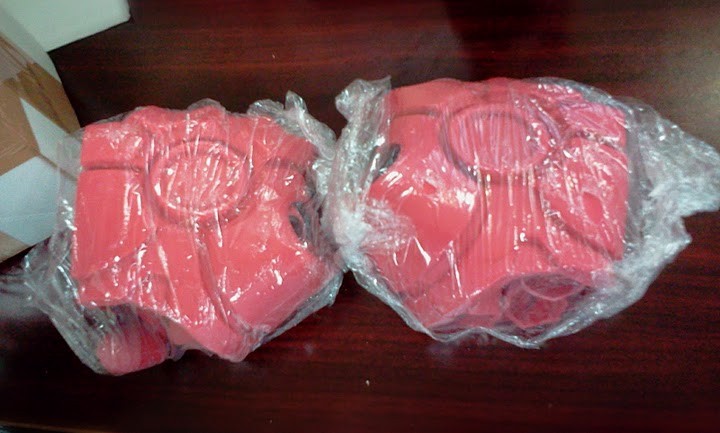
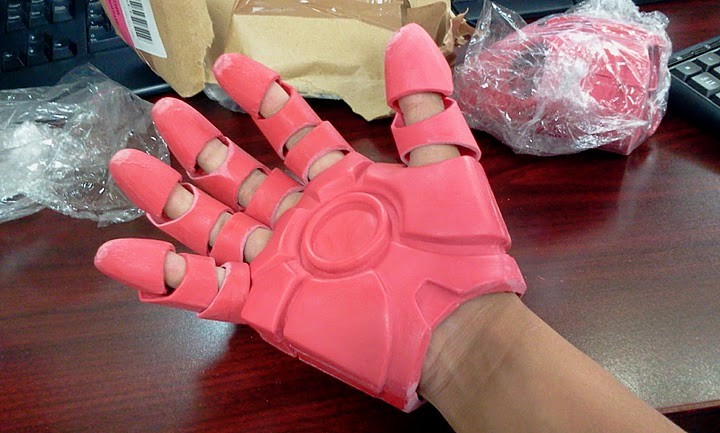
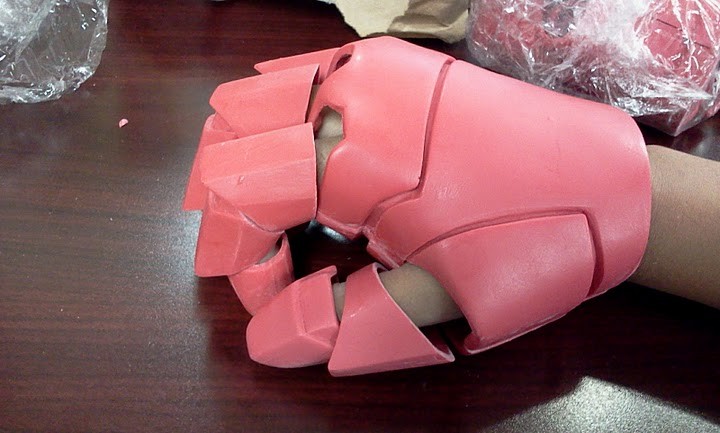
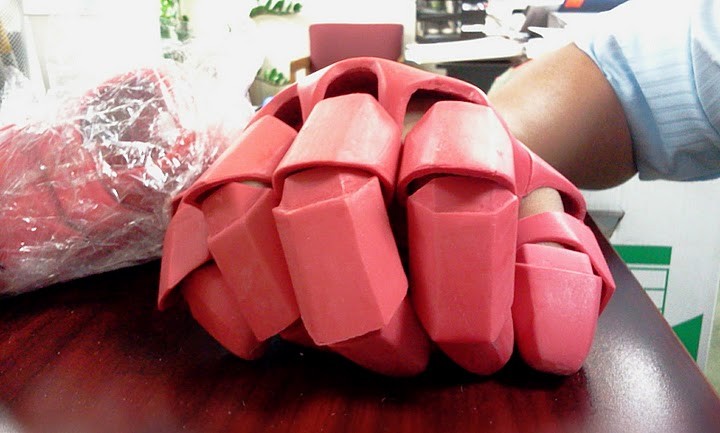
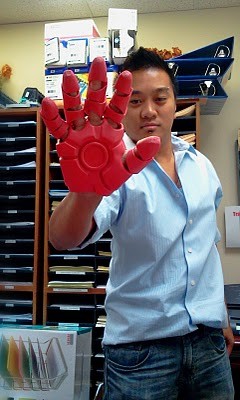
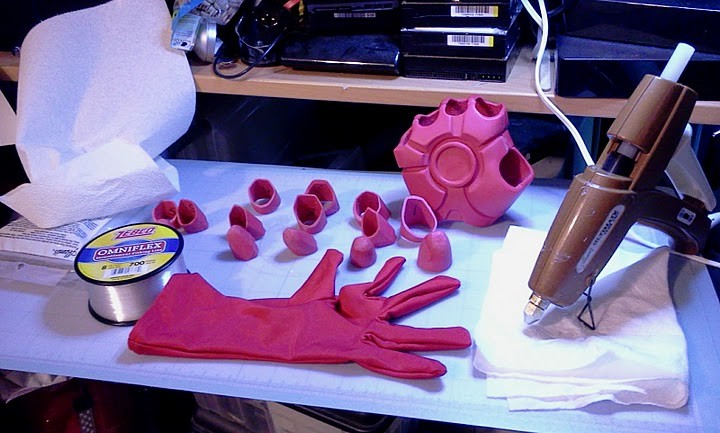
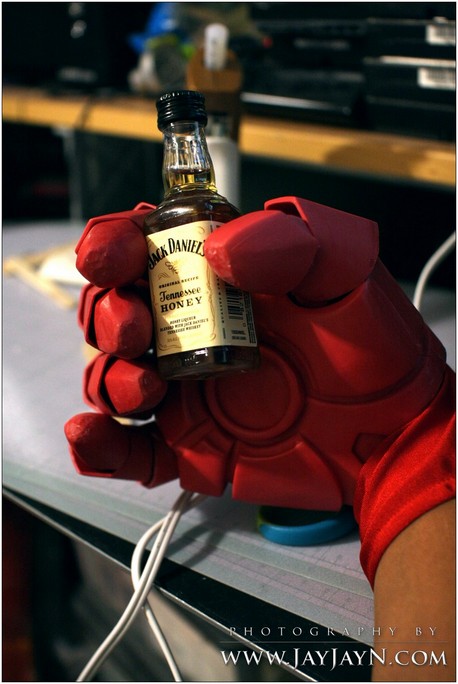
Gloves - Polyeurethane gloves from Zabana
I'm also working on gathering all the reciepts so everybody can get a idea of how much i spent on this build.
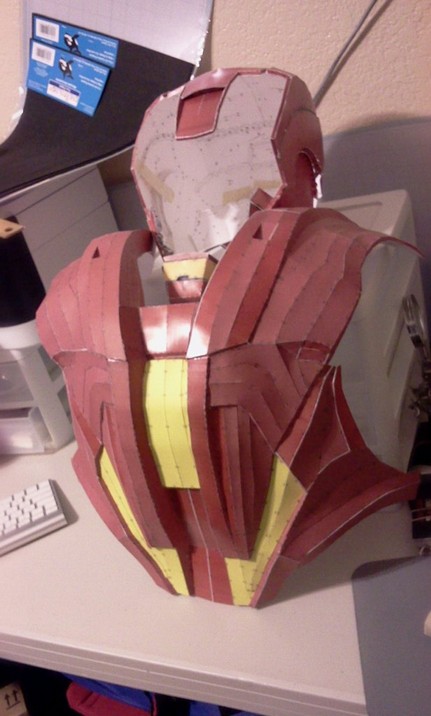
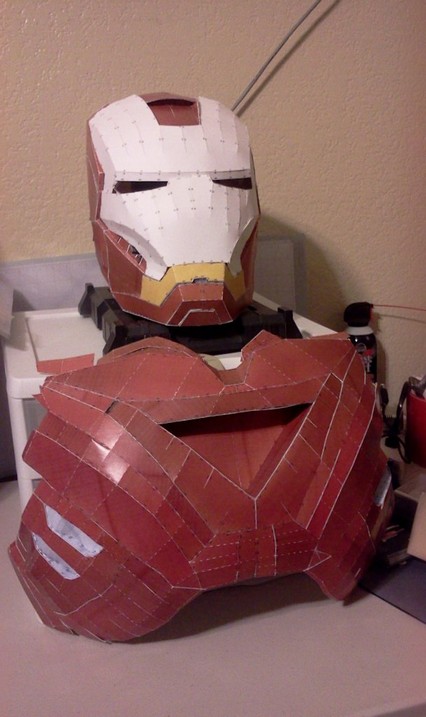
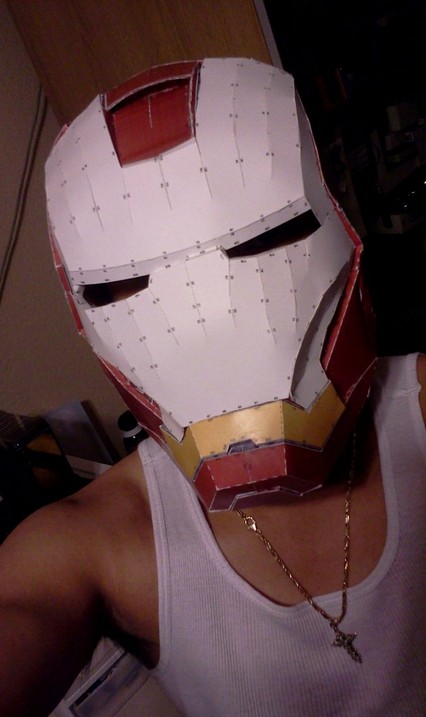
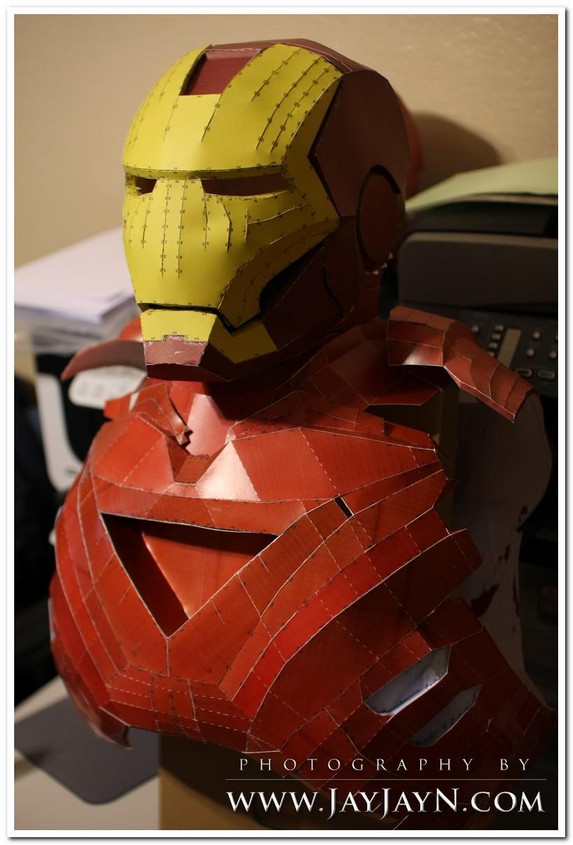
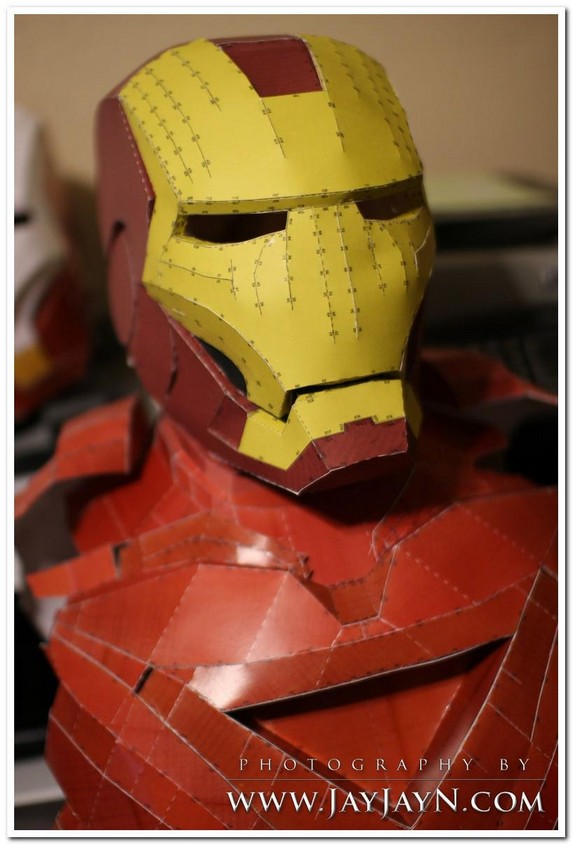
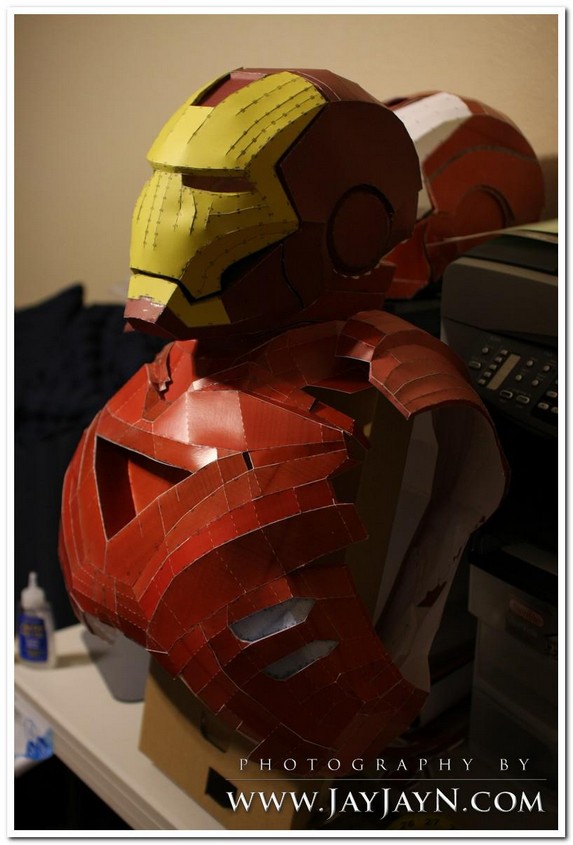
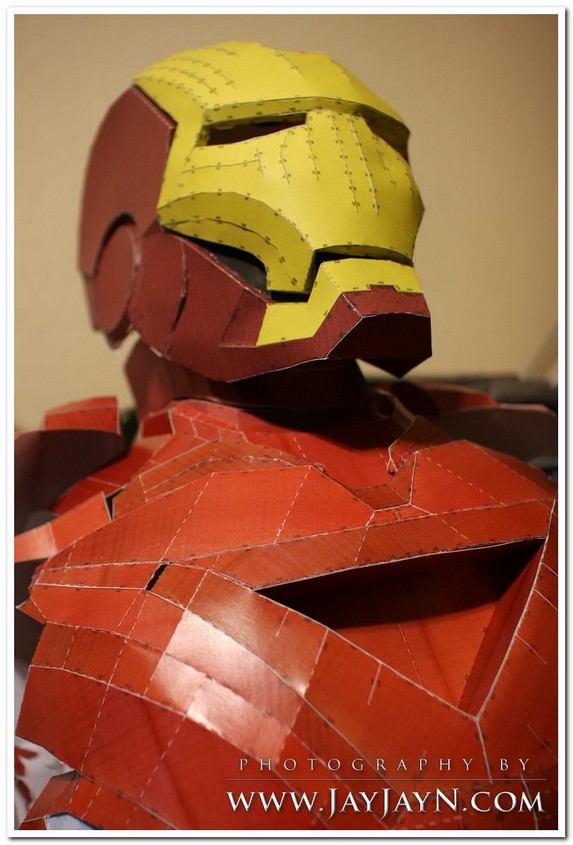
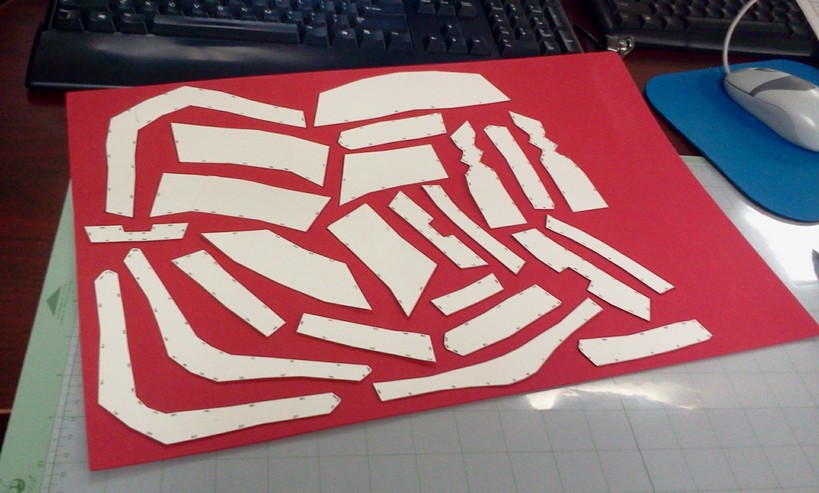
--MY FIRST PEP JOB
CAN'T LIVE WITHOUT THIS!! realized it was more effective setting up the settings like this over some recommendations that others have posted.
SIZE
WIDTH: 214
HEIGHT: 305
SIDE MARGIN: 15
TOP/BOTTOM MARGIN: 32

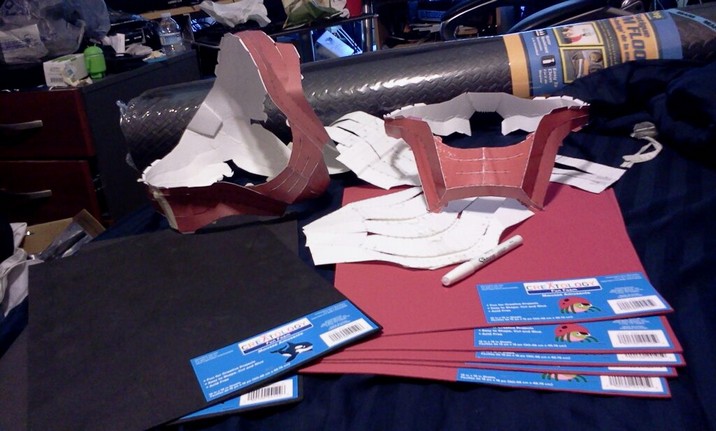
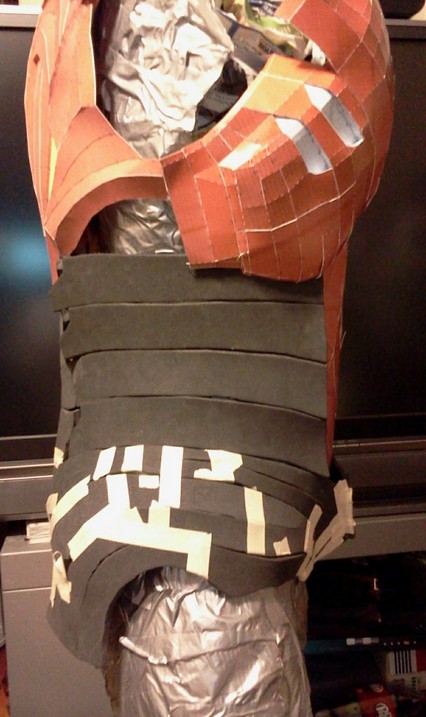
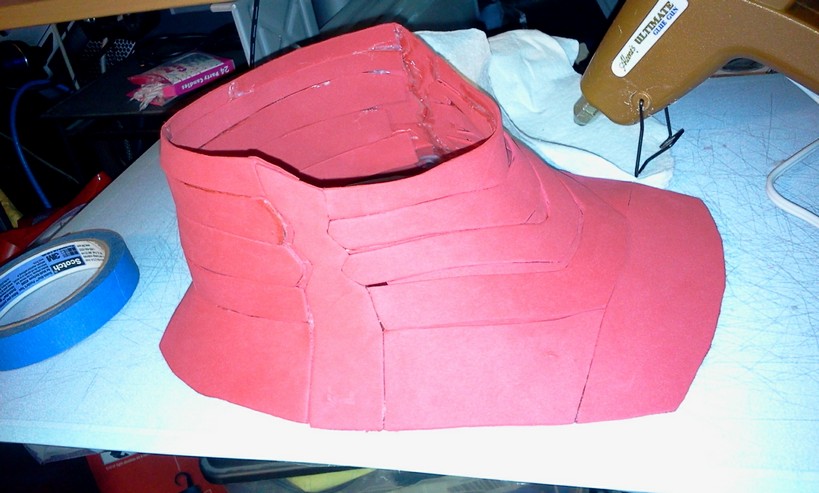
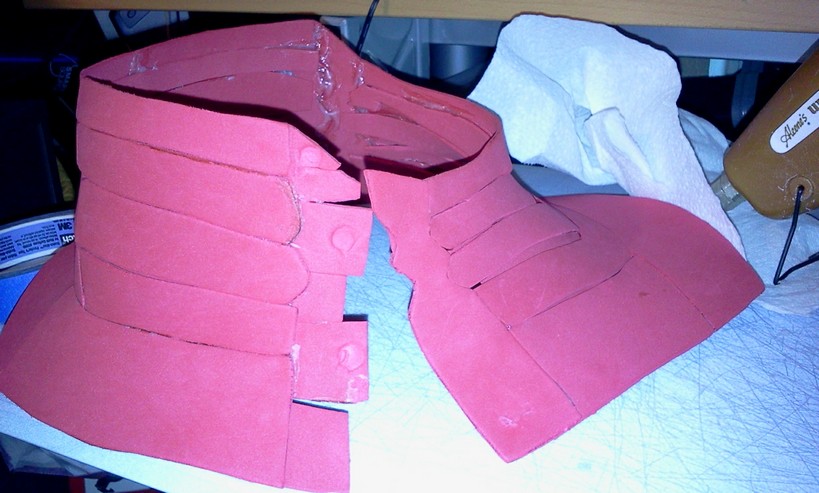
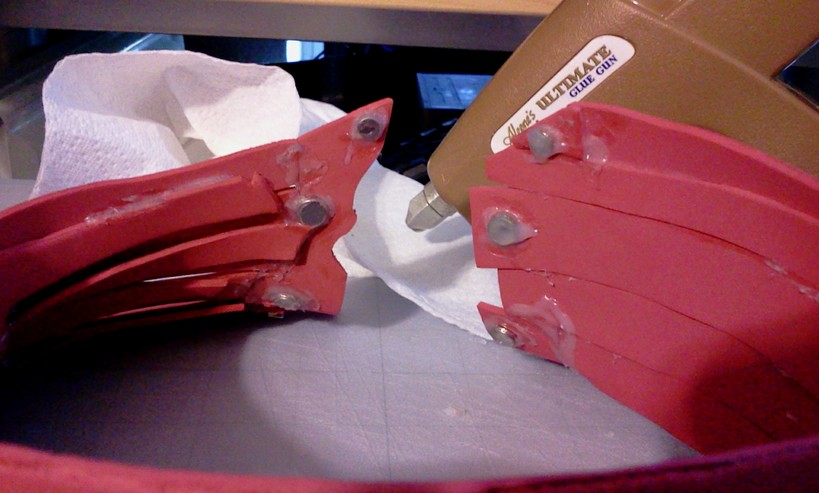
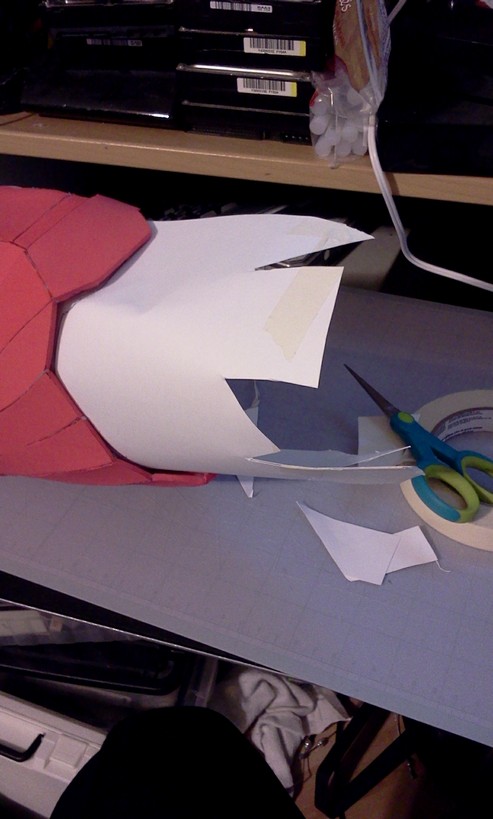
--COD PIECE IN FOAM - ENDED UP MAKING IT TOO BIG AND WILL THROW OUT THIS PART AND REMAKE IT USING GLENN TECH's FILES
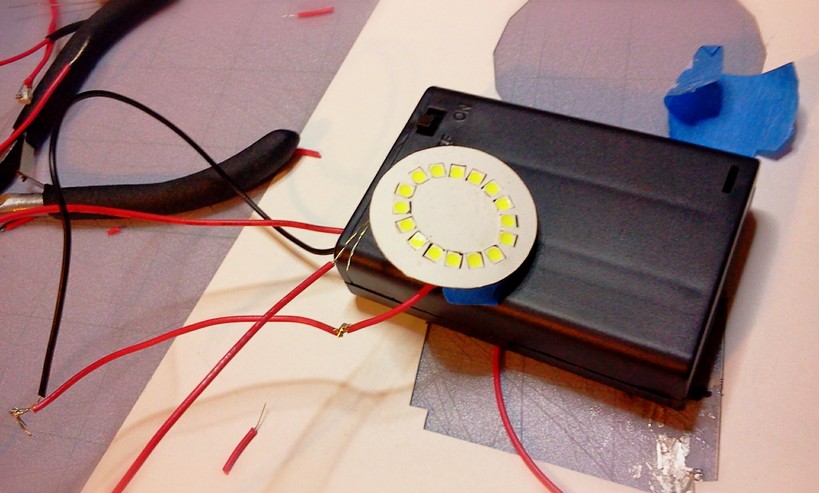
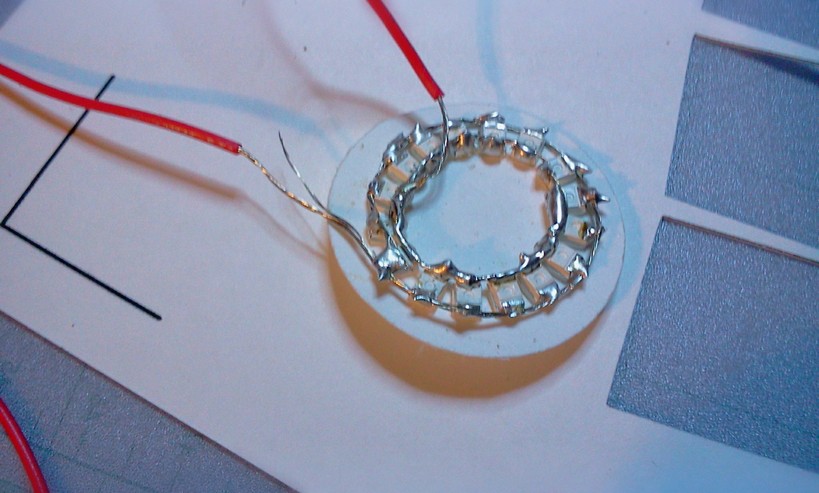
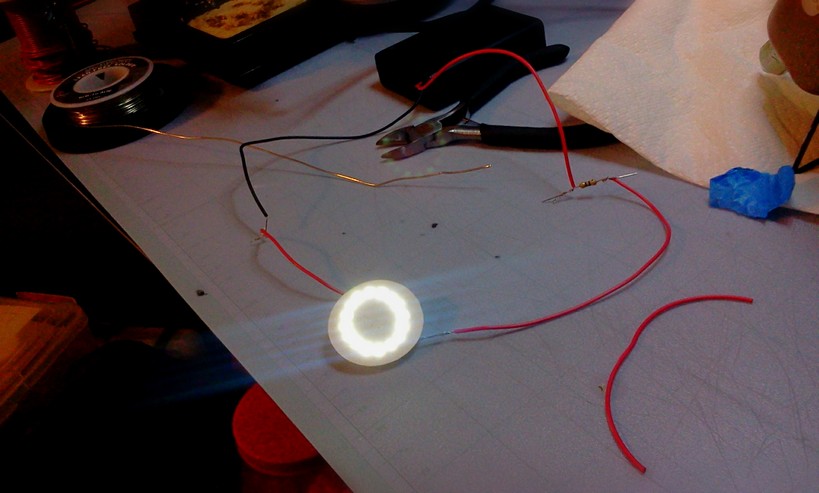
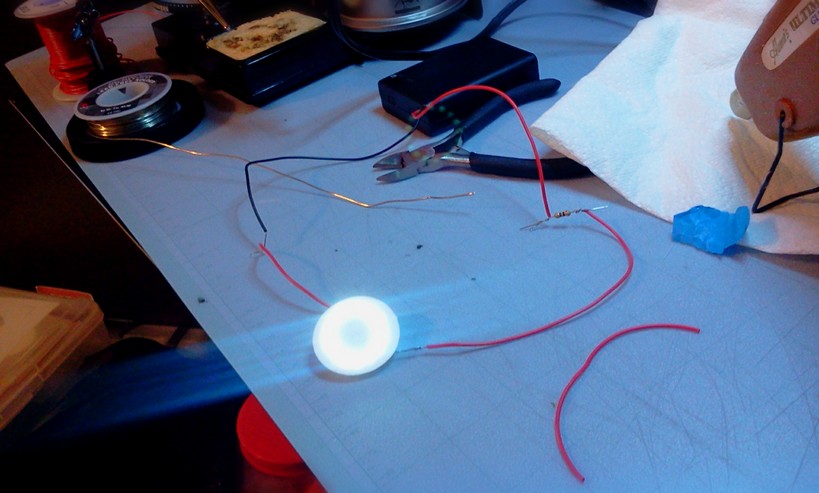
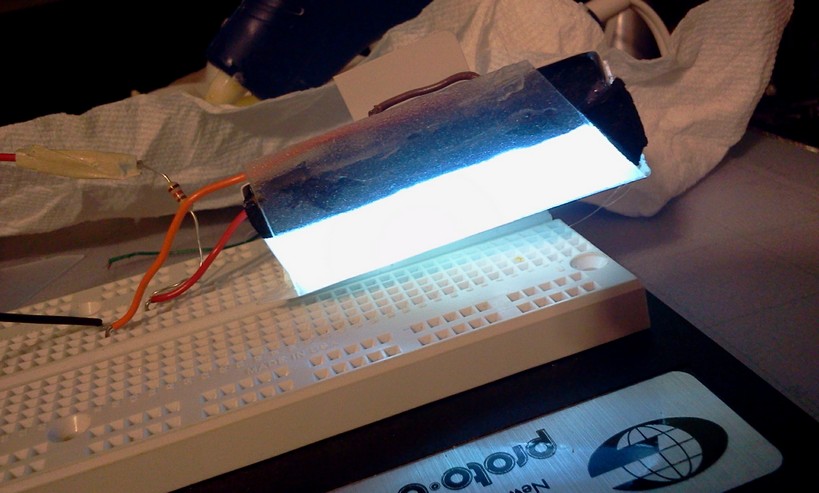
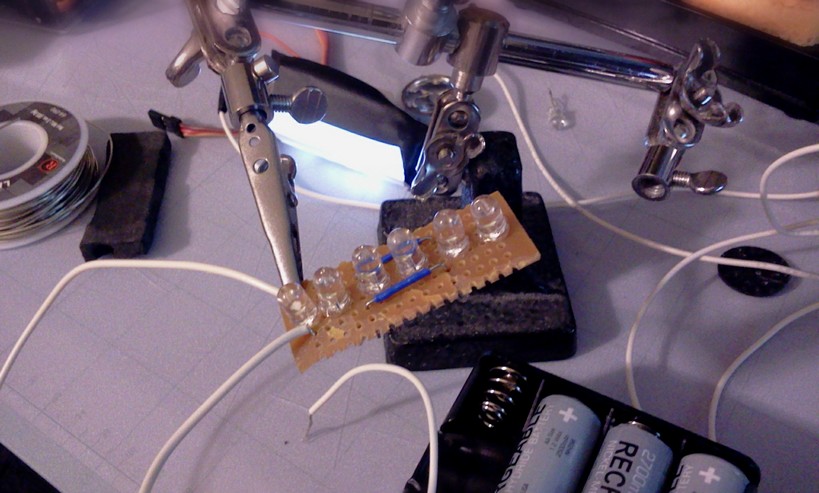
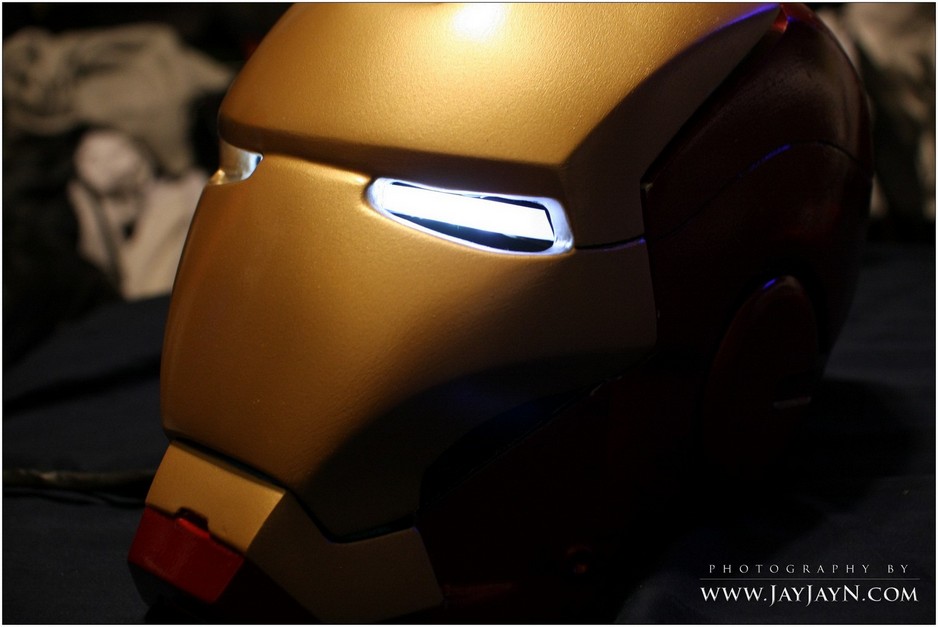
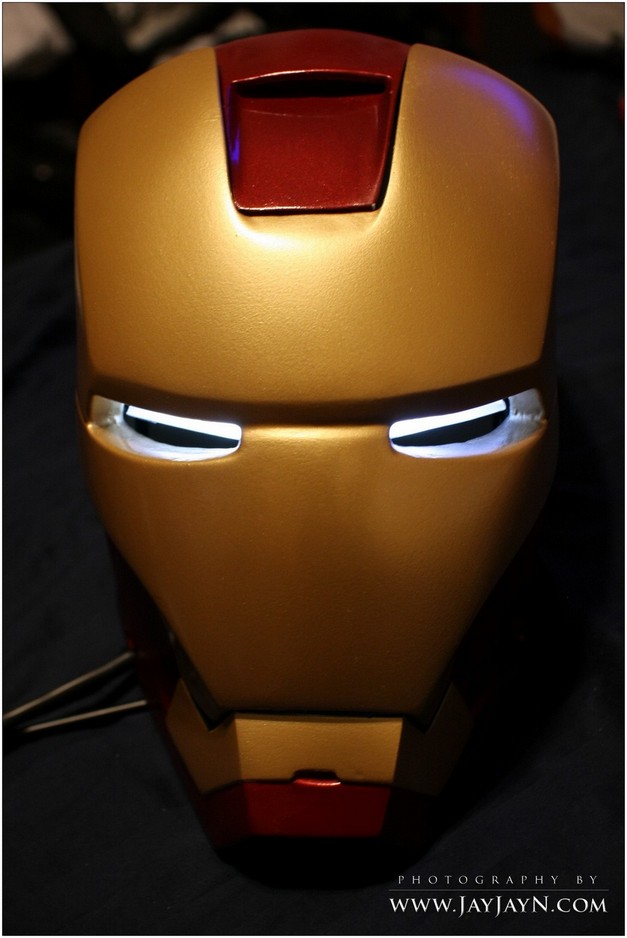
--Custom $2 LED Eyes
I took apart a 9 LED FLASH light from the 99cent's store very hard to find, had to go to numerous stores to find 3.
I'm also using a white reflective sheet from a ipod nano cover.
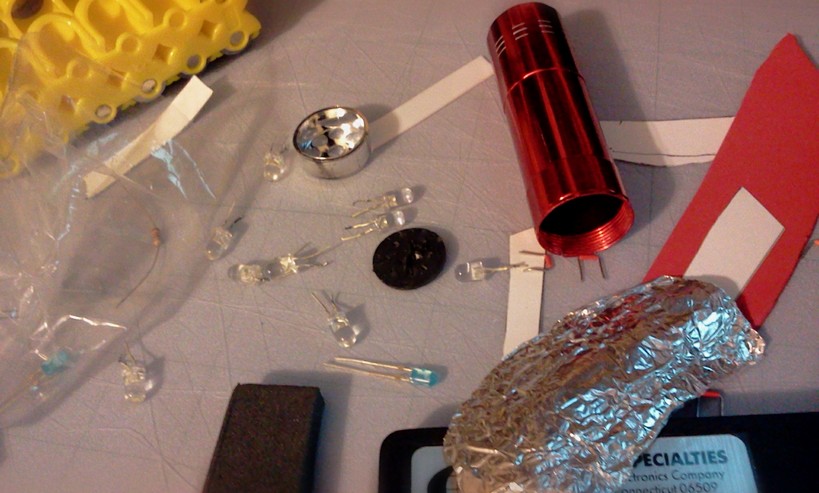
I didn't have a circuit board so tried to do it in foam.
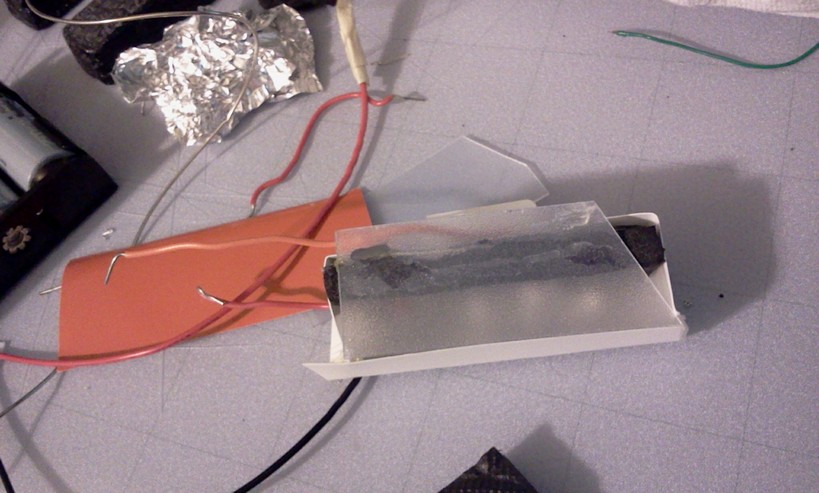
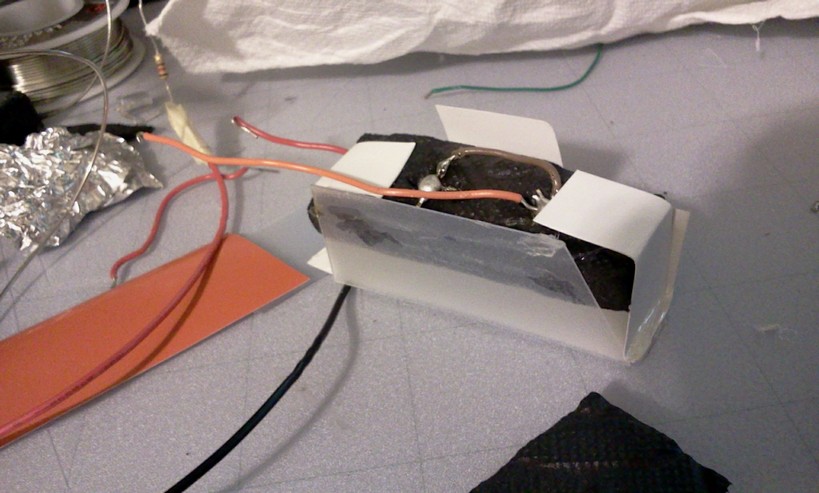
I made the front diffused by using a CD case holder from a asian store and it diffused the light well.
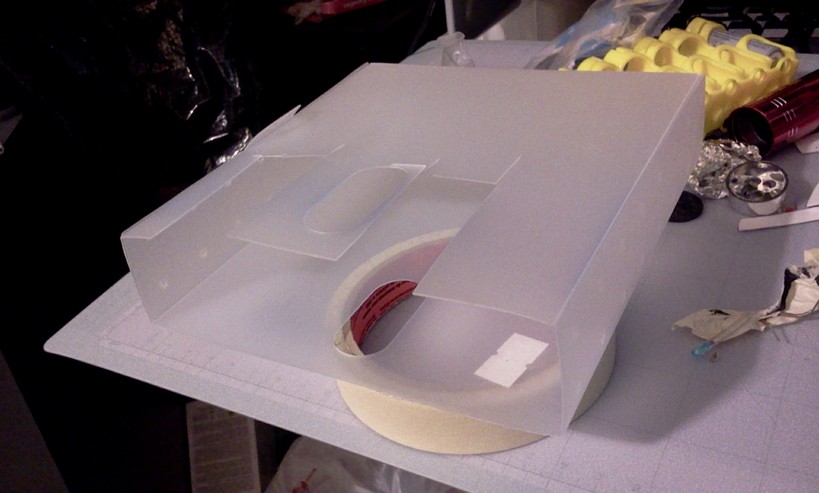
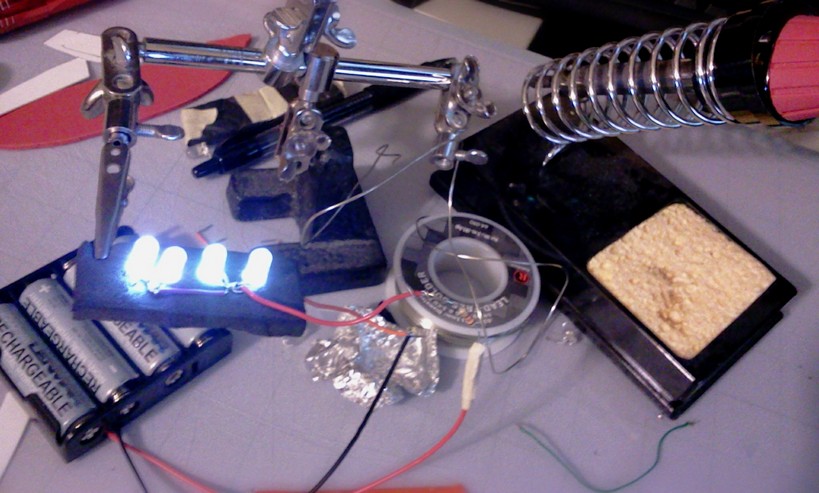
I finnally got a proper circuit board and made the other eye.

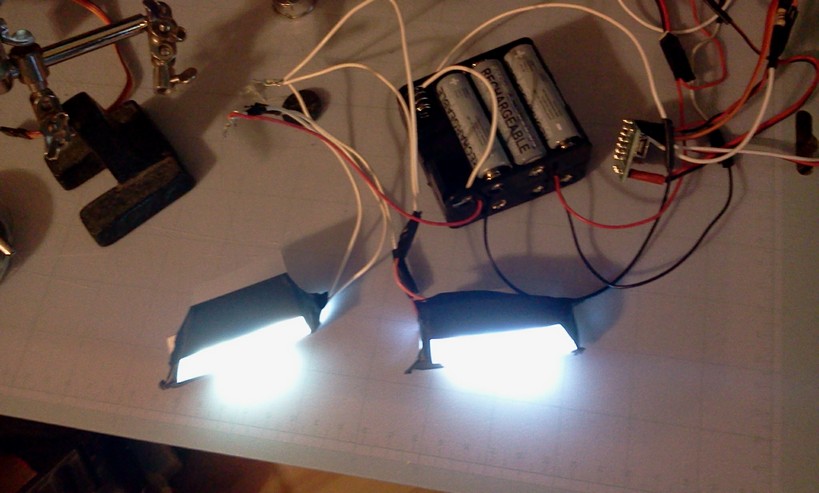

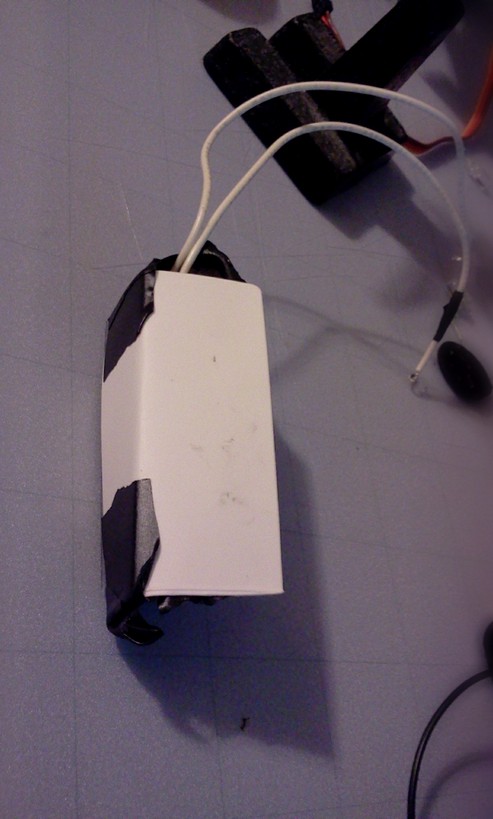


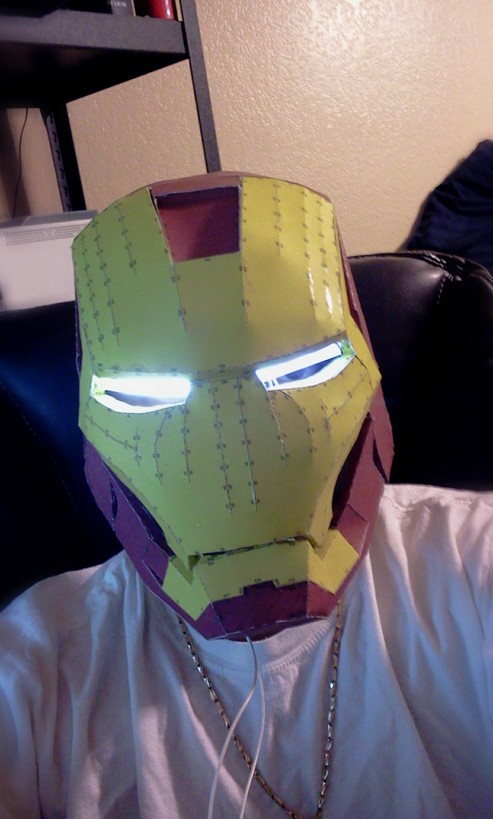

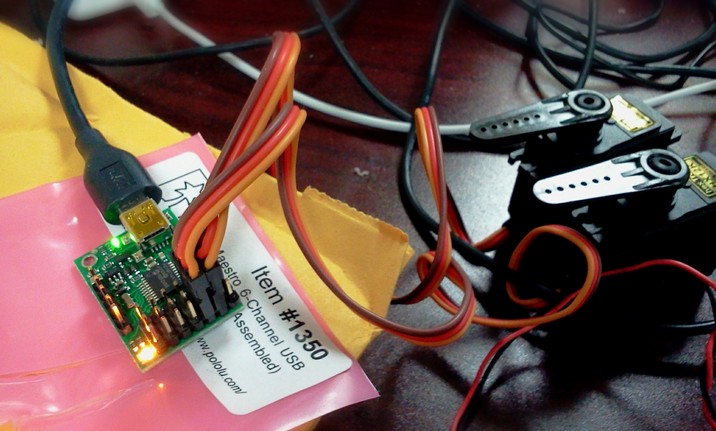
I ordered a Pololu Micro Controller and programmed it to open the servo's and light up the eyes.

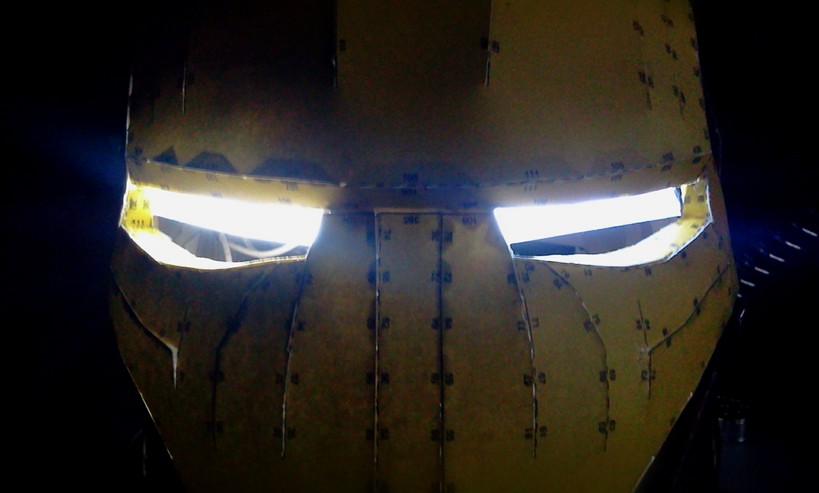
Here is a video of my light up eyes i have it studder when lighting up like flickering office lights when turning on.
PEPAKURA IRON MAN HELMET EYES LIGHT UP - YouTube
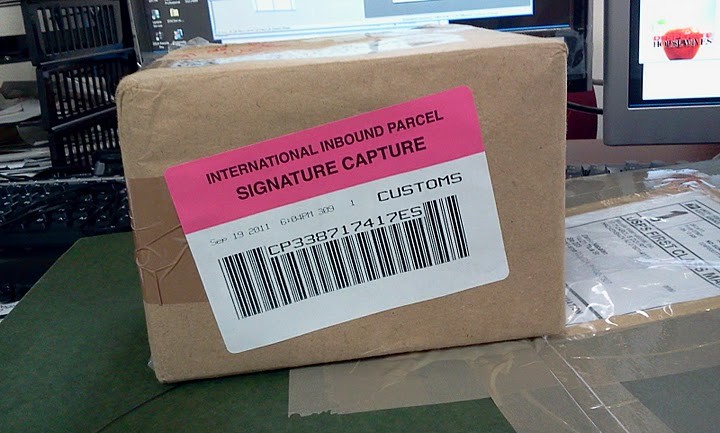
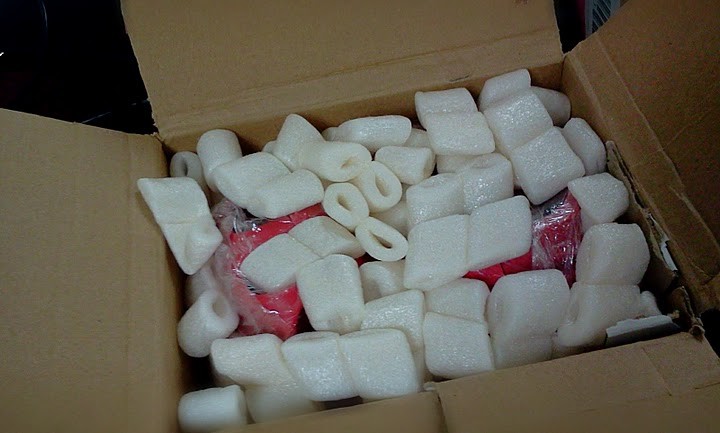
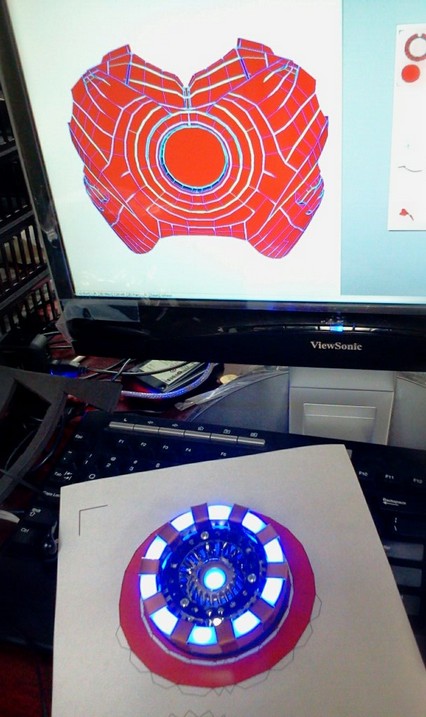
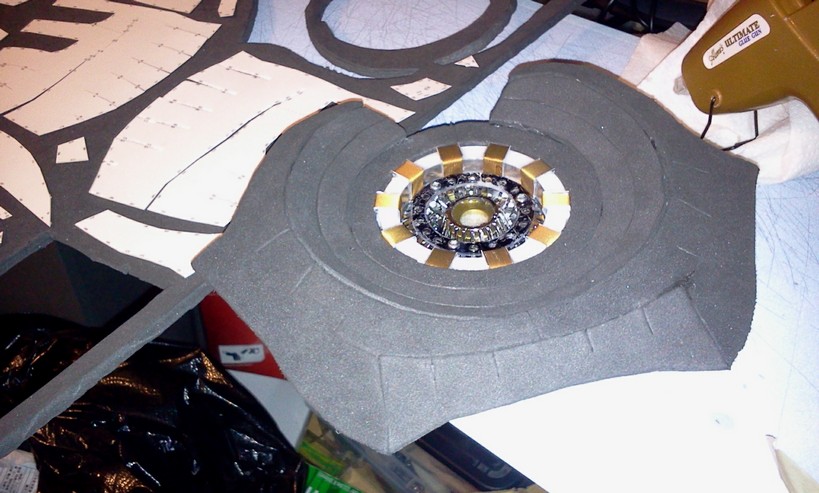
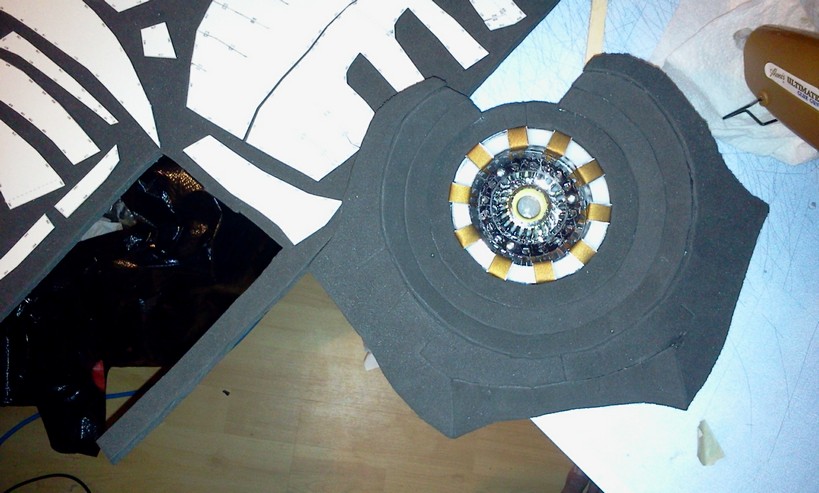
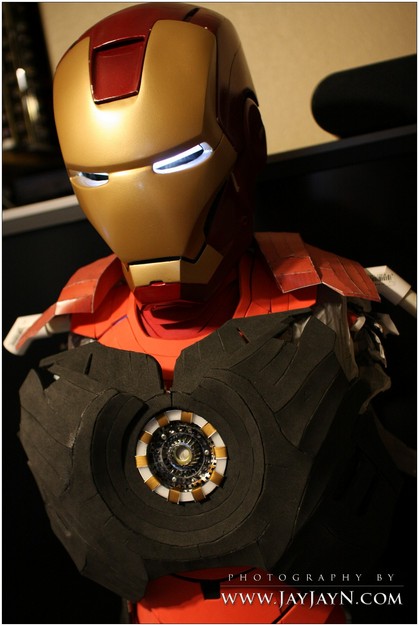
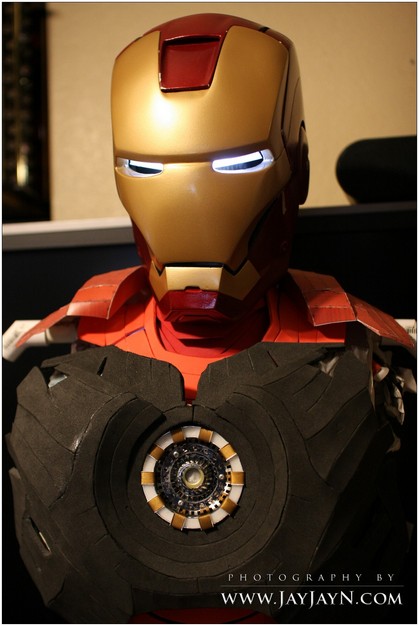
--I RECIEVED MY ARC REACTOR FROM EBAY BUT REALIZED SHORTLY THAT IT STARTED FAILING AND CURRENTLY WORKING WITH THE SELLER TO GETTING A THIRD REPLACEMENT

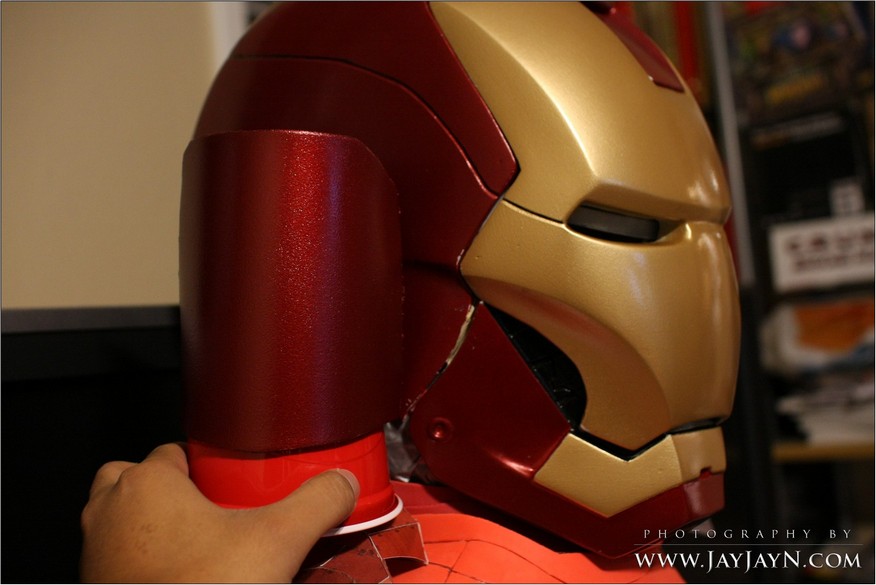
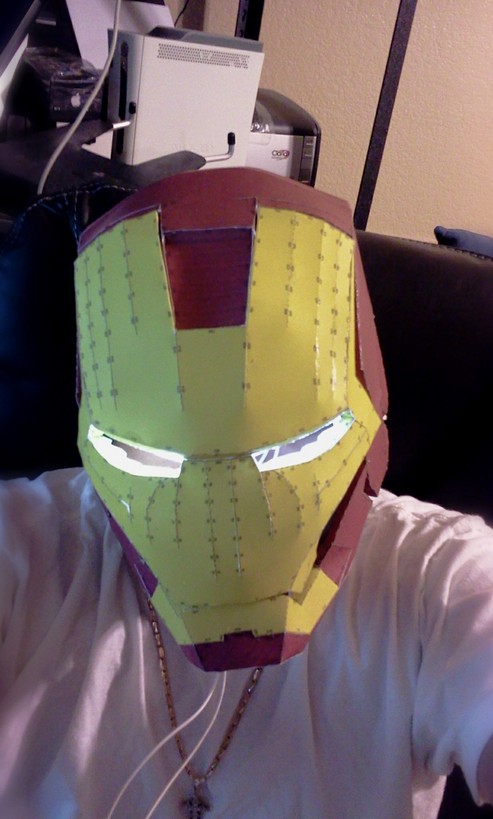
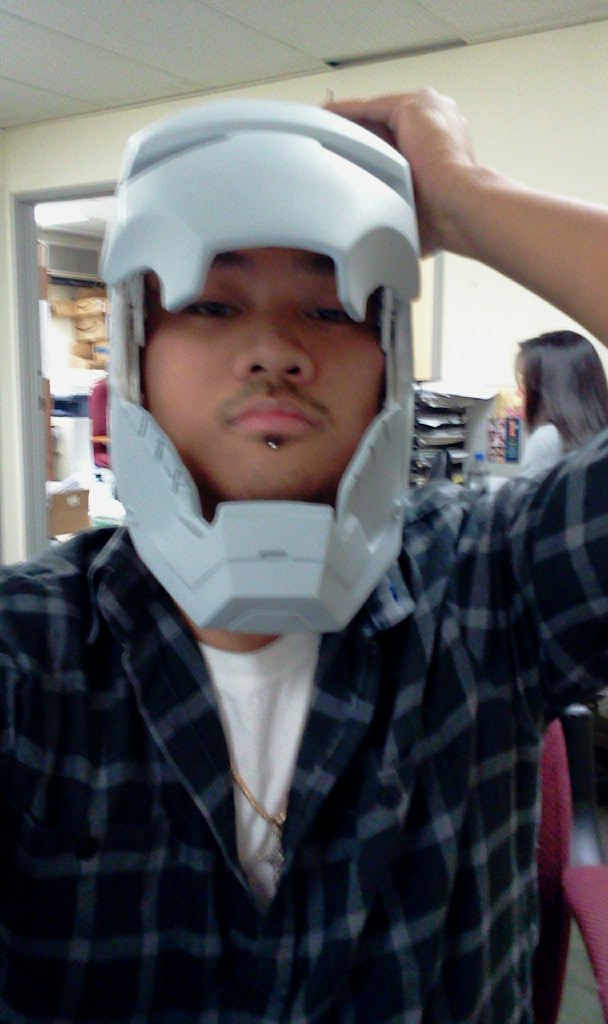
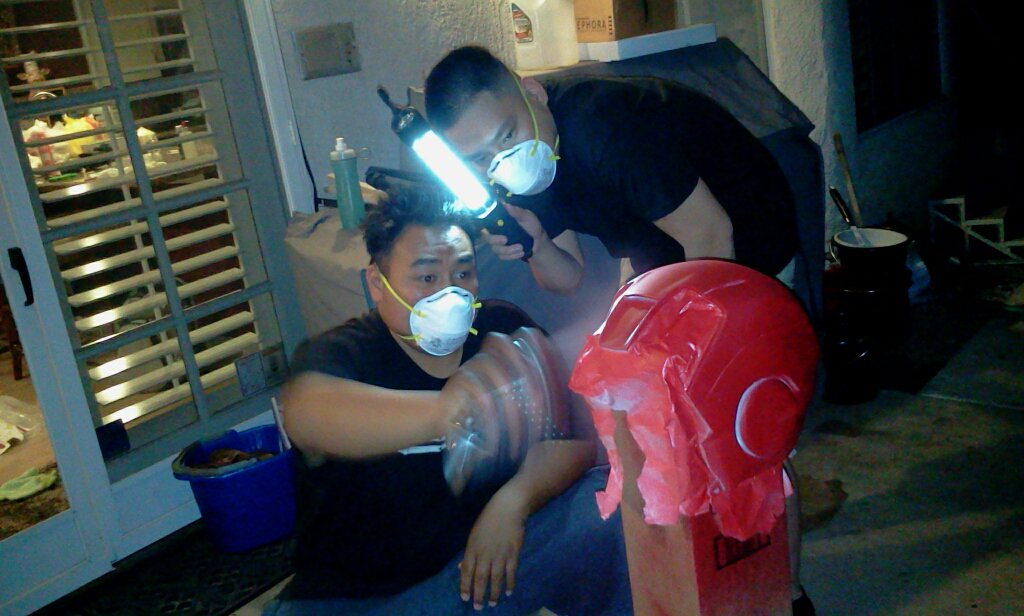
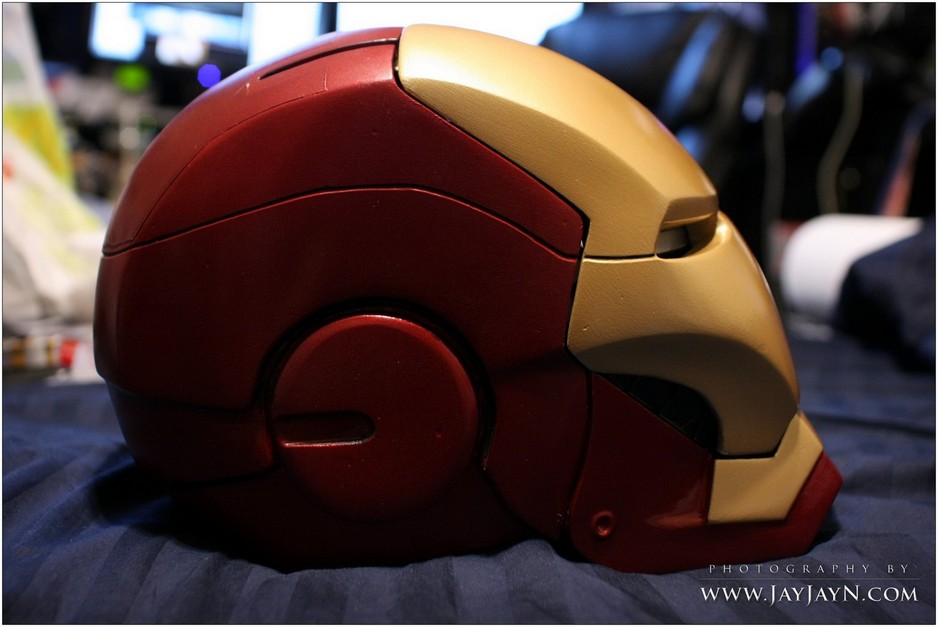
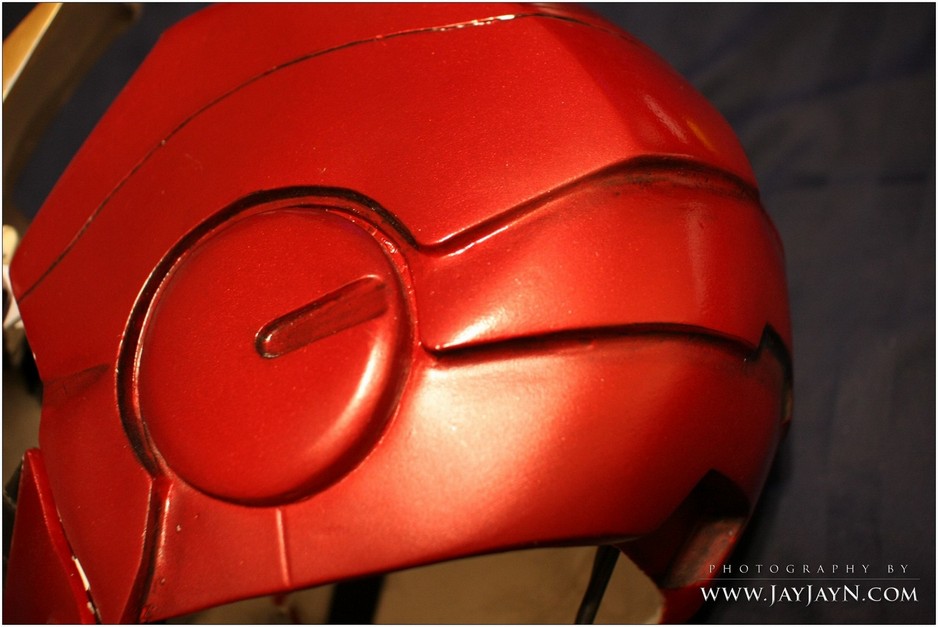
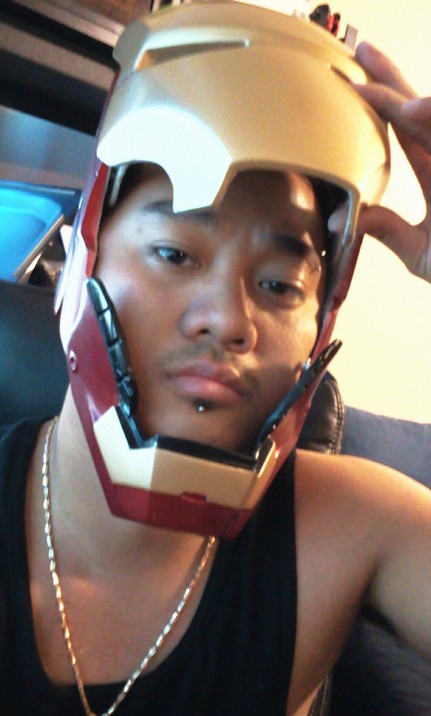
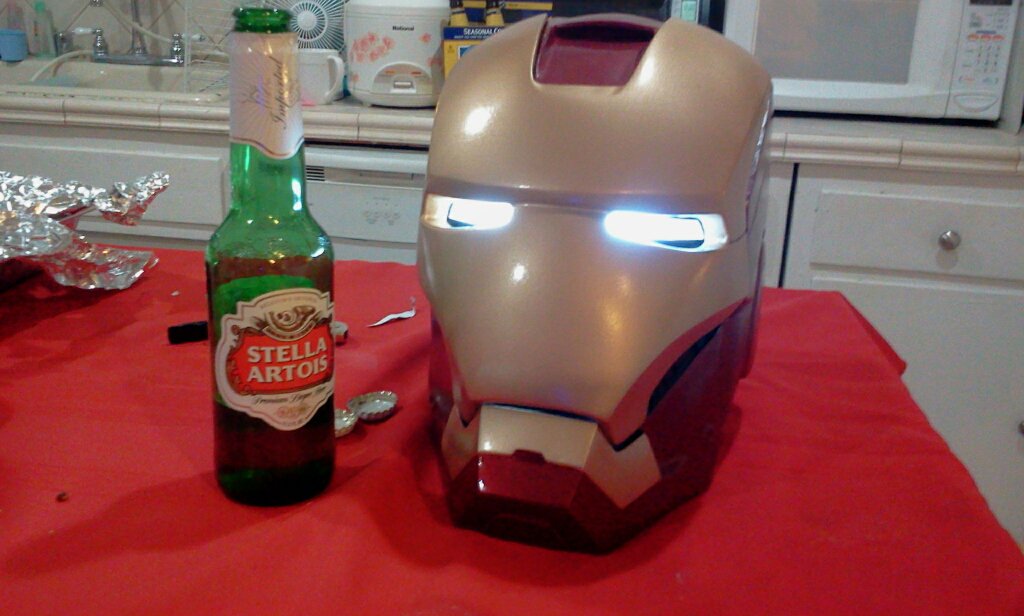
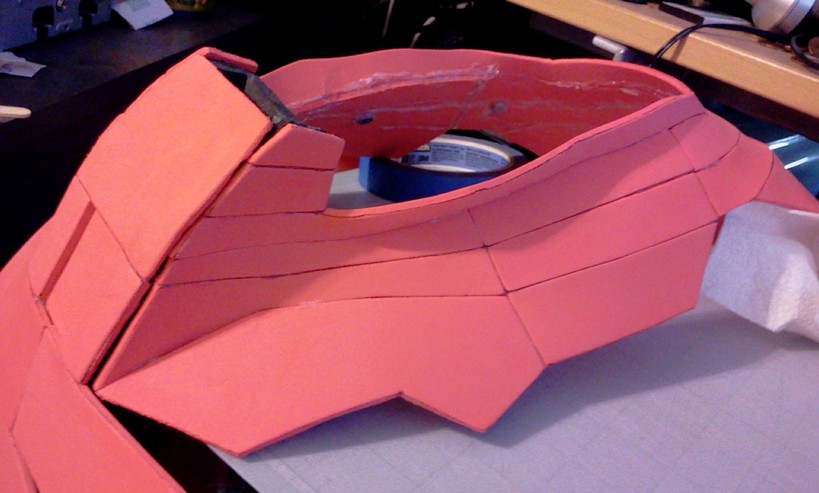
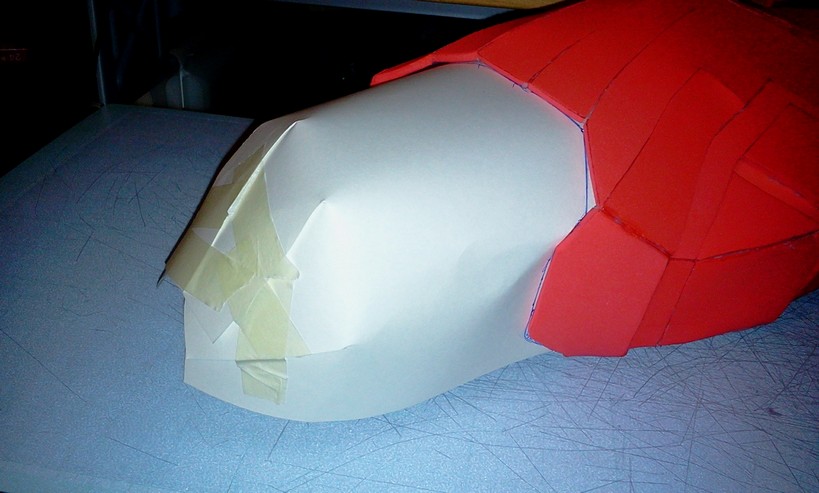
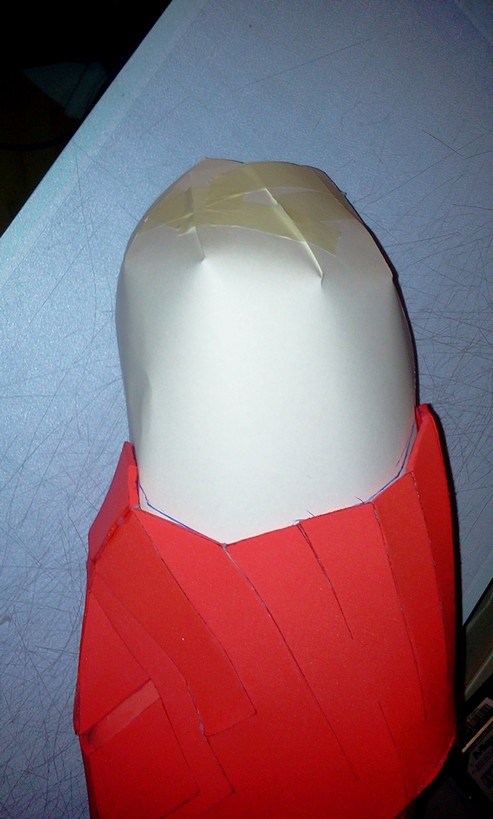
--My NEW 22" HELMET FROM MIGHTJOHN FROM A EBAY WIN - VERY TIGHT AND HAD HIM CUSTOM MAKE HINGES BUILT INTO IT, CURRENTLY MAKING CHANGES TO THE HINGES TO WORK BETTER WITH THE HELMET
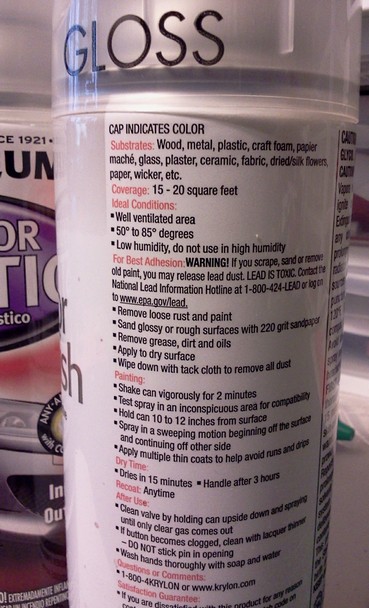
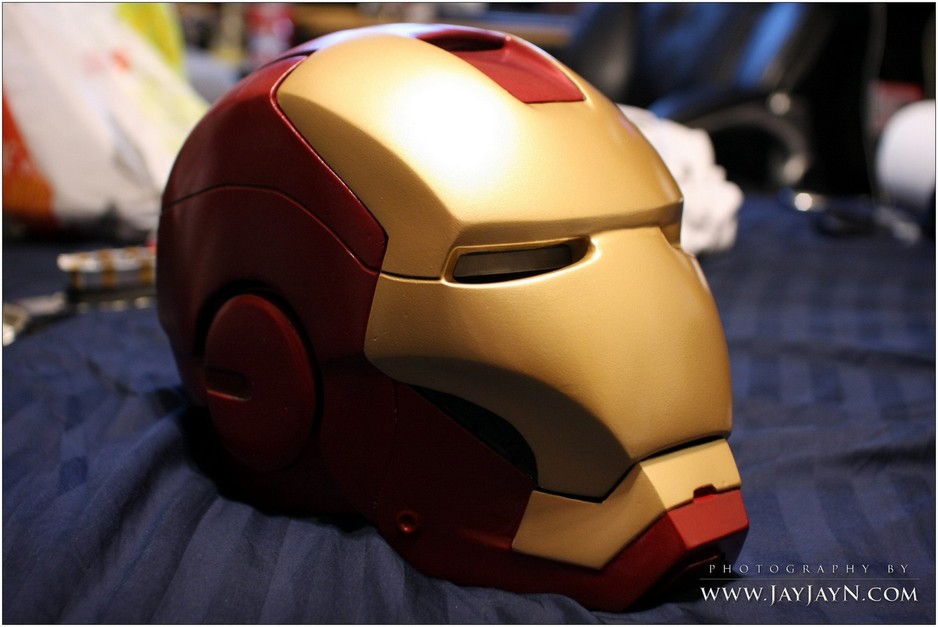
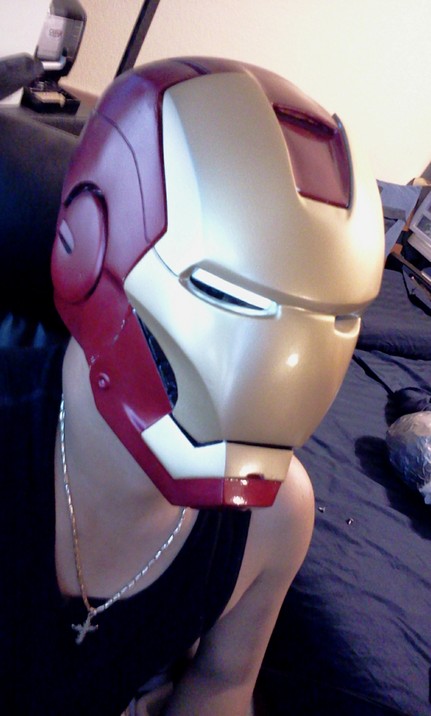
I didn't do any preping or filling because i had to rush it in a few hours for a party, going to redo the paint job later.
Painted with:
Duplicolor - Adhesion Promoter Part # CP199 $6.49 Each - Duplicolor CP199 - Adhesion Promoter | O'Reilly Auto Parts
Duplicolor - Dark Cherry Metallic Touch-Up Paint Part # BGM0449 $6.99 Each - Duplicolor BGM0449 - Touch-Up Paint | O'Reilly Auto Parts -
Duplicolor -Part Number: BFM0351- Dupli-Color/8 oz. sunburst gold metallic Perfect Match paint - 6.99
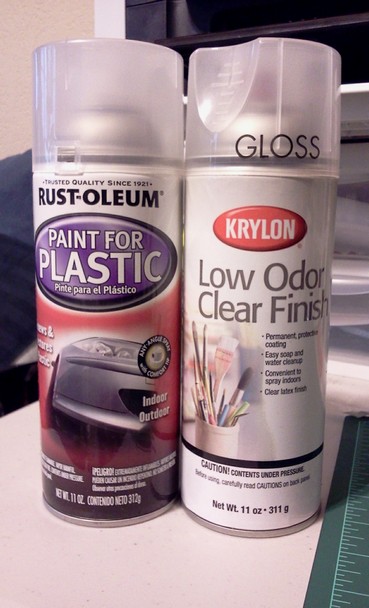
Rust-Oleum Paint for Plastic Spray Clear Coat Gloss - 254855
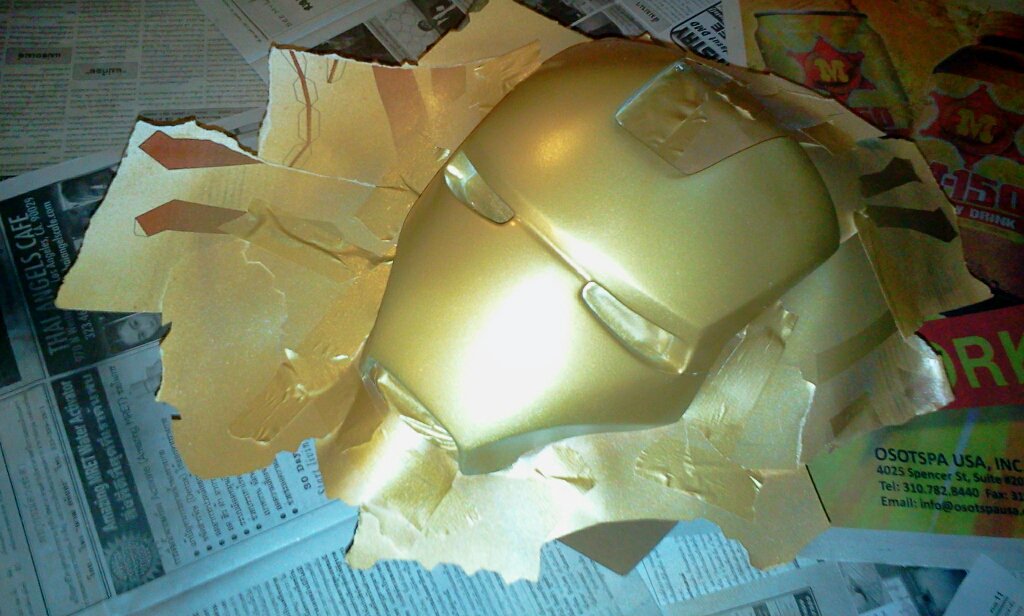
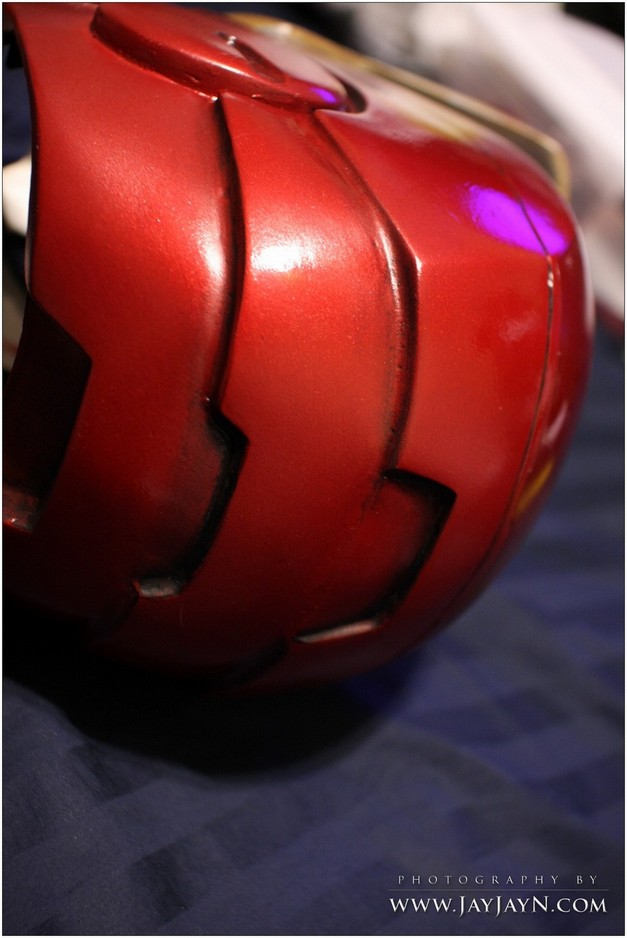
Using black acrylic to detail the fine lines around the helmet and smudging with a finger to make it weathered.
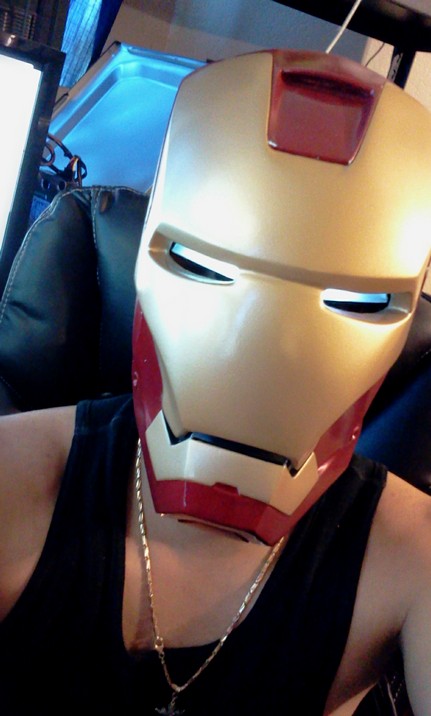
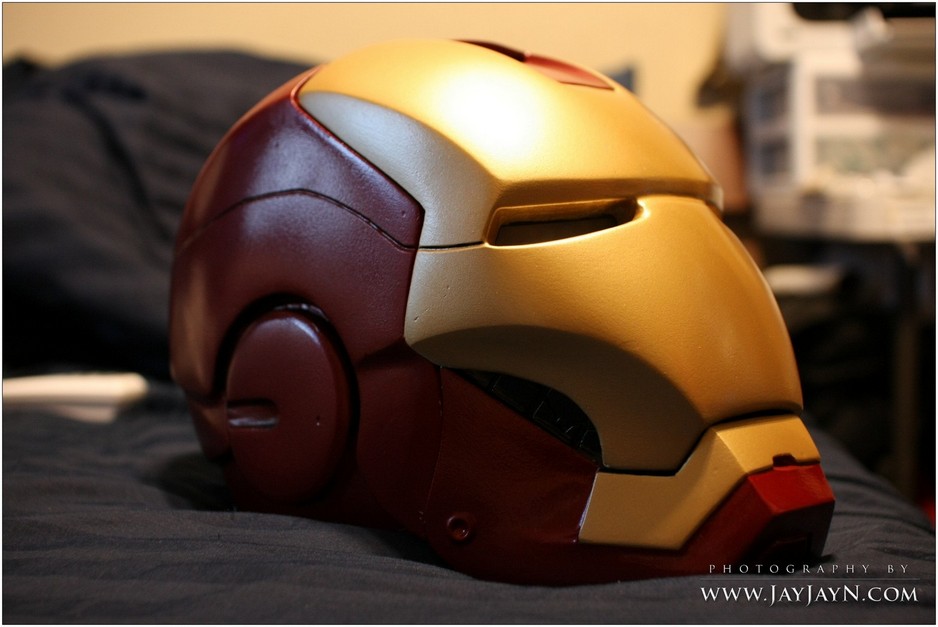
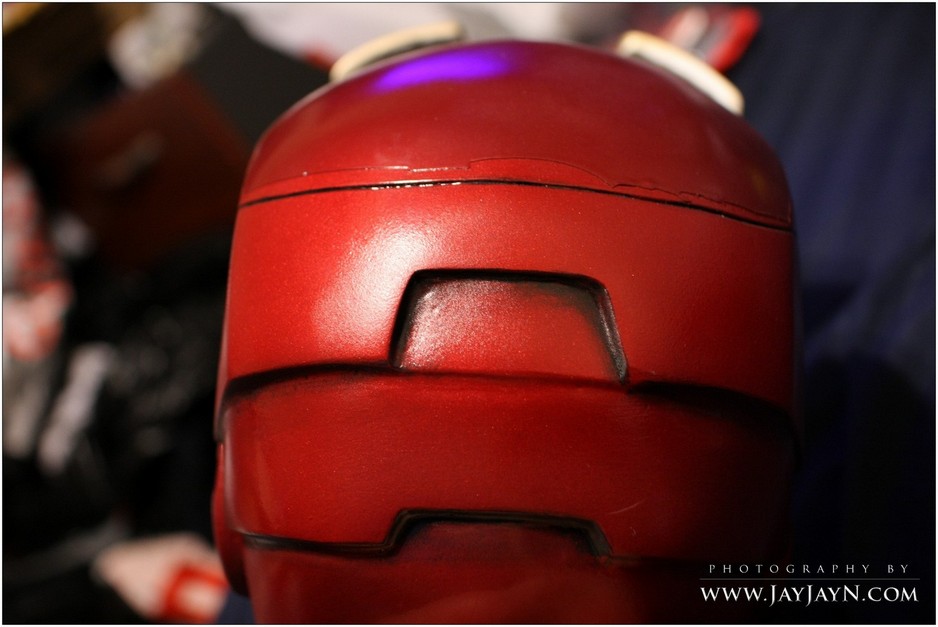
I had a lot of issues with a rush paint job in a few hours and ended up messing up the top portion of the helmet and repainting it for a party
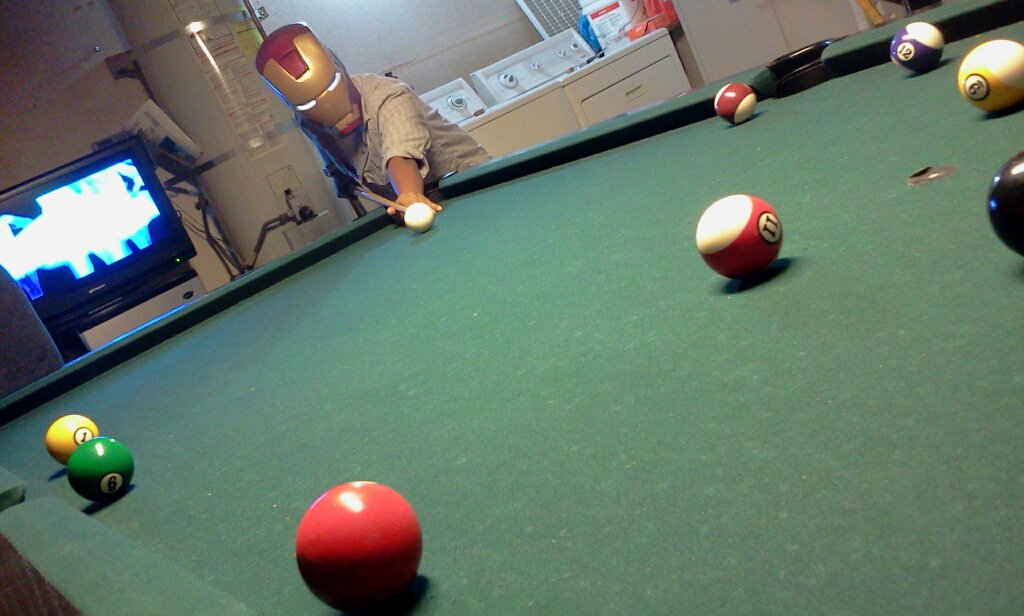
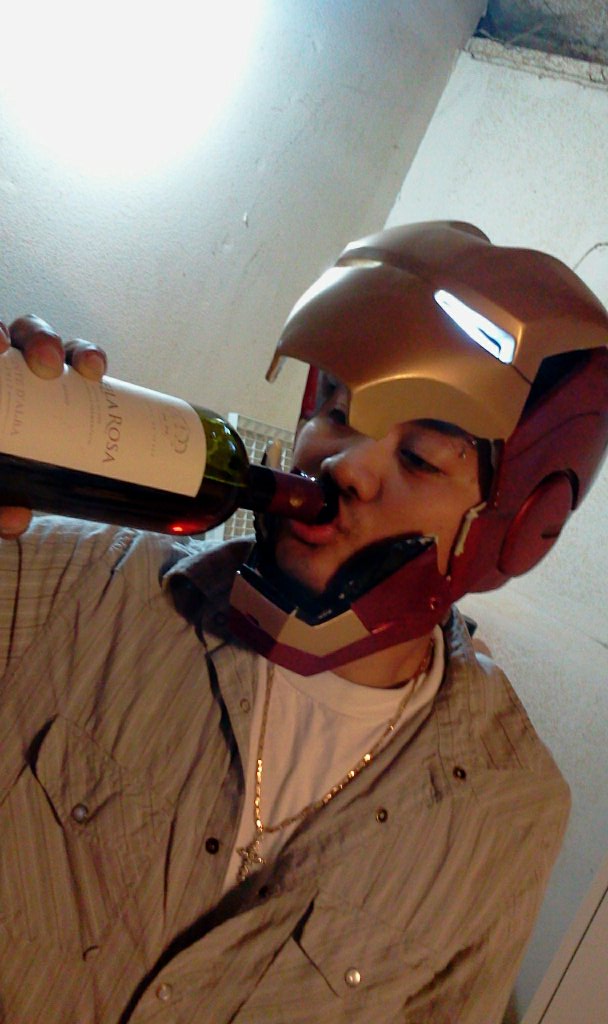
Was lucky enough to make it to the party at midnight and have a lil fun.

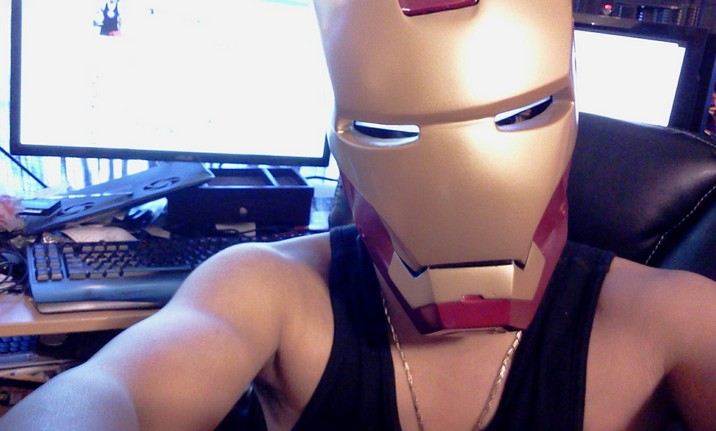
Here is a video of the helmet with the eyes lightup and my issue with my hinges with my servo's
IRON MAN HELMET EYES LIGHT UP AND MOTORIZED HINGE TEST - YouTube
also here's the link to the thread with our progress on MIGHTYJOHN'S hinges
http://www.therpf.com/f24/iron-man-helmet-motorized-hinge-problems-video-126124/
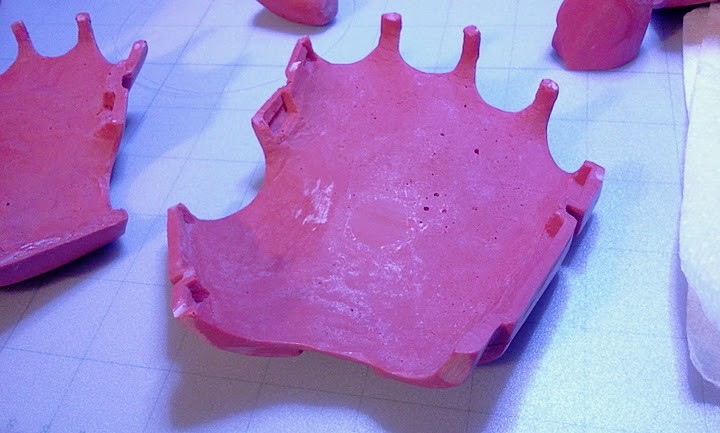
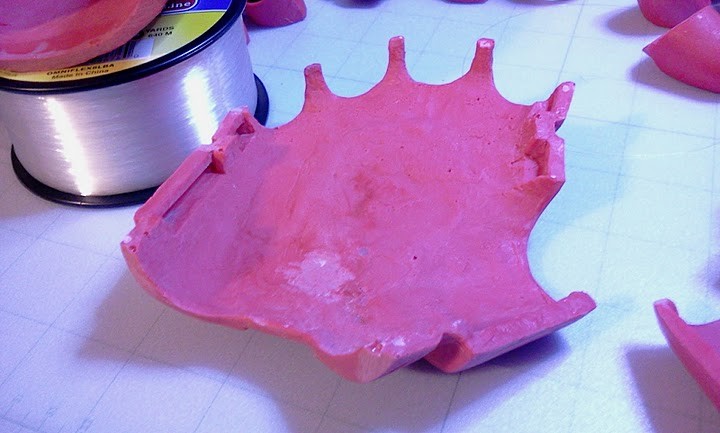
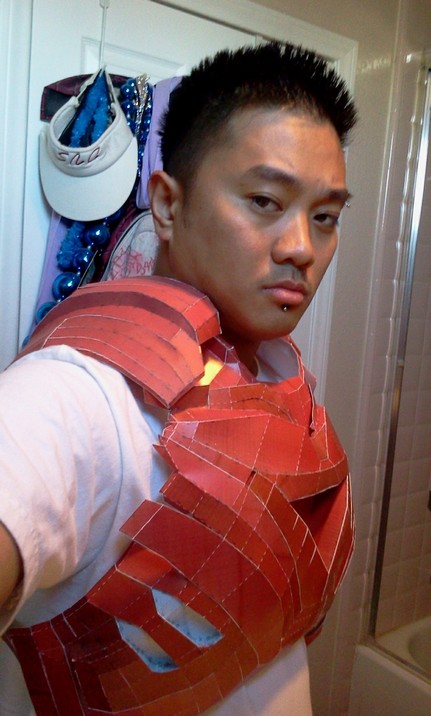
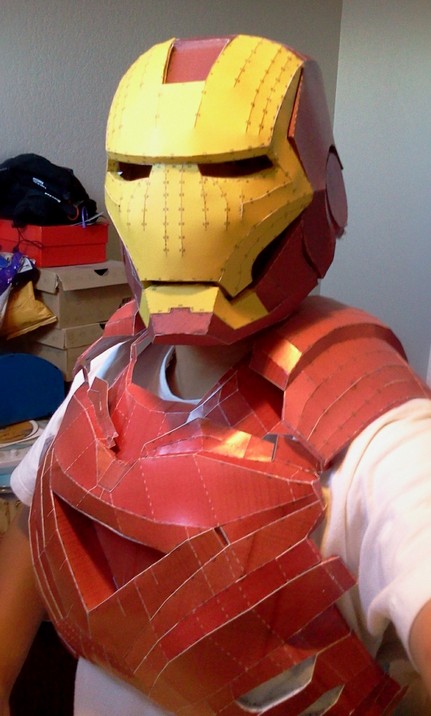
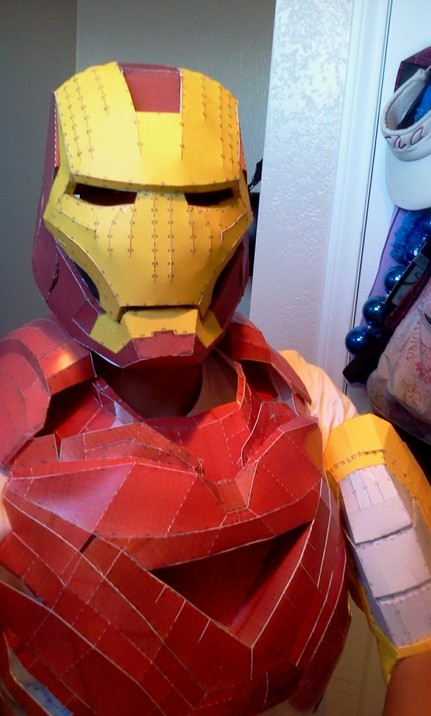
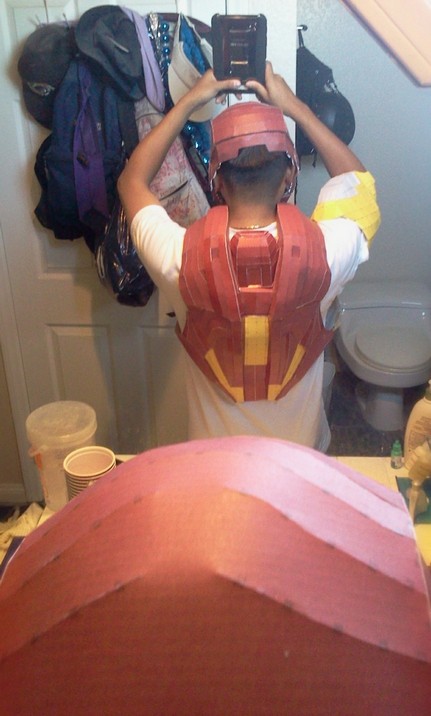
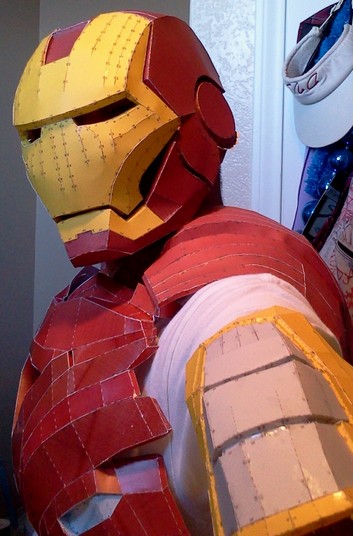
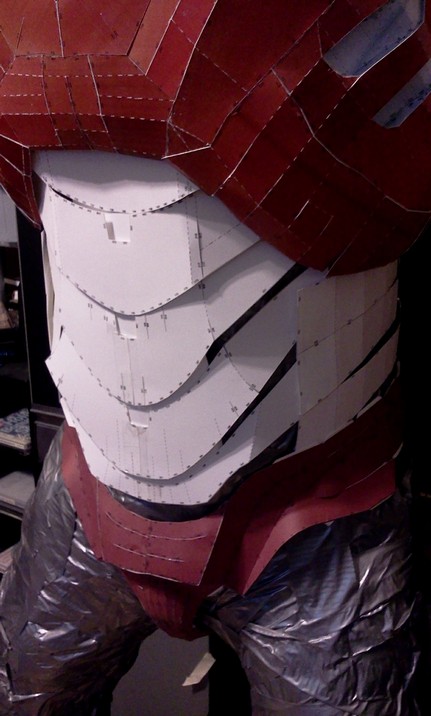
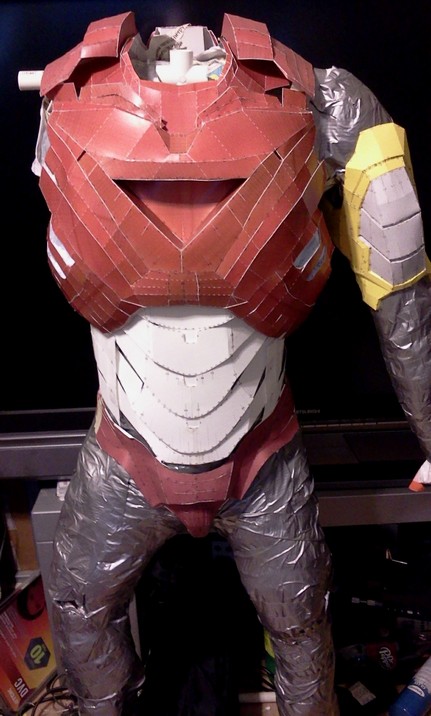
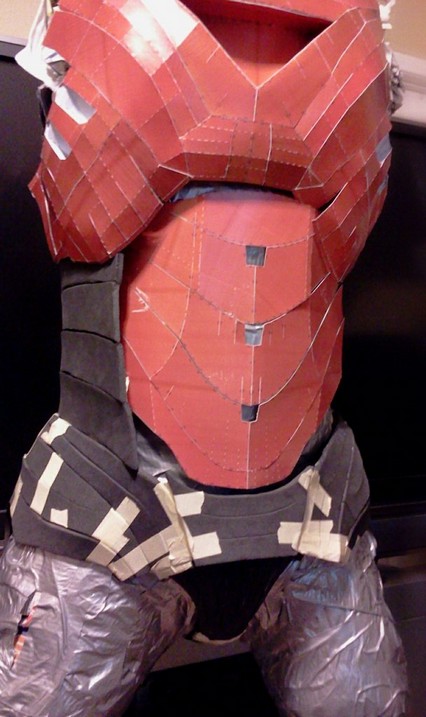
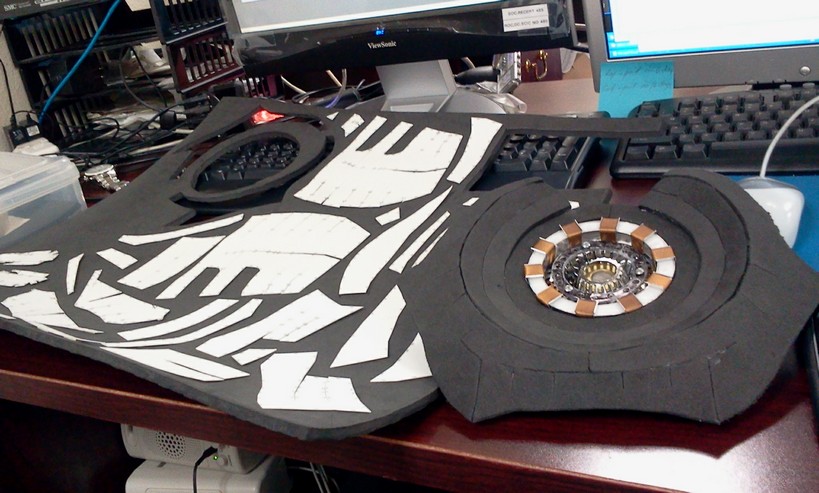
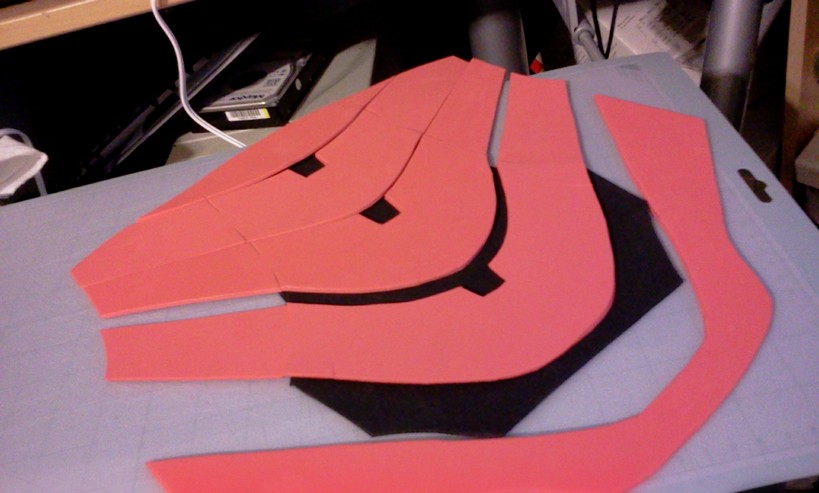
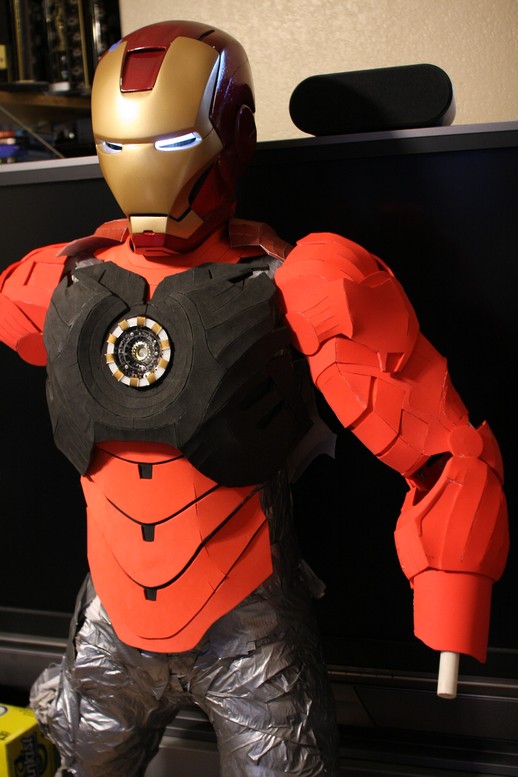
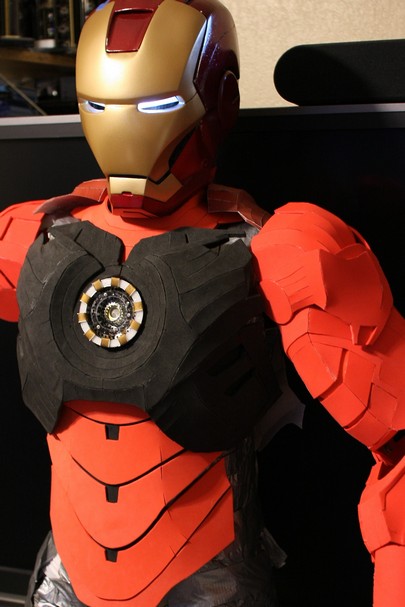
--FOAM CHEST PIECE OUT OF THE THICKER FOAM - ENDED UP REDOING IT TO BE LARGER IN THE 4MM EVA FOAM SINCE I REALIZED THIS DOESN'T SEEM LARGE ENOUGH FOR THE CHEST AREA

--ABS PORTION IN 3MM FOAM - will be changing this to be overlapping so i can sit down, as suggested in another thread i can't find that someone did on a MARK V build
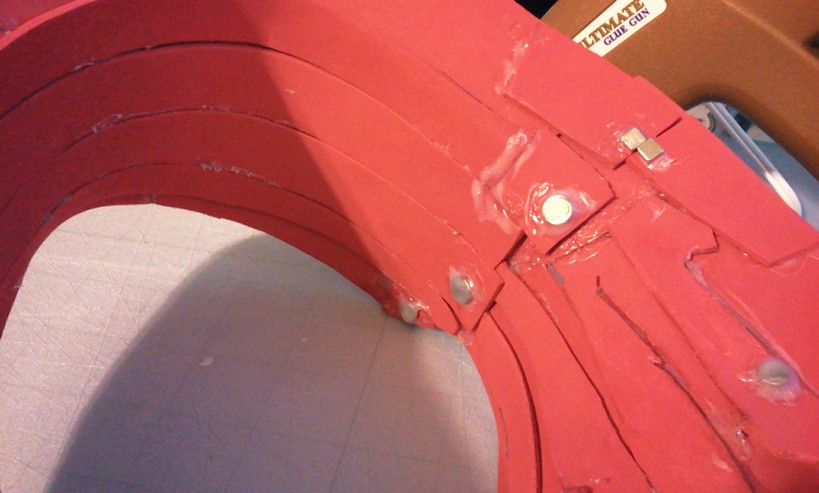
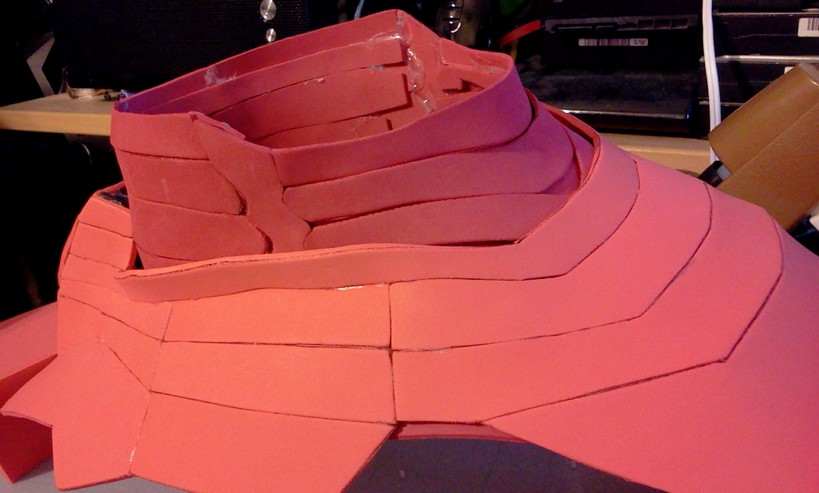
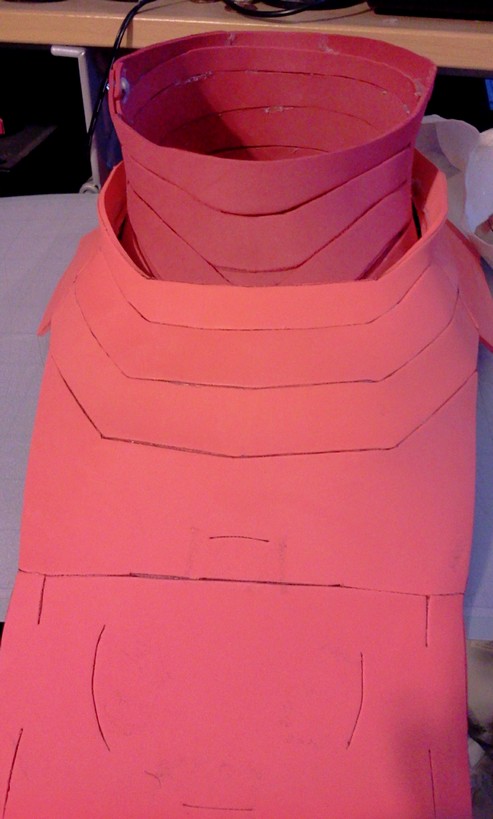
--NECK PORTION IN 2MM FOAM - so it would be more flexible and comfortable
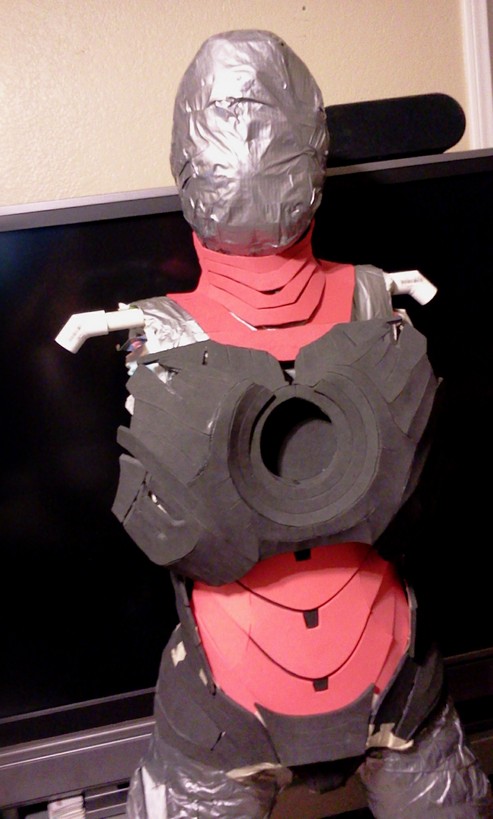
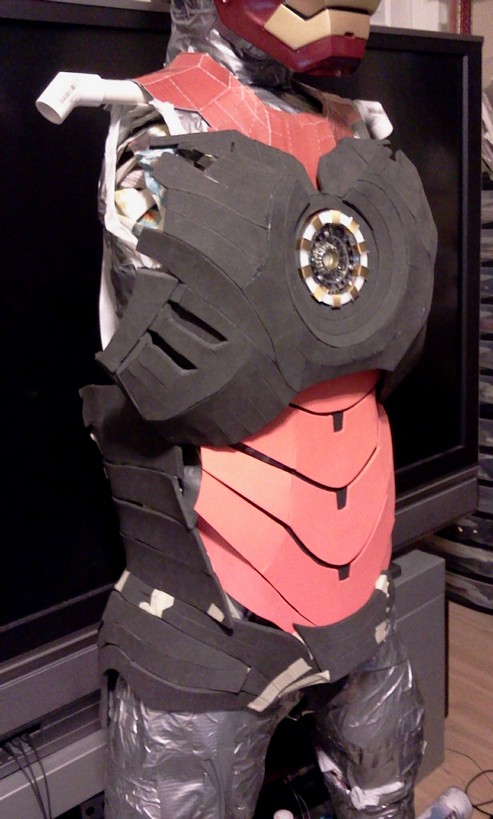
--Neck and Chest Brace mounted with rare earth magnets
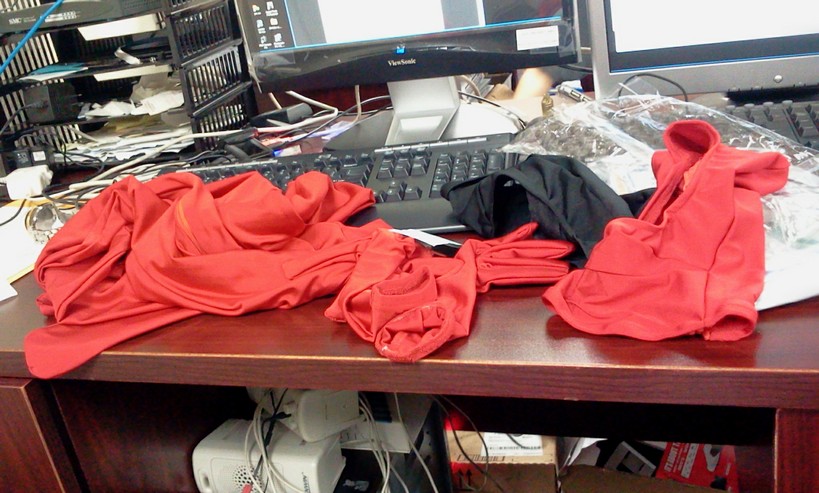
Got my dark red spandex zentai dark red suit from ebay - I specifically asked for the dark red suit isn't listed on ebay
eBay - New & used electronics, cars, apparel, collectibles, sporting goods & more at low prices
the neck piece and neckbrace below aren't fully glued and doesn't have the magnet latches.

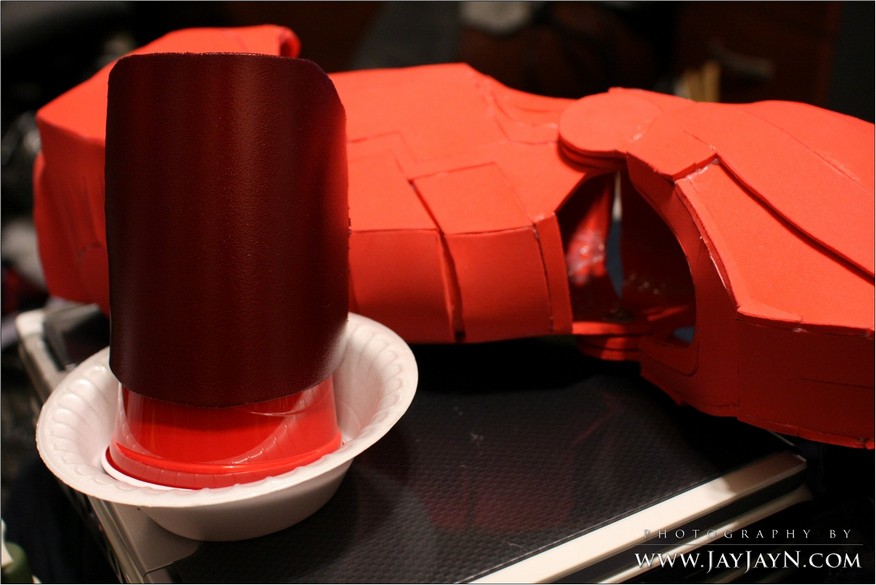
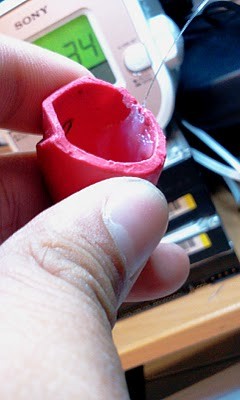
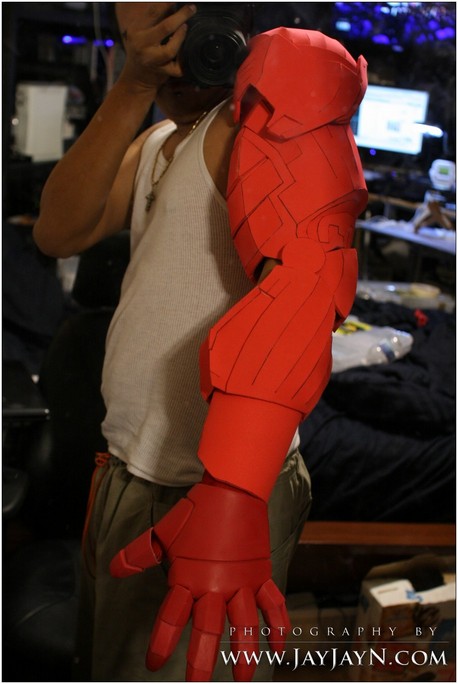
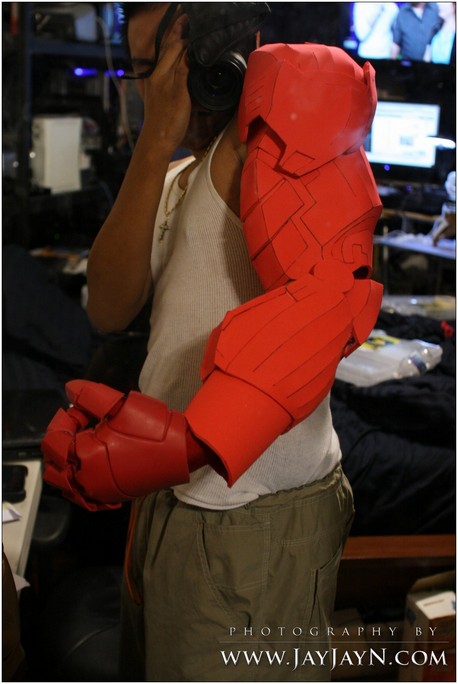
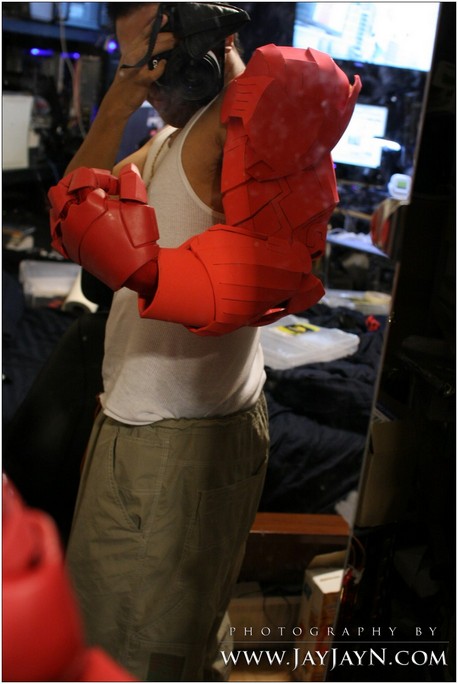
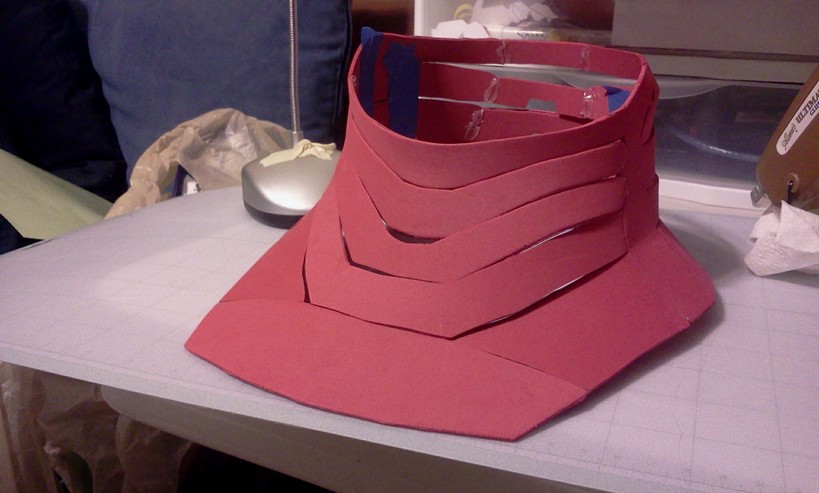
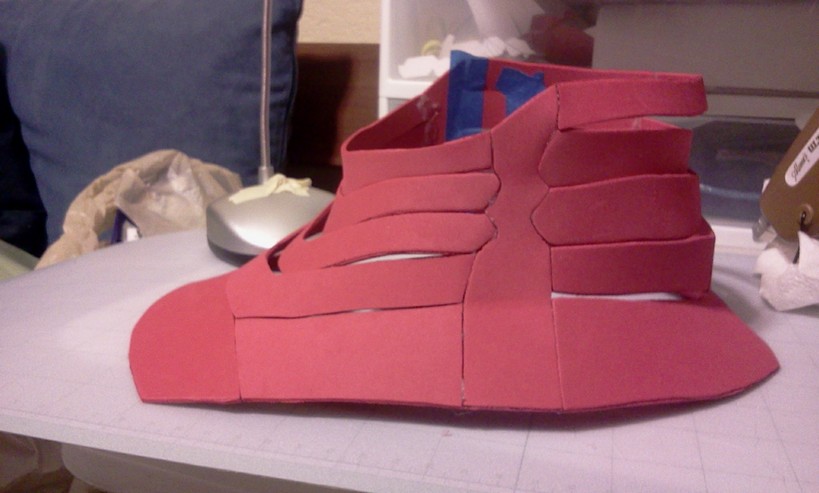
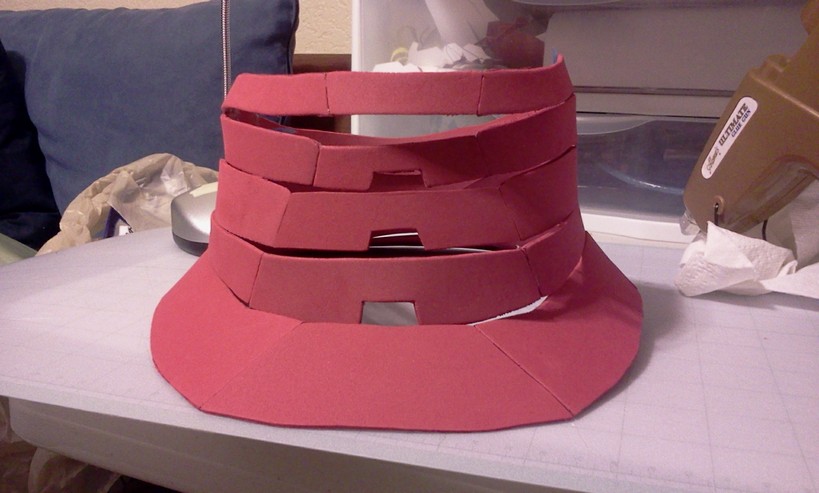
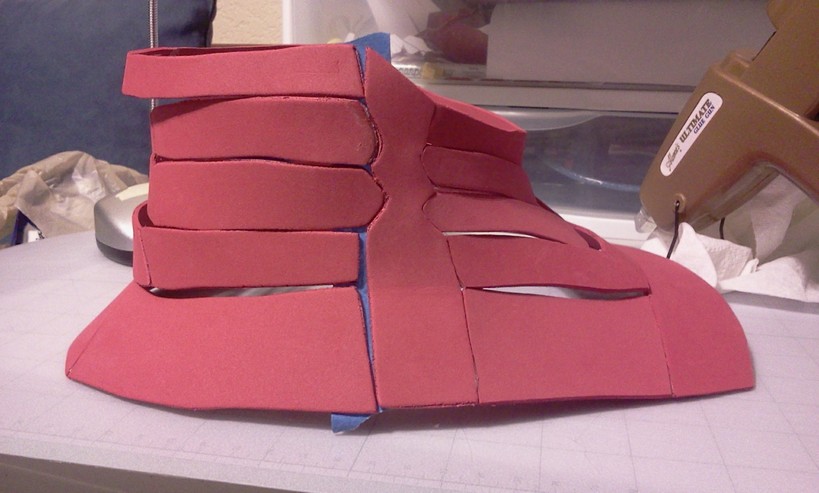
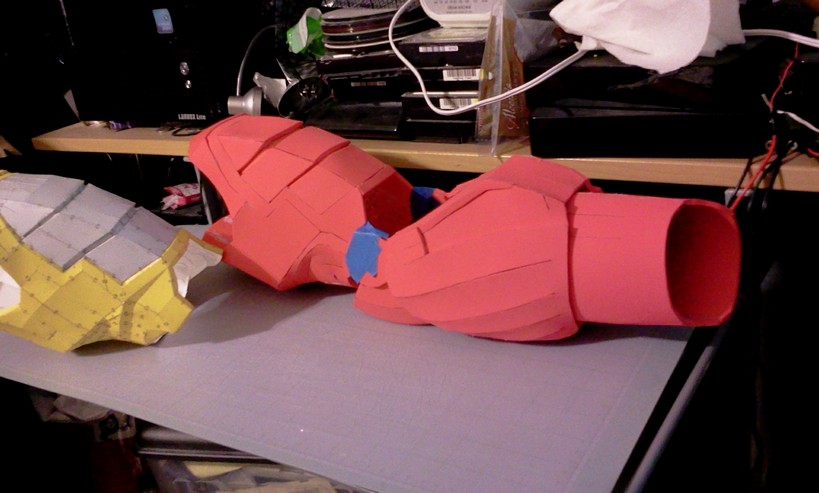
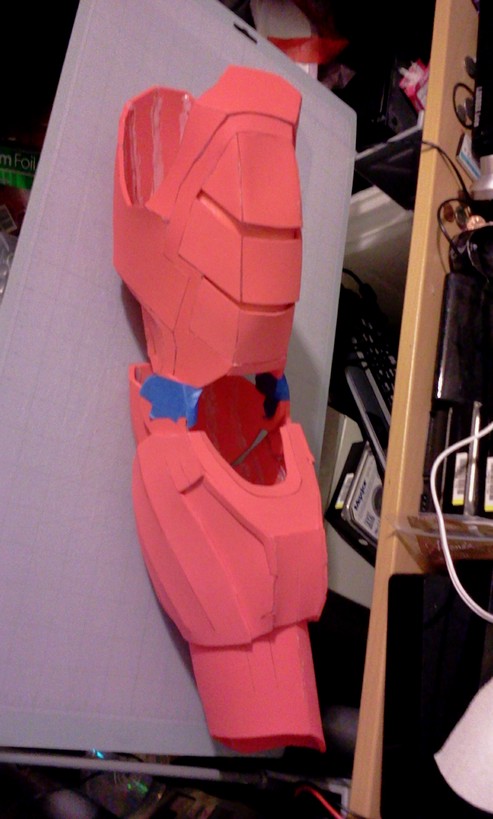
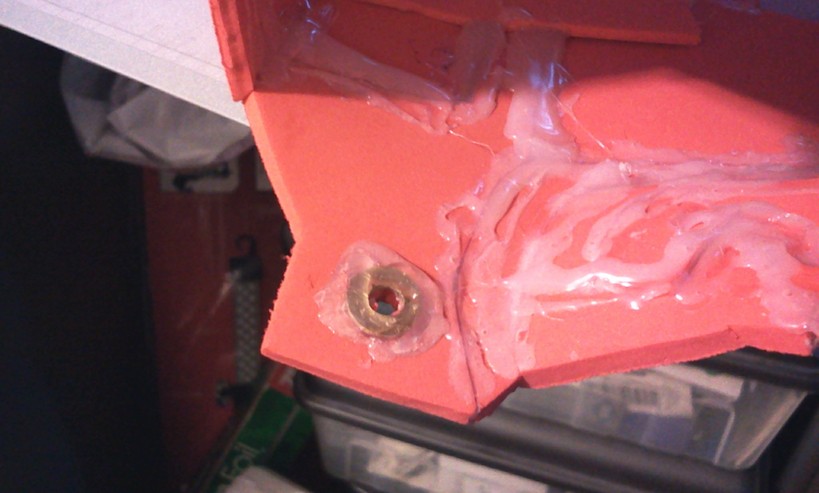
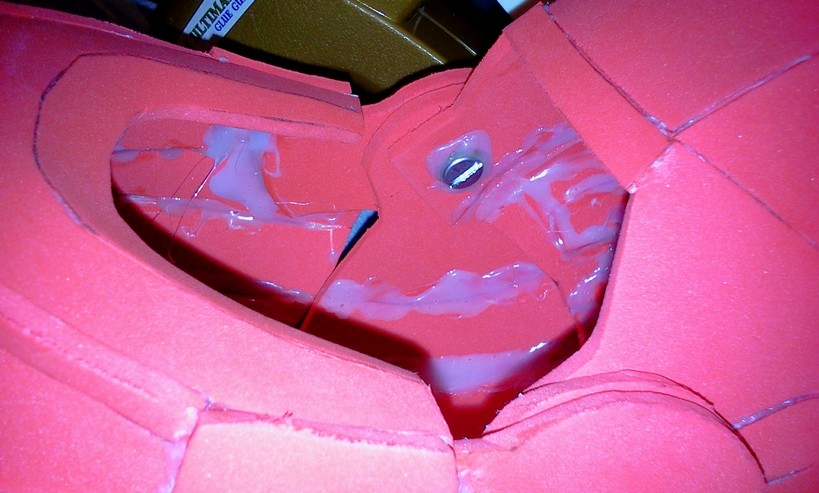
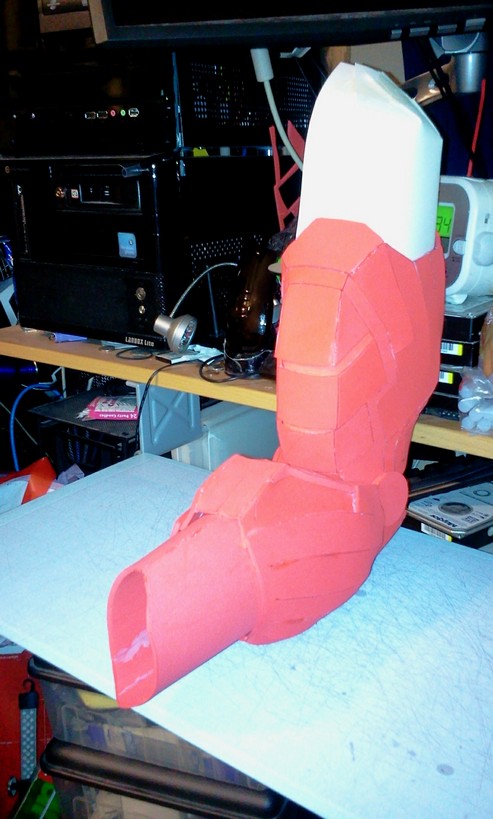
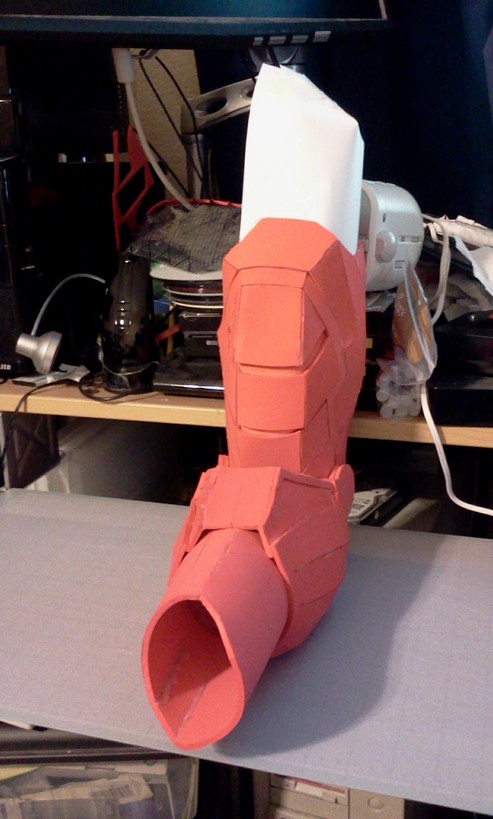
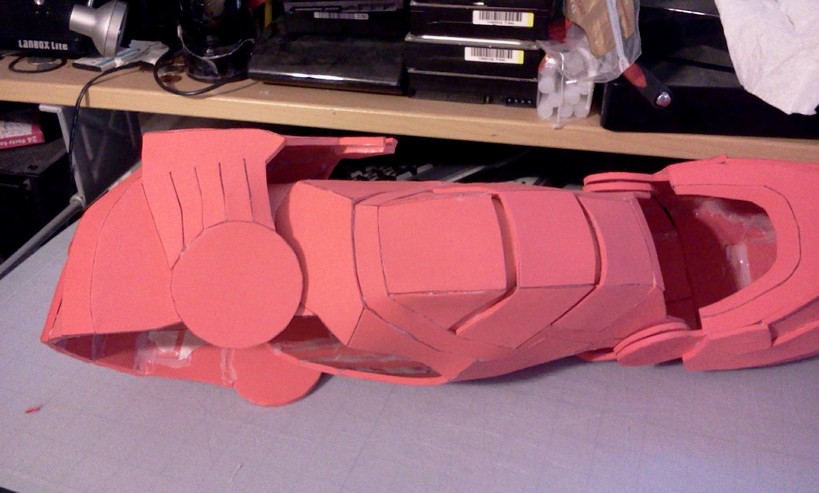
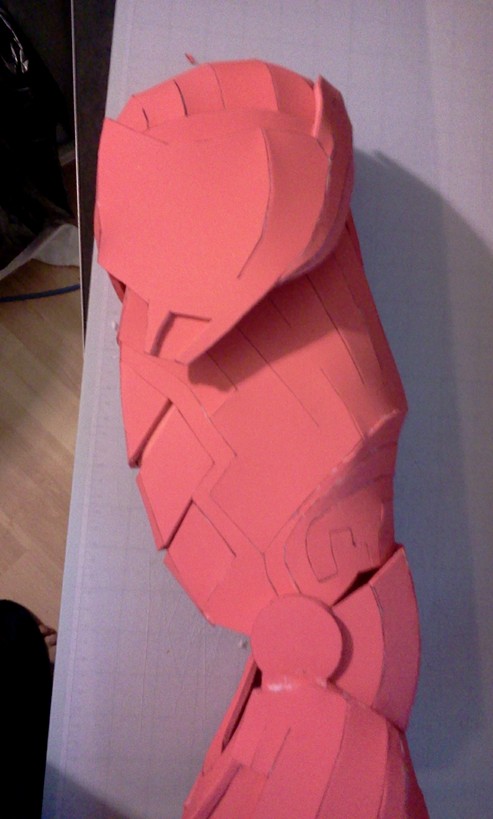
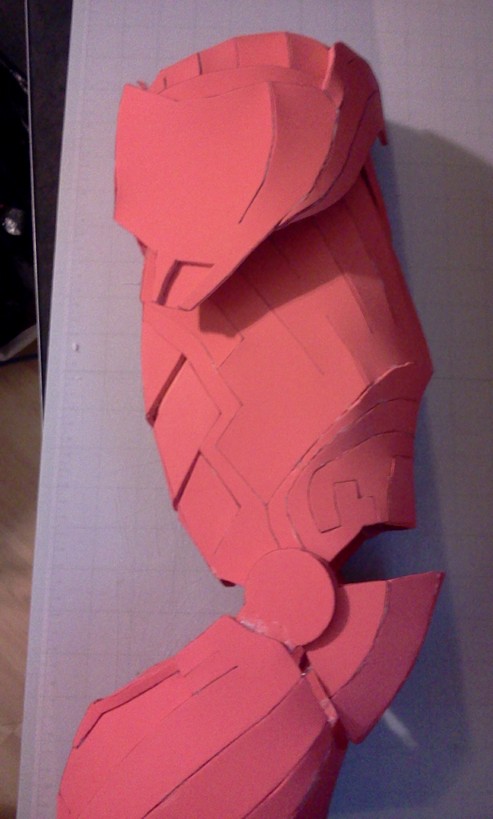
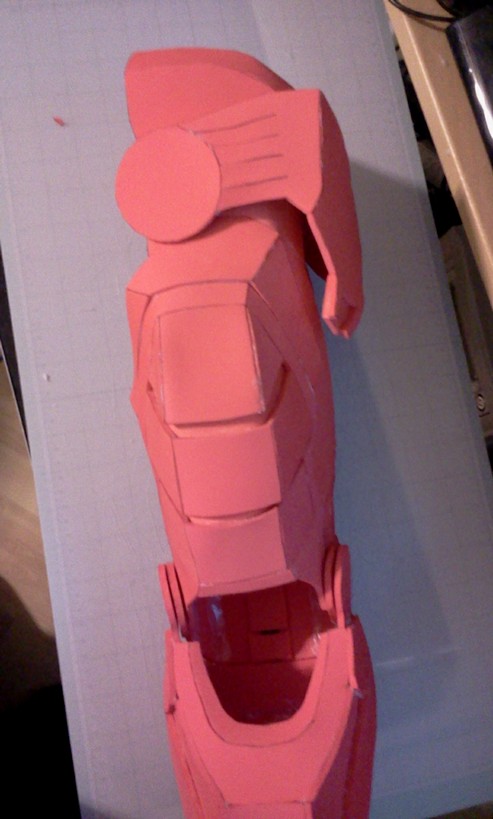
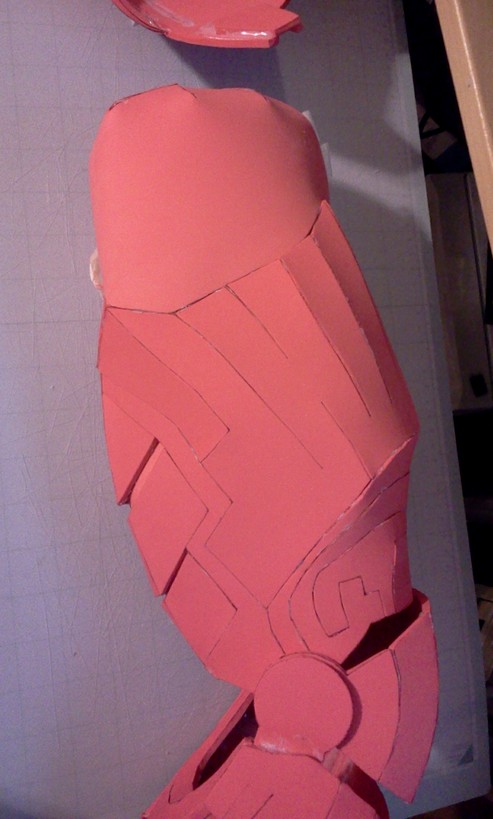
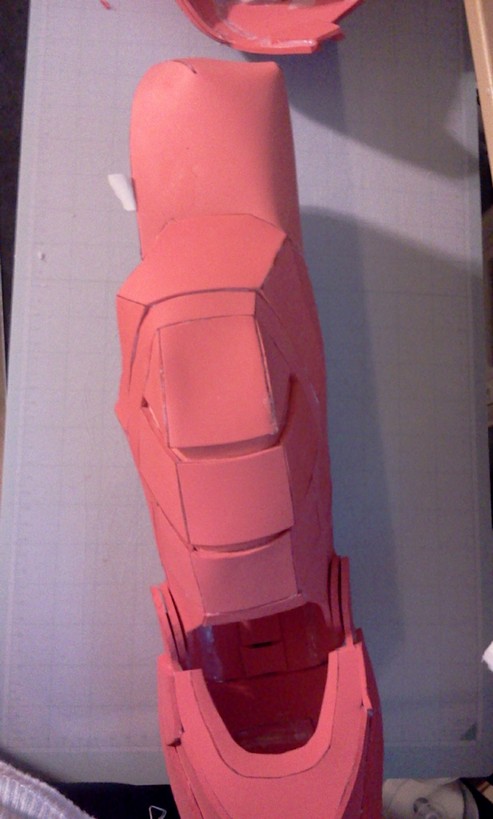
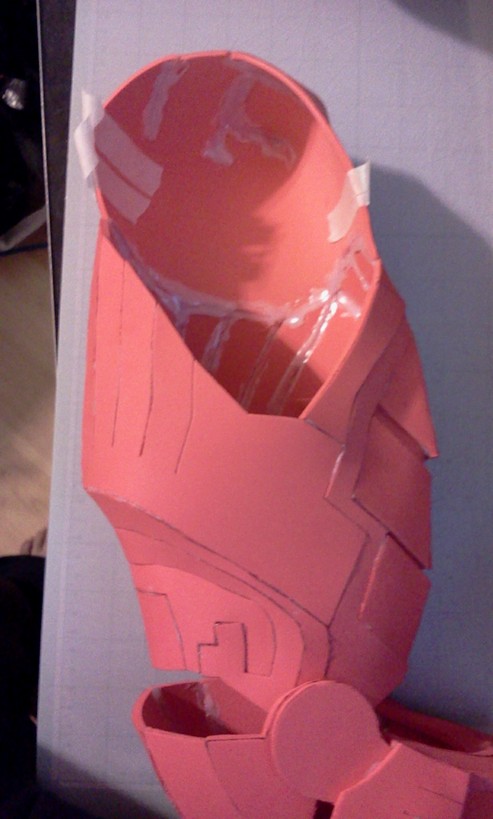
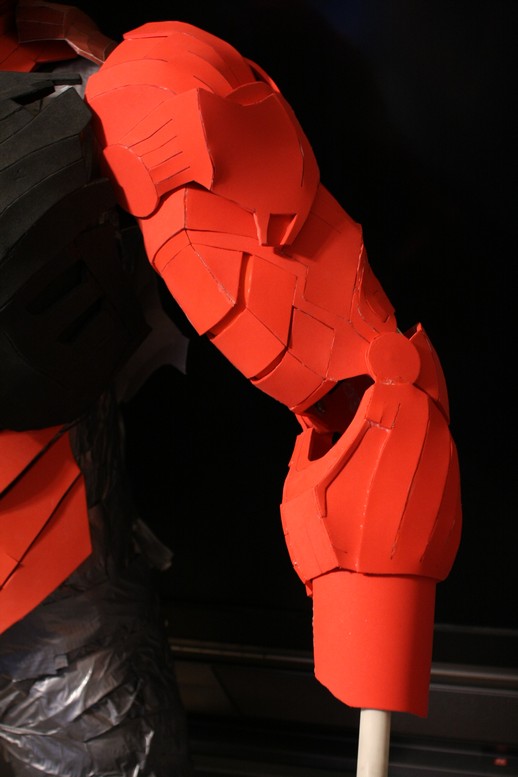
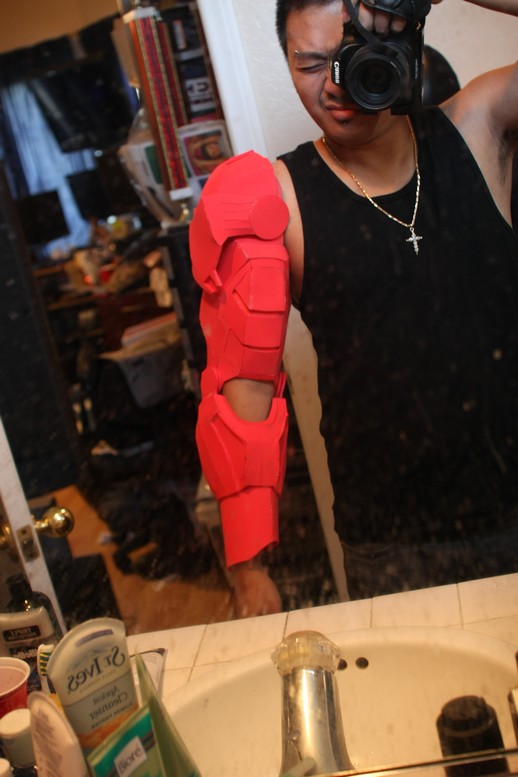
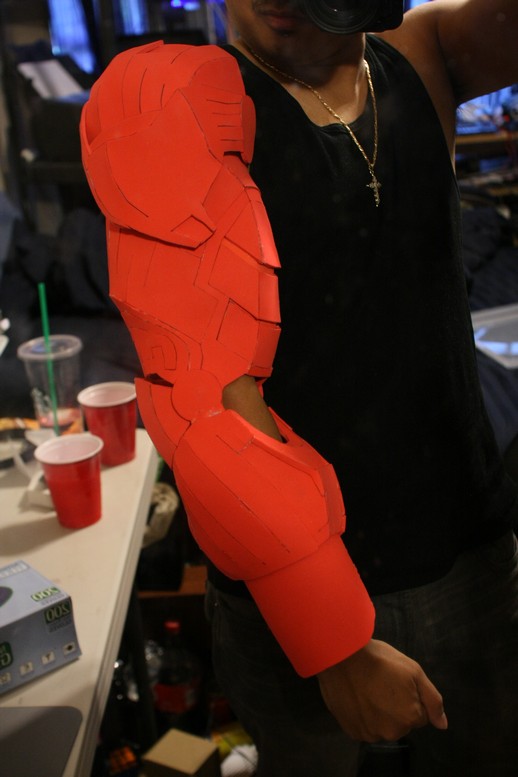
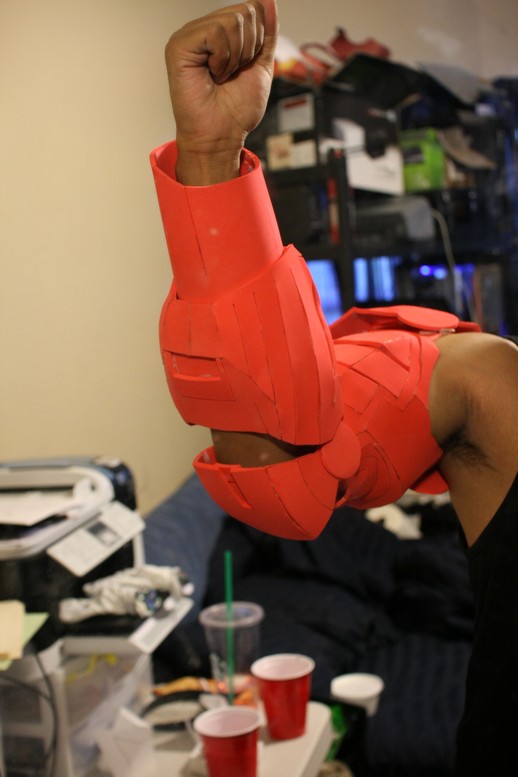
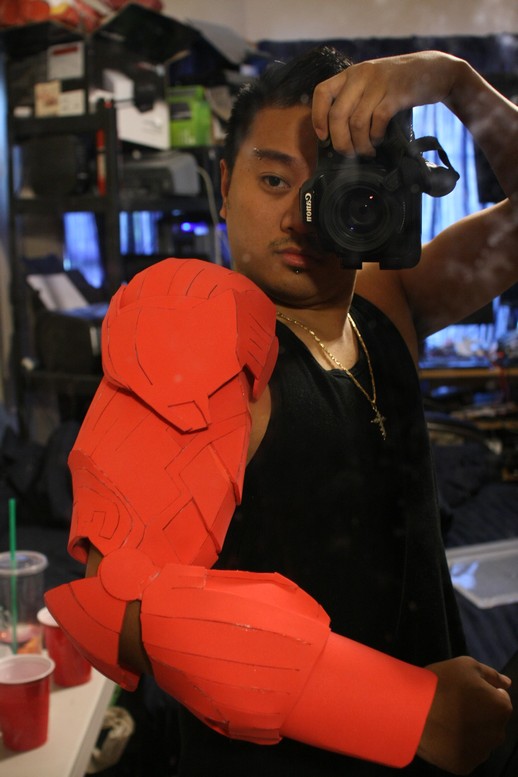
--Arm in 4mm eva foam
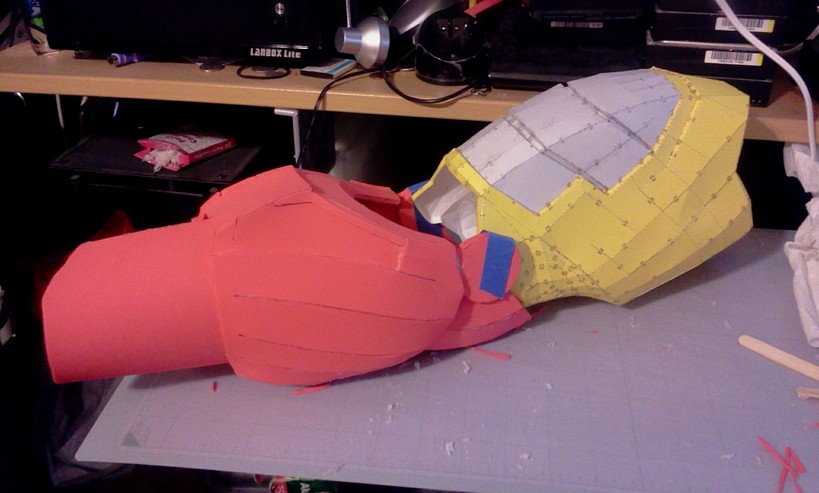
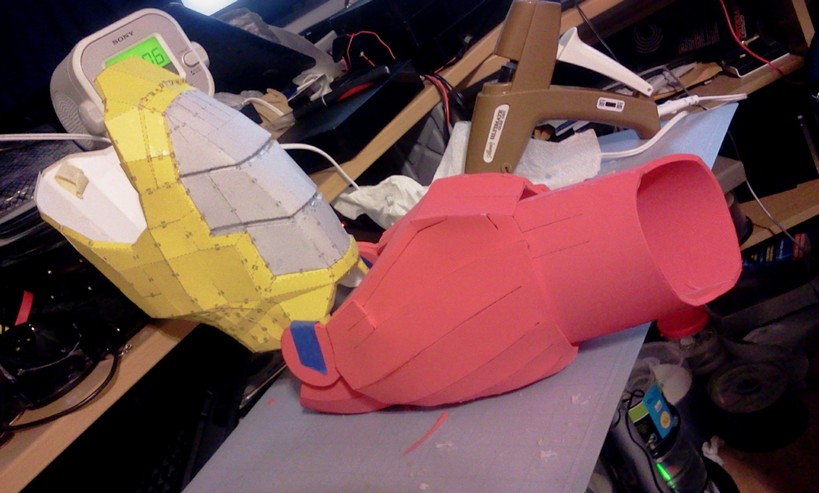
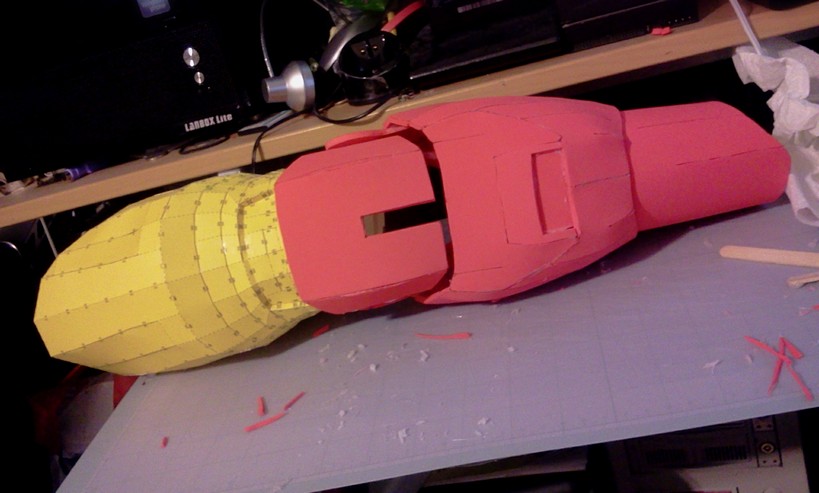
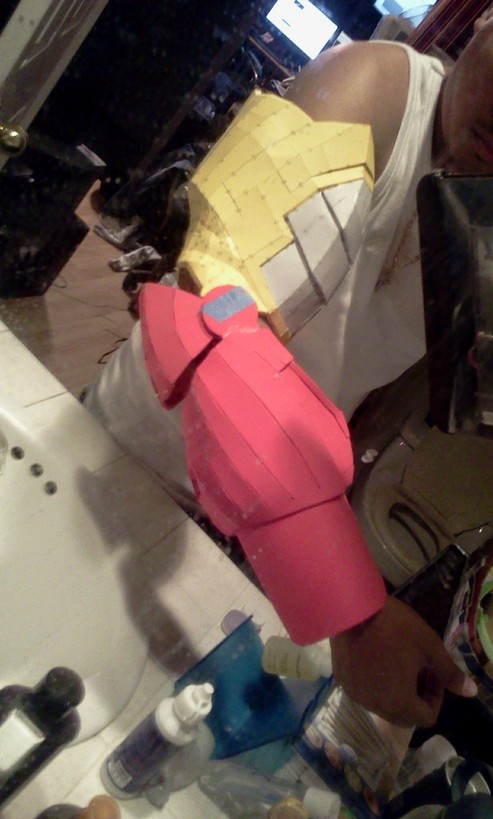
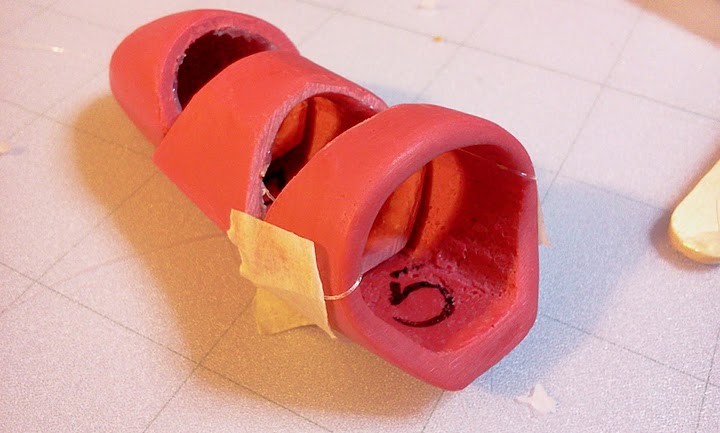
--FULL Arm in 4mm eva foam , BICEP made from GLENN TECH's Foam Templates
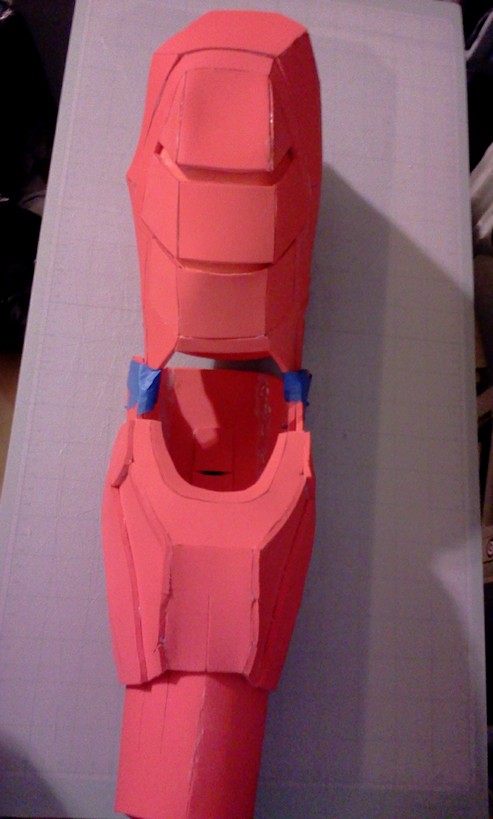
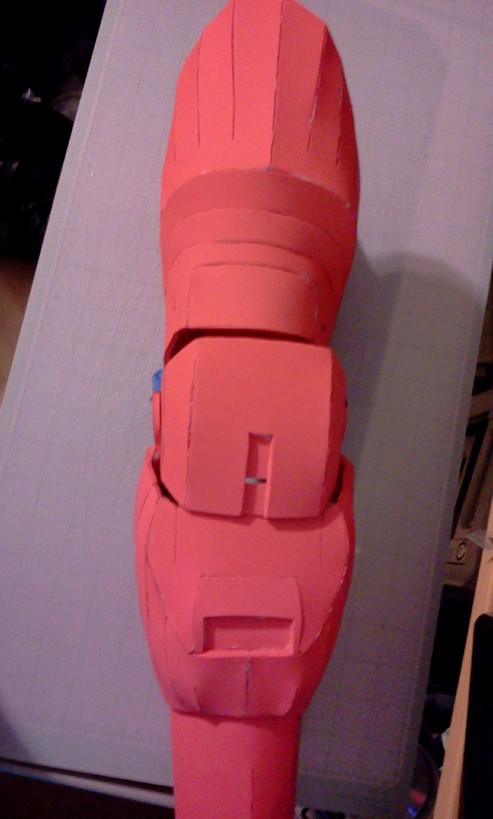
Using screw posts from home depot , and realized using a 1/2" screw was better and a 1/4" screw post

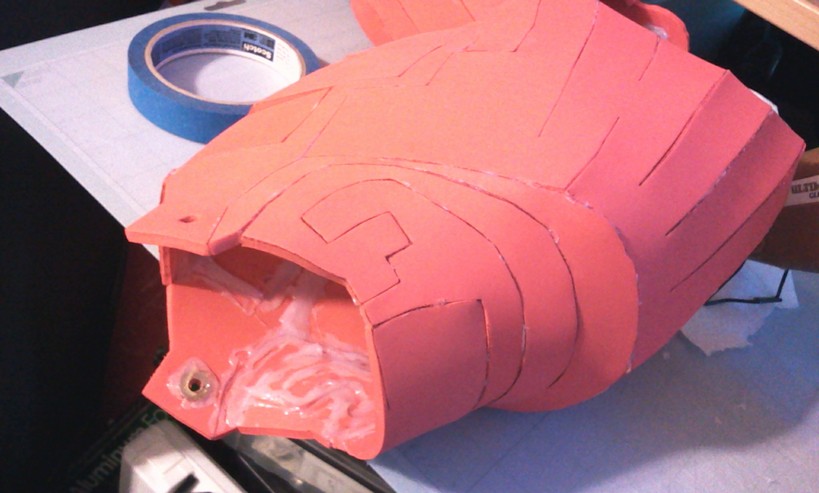

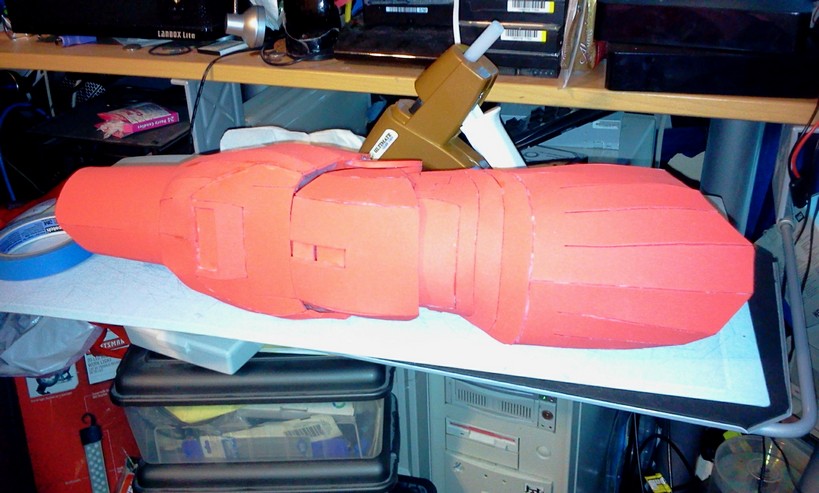
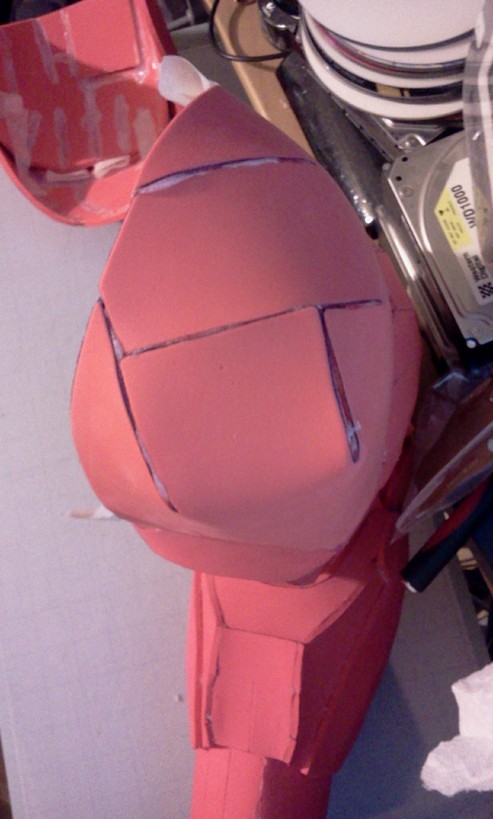
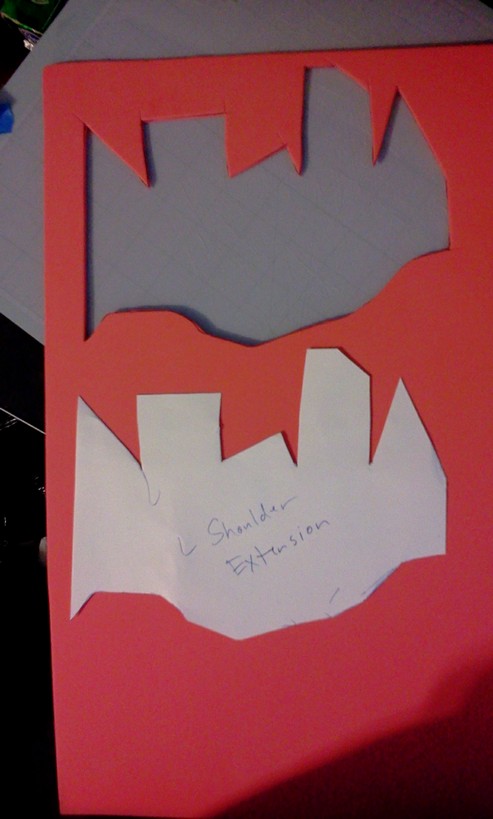
--Inspired by Graphic Jordan to make a custom top bicep portion to help hold the arm up on the shoulders


I have been on this forum for a few months now and been doing my build since then and now i'm ready to show my progress.
Originally i was working on a pep job of the Mark VI and realized from pictures that a foam build would be more suitable on time
and ease of the build over a fiberglass pep build.
I originally was using the foam mats that stealth recommended but i realized for my Mark IV build i prefered to use a thinner 4mm eva foam as used by Graphic Jordan, and some 2mm, 3mm foam for certain parts of the build. I decided to switch over to the Mark IV build since its easier to get a Arc Reactor for the Mark IV
I'm currently using modified robo3687 pep files that i modified to work with foam and my Silhouette SD, i'm also using some files of GLENN TECH's foam files modified to my liking and modified to be cut on my cutter as well.
Thanks to Graphic Jordan and indiefilmgeek if it wasn't for there threads i would have not figured out tips and tricks on what to do in this build. STEALTH's foam build vid's helped alot as well.
Helmet - MightyJohn's first cast won on ebay and installed his hinges - currently working on a modified version to work with my servo's
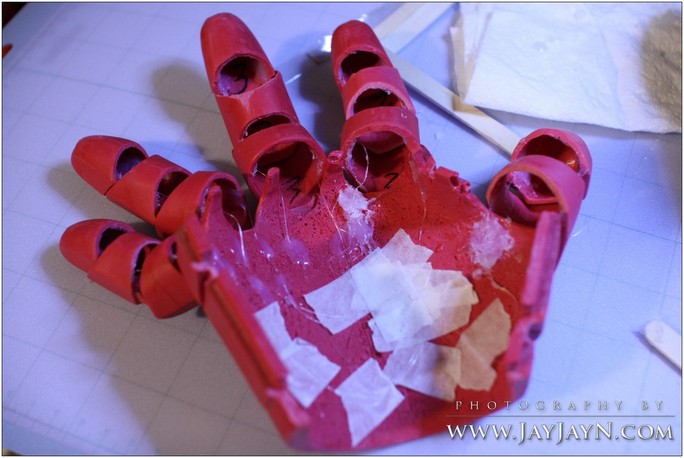
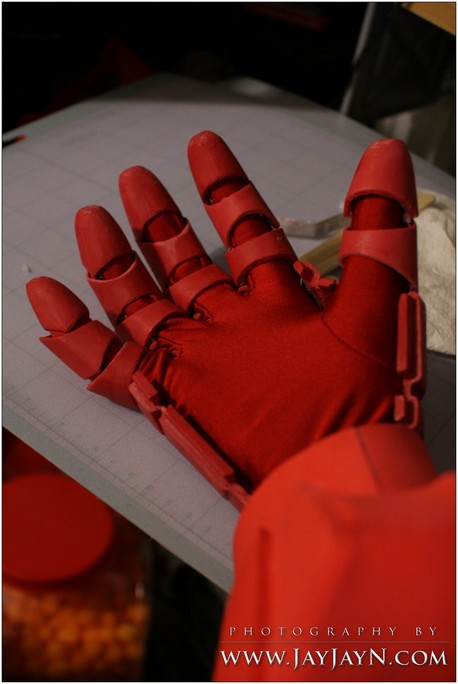
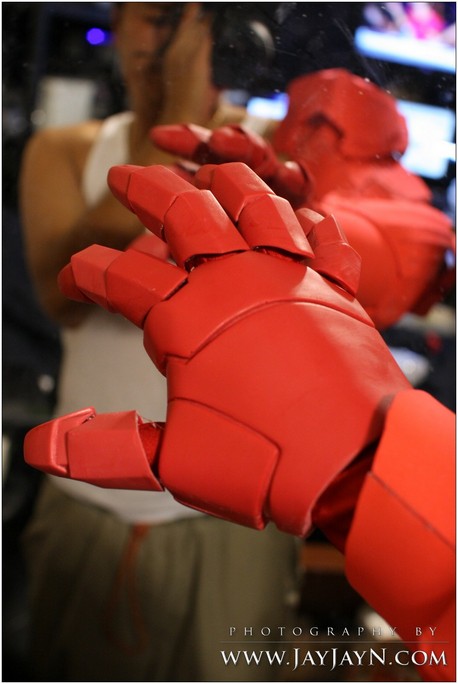
Gloves - Polyeurethane gloves from Zabana
I'm also working on gathering all the reciepts so everybody can get a idea of how much i spent on this build.
--MY FIRST PEP JOB
CAN'T LIVE WITHOUT THIS!! realized it was more effective setting up the settings like this over some recommendations that others have posted.
SIZE
WIDTH: 214
HEIGHT: 305
SIDE MARGIN: 15
TOP/BOTTOM MARGIN: 32
--COD PIECE IN FOAM - ENDED UP MAKING IT TOO BIG AND WILL THROW OUT THIS PART AND REMAKE IT USING GLENN TECH's FILES
--Custom $2 LED Eyes
I took apart a 9 LED FLASH light from the 99cent's store very hard to find, had to go to numerous stores to find 3.
I'm also using a white reflective sheet from a ipod nano cover.
I didn't have a circuit board so tried to do it in foam.
I made the front diffused by using a CD case holder from a asian store and it diffused the light well.
I finnally got a proper circuit board and made the other eye.
I ordered a Pololu Micro Controller and programmed it to open the servo's and light up the eyes.
Here is a video of my light up eyes i have it studder when lighting up like flickering office lights when turning on.
PEPAKURA IRON MAN HELMET EYES LIGHT UP - YouTube
--I RECIEVED MY ARC REACTOR FROM EBAY BUT REALIZED SHORTLY THAT IT STARTED FAILING AND CURRENTLY WORKING WITH THE SELLER TO GETTING A THIRD REPLACEMENT
--My NEW 22" HELMET FROM MIGHTJOHN FROM A EBAY WIN - VERY TIGHT AND HAD HIM CUSTOM MAKE HINGES BUILT INTO IT, CURRENTLY MAKING CHANGES TO THE HINGES TO WORK BETTER WITH THE HELMET
I didn't do any preping or filling because i had to rush it in a few hours for a party, going to redo the paint job later.
Painted with:
Duplicolor - Adhesion Promoter Part # CP199 $6.49 Each - Duplicolor CP199 - Adhesion Promoter | O'Reilly Auto Parts
Duplicolor - Dark Cherry Metallic Touch-Up Paint Part # BGM0449 $6.99 Each - Duplicolor BGM0449 - Touch-Up Paint | O'Reilly Auto Parts -
Duplicolor -Part Number: BFM0351- Dupli-Color/8 oz. sunburst gold metallic Perfect Match paint - 6.99
Rust-Oleum Paint for Plastic Spray Clear Coat Gloss - 254855
Using black acrylic to detail the fine lines around the helmet and smudging with a finger to make it weathered.
I had a lot of issues with a rush paint job in a few hours and ended up messing up the top portion of the helmet and repainting it for a party
Was lucky enough to make it to the party at midnight and have a lil fun.
Here is a video of the helmet with the eyes lightup and my issue with my hinges with my servo's
IRON MAN HELMET EYES LIGHT UP AND MOTORIZED HINGE TEST - YouTube
also here's the link to the thread with our progress on MIGHTYJOHN'S hinges
http://www.therpf.com/f24/iron-man-helmet-motorized-hinge-problems-video-126124/
--FOAM CHEST PIECE OUT OF THE THICKER FOAM - ENDED UP REDOING IT TO BE LARGER IN THE 4MM EVA FOAM SINCE I REALIZED THIS DOESN'T SEEM LARGE ENOUGH FOR THE CHEST AREA
--ABS PORTION IN 3MM FOAM - will be changing this to be overlapping so i can sit down, as suggested in another thread i can't find that someone did on a MARK V build
--NECK PORTION IN 2MM FOAM - so it would be more flexible and comfortable
--Neck and Chest Brace mounted with rare earth magnets
Got my dark red spandex zentai dark red suit from ebay - I specifically asked for the dark red suit isn't listed on ebay
eBay - New & used electronics, cars, apparel, collectibles, sporting goods & more at low prices
the neck piece and neckbrace below aren't fully glued and doesn't have the magnet latches.
--Arm in 4mm eva foam
--FULL Arm in 4mm eva foam , BICEP made from GLENN TECH's Foam Templates
Using screw posts from home depot , and realized using a 1/2" screw was better and a 1/4" screw post
--Inspired by Graphic Jordan to make a custom top bicep portion to help hold the arm up on the shoulders
Last edited:
") :thumbsup
:thumbsup