Iron Man Mark 39 (Gemini/Starboost)

Green Martian

New Member
Hi guys,

This is my first big cosplay project ever. I have always wanted to do something from Iron Man, and after seeing the Gemini space armour, I decided to start.

I started this back in July of 2018, but only thought to post it now. I worked on it for July, August, and September, but sadly school got in the way and I haven't been able to do much since. In those 3 months, I was able to create the boot, shin, thigh and cod pieces, all out of EVA foam (mostly 6mm and floor mats). I am leaving most of the hexagon work till the end.

I am using the files from Pepcowboy as the base, though for most of the parts I ended up adapting them slightly.

Hopefully I can start work again sometime at the end of June. Aiming to finish by the end of this summer. Still lots to do!

I will try to update as frequently as possible, but I probably won't have anything new before early July. Please leave suggestions if you have them, cause chances are I am doing lots of things wrong;)
 
Here are the shins and boots:
236911084449032387%253Faccount_id%253D5.jpg


Shin front view:
4741824699593072665%253Faccount_id%253D1.jpg


Shin back view:
4613200050204218262%253Faccount_id%253D1.jpg


Thigh pieces:
2709679254531988043%253Faccount_id%253D1.jpg


6852237465203853864%253Faccount_id%253D1.jpg


Complete lower portion:
6064240233359931786%253Faccount_id%253D5.jpg


295758706590603443%253Faccount_id%253D5.jpg

The cod piece needs to be adjusted at the hips a bit.


Hexagon pattern:
1187088280633481465%253Faccount_id%253D1.jpg

For the hexagons, I score halfway with a knife, then expand the cuts with a heat gun.
 
Its been a while since the last update, and school's finally over so I can start work again. I've been working on the helmet over the past few days. I have the parts all put together, but I still need to do some trimming on the faceplate so that it fits in the main structure. It's a snug fit on my head, and it kinda squeezes the front. Iron Man doesn't seem to have a nose, cause the faceplate is almost completely flat. I want to do a hinge on the faceplate, probably non-motorized for the time being unless I find some cheap motors (I would appreciate suggestions). The problem is that a hinge won't really pressure the faceplate onto my face when it is closed, and I need the faceplate to slightly squish my nose for the helmet to close without any ugly gaps (suggestions welcome here aswell!).

1038767


1038768


1038769


1038770


After trimming, I will sand all of the edges and apply kwik seal, hopefully, this will reduce the visibility of the seams. Hinges and eye lights will come after.
 
Does anybody have any suggestions as to how to harden eva foam? For the hinge to work, I need the faceplate and the helmet structure to maintain their shape and not bend/flex. I don't really want to use any sorta resin or fibreglass. Tell me if this is a bad idea, but has anybody tried paper macheing foam to harden it? Are there any glues or sealants that would harden the foam? I am in Canada if that helps.
 
Last edited:
Looking good!
Does anybody have any suggestions as to how to harden eva foam? For the hinge to work, I need the faceplate and the helmet structure to maintain their shape and not bend/flex. I don't really want to use any sorta resin or fibreglass and I would prefer to harden from the inside, not the outside surface. Tell me if this is a bad idea, but has anybody tried paper macheing foam to harden it?
I'm pretty sure the paper mache won't adhere to the foam, certainly not well enough to support a hinge.
Instead, I'd recommend gluing some relatively thin styrene sheet "hard points" inside the helmet and face mask where you intend to mount the hinge. If you put them on with SuperGlue, they won't come off.
 
Looking good!

I'm pretty sure the paper mache won't adhere to the foam, certainly not well enough to support a hinge.
Instead, I'd recommend gluing some relatively thin styrene sheet "hard points" inside the helmet and face mask where you intend to mount the hinge. If you put them on with SuperGlue, they won't come off.

Thanks, I'll see if I can find styrene sheets thin enough that will hold the shape (there isn't much room in the helmet, its a snug fit when I wear it).
 
Does anybody have any suggestions as to how to harden eva foam? For the hinge to work, I need the faceplate and the helmet structure to maintain their shape and not bend/flex. I don't really want to use any sorta resin or fibreglass. Tell me if this is a bad idea, but has anybody tried paper macheing foam to harden it? Are there any glues or sealants that would harden the foam? I am in Canada if that helps.
I once saw a video by Cyehra on youtube.She used Impasto Gel 1 by Lascaux,which is bacially acrylic gel to harden the surface of a painting.No chemicals needed.I hope that helps
 
It is common to use fiberglass cloth/mat to give an extra layer of strength to fiberglass resin projects. If I understand the reasoning for the use of cloth on other projects, it should work for you as well, but with another glue medium. It is my understanding that the resin cloth fibers help distribute the "flex" and pressure on the object throughout its surface. So if that reasoning is correct, you should be able to superglue squares of fiberglass cloth onto the inside of the foam. This is usually used on paper or cardboard though and I'm not sure how effective it would be on foam, but would be worth a shot I think.
 
It is common to use fiberglass cloth/mat to give an extra layer of strength to fiberglass resin projects. If I understand the reasoning for the use of cloth on other projects, it should work for you as well, but with another glue medium. It is my understanding that the resin cloth fibers help distribute the "flex" and pressure on the object throughout its surface. So if that reasoning is correct, you should be able to superglue squares of fiberglass cloth onto the inside of the foam. This is usually used on paper or cardboard though and I'm not sure how effective it would be on foam, but would be worth a shot I think.

Yes that seems reasonable. I was looking into glueing on some sort of cloth, and since fibreglass is stiffer than regular cloth, it could add the rigidity I am looking for. I'll see where I can get it and update if it works. Thanks for the suggestion! So far I have been spending a lot of time sanding. First I went over with a dremel to get the spherical shape on the top of the helmet, and now I am hand sanding it to get rid of the small grooves left behind.
 
I have made a change in plans. My main goal now is to get the build for the whole suit done by the end of August, and that will leave school nights and weekends in the fall for me to do the polishing, sealing, priming, and painting. This way there is a higher chance that the suit will be ready in a pretty good condition for Halloween, and there will be time after that to do any other finishing work for the Calgary Comic-Con next spring.

So for now, the helmet is in good shape, all the edges are very smooth and it is spherical (wet sanding worked really well). Some gaps need to be filled, and if there is time in the end, I may go for fibreglass and resin. I am currently working on the arms, so they should be done in a few days. After that, it is on to the torso!
 
Forgot to update, I finished the arms a week ago. I still need to figure out how the joint will work. I made 2 shoulder pads but didn't like the look of them so I remade them, but they aren't complete yet. Been working on the torso for the past few days, the front chest piece should be done by the end of the week.

2019-07-31.jpg
 
First update in quite a while, but I finished the suit barely in time for Halloween!!!!! I didn't update after the arms were finished so I'll go back in time and post about the torso and the other parts I made afterwards.

The torso ended up taking significantly more time than I anticipated, but I think it was one of the best constructed parts of the suit so the time was worth it. I started with the front chest then did the back chest. The abs actually only took me 2 days to make and I decided to directly connect the upper torso with the lower torso because they fit together so nicely. I used the templates for the side and back parts of the abs, but the front area was too complicated for the amount of time I had (lots of ridges and valleys) so I made a much simpler design that was just one piece at the front with a few details carved in.

These photos were taken before any sanding so the edges look a lot sharper:
DSC00902.JPG
DSC00903.JPG
DSC00904.JPG
2019-10-2.jpg


With the abs connected to the torso:
2019-10-21.jpg
2019-10-.jpg


Test fit of torso and helmet:
P_20191021_223010.jpg


The pictures of the helmet I posted before were taken before sanding it. It took quite a lot of passes with the Dremel to get the top edges all spherical. The Dremel did leave some visible grove lines on the edges though, so I found some tile adhesive in my basement and I applied that into the grooves. It dried very hard and I used regular old 120 grit sandpaper to sand that smooth. After that, I filled in some smaller gaps in the edges with kwik-seal, which I then dry sanded with 600 grit. The final sanding pass was with wet sanding at 600 grit. The most difficult edge on the helmet to get rid of was the seam line running down the middle of the faceplate. This one I did a few passes with kwik-seal and sandpaper. I left the seam lines on both sides of the faceplate (starting at the edge of the eyes and going to the bottom of the faceplate) more visible since they were supposed to be seen on the final product.

These pictures are of the helmet once all the sanding was finished except for the seam line down the middle of the faceplate:
2019-09-07.jpg
2019-10-21.jpg


After the torso was complete the only pieces I had left to complete were the neckpiece, the redesigned shoulder pads, and the gloves. I also modified the hip section of the codpiece so that it didn't stick outwards so much

The neckpiece was made out of 2mm EVA foam for increased flexibility. I made a slit down the back of the neck where I put a piece of velcro so I could put it on easily.

DSC00942.JPG
DSC00944.JPG


For the shoulder pads, I strayed a bit from the design and added white borders to the 2 holes on each pad (I thought it added a good contrast in colour with the black base).

DSC00945.JPG
DSC00946.JPG


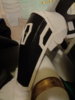
I ended up running out of time to make proper gloves so I got gray gloves from Walmart and glued on hand plates and repulsor circles. When I come back to this suit, the first thing I'll do is make real segmented gloves (I was thinking about making the fingertips from heat shaped styrene).

By this time all of the parts were constructed and sanded so it was time for sealing and painting. I ended up going with Mod Podge Matte for sealing because I was short on time and it was the cheapest and most commonly used sealant available to me. This did result in some cracking/wrinkling after wearing the suit on Halloween, but it was pretty minimal. My parents helped a lot with the sealing and painting (there was no way I could finish it all on my own on time). We put on 2-4 coats depending on the piece (ones that needed to stay more flexible got fewer coats). The sealing took 2 days with drying (I was making some of the last parts as my parents sealed). The torso was so big that I ended up creating a harness for it and hung it up from a chandelier in my living room (this allowed us to coat the entire torso at once instead of coating it in sections).

Parts drying on a drying rack I made over the bathtub with the shower curtain rod and some clothes pins/hangers:
P_20191029_183929.jpg


We put on the white paint first, so I masked off all the black areas with tape. Masking took a significant amount of time that I didn't have, so when it came to painting black, we freehanded which actually turned out as neat as areas we had masked. In total the black and white areas got a minimum of 2 coats, more on the areas that had pen/sharpie marks on the foam. Then I painted the gold sections, which took 4-5 coats to get the proper metallic shine. Lastly, silver paint went on the thrusters/vents. I ran out of time for weathering, but that's something I'll do later. There were red details on the helmet which I drew on with a red sharpie.

P_20191030_222734.jpg
DSC00947.JPG


After all the painting was done, it was time for strapping the armour. I bolted on screws for a hinge from the shoes to the shin (this allowed the shins to move around). The knee pads were fixed onto the shins and then elastic was used to connect the knee pads to the thighs. For all of the connections that used elastic, my mom sewed fabric onto the ends of the elastic straps since stretchy materials won't stick with hot glue. The shoulder pads, biceps, forearms, and torso were all connected together with more elastic (its a pretty big setup but there are fewer individual parts to keep track of and it all fits in the trunk of the car). I thought about connecting the thighs to the codpiece but the connection would be awkward so I decided against it. The front torso friction fits with the front of the codpiece and there is an overlap area at the back of the 2 pieces so I put velcro there. That way I can put the 2 pieces on separately but then join the velcro so they stay in place. The neckpiece goes up through the torso and the base of the neck locks into place with the torso's neck ring. There is a small gap from the back of the helmet to the neckpiece, but I didn't have time to cover it up and my hair colour is black so it isn't too noticeable. I wear all black clothes under the suit anyways so the few gaps look flush with the rest of the suit.

Anyways that's enough description :D

P_20191031_172746.jpg
P_20191031_172738.jpg

DSC00920.JPG
DSC00924.JPG

DSC00928.JPG
DSC00926.JPG


I took the suit to the mall in the afternoon of Halloween and everybody loved it there. They all wanted pictures with me hahaha.
P_20191031_174231.jpg

P_20191031_172825.jpg

The neon dinosaur in the background was a costume I designed for my sister.

There was a costume competition at school and I won it in a landslide haha, all the other kids at school were stunned. Though there was a no masks rule, none of the teachers stopped me, one of them actually gave me permission to wear the helmet.

The school costume competition finalists:
Competition finalists.jpg


It was probably my last year going trick or treating (not sure if 15 year olds are allowed to trick or treat ;)). However, I wore an older costume instead of the suit when I trick or treated because it isn't easy going up and down stairs, especially in the dark. I wonder what the reactions would have been if I had trick or treated in the suit though hahaha. I was thinking about going to my grade 9 graduation next June wearing the suit, it would be pretty funny!

In the meantime, I will be taking a break from this suit until winter break. That's when I plan on adding all of the things I ran out of time to add for Halloween. That way it will be completely ready for the Calgary Comic-Con cosplay contest in April (if only I had been 2 years younger I could have entered in the age 12 and under category:unsure:).

Additions and modifications left to complete for comic-con:
-add hexagon pattern to all black areas (only got to do it on the shoes this time)
-make real gloves
-add lighting to arc reactor, repulsors, faceplate, and jets/thrusters
-make faceplate hinge
-add black/silver/gold detail pieces and weathering
-add a clear varnish to the entire suit
-add a smoke machine to the jets?!?

I'll update again when I start working on this again. If anybody wants any more info on the parts/processes, feel free to ask (I know I learned a lot from these forums and others' builds, so thanks for all the help!).
 

Attachments

  • DSC00945.JPG
    DSC00945.JPG
    2 MB · Views: 181
To quote Jamie Foxx in The Amazing Spider-man 2: "Aces(y), Max...Aces(y)".
I love this build and the model you chose ! I know it's been done before, but it never gets old.Awesome rocket boosters in particular ! Thank your parents for helping you with the suit.
You're right about one thing though: please finish the rest of the suit later, because visually it did feel 'incomplete'.I'll be looking forward to seeing the final suit !

Can you elaborate on the velcro- and elastic connections though ? What did you use where for which part and how?
For example: the neck wrap.Did you run velcro vertically or horizontally to connect the sides?
Could you perhaps share some photos of the inside of the parts where the velcro/elastic was glued on?
Thank you so much for sharing this journey with us.I enjoy every single one of them on this forum.

Sorry for the super late reply. Thanks for the kind words! Now that school has been cancelled, I have some time to start working on the suit again.

As for the connections, most of them were elastic. I only used velcro on the neck wrap and a small bit to connect the cod piece with the lower torso. The boots, shins, and thighs are all connected with elastic and screw hinges. The torso, shoulder pads, biceps, and forearms are all connected with elastic. I had to keep the cod piece and the torso setup separate so that I can wear it, but there is a bit of velcro there to hold it in place after I put it on.

For the neck wrap, I put velcro horizontally on the upper portion of the backside. This turned out to be a mistake because the bottom areas are not secured and moved around frequently while I was in the suit. I will be changing this to a single vertical strip of velcro running the entire length of the connection.

DSC00966.JPG

DSC00965.JPG


For all of the elastic connections, my mom took strips of elastic and sewed regular fabric to each end of the strips. The fabric was necessary because hot glue doesn't really bond with stretchy materials like elastic.

An example of how these elastic/fabric strips were used is one fabric end was glued to a bicep and the other fabric end was glued to the forearm. This left the elastic in the middle, allowing the bicep/forearm combo to stretch while still connected to each other. Here's a picture:

elastic diagram.jpg
 
This thread is more than 4 years old.

Your message may be considered spam for the following reasons:

  1. This thread hasn't been active in some time. A new post in this thread might not contribute constructively to this discussion after so long.
If you wish to reply despite these issues, check the box below before replying.
Be aware that malicious compliance may result in more severe penalties.
Back
Top