Iron Man Foam Completed Assembly Questions/Ideas

Barcrest

Member
I have been following quite a few iron man builds, foam or otherwise and I have not really seen much in the way of assembly instructions or advice.

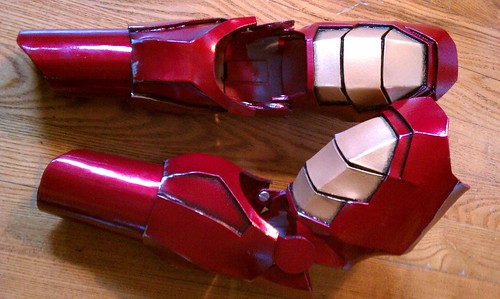
Last night I tried my chest/back section with the abs section and I think i need to add velcro to stop the chest riding up and do something at the back where there appeared a bigger gap, I also found fixing the shoulder bells to the main check back section worked a lot better than trying to secure them with elestic around my arm as in my bikerscout.

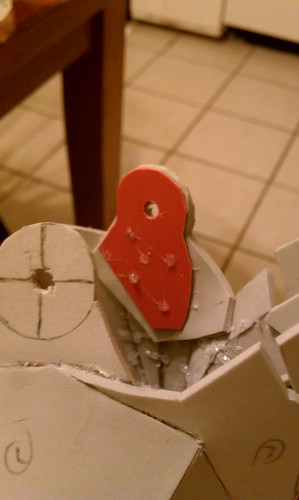
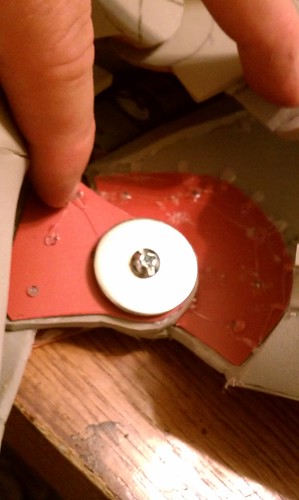
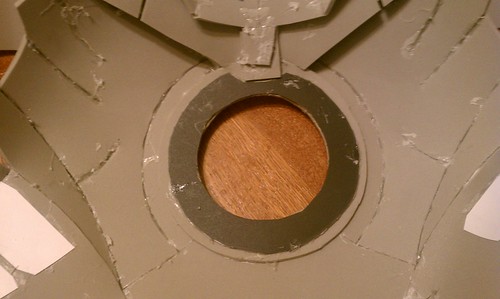
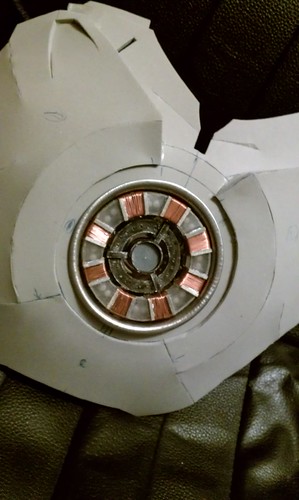
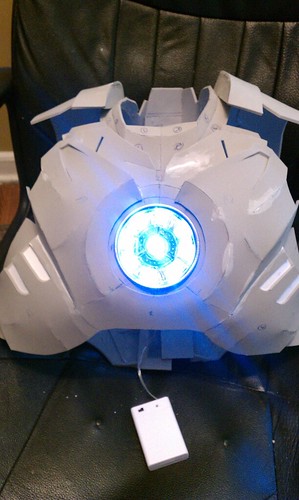
These issues are what lead me to this post to see what you guys have done to assemble your suits once all the parts are made and painted. I have not even thought about mounting the arc reactor. these are issues the pepakura files don't help with and people don't always mention in their build threds.

I do appologise if this has been covered in depth and i'm just missing it.
 
Barcrest,

It's a good point, and I don't know if there's a separate thread devoted to this specific topic.... but maybe there should be. :):thumbsup

I'm finishing up Mikey's legs/boots right now, so my next task will be to get the entire suit 'rigged.' I have some ideas for most of the parts, but I haven't tried them out yet; however, I'll be happy to share how I tackle the armor connection/rigging in detail as I work through it.

I won't mind copying and pasting some of build posts regarding rigging into this thread as well. If anyone else wants to join in - it would probably be a great resource for other builders!
 
I would be interested in this but I think it also comes down to the builder as well. I hope one of the Storm Troopers or IM buiders could help out with your question.
 
I will add any ideas I come up with as I finish up my build - it can one big resource thread to help other builders! I've never seen or read any info on the 'strapping up' the entire IM armor and I'm sure many others are wondering the same.
 
This is what i got assembled last night.


Grey boxes are where I used the hot gle gun to create a permenant fix. I did both sides of the shoulders to the front and back pieces. It seems too look good on and they seem to sit in the right place. I joined the 2 pieces together or each shoulder with a brass split paper fasteners then glued the disc over the top and put masking tape on the inside. This means that each section still moves as it should. Even though you can only see the front i glued the cod at the back as well either side of the spine. I need to make the spine seperate, in the dancing fool file i user it was part of the abs but it will be better coming off the back piece and velcroring to the back of the abs to anchor them.

That yellow box is there I am going to add velcro tonight. I suppose you guys alread know this but always put the hook part on the outward facing section (In this case the abs) to prevent getting snags in your undersuit. I learned this with my biker scout, but you guys probably already knew it.
 
I suppose you guys alread know this but always put the hook part on the outward facing section (In this case the abs) to prevent getting snags in your undersuit. I learned this with my biker scout, but you guys probably already knew it.

That's actually really, REALLY good advice. I hadn't considered that before, but I will now - thanks for the tip! :):thumbsup
 
ELBOW HINGE:

Here's a look at the hardware I'm using for my son's elbow assembly. I must first credit MightyJohn's post on Robo's build thread for 100% of the design of the hardware.

As for adhesives, I tried epoxy... but that wasn't as effective as hot-glue when dealing with affixing the metal hardware directly to the foam. So, I used an extra application of hot-glue that overlaps the edge of the binding post - sealing it to the foam. I ended up only hardening the area around the connection hole on the bicep with epoxy. I also strengthened that area by epoxying a washer onto the inside of the piece around the hole. That should prevent it from pulling through the foam when under stress.

Anyway... on to the pic!!!

5801288151_3934959468.jpg

Forearm piece with binding post hot-glued in place (these are just temporarily attached in this photo as I was sizing it before painting anything).

5801304591_cbdff12f7b.jpg

Here is the elbow piece. I used a hard plastic piece attached with hot-glued to the foam elbow piece to act as hardener for the area where the binding post will be inside the elbow AND to give me a solid place for the connection hole which will attach to the forearm piece.

5801311011_bbf6f2310d.jpg

Here you can see the bicep piece with the hardened area near the connection point. You can also see the epoxy-covered washer I built into this so the hole won't be ripped out while Mikey is moving the arms.

5801300103_f5513122b7.jpg

Here is the arm assembly -- fully extended.

5801849662_af8fe897e7.jpg

Here is the arm assembly -- fully bent

And finally, here's the arm assembly fully painted...
5875013719_fd00b7c1d6.jpg


NOTE: For this build I did NOT attach the wrist piece to the forearm section. The wrist piece was made longer than the pep file, and it slides inside the forearm section. I did this specifically for my build as Mikey was going to grow and I didn't want the arms to be too short when finished.
 
Last edited:
KNEE JOINT ATTACHMENT:

Here is what the full lower and upper leg pieces look like for my foam build...

6183859256_6fcd1b41e5.jpg


To hinge these two pieces, I bought the following posts, bolts and washers for the job (2 on each leg - 4 total):

6206249830_2e08bfa22b.jpg


However, before mounting these I wanted to re-enforce the connection area.

On the elbow joint, I did this by gluing down a metal washer over the opening of the bolt hole with 2-part epoxy. This was enough for the elbow joint, but I wanted something a bit stronger for the knee joint (as I imagine this will have more torque on it then even his elbow).

So, I cut out some heavy plastic pieces which will be glued to the inside of the connection points on both the upper and lower legs sections.

6206252422_2911d00f8b.jpg


6205736241_03386889a0.jpg


I then used 2-part epoxy to attach the screw posts (or binding posts) to the re-enforced areas of the upper leg sections.

NOTE: I went back with hot glue and 'stitched' beads of glue around the outside edge of the re-enforcing plastic, so if stressed it would not tear off the foam.

6206248834_c336e7c37e.jpg


The final joint hardware will look like this on the inside...

6205735485_7838b13af5.jpg
 
ATTACHING ARC REACTOR:

So, there was mention of how the arc reactor was mounted in a foam suit... I'm not sure how other folks are doing this, but for my build I just hot glued it into place in the chest.

Before I glued it, however, I added a re-enforcing piece of hard plastic around the chest hole. This helps to keep the reactor from distorting the shape of the foam chest piece.

6078727588_76d170f261.jpg


I then just applied a bead of hot glue around the inner lip of my arc reactor and pushed it into place...

6021012392_7489027258.jpg


6078730002_4ffbfd0a9c.jpg


I went back and also glued the battery box inside the chest just to keep it all together and out of the way.
 
Thanks for showing how you put the arm together. Should the hand cover armour be fixed to the forearm with only a small section over hanging the hand or should it be attached to the back of the glove? I undersand the mk3 and mk4 are different, seems like the mk4 is more popular.


I have sizing issues with the back/cod if i make it smaller i can't pull it on but it seems too big as i can't fit it under the chest back armour. Sould I make it so they velcro together? I have a split down the back where the spine should velcro to it but it didn't seem to work.

Just wondering how you guys have put your abs/cod together?

Looking at it maybe i should have put the the spin under the abs?
 
Ah yes the old ab/cod issues, my advice is to make a duct tape dummy of yourself, and build the ab/cod around it from scratch, this way it will fit you perfectly. This seems to be a common issue, as the files look great on screen but when built they dont always fit correct and modding almost always needs to be done
 
Ok ill try and help best i can first i attached the chest to the back at the shoulders with hot glue and 2 bits of extra foam and then use velcro at the sides / the neck i cut stright down the front and added extra foam flap and velcro / abs are glued to cod ,abs are velcroed down the front right across the seam of the cod and down the side of the cod also under the crotch so i just put it on like a big belt / the shoulder bells i also velcro to the chest and back combo / and i have about 3" of velcro at the front and back to attach attach the chrst to the abs hope this helps ,
On the pick where ever theres a green circle theres velcro as you see ive still got to add the spine it will be hot glued to the back and then velcroed to the abs/cob joining them all together.

1497628fvelcro.jpg


f6a26d42velcro.jpg
 
I was thinking about this all last night and I might try removing the side velcro that attaches the front to the back at the sides and just velcro the front and back to the abs where they meet. If that doesn't work (Or look right, which is more likely) then I guess I will have to remake the abs).

I will fix the hand cover to the forarm tonight now I have seen in demolitions that is how it goes as opposed to being fitted to the back of the glove.
 
just because iron man is assemble by number, doesn't mean it will be easy. those evil paint by number paints back in the day kicked my rear end. and some of those files are for only people of a exact size.

i recommend car wax, buffed nice for a shine? or would that make it too stiff?
 
just because iron man is assemble by number, doesn't mean it will be easy. those evil paint by number paints back in the day kicked my rear end. and some of those files are for only people of a exact size.

i recommend car wax, buffed nice for a shine? or would that make it too stiff?

This is the first costume I have attempted to make from scratch. My Biker scout was made with parts I purchased and put together. Aside from the final assembly snags I have not found it difficult, although I can see the final product isn't outstanding (Due to my lack of skills and impatience). I will try coating mine with car laquer to seal it after being warned that my PVA will disolve in the rain.
 
ive seen far worse. some people couldnt even walk in theirs.


and i hear you laughing. i have super hearing powers.


here is something that turned out far less nice than yours. since we cannot say anything bad on this forum, ill let the comments on the u-tube site speak for me.

steves hulk costume - YouTube
 
PVA will not disolve in the rain they use it to seal walls on the building site yes it maybe water base but thats just aplication of it masonry paint for the outside of your house and shed and fence paint is also water based but you done see that running off the walls in the rain i wouldnt worry to much
 
This thread is more than 9 years old.

Your message may be considered spam for the following reasons:

  1. This thread hasn't been active in some time. A new post in this thread might not contribute constructively to this discussion after so long.
If you wish to reply despite these issues, check the box below before replying.
Be aware that malicious compliance may result in more severe penalties.
Back
Top