Iron man electronics add ons

toxicvenom

Active Member
So I have been working on the posts here to open the face plate and work the eyes, only just started with Arduino.
Has anyone added the sounds and maybe rf remote , I have the servo and led working on the Uno and breadboard , now trying to transfer to a nano or mini, trying to run before I walk as usual ,would buy the plans and sketch if it was available..?
 
nano or pro-mini should be direct drop-in replacements for the UNO board.

*Note: the pro-minis do -not- have a USB socket, so you will need to buy a FTDI type programmer (I use a CP2102 based one...costs roughly $1-$2.00 USD)

The audio is a little bit more complicated.. as you'll need extra parts..

either a shield.. or some other add-on board..

(or try to make your own using a DAC, SD card and an AMP)...

Outlining and understand your 'wants' will help dictate where and what parts you need.


Same type of approach I used here:

https://www.youtube.com/watch?v=cTXt8l2XH-Q (if its not blocked)

had some copy right issues with the AC/DC audio I guess
 
Last edited:
the soundfx board looks good....by the look of the switches each trigger a different sound?
could the arduino then trigger each sound at the same time as triggering the servo and leds?
 
Thats exactly want i want to do , now its just working it out LOL....


nano or pro-mini should be direct drop-in replacements for the UNO board.

*Note: the pro-minis do -not- have a USB socket, so you will need to buy a FTDI type programmer (I use a CP2102 based one...costs roughly $1-$2.00 USD)

The audio is a little bit more complicated.. as you'll need extra parts..

either a shield.. or some other add-on board..

(or try to make your own using a DAC, SD card and an AMP)...

Outlining and understand your 'wants' will help dictate where and what parts you need.


Same type of approach I used here:

https://www.youtube.com/watch?v=cTXt8l2XH-Q (if its not blocked)

had some copy right issues with the AC/DC audio I guess
 
The Adafruit board linked to above will work..

and yes, I believe can be triggered by an Arduino pin vs a physical 'switch'

but most of the other 'players' will work as well I would imagine.


(depends on if you want gapless/seamless play back of a looping sound.. then your options get smaller)

DFPlayer
WT588D-16 boards

I think there are several variants of that last one too

-20?

and maybe even some that ise a micro SD card instead f loading sounds directly to the board..


(IMHO.. having sounds housed on a microSD card is the better/best option)
 
the soundfx board looks good....by the look of the switches each trigger a different sound?
could the arduino then trigger each sound at the same time as triggering the servo and leds?

yeah you can setup the code to activate the servos, lights etc in the code along with triggering the sound. That's how I did it originally in my mk42 gauntlet, it worked out good but I figured a way simpler method for iron man gauntlet.
 
so did you revert to a wave/sd card board connected to the arduino ?
I need to step back and learn more ,got to stop trying to get the best final
result straight away , everyone else had to start at the beginning LOL...
 
For the simpler version, sparkfun actually makes an arduino that will play .mp3's. When I say simpler method for it, I mean it was actually less hardware to setup but a lot more code.
 
Last edited by a moderator:
devildog12

what board are you referring to from Sparkfun?

The Lilypad/MP3 board?

From your video though.. it doesnt look like that one though.. (video makes it look like an UNO?)
 
Last edited by a moderator:
@devildog12

what board are you referring to from Sparkfun?

The Lilypad/MP3 board?

From your video though.. it doesnt look like that one though.. (video makes it look like an UNO?)

yeah in that particular video, i believe i was using the uno and adafruit soundfx board.
 
Interested in your simplification for the repulsors. Do you have a code setup we can use?

I believe that this is the code I used. I've had a hard-drive crash in the last couple of months with all my files but essentially this code ties the soundboard to a ground when a specific sensor value is met along with changing the colors of replusor rings. I'm not 100% sure this the code I used but I'm pretty sure. When you do the soundfx board setup, you have a total of 2 different boards, the arduino and soundfx board however, when you do the lilypad mp3 board from sparkfun, you have a single board but a whole more code.

Code:
#include <Adafruit_NeoPixel.h>
#include <avr/power.h>


#define PIN 4
#define PIN1 5 
#define PIN2 6
#define PIN3 7
#define PIXELSM_PIN 8   
#define PIXELLG_PIN 10
#define PIXELSM_COUNT 7
#define PIXELLG_COUNT 12
int delayval = 250;
int RepBright = 0;
const int muscleSensor = A1;
int sensorValue = 0;


Adafruit_NeoPixel sml_ring = Adafruit_NeoPixel(PIXELSM_COUNT, PIXELSM_PIN, NEO_GRB + NEO_KHZ800);
Adafruit_NeoPixel lrg_ring = Adafruit_NeoPixel(PIXELLG_COUNT, PIXELLG_PIN, NEO_GRB + NEO_KHZ800);


uint32_t black = lrg_ring.Color(0,0,0);


void setup() {
  #if defined (__AVR_ATtiny85__)
  if (F_CPU == 16000000) clock_prescale_set(clock_div_1);
#endif
  // put your setup code here, to run once:
  Serial.begin(9600);
  
  sml_ring.begin();
  lrg_ring.begin();
  sml_ring.show(); // Initialize all pixels to 'off'
  lrg_ring.show(); // Initialize all pixels to 'off'
  
  startupLrg();
  startupSml();
}


void loop() {
  setupSound(PIN);
  setupSound1(PIN1);
  setupSound2(PIN2);
  reset(PIN3);
  sensorValue = analogRead(muscleSensor);


  Serial.print("sensor = " );                       
  Serial.println(sensorValue);      
  //delay(200);
 
  if (sensorValue > 300)
  {
    //delay(100);
  
  RepBright = 255; 
  //sml_ring.setBrightness(RepBright);
 //sml_ring.show();
  lrg_ring.setBrightness(RepBright);
  lrg_ring.show();
  warmUp(PIN, PIN3);
  delay(500);
  explode(PIN2, PIN3);
 
  
  delay(50); 
  for(RepBright; RepBright>19; RepBright--) {
    //sml_ring.setBrightness(RepBright);
    lrg_ring.setBrightness(RepBright);
   //sml_ring.show();  
    lrg_ring.show();
    
     delay(2); 


  }
  delay(250);
 powerDown(PIN1, PIN3);
  startupLrg();
  //delay(125);
   
}
}
   
void setupSound (int pin){
 pinMode(pin,OUTPUT);
 digitalWrite(pin, HIGH);
}


void warmUp (int pin, int pin1){
 digitalWrite(pin, LOW);
 delay(250);
 digitalWrite(pin,HIGH);
 delay(250);


 digitalWrite(pin1, LOW);
 delay(250);
 digitalWrite(pin1,HIGH);
 delay(250);
 digitalWrite(pin1, LOW);
}


void setupSound1 (int pin1){
  pinMode(pin1, OUTPUT);
  digitalWrite(pin1, HIGH);
}


void powerDown (int pin, int pin1){
  digitalWrite(pin, LOW);
  delay(250);
  digitalWrite(pin,HIGH);


  digitalWrite(pin1, LOW);
  delay(250);
   digitalWrite(pin1,HIGH);
 delay(250);
 digitalWrite(pin1, LOW);


}


void setupSound2 (int pin2){
  pinMode(pin2, OUTPUT);
  digitalWrite(pin2,HIGH);
}


void explode (int pin, int pin1){
   digitalWrite(pin, LOW);
  delay(250);
  digitalWrite(pin,HIGH);


  digitalWrite(pin1, LOW);
  delay(250);
   digitalWrite(pin1,HIGH);
 delay(250);
 digitalWrite(pin1, LOW);
}
void setupReset (int pin3){
  pinMode(pin3, OUTPUT);
  digitalWrite(pin3, HIGH);
}
void reset (int pin3){
  digitalWrite(pin3, LOW);
 delay(100);
 digitalWrite(pin3,HIGH);
 delay(100);
 digitalWrite(pin3, LOW);
}


void colorWipe(uint32_t c, uint8_t wait) {
  sml_ring.setPixelColor(5, c);
  sml_ring.setPixelColor(6, c);
  sml_ring.show();
  delay(wait);
  sml_ring.setPixelColor(4, c);
  sml_ring.setPixelColor(7, c);
  sml_ring.show();
  delay(wait);
  sml_ring.setPixelColor(3, c);
  sml_ring.setPixelColor(8, c);
  sml_ring.show();
  delay(wait);
  sml_ring.setPixelColor(2, c);
  sml_ring.setPixelColor(9, c);
  sml_ring.show();
  delay(wait);
  sml_ring.setPixelColor(1, c);
  sml_ring.setPixelColor(10, c);
  sml_ring.show();
  delay(wait);
  sml_ring.setPixelColor(0, c);
  sml_ring.setPixelColor(11, c);
  sml_ring.show();
  delay(wait);
}


void colorWipe1(uint32_t c, uint8_t wait) {
  lrg_ring.setPixelColor(5, c);
  lrg_ring.setPixelColor(6, c);
  lrg_ring.show();
  delay(wait);
  lrg_ring.setPixelColor(4, c);
  lrg_ring.setPixelColor(7, c);
  lrg_ring.show();
  delay(wait);
  lrg_ring.setPixelColor(3, c);
  lrg_ring.setPixelColor(8, c);
  lrg_ring.show();
  delay(wait);
  lrg_ring.setPixelColor(2, c);
  lrg_ring.setPixelColor(9, c);
  lrg_ring.show();
  delay(wait);
  lrg_ring.setPixelColor(1, c);
  lrg_ring.setPixelColor(10, c);
  lrg_ring.show();
  delay(wait);
  lrg_ring.setPixelColor(0, c);
  lrg_ring.setPixelColor(11, c);
  lrg_ring.show();
  delay(wait);
}


/*void fire(){


 //delay(100);
 
  RepBright = 255; 
  //sml_ring.setBrightness(RepBright);
 //sml_ring.show();
  lrg_ring.setBrightness(RepBright);
  lrg_ring.show();
  delay(125); 
  for(RepBright; RepBright>19; RepBright--) {
    //sml_ring.setBrightness(RepBright);
    lrg_ring.setBrightness(RepBright);
   //sml_ring.show();  
    lrg_ring.show();
     delay(2); 
   
  } 
  
}*/


void startupLrg(){
    for (int i = 0;255  > i; i++)
  {
      
      lrg_ring.setPixelColor(0,(i,i,i));
      lrg_ring.setPixelColor(1,(i,i,i));
      lrg_ring.setPixelColor(2,(i,i,i));
      lrg_ring.setPixelColor(3,(i,i,i));
      lrg_ring.setPixelColor(4,(i,i,i));
      lrg_ring.setPixelColor(5,(i,i,i));
      lrg_ring.setPixelColor(6,(i,i,i));
      lrg_ring.setPixelColor(7,(i,i,i));
      lrg_ring.setPixelColor(8,(i,i,i));
      lrg_ring.setPixelColor(9,(i,i,i));
      lrg_ring.setPixelColor(10,(i,i,i));
      lrg_ring.setPixelColor(11,(i,i,i));
      lrg_ring.show();
      delay(10);
  }
 // delay(250);
      for (int i = 255;255  > i; i--)
  {
      
      lrg_ring.setPixelColor(0,(i,i,i));
      lrg_ring.setPixelColor(1,(i,i,i));
      lrg_ring.setPixelColor(2,(i,i,i));
      lrg_ring.setPixelColor(3,(i,i,i));
      lrg_ring.setPixelColor(4,(i,i,i));
      lrg_ring.setPixelColor(5,(i,i,i));
      lrg_ring.setPixelColor(6,(i,i,i));
      lrg_ring.setPixelColor(7,(i,i,i));
      lrg_ring.setPixelColor(8,(i,i,i));
      lrg_ring.setPixelColor(9,(i,i,i));
      lrg_ring.setPixelColor(10,(i,i,i));
      lrg_ring.setPixelColor(11,(i,i,i));
      lrg_ring.show();
      delay(10);
  }
    
}


void startupSml(){
    for (int i = 0;200  > i; i++)
  {
      
      sml_ring.setPixelColor(0,(i,i,i));
      sml_ring.setPixelColor(1,(i,i,i));
      sml_ring.setPixelColor(2,(i,i,i));
      sml_ring.setPixelColor(3,(i,i,i));
      sml_ring.setPixelColor(4,(i,i,i));
      sml_ring.setPixelColor(5,(i,i,i));
      sml_ring.setPixelColor(6,(i,i,i));
      sml_ring.setPixelColor(7,(i,i,i));
      sml_ring.setPixelColor(8,(i,i,i));
      sml_ring.setPixelColor(9,(i,i,i));
      sml_ring.setPixelColor(10,(i,i,i));
      sml_ring.setPixelColor(11,(i,i,i));
      sml_ring.show();
      delay(10);
  }
 // delay(250);
      for (int i = 200;200> i; i--)
  {
      
      sml_ring.setPixelColor(0,(i,i,i));
      sml_ring.setPixelColor(1,(i,i,i));
      sml_ring.setPixelColor(2,(i,i,i));
      sml_ring.setPixelColor(3,(i,i,i));
      sml_ring.setPixelColor(4,(i,i,i));
      sml_ring.setPixelColor(5,(i,i,i));
      sml_ring.setPixelColor(6,(i,i,i));
      sml_ring.setPixelColor(7,(i,i,i));
      sml_ring.setPixelColor(8,(i,i,i));
      sml_ring.setPixelColor(9,(i,i,i));
      sml_ring.setPixelColor(10,(i,i,i));
      sml_ring.setPixelColor(11,(i,i,i));
      sml_ring.show();
      delay(10);
  }
    
}
 
so far for me, the sparkfun board has been the secret to getting sound to my props *however* it doesn't have as many I/O ports as a regular arduino. I think it has like 5 trigger I/O's and I think if you don't add the additional rotary encoder (you'd only use that if you were going to use it as mp3 player?) that you'd have access to up to I think 7 more additional digital I/O's. One of downsides to this board is that it runs at 3.3v but you need a 5v FTDI programmer to program it. (That's really stupid and I have no idea how it works that way.) But overall it's a really awesome board - pretty much you have an arduino, sd card shield, and mp3 shield along with a very small amplifier all rolled into one. That's the perfect setup for the Iron Man gauntlet/ hand replusor. It's decent enough size to fit into the glove itself along with having the standard JST connector for using standard rechargable 3.7 lipo batteries. Oh and there's a built in on/off switch on it as well. Here's the link for it, a little expensive I thought but for the functionalities it has, it's pretty awesome. https://www.sparkfun.com/products/11013 . The code is a little ridiculous, but remember your pretty much pulling information off of one "shield" and putting it onto another for the mp3 player shield to play.
 
Last edited:
Nice..

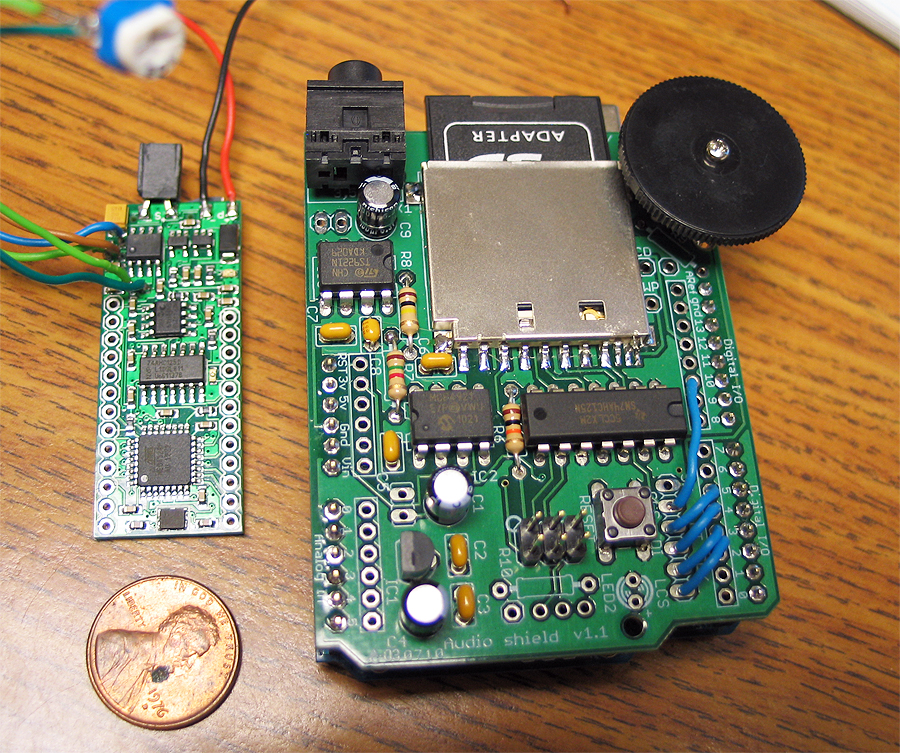
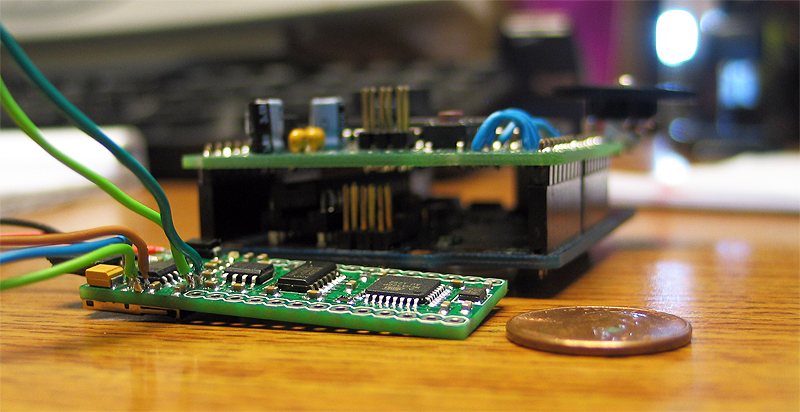
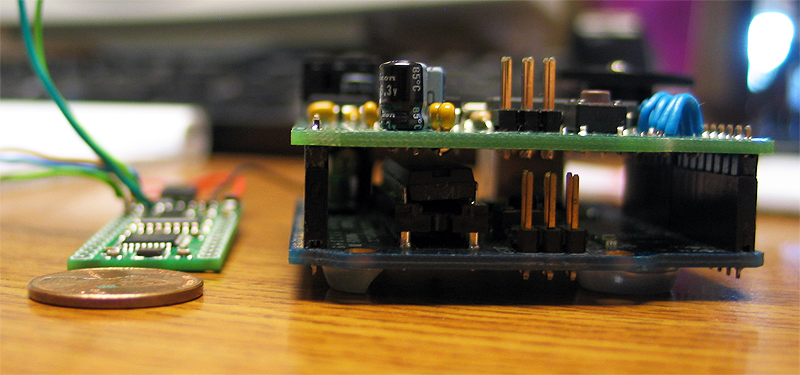
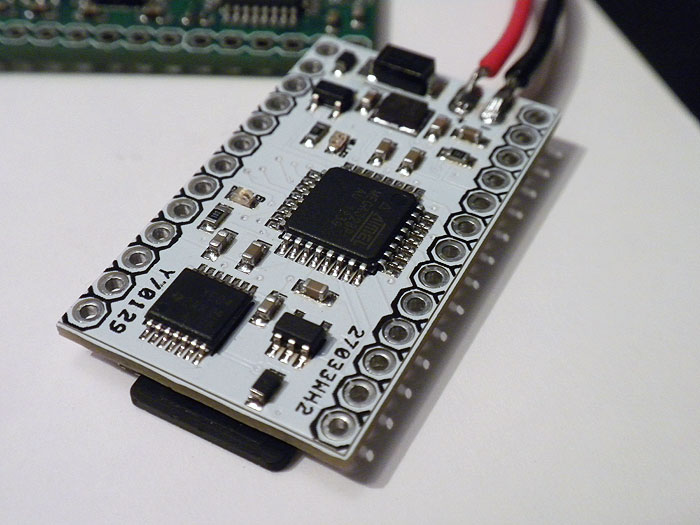
heres my 'secret'.. (although I made it myself)


Here it is (on the left).. next to an Adruino Uno with an Adafruit Waveshield next to it for size comparison
all-in-one_2.jpg


all-in-one_1.jpg


all-in-one_3.jpg


thats my 'brain' for most of my projects (if they need sound)..

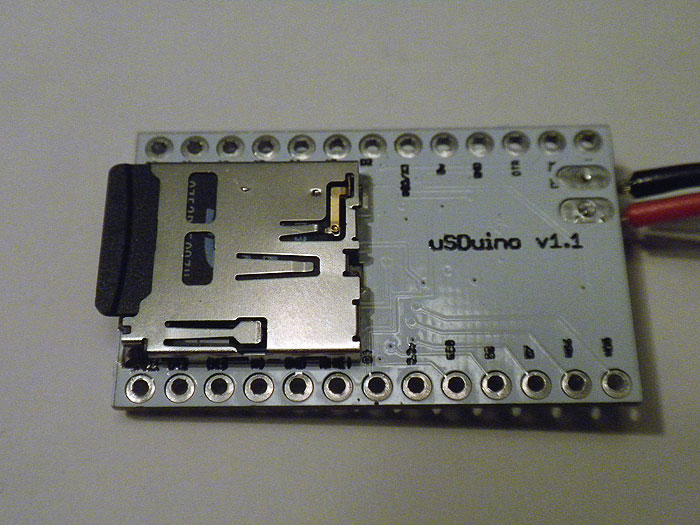
heres a different custom board I made (if I dont need sound).. still has microSD socket though (never know when you need one)

uSDuino_top2.jpg


uSDuino_bottom.jpg
 
@xl97 I think that "yeah" was for the LilyPad mp3.

hmm.. I thought it was for agreement about the use of an Uno in the video?


either way... it looks to be the Lilypad version I saw on Sparkfun.


devildog12

have you tried to play a 'loop' with your 'player'?

Does it seamless/gapless playback (might be hard to an .mp3 with header stuff?)... but maybe it compensates for it in/with a buffer?
 
Last edited by a moderator:
How does the sound board connect to the nono?
Do you want to share your
plan and sketch ..
I find it easier to follow a plan of instructions
And I don't mean for free..
 
Back
Top