Done / Completed Hellboy Good Samaritan DIY Kit (Completed but still available continuously)

DaveChaos

Well-Known Member
RPF PREMIUM MEMBER
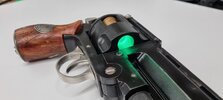
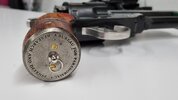
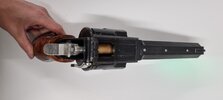
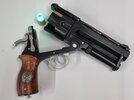
Hellboy Good Samaritan. Cast Resin, Metal Pewter and 3D Resin Printed greebles.

151310569_806323083303169_8005137094371756568_n.jpg

20210422_133903.jpg

20210507_151541.jpg

20210507_152510.jpg

20210729_120155.jpg


Expolded_View.PNG


I have a build log nearing its end in the Replica Props section HERE if you would like to check out how it's made.

Details

We, Tip Top Workshop will be making some raw DIY kits available. They will need post-processing to get to the finish you require.
The main body of the gun will be a solid resin cast under pressure to eliminate the majority of bubbles.
Some of the smaller details such as the sights will be resin 3D printed, as will the body of the rounds (rounds tips will be clear cast resin)
The shiny parts (Silver) will be cast Pewter! Again a raw cast for you to sand and polish. It is possible to electroplate Pewter with Copper then Brass, to get a more accurate finish.
The Brass bushings seen in the diagram will be turned on a Lathe and pre drilled and tapped for you!
All screws, Laser, LED's, Springs, and Magnets needed will be supplied.
There are Electronics for the Laser, activated by the trigger. and electronics for the Bullets to give off a Green glow!

Price

£250 with free shipping for UK mainland orders, International orders will need to pay for shipping. (£30 international, £15 EU)

The processing time will be 3-4 weeks as they're made by hand, as and when a order comes in.

RUN COMPLEATED, BUT YOU CAN NOW ORDER ON DEMAND VIA MY WEBSITE HERE!

20210510_150313.jpg20210510_150328.jpg

20210510_150341.jpg20210510_150410.jpg

20210510_150429.jpg20210510_150604.jpg
 
Last edited:
Oh man...would you consider offering a finished version? I am so bad at assembly and painting....
 
Just a quick update to this thread, I have changed it to a "Limited Run" so for those of you on the interest list I will be dropping you a PM with instructions on how to order. This initial run is for 10 Samaritans.

I have also updated some of the details in the OP.

Thanks all!
20210510_150313.jpg
 
The first run is now full and shipping has started for those who have paid already, I'm now taking names for the 2nd run interest list if you still want in. ;)

Any chance a set of glow rounds could be available separately?

--Shelby

I'm not taking orders for individual parts just yet as I only have enough hardware for the run. But as soon as I have extra I will let you know. Not sure what you plan to do with them but I thought you should know that I have no idea if they will fit any other Samaritan.
 
The first run is now full and shipping has started for those who have paid already, I'm now taking names for the 2nd run interest list if you still want in. ;)


I'm not taking orders for individual parts just yet as I only have enough hardware for the run. But as soon as I have extra I will let you know. Not sure what you plan to do with them but I thought you should know that I have no idea if they will fit any other Samaritan.
I'd love to have glow bullets to display with my Sideshow Samaritan. If yours is scaled to the original, they should fit no problem. But even if they don't, again, no problem since I'd just display off to the side from the gun rather than keeping them in. I can't imagine the scaling would be that far off.
 
Quick update, as you can see orders are shipping and a couple have already been delivered. We now have 2 slots open if you would like to get in on this first run. or alternatively get your name down to the next run.

Thanks :)
 
Update for those of you who have received their Kit already.

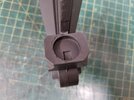
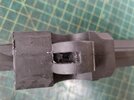
A problem with the laser tube has come up that a couple of you are experiencing, it seems the laser holder doesn't want to fit all the way into the tube. A quick fix for this for you is to either cut the holder short or drill out the back of the space where the tube attached to the barrel frame.

Another snag that I hadn't mentioned is that the rout for the wires to switch is blocked off, this is due to the casting process. You will need to drill a hole that leads the the hinge. You can see the original square where It should be at the back of the laser tube hole.

20210527_113617.jpg20210527_113626.jpg

The diagram is missing two screws for part 24/25 they are M3x8 (E on the list).

The included spring for the trigger is too strong and is causing the plate above it to bulge, if you have a softer spring that should stop that from happening, I will need to investigate further for a solution.

There also seems to be a couple of fitment issues on the smaller parts that I will need to address. if you're having trouble with any of the parts please let me know I can make you replacements and if I make any major changes to the design I will automatically send you a new part.

Anyone new joining the run shouldn't have the same problems going forward.
 
Last edited:
Regarding the laser tube - the reason the holder doesn't slide all the way in is because there is a lump on the inside of the tube about 2/3 of the way in. I used a rotary tool with a flex shaft and sanding drum bit and was able to sand down the lump. I initially tried using a large diameter drill bit as well, and didn't have much luck, as the lump isn't that big and the bit doesn't really have anything to bite into.

Also, remember to sand down the bottom of the laser holder to get a bit more clearance

I found the same today, I inspected the mould and its there. Not sure how that happened but I'm working on a fix.

I will manually fix them myself before shipping for now. Hopefully I will have a better solution soon!
 
Hello :) ,
I started working working very very slowly on my Samaritan and I'm really enjoying it so far. I'll be working extremely slowly on it from time to time to let the pressure down a bit from my own projects and will be upgrading the parts as much as I can with wood and metal as I progress :) the fact that a few hard to make metal parts are included is already a great plus :)

If I may just make a small comment, the packing could use a bit more care, I was quite scared when I received the package and heard all the rattle inside then opened it and saw that everything was just in the box with absolutely no additional protection. luckily everything seems to be ok but that was honestly quite scary to see in my opinion :)

cheers and thank you for offering that, It will be one of the very very rare things that I spend money on this year and I'm glad to be working on that prop :)
P_20210602_192300.jpg
 

Your message may be considered spam for the following reasons:

If you wish to reply despite these issues, check the box below before replying.
Be aware that malicious compliance may result in more severe penalties.
Back
Top