Maul
Well-Known Member
I was going to wait and debut this when it was a little further along, but figured why not go ahead and do it now. The journey is half the fun, right? :cool
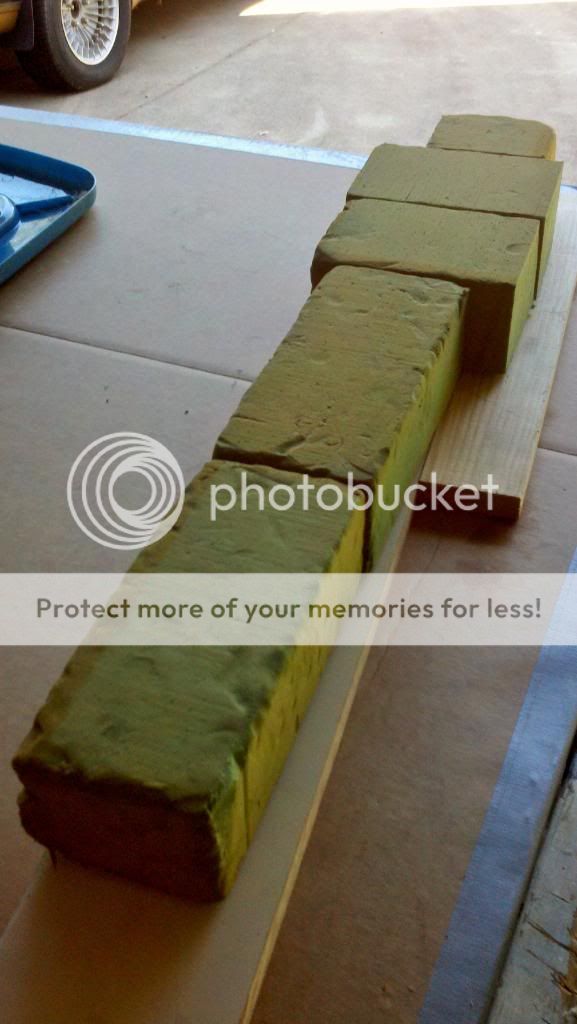
This has been a long time coming for me. I've wanted a good version of the Power Sword since I was about 3 pretty much. I actually started one of these about 10 years ago, while I was in college. Same basic idea, but it was made completely from clay, and was much more freehand. Needless to say, it didn't turn out very well. For this one I wanted to ensure symmetry as much as possible. You can basically divide it in half lengthwise and widthwise, and get four quadrants. I figured I'd make half of it, mold, cast twice, and then joing together to try and at least save some work from one side to other. I cut a profile template out of 1/8" Masonite, screwed that down to backing boards, then glued green floral foam onto that. I made another template out of 1"x 6" that had the curve of the thickness of the sword that I wanted. On the bottom of it, I screwed a piece of the same Masonite to get it raised off the backing board the same amount as the sword, then pass the template over the foam until that lip meets the Masonite under the sword. That should ensure pretty good symmetry on both sides. I'll get a picture of it later and I'm sure it will make a lot more sense. I carved the foam down a little lower than what the template would hit it at, then sealed with some fiberglass resin. I know floral foam isn't really the most ideal kind to use for this, but hey, I had some laying around.") I first tried coating it with drywall mud, which worked ok, except I would end up finding some soft spots from where the foam would move under the hardened resin. I didn't use any mat with the resin, to try and keep it as clean as possible, so in some areas it wasn't as solid as it needed to be. I just cut those areas out, re-fiberglassed, and then just started bondoing from there, rather than drywall mud. At first, I was holding the sandpaper on by hand, which just didn't work for long. I then started clamping the sandpaper to it, which also didn't work too well. Then it hit me, adhesive backed sandpaper, DUH. That's sped things up tremendously. It's been through many rounds of mudding and sanding, and still has many more to go. Once this part is done, I'll add the raised area in the middle, side guards, and handle. I left them off for now since it was easier to get to the inside of the curves, and I haven't decided exactly how they'll look yet since there are so many variations. Also, the bottom is going to change a good bit, so pay no attention to it right now.
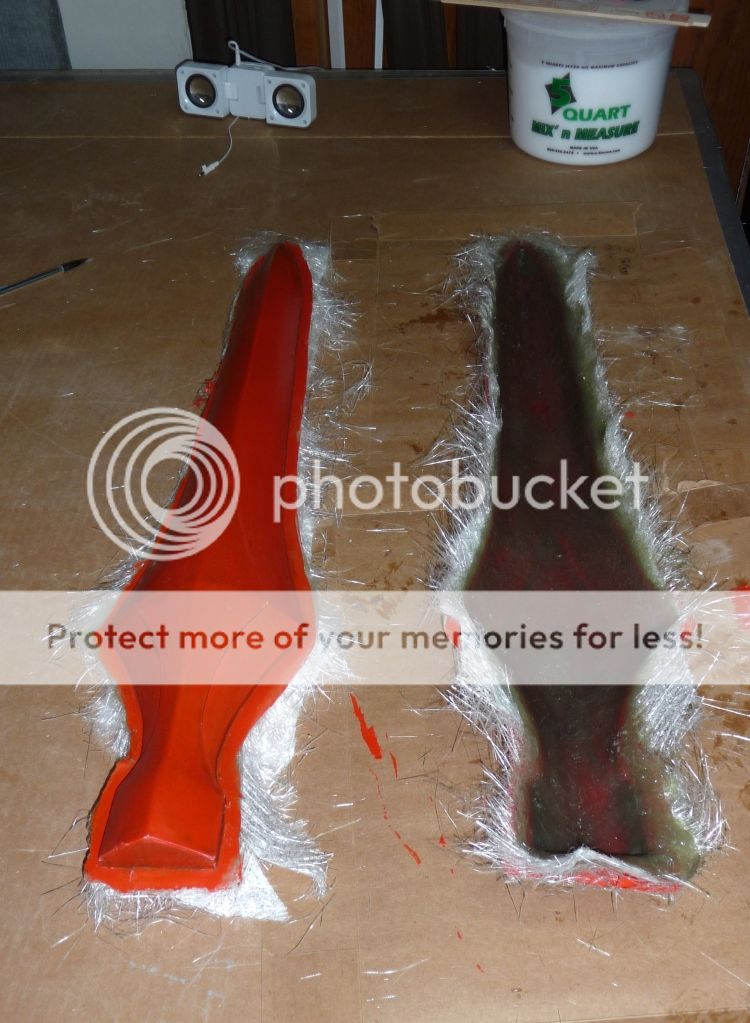
I first tried coating it with drywall mud, which worked ok, except I would end up finding some soft spots from where the foam would move under the hardened resin. I didn't use any mat with the resin, to try and keep it as clean as possible, so in some areas it wasn't as solid as it needed to be. I just cut those areas out, re-fiberglassed, and then just started bondoing from there, rather than drywall mud. At first, I was holding the sandpaper on by hand, which just didn't work for long. I then started clamping the sandpaper to it, which also didn't work too well. Then it hit me, adhesive backed sandpaper, DUH. That's sped things up tremendously. It's been through many rounds of mudding and sanding, and still has many more to go. Once this part is done, I'll add the raised area in the middle, side guards, and handle. I left them off for now since it was easier to get to the inside of the curves, and I haven't decided exactly how they'll look yet since there are so many variations. Also, the bottom is going to change a good bit, so pay no attention to it right now.
It's still very rough right now, but hopefully you guys can see the potential. I'll get more pics up soon if anyone's interested. It will look a lot better when it's in primer so it's one solid color, lol.
Thanks for looking!


This has been a long time coming for me. I've wanted a good version of the Power Sword since I was about 3 pretty much. I actually started one of these about 10 years ago, while I was in college. Same basic idea, but it was made completely from clay, and was much more freehand. Needless to say, it didn't turn out very well. For this one I wanted to ensure symmetry as much as possible. You can basically divide it in half lengthwise and widthwise, and get four quadrants. I figured I'd make half of it, mold, cast twice, and then joing together to try and at least save some work from one side to other. I cut a profile template out of 1/8" Masonite, screwed that down to backing boards, then glued green floral foam onto that. I made another template out of 1"x 6" that had the curve of the thickness of the sword that I wanted. On the bottom of it, I screwed a piece of the same Masonite to get it raised off the backing board the same amount as the sword, then pass the template over the foam until that lip meets the Masonite under the sword. That should ensure pretty good symmetry on both sides. I'll get a picture of it later and I'm sure it will make a lot more sense. I carved the foam down a little lower than what the template would hit it at, then sealed with some fiberglass resin. I know floral foam isn't really the most ideal kind to use for this, but hey, I had some laying around.
I first tried coating it with drywall mud, which worked ok, except I would end up finding some soft spots from where the foam would move under the hardened resin. I didn't use any mat with the resin, to try and keep it as clean as possible, so in some areas it wasn't as solid as it needed to be. I just cut those areas out, re-fiberglassed, and then just started bondoing from there, rather than drywall mud. At first, I was holding the sandpaper on by hand, which just didn't work for long. I then started clamping the sandpaper to it, which also didn't work too well. Then it hit me, adhesive backed sandpaper, DUH. That's sped things up tremendously. It's been through many rounds of mudding and sanding, and still has many more to go. Once this part is done, I'll add the raised area in the middle, side guards, and handle. I left them off for now since it was easier to get to the inside of the curves, and I haven't decided exactly how they'll look yet since there are so many variations. Also, the bottom is going to change a good bit, so pay no attention to it right now. It's still very rough right now, but hopefully you guys can see the potential. I'll get more pics up soon if anyone's interested. It will look a lot better when it's in primer so it's one solid color, lol.
Thanks for looking!