Hi folks.
Please find the new revised wish list for anyone wanting one of these replacement kits.
Thank to everyone who has had one of these over the last year or so.
If you would like one of these kits, please post on the thread and i will add you to this NEW "THE 2021 LIST" below.
Thanks again
"THE 2021 LIST"
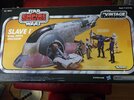
Last Christmas i received a Slave 1 vintage series toy. Its pretty good except the bottom is very underwhelming. I thought i would have a go at upgrading the model starting with the lower surface. It then occurred to me that it might be a good idea to make a refit kit so others could enjoy the process of upgrading their toys as i do.
I know others have done this before and their versions look great, but i wanted to bin the main surface moulding from the underside and work with completely new components.
So over the last holiday i spent a few days hitting the lathe and greebly box to make as close an approximation as i could to the studio model. Obviously the scale of this model is way off the studio scale version, so most of the parts are either scratch built or fudged to make them work ok, so please don't beat me up too much about the accuracy ;-)
This is mainly a run through to visualise and absorb the models details for my attempt (over the next year or so) to recreate the studio scale version from scratch. (ill be making a thread for that sometime).
So far i have a total of about 40 parts which i intend to make moulds of and offer them to you through the RPF. Please bear in mind these parts are not finished just yet, and there are a lot more to come.
I have made the parts to minimise the change to the structure of the toy. The only things which becomes unusable are the Mines which need removing in order to fit the base plate (but there in the wrong place anyhow, so do we care !! I don't). everything else is still playable, should you feel the need.
Heres where i am so far, and how it will work on the toy.
Remove the base (6 screws or so) and attach the new flat plates then glue into position. A couple of screw spigots on the body need cutting down by a couple of mm, but its dead easy as the reinforcement fins on the moulding guide the depth, i did mine with a side cutter tool and it works great.
Also shave off the mouldings for the mine assemblies which you've already removed.

then you can start to add the parts to this new base.


So heres the parts i have spread out.

The base plates will be part of the kit as well. They can be plastic sheet, or i can get them made in steel so you can mount the model in the correct place on the rear.
I turned the engines and the main dish in my woodworking lathe. Most other parts are kitbashed and some are scratch made. As i get closer to completion some of the parts will change as more model kits come to me and i test them for scale. Just waiting for some Chieftain tank kits to arrive for teh centre section over the wing axle, and the Leopold gun for the main tubes (if it fits).
If you fancy one of these kits, (i have no idea on price just yet ) please leave a post so i can determine if its worth spending the cash on silicone for the moulds. If no one fancies it then no problem, i will use these parts for my build only.
Cheers everyone, stay safe.
Flyscriber
Please find the new revised wish list for anyone wanting one of these replacement kits.
Thank to everyone who has had one of these over the last year or so.
If you would like one of these kits, please post on the thread and i will add you to this NEW "THE 2021 LIST" below.
Thanks again
"THE 2021 LIST"
mktodd .........................awaiting 2021 run
rooker2k ..........................awaiting 2021 rundse2187......................awaiting 2021 run
mechaneil. .......................awaiting 2021 run
Spankuh.......................awaiting 2021 runLast Christmas i received a Slave 1 vintage series toy. Its pretty good except the bottom is very underwhelming. I thought i would have a go at upgrading the model starting with the lower surface. It then occurred to me that it might be a good idea to make a refit kit so others could enjoy the process of upgrading their toys as i do.
I know others have done this before and their versions look great, but i wanted to bin the main surface moulding from the underside and work with completely new components.
So over the last holiday i spent a few days hitting the lathe and greebly box to make as close an approximation as i could to the studio model. Obviously the scale of this model is way off the studio scale version, so most of the parts are either scratch built or fudged to make them work ok, so please don't beat me up too much about the accuracy ;-)
This is mainly a run through to visualise and absorb the models details for my attempt (over the next year or so) to recreate the studio scale version from scratch. (ill be making a thread for that sometime).
So far i have a total of about 40 parts which i intend to make moulds of and offer them to you through the RPF. Please bear in mind these parts are not finished just yet, and there are a lot more to come.
I have made the parts to minimise the change to the structure of the toy. The only things which becomes unusable are the Mines which need removing in order to fit the base plate (but there in the wrong place anyhow, so do we care !! I don't). everything else is still playable, should you feel the need.
Heres where i am so far, and how it will work on the toy.
Remove the base (6 screws or so) and attach the new flat plates then glue into position. A couple of screw spigots on the body need cutting down by a couple of mm, but its dead easy as the reinforcement fins on the moulding guide the depth, i did mine with a side cutter tool and it works great.
Also shave off the mouldings for the mine assemblies which you've already removed.
then you can start to add the parts to this new base.
So heres the parts i have spread out.
The base plates will be part of the kit as well. They can be plastic sheet, or i can get them made in steel so you can mount the model in the correct place on the rear.
I turned the engines and the main dish in my woodworking lathe. Most other parts are kitbashed and some are scratch made. As i get closer to completion some of the parts will change as more model kits come to me and i test them for scale. Just waiting for some Chieftain tank kits to arrive for teh centre section over the wing axle, and the Leopold gun for the main tubes (if it fits).
If you fancy one of these kits, (i have no idea on price just yet ) please leave a post so i can determine if its worth spending the cash on silicone for the moulds. If no one fancies it then no problem, i will use these parts for my build only.
Cheers everyone, stay safe.
Flyscriber
Last edited:
")